
More Tips for Managing Profiles
Last week we looked at some ways to help us manage existing profiles in the Profile browser. We also learned that changes we make to profiles in Lightroom Classic are also reflected in the Camera Raw plug-in (and vice versa). Let’s look at some other useful things to know.
Importing New Profiles
From the moment these new profiles we announced by Adobe there were third-party vendors selling or giving away additional profiles we could import into our workflows. Linked within Adobe’s announcement of the updated profile function you will find some excellent vendors selling new profiles. Once you download the profiles locally, here’s how to import them:
Step One: Go to the Develop module, then go to File > Import Develop Profiles and Presets to open the file browser for navigating to where the downloaded preset file is located.
Step Two: Select the file(s) to be imported (you can choose the zip file you downloaded or the individual .xmp files).
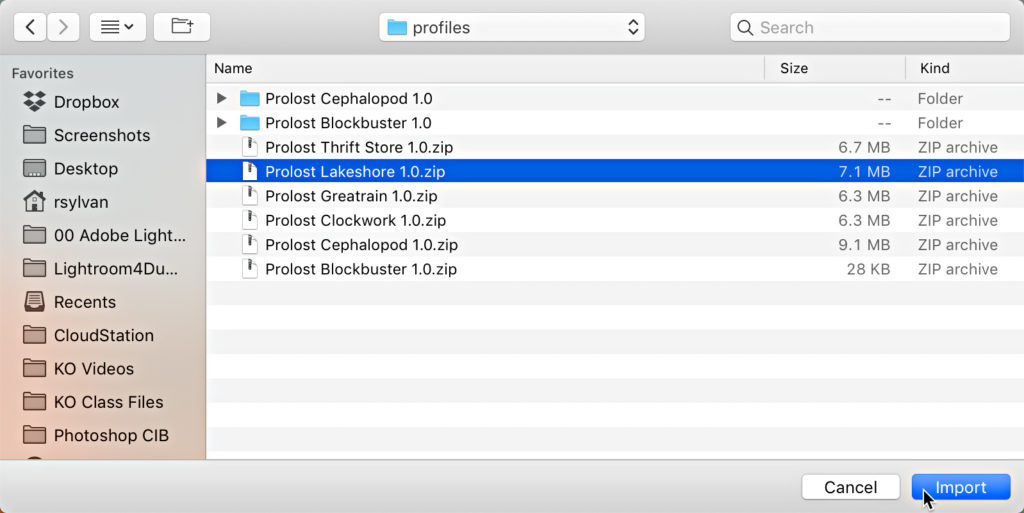
Step Three: Click Import to bring them in.
Once imported, they will appear (alphanumerically) near the bottom of the Profile Browser.
Deleting Custom Profiles
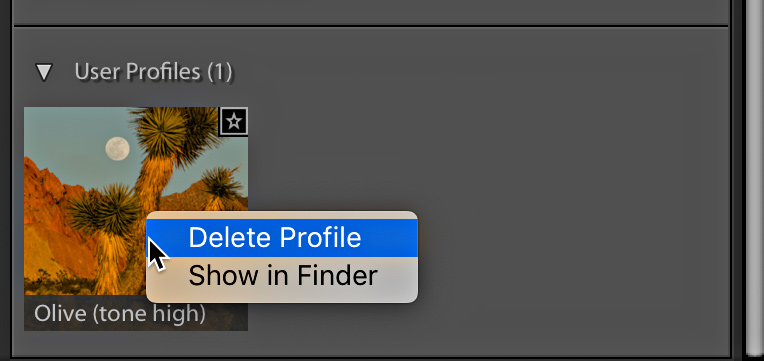
If you find that you don’t care for some (or all) of the profiles you imported, you can delete them simply by right-clicking the profile and choosing Delete from the contextual menu. Remember, we can’t delete the pre-installed profiles, but we can hide them (see last week’s post).
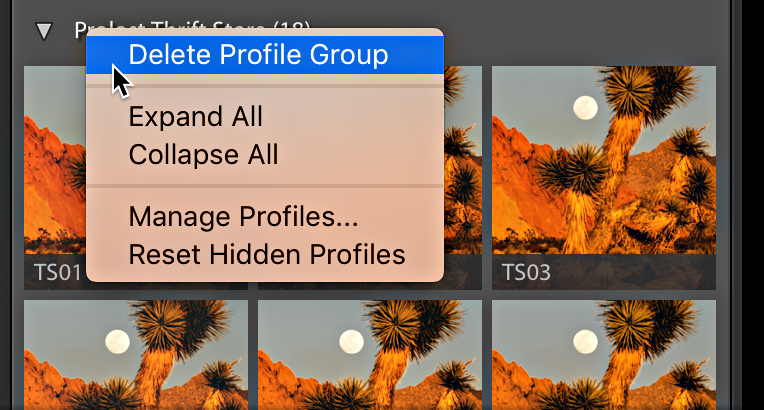
You can also delete an entire profile group that you’ve imported (or created) by right-clicking the name of the profile group, and choosing Delete Profile Group from the contextual menu. Note the options for expanding or collapsing all profile groups, as well as access to the Manage Profile dialog box or simply resetting any that you had previously hidden.
Create Your Own Profiles
Josh Haftel, one of the awesome product managers for Lightroom, published a fantastic article on how to create your own custom profiles if you’d like to give that a try. With this enhanced profile experience I’m seeing more and more people sharing .LUT files, which you can use to create your own profiles from, so it is a skill worth knowing (or at least filing away until you want to use it).
Options Found in Camera Raw
As Josh demonstrates in the above linked article, the creation of profiles starts within the Camera Raw plug-in for Photoshop. Camera Raw also has a couple of other options not found in Lightroom Classic that you might want to be aware of.
If you are a Camera Raw-only user, you should note that you can access the Import Profiles and Presets menu by right-clicking just about anywhere within the Profile Browser in Camera Raw.
The big difference in options in Camera Raw piggybacks off of Josh’s post on creating custom profiles. If you start creating profiles of your own, they are likely to land in the User Profiles group by default. That’s fine, but you may want to start organizing the profiles you create into other groups, and you can only do that from within Camera Raw. Here’s how:
Step One: Right-click one of the profiles you created (note this doesn’t work on pre-installed or third party profiles), and choose Move Profile from the contextual menu.

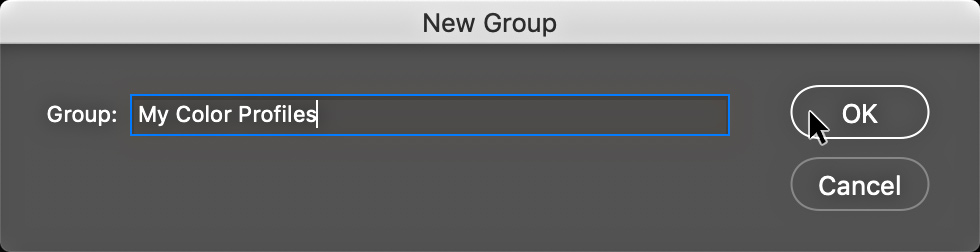
Step Two: This opens the Move popup dialog, where you can choose New Group from the drop-down menu.
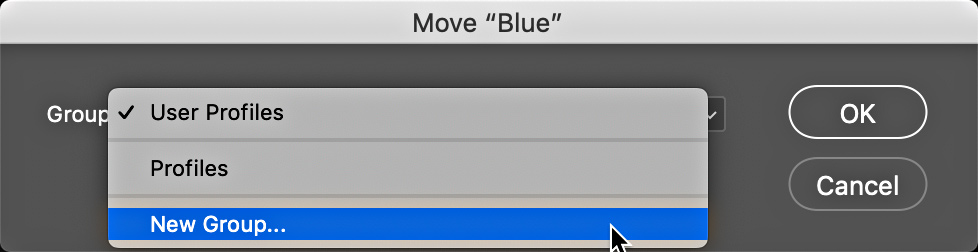
Step Three: In the New Group popup dialog, enter a meaningful name and click OK.
That will create the new profile group with your meaningful name and move the profile you right-clicked on into that group. From there you can use the Move Profile command to move other profiles you created into that group, or create additional groups.
If you really want to dive into the nitty-gritty of profile creation be sure to check out the Profiles SDK to learn even more.

Thanks for the tip re: moving Profiles to different Groups in Adobe Camera RAW. For me, it does not completely work. There are Groups that I have made that I cannot move Profiles that I have made into. When I make a Profile, I can move the Profile from User Profiles to a Group called Profiles but I cannot move it to either of two other Groups I have made. Am I doing something wrong?
Rob – Thanks for writing this. With so many 3rd party profiles out there, managing them has become overwhelming.
See you at PhotovilleNYC this weekend!
See you there! 🙂
hello,
it is strange that it is easier to import profiles in lR than in camera raw so we must start from lightroom BUT we must use camera raw to load a profile, add a cube (in my case a red blue infrared swap) and create a new profile which will appear in lightroom.
i don’t understand why ACR and LR are different. for instanace i prefer ACR panels with more rrom in each panel thanks ton tabs instead of stacking panels.
we need a solo mode for presets and profiles so it closes other ones when we open a new one. i waste lot of time browsing profile and closing previous open ones.
we also need a full screen grid view of images with all presets or profiles of a category like ON1 photo raw 2019 to better select between them. mouse rollover is tedious and all presets look similar.
really ON1 with LUT and grid view is top. Adobe should look what competition does.
best regards
marc
best regards
marc
Hi Marc, Thanks for the feedback. I don’t think it is really any harder to import profiles into the Camera Raw plug-in. Suggestions for new features/changes are best made on the Adobe community forum where they are monitored and discussed: https://feedback.photoshop.com/photoshop_family