A Look at Filtering: Part 2
This is a continuation of last week’s post on ways to filter your data inside of Lightroom Classic. Picking up with more aspects of the Library Filter bar …
Attributes
In the course of your workflow you may apply color labels, flags, or star ratings, and eventually you will edit some (or all) of the photos. Additionally, you may have a mix of photos and videos, and perhaps even some virtual copies. All of these aspects can be used as filters under the Attribute button on the Library Filter.
One of the most useful ways I’ve found for this is when making my initial selects after returning from a shoot. I’m a big fan of using Flags to mark the keepers from the ones headed to the trash. Here’s what I do:
Step One: Select the desired source to filter and press G for Grid view.
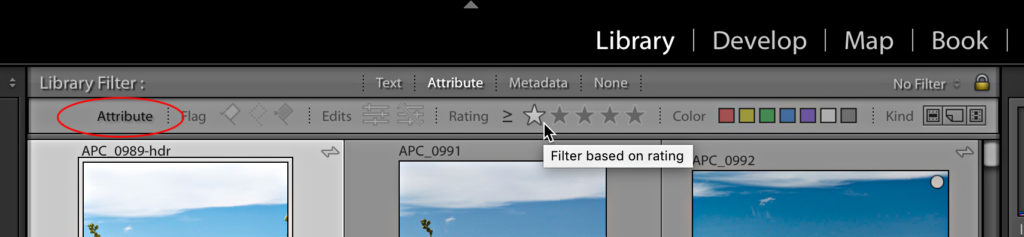
Step Two: Click the Attribute button to expand its options, then right-click the Flag section to access the contextual menu. Select Flagged and Unflagged. Assuming you have not yet applied any flags, there should be no change in what photos are being shown.

Step Three: Begin the process of applying Flags. Make sure Auto Advance is checked under the Photo menu. Use P for picks, X for rejects, and U for unflag. Why U for unflag? If you come to a photo that you can’t immediately decide to keep or delete press U for unflag to trigger Auto Advance to skip to the next photo in line. Because of the filter that is set any photos marked as Reject will be hidden from view. When you reach the last photo in the shoot you will only see picks and unflagged.
Step Four: Right-click the Flag section and choose Unflagged Photos only. Now picks and rejects are hidden and only the ones you skipped are visible. Repeat the process again using only pick or reject until all are hidden from view.
Step Five: Set the filter to Rejected Photos Only and make sure there were no accidental rejections. Change if needed.
Disable the filter to see all the photos and delete the rejects or use the filter to keep the rejects hidden and move on to processing. Explore all the other ways you can turbo-charge your workflow with this filter.
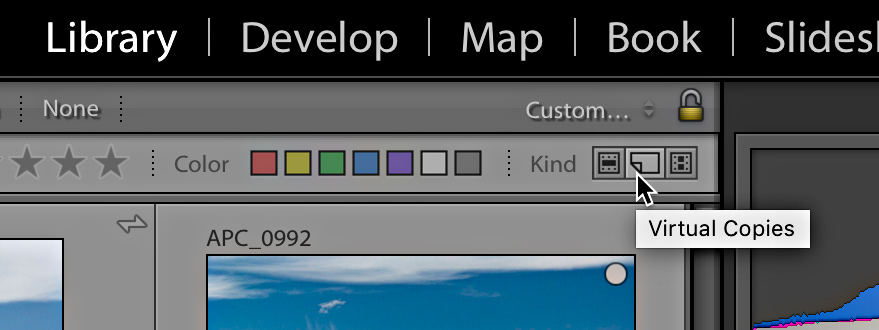
One note of caution, at the end of the Attribute filter is the Kind section. If you hover your cursor over each icon, you’ll see what they represent. If you ever get a weird filter result that doesn’t make sense double-check that one of these Kind icons is not accidentally included in the filter. I have seen that virtual copy icon get enabled by accident (somehow) and it can be easy to miss.
Metadata
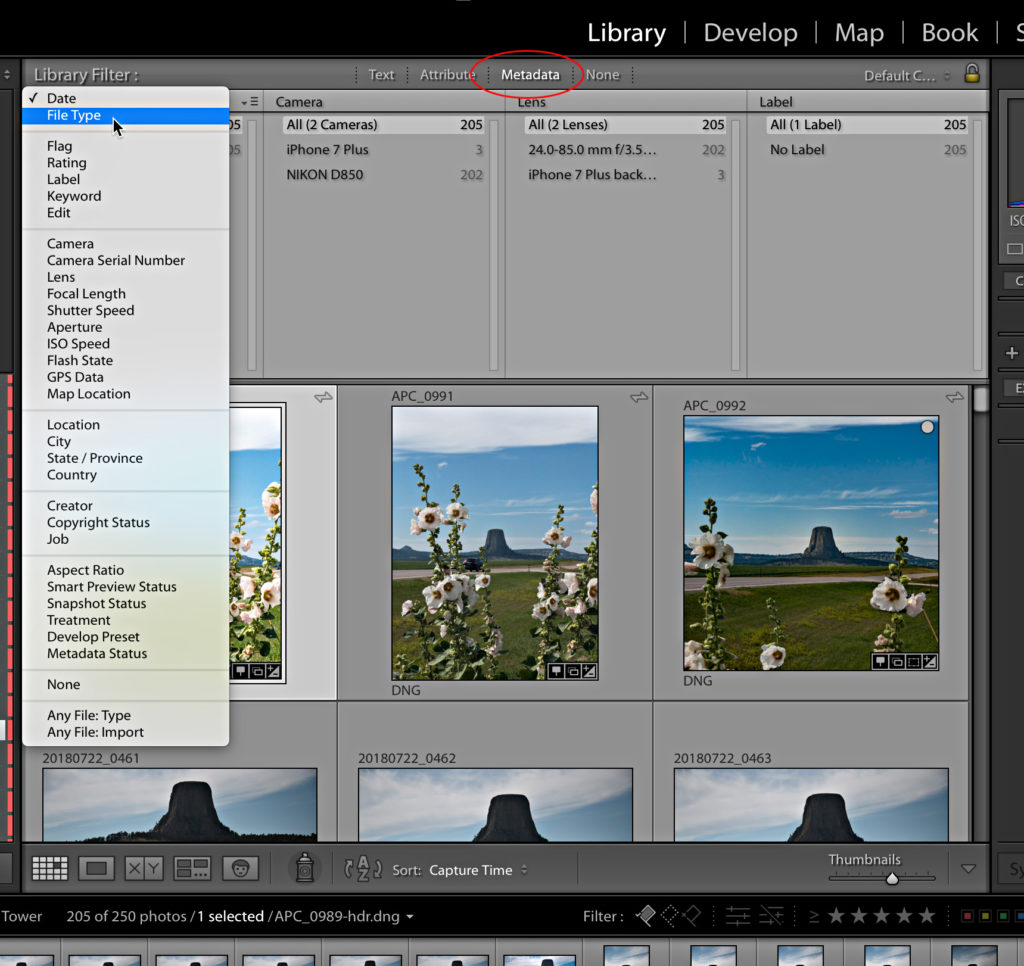
The most powerful aspect of the Library Filter is the Metadata section simply because there is so much more data available to filter on. Once enabled you’ll likely see the default set of metadata columns. If you place your cursor over the label on any column, you’ll see it become active and drop-down arrows appear. Click that label to access a different set of data for that column.
On the right-side of the column is another drop-down menu where you can access controls for removing a column, adding a new column, and changing the way the data in the column is displayed or sorted. You can have as many as 8 columns or as few as just a single column.

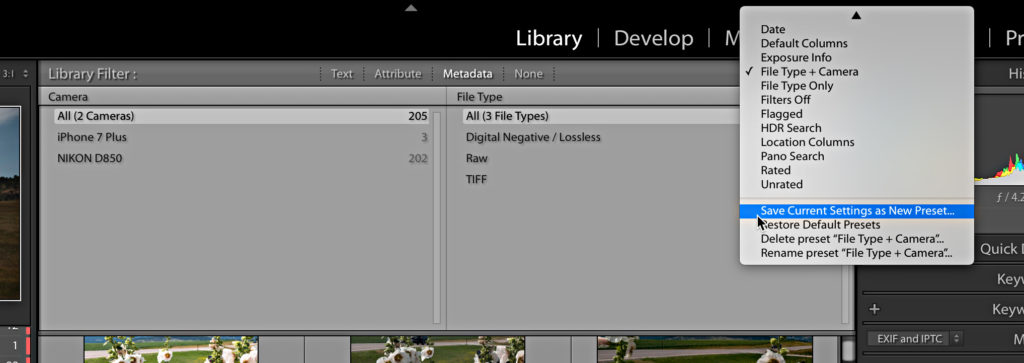
Customizing these columns to your needs is where the real power lies, and once you’ve created a set of columns to your specifications click the Preset drop-down menu at the far-right of the Library Filter and choose Save Current Settings as New Preset. Give that preset a meaningful name and you’ll be able to recall it anytime in the future from that same Preset drop-down menu or under the Library > Filter by Preset menu (note the other filter options buried in that Library menu too). You can also create saved presets based on Text, Attribute, or any combination of filters too.
Bonus tip! Place your cursor over the bottom edge of the Library Filter when Metadata is enabled, and you’ll see it change to a double-sided arrow. Click and drag up or down to change the height of the columns. Remember that the \ key hides and shows the Filter bar without disabling the filter to better see the photo results.
Ok, we’ll wrap this up next week with a look at some other (somewhat hidden) places in Lightroom Classic that we can also use different filters.