
A Look at Filtering
The word “filter” often gets used to describe the edits and adjustments made to our photos, but in Lightroom the real meaning has to do with how you can filter the data stored in the catalog to help you in your workflow. In my next series of posts I’m going to dig into getting the most out of these easily overlooked, yet extremely powerful functions hidden in plain sight. We’ll start with the most obvious, but there’s more hidden here and there within the Library module.
The Library Filter Bar
Located above Grid view in the Library module, the Library Filter bar is the most powerful and useful filtering tool in Lightroom. The key to using the filter is understanding that it only filters the currently selected source, whether that is folders, collections or your entire catalog. You select the source first, then apply the desired filter to see the results.

The Library filter consists of four parts, a filter by text function (Text), a filter by photos’ attributes (Attribute), a filter by photo’s metadata (Metadata), and a drop-down menu for accessing saved Library Filter presets. The Text, Attribute, and Metadata sections can be used independently or in conjunction with each other.
The best way to learn how to use these is to explore and try out the various options, but before doing that there are a couple of keyboard shortcuts you should file away to keep you out of trouble. The first is CMD+L (PC: Ctrl+L) which will turn on or turn off the Library Filter, so if you are playing around and want to escape the filter simply employ that shortcut and you’re back to the unfiltered view. The second is the backslash (\) key which hides and reveals the Library Filter bar itself. This is useful when using the Library Filter and you want to hide it to see more of your photos, but I’ve seen it cause frustration when people hit that key by accident and can’t find the filter bar. Here’s a bonus tip, in any module press CMD+/ (PC: Ctrl+/) to display common keyboard shortcuts for the module you are in, and then click anywhere on the overlay to dismiss it.

Text-based Filters
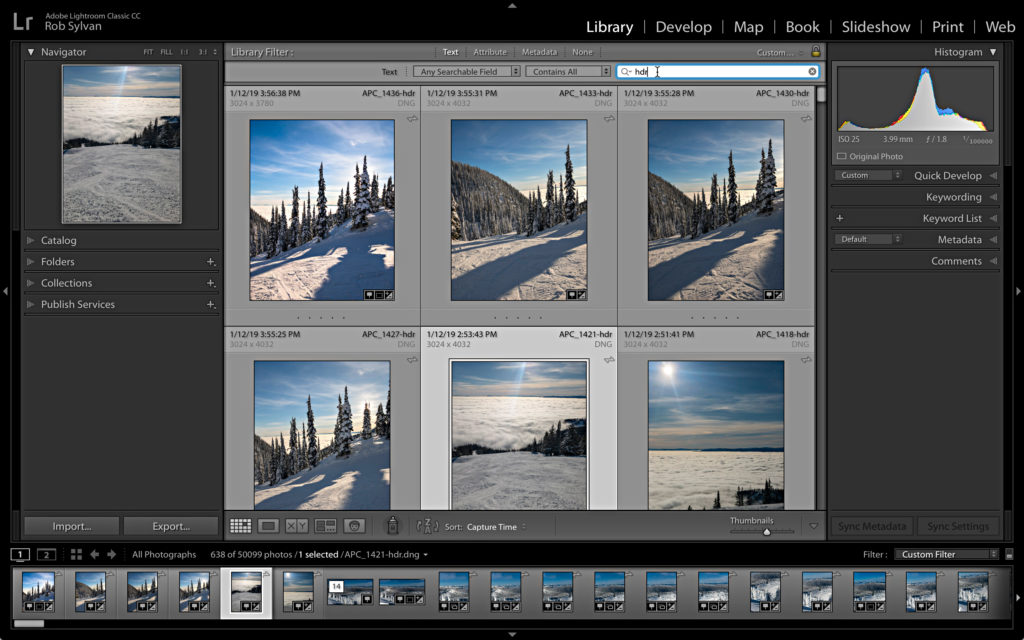
A practical example of the Library that I use frequently is a text-based filter to find HDR photos based on filename. Here’s how:
Step One: Select the desired source containing the photos you want to filter. In my example I selected All Photographs in the Catalog panel to filter the entire library.
Step Two: Press CMD+F (PC: Ctrl+F) to open the Text filter with the search field active for text input. This will also switch to Grid view if not there already.
Step Three: Type in the text you want to filter the results on. In my case I typed hdr because Lightroom automatically adds those letters to the filenames of all merged HDR photos it creates, as does the HDR mode in the Lightroom CC camera module. As soon as you start typing the filter starts working in real time.
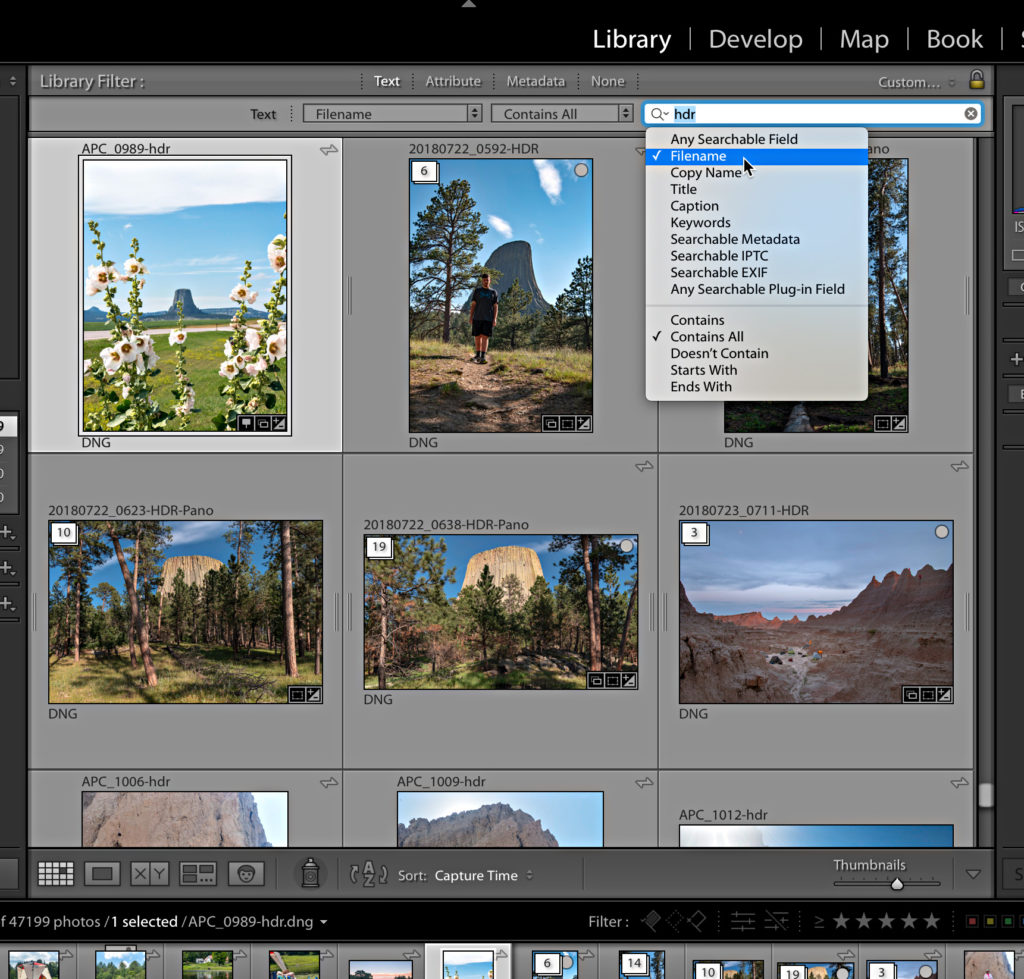
Step Four: Refine the filter. By default, that filter is set to Any Searchable Field, which may cast the net wider than you intend. Click the (tiny) drop-down arrow next to the magnifying glass icon in that text field and choose Filename (for my example) to force the filter to only use photo file names. You can achieve the same result by clicking the drop-down where it says Any Searchable Field and changing it there. The same goes for changing the Contains All option to something that better fits your needs.
Pretty cool? I most often use that when working in a folder full of brackets that I am merging to HDR. After setting all the various brackets to be merged I enable the filter so that I only see the final results in the folder for processing further. When finished, press CMD+L (PC: Ctrl+L) to disable the filter.
Ok, so that’s just a taste of what the Library Filter can do, and next week we’ll move on to the Attribute and Metadata section before wrapping up with a few hidden filters you may have overlooked.


Nice picture of hollyhocks btw – dutch – stokrozen… deep emotional attachment for family reasons…
Great tips here, need to keep improving my software skills, so this was great! Thank you 🙂
Thanks for the great tips, they are all very helpful. Keep up the great work
Those were helpful tips. I particularly like the bonus tip about showing the keyboard shortcuts:
“Here’s a bonus tip, in any module press CMD+/ (PC: Ctrl+/) to display common keyboard shortcuts for the module you are in, and then click anywhere to dismiss that overlay.”
I would edit that statement to say “click anywhere on he keyboard shortcut overlay to dismiss it”. You can not dismiss it by clicking anywhere else on the screen.
Thanks –
Thanks, Dudley!
Thanks, most important : you can save a filter, name it HDR 😉