
Going From Lightroom to Photoshop for Focus Stacking
Happy Monday, everybody — I’m just back from a workshop trip to Banff National Park in Alberta, Canada (details over on my blog, with BTS photos — I was a student in the workshop, not the instructor). Anyway, one thing we did a lot of was “Focus Stacking” to expand our depth of field, so the objects directly in front of us would be in focus, and the middle ground would be in focus and the mountains in the distance would all be in perfect focus. All of this, way sharper than you’d get from just shooting at f/11 — it’s an expanded depth of field by using multiple photos with different parts in focus.
Anyway, today here I’m showing how to go from Lightroom to Photoshop with your focus-stacked images, and then I did a step-by-step tutorial on how to have put them together for you (just the sharp parts, all combined into a single image) automatically, over on my daily blog today.
First, the Lightroom part:
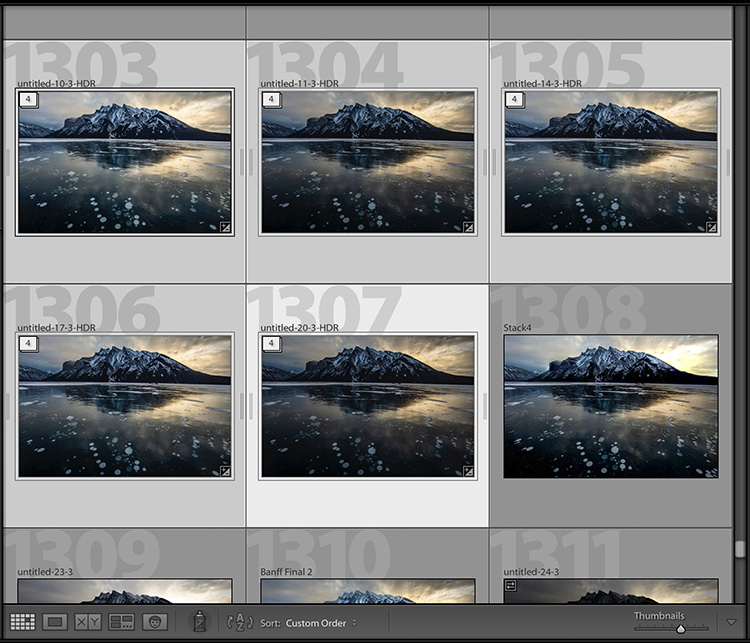
STEP ONE: Select the images that you shot focus-stacked (as shown above).
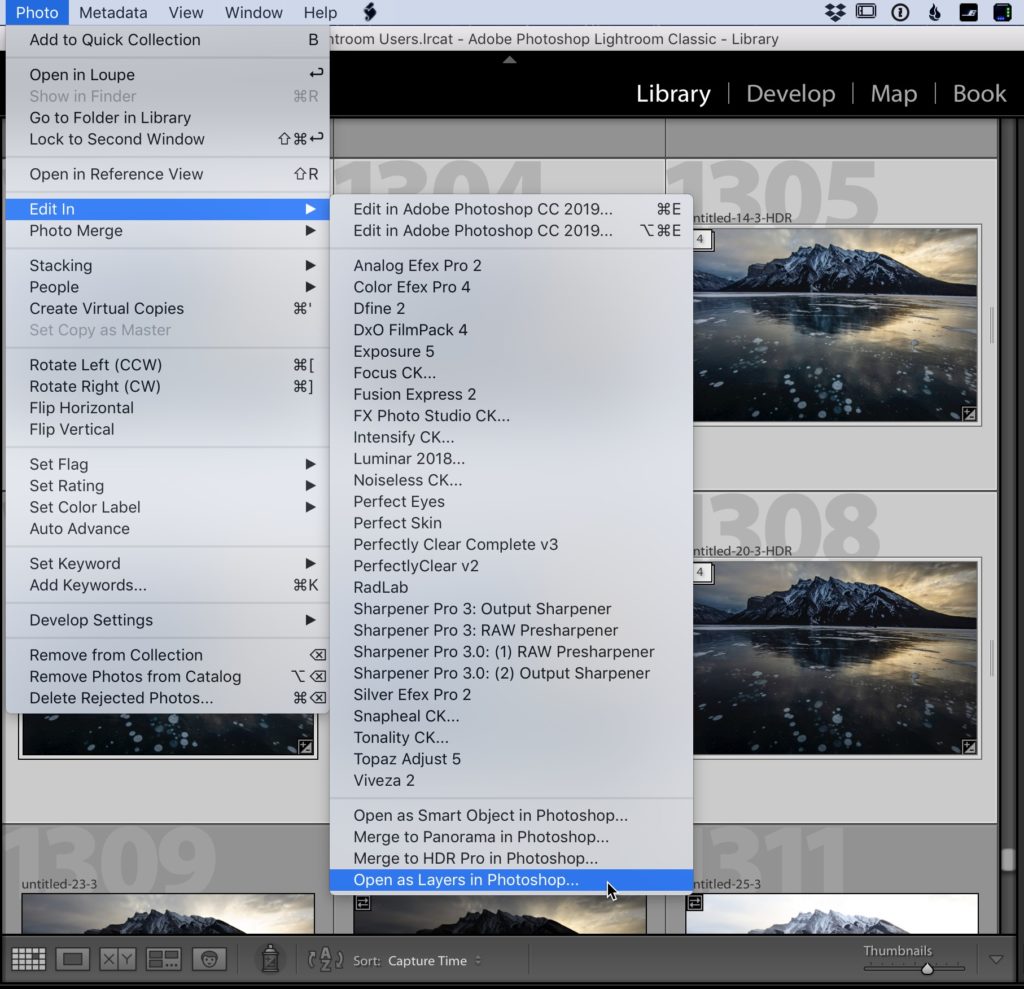
STEP TWO: Go under the Photo menu, under ‘Edit in’ and choose ‘Open as Layers in Photoshop” (as shown here).
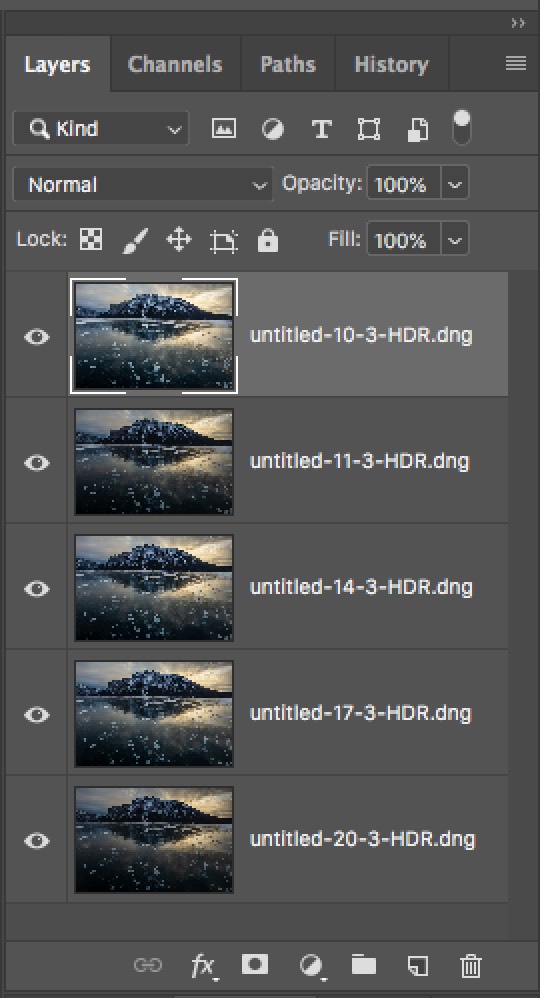
STEP THREE: This launches Photoshop and puts each of those images into a single document, with each image appearing on its own separate layer (as seen here).
The rest of the technique is all done inside of Photoshop, and if you want to see how the focus stacking post-processing, today I did a step-by-step tutorial over on my daily blog at scottkelby.com — if you’re interested you can catch that tutorial at this link and it shows you how to have Photoshop automatically find the sharp parts of each layer and mask away the rest, all with just one click. It’s pretty sweet.
Hope you found that helpful. Have a good one!
-Scott
Aside from the HDR brackets you mention in one of the other blog comments, did you do any processing prior to stacking, or did you do that afterwards? I’ve seen Serge and others do tutorials on this in which they did some editing prior to stacking – is one way better than the other, or does it matter? Thanks so much for sharing Scott.
Thanks! I appreciate the effort to pull these tutorials together. Very helpful.