
How To Clearly See Spots or Sensor Dust In Your Image
Hi gang: Happy Monday — OK, that’s enough chatty stuff, let’s get to work! 🙂

STEP ONE: When you look at the image above, you can see a few spots, mostly to the left of our subject. But the problem is — spots are easy to miss, especially on solid color backgrounds like this, or on skies for landscape or travel photos. The goal is to see these spots easily, and it start with you choosing the Spot Removal tool from the toolbar under the Histogram in the Develop Module.
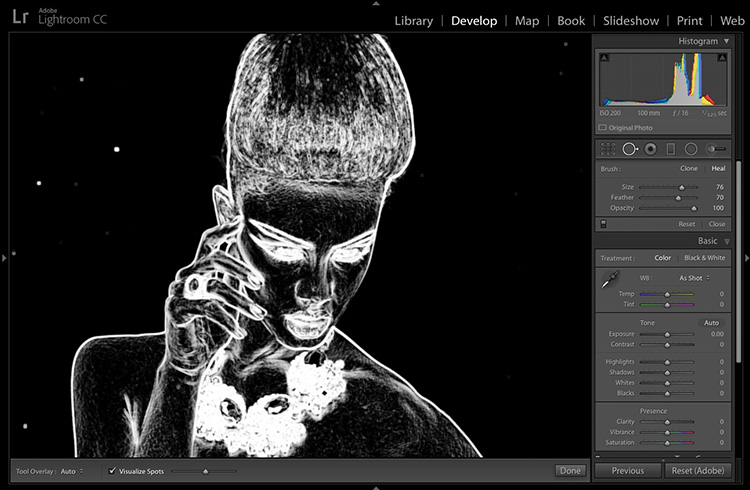
STEP TWO: Once you have that tool; go down to the toolbar that appears below your image (if you don’t see that gray toolbar, press the letter “t” on your keyboard to make it visible). Now, turn on the checkbox for “Visualize Spots” (as shown here), and it inverses the image and the spots suddenly stand out like a sore thumb. However, you don’t see many more spots than you did in the normal view — they just really stand out. However, you can tweak this view so any spots that are hiding show up.
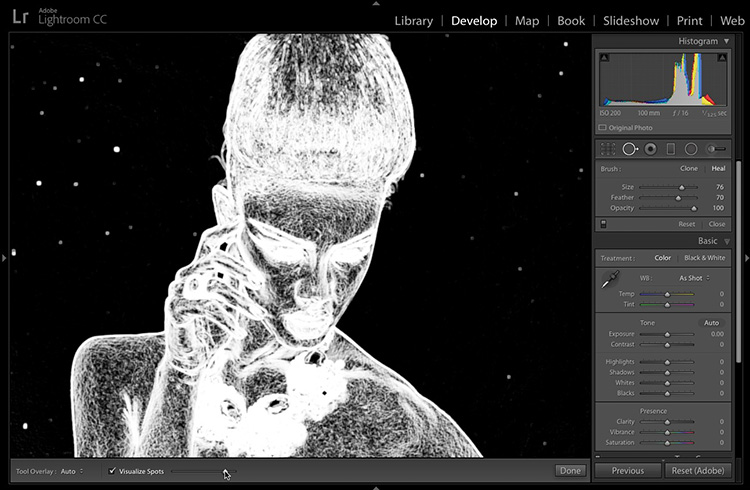
STEP THREE: To tweak how this visualize spots displays the spots, drag the Threshold slider (to the right of the Visualize Spots checkbox) over to the right, and suddenly all those spots that were hiding, come out into full view.
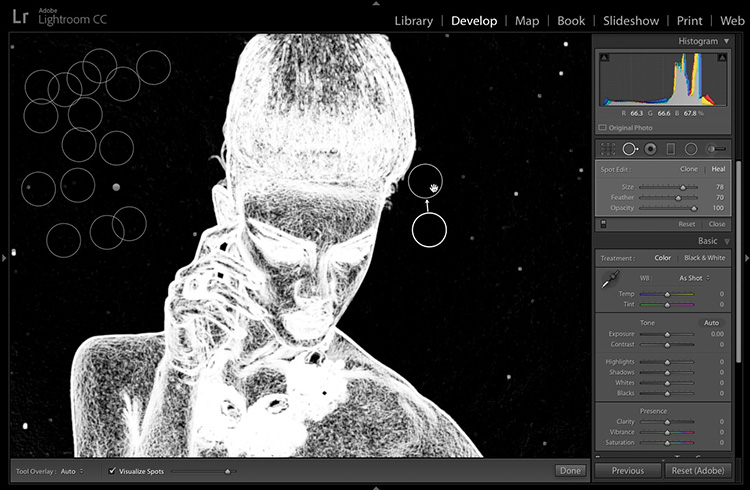
STEP FOUR: One of the handiest things about this “Visualize Spots” view is that you can remove the spots using the Spot Removal tool while it’s turned on, which makes your job much easier.

STEP FIVE: When you’re finished removing all the spots, just press the “Done” button at the bottom right corner of the toolbar at the bottom, and it returns you to the normal view, as seen here.
Hope you found that helpful. I hope to see ya back here on Wednesday for “Quick Develop’s Hidden Little Secret.” 🙂
Best,
-Scott
P.S. I’m in Charlotte next Monday, the 17th, and then I’m in Sacramento the next week, on the 24th, with my full day seminar. Hope you can come out and spend the day with me. 🙂


So I got my my LR Spot Removal stuck in this mode with the toolbar hidden. This Google search “lr spot removal black and white” lead me here. Thx for writing this up because I too was not aware of this…
I never knew about this tool. Best tip ever. Thanks!
Hi Scott.
Brilliant tip, even when not entirely new. Too bad you missed the spot on your iceland portfolio though…
Best regards
Matt
Thanks Scott never new this tip brilliant glad ifound this site definitley be studying it a lot
This even works on LR 5.7! Thanks!
Thanks for this (and all your other tips) Scott. Very helpful.
Julian – London, UK
Is this feature available in the desktop (non CC) version of LR?
Excellent as always, Scott! I wrote a very similar post just a couple of weeks ago, where I added the ability to use color to get at spots that are not quite so visible in the built-in black and white spot removal. It also uses the tip mentioned by @David Levin – to zoom in and use the page-up, page-dn keys to navigate. Assuming links can be posted, you’ll find it here: http://scottthomasimages.com/spot-removal-lightroom/
I’ve got another tip that RC Concepcion showed us a few years ago. He also showed us how to look for spots on photos by zooming in (Command-Z on the Mac) and then using the page up and page down keys on the keyboard to examine each small segment of the photo. When you got down one column, LR would automatically go to the top of the next “column” of the photo to continue looking for dust spots. As you hit the page up/page down keys, you could monitor your progress of coverage in LR’s Navigator to see what area of the photo you’re in. I hope this adds to today’s “killer tip.”