When I was writing my tip for Monday, I realized that while I’ve got a lot of different tips here on how to make tethering easier, and how to troubleshoot tethering, and how to work with the Heads Up Display, I don’t really have a tutorial on simply how to set up tethering from scratch for someone who has never tethered before, so… here ya go:
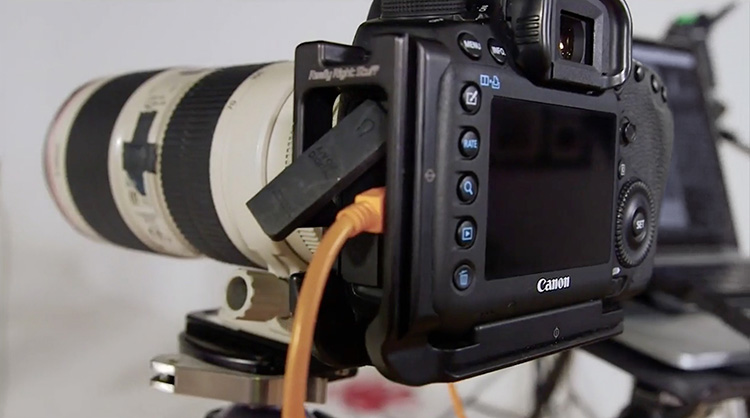
STEP ONE: Tethering starts with connecting a special USB cable to your camera. You can use the cable that came with your camera (look in the product box your camera originally came in) but if you don’t still have it, you’ll need to buy a tethering cable (which ends you need on your cable depend on which camera make/model you’re shooting, but most use a mini USB on the end that plugs into your camera, and a regular USB to plug into your computer. Some newer cameras, like a Canon 5D Mark IV, use a USB 3 end to plug into the camera, rather than a mini-USB). I got my cable from a company that does specializes in tethering gear — Tethertools.com — but I’ll have more details on my tethering rig on Friday, but for now, just know you’ll need that cable (again if you don’t already have the one that came with your camera).
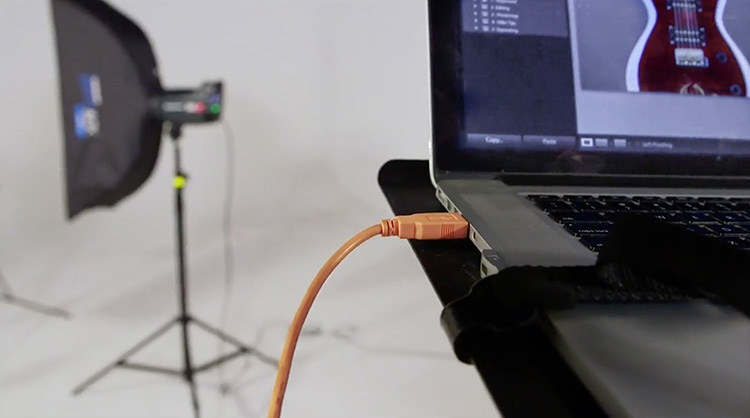
STEP TWO: You’re going to plug the other end of your cable directly into your computer’s USB port (in the example shown here, I’m plugging it into my Laptop. So, the mini-USB end is plugged into my camera, and the regular USB end is plugged into my computer. That’s the set-up hardware wise.
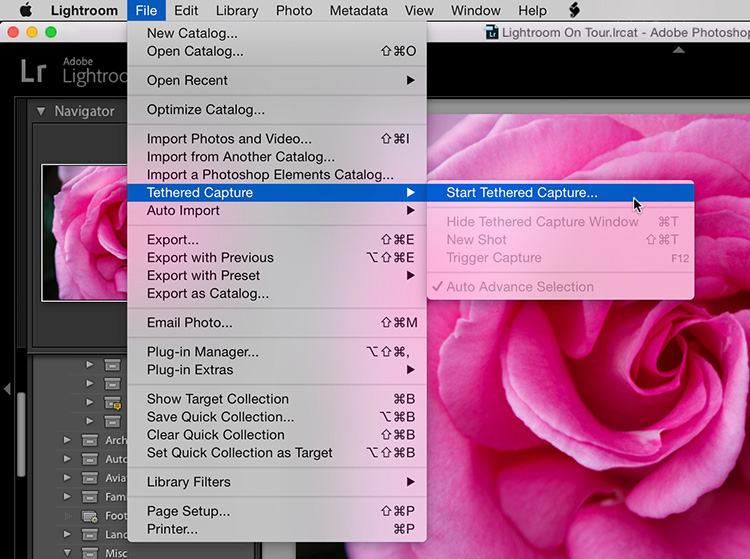
STEP THREE: Inside of Lightroom, to turn tethering on, go under the File menu, under Tethered Capture, and choose ‘Start Tethered Capture’ as shown here.
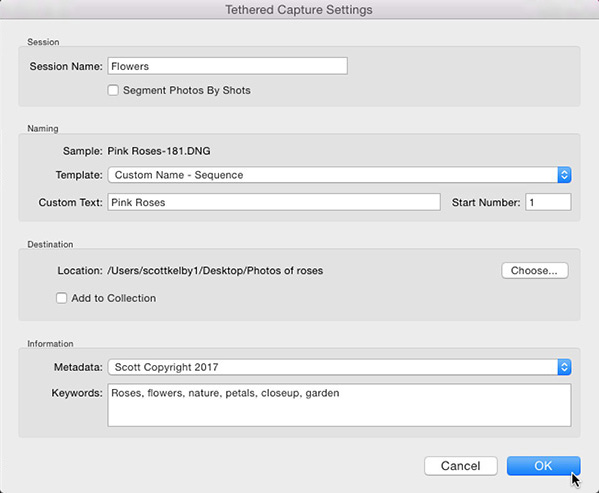
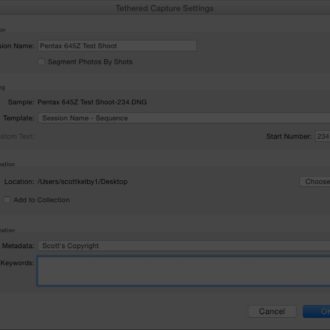
STEP FOUR: That brings up the ‘Tethered Capture Settings” window (shown above). At the top, you can name your session (totally optional).
At the top, in the Sessions section, you can name the Folder that will be created to store your tethered images. If you want to create a subfolder, click the ‘Segment Photos by Shots’ checkbox below it.
In the Naming Section, you can give your files a more descriptive name than the default _DSC09584.CR2 name your camera will probably give it. I generally choose “Custom name – Sequence’ so I can type in a name, and then it will auto-number the files for me as I shoot (I named mine “Pink Roses” and in the ‘Start Number” field I just started with number 1, so my images will be named ‘Pink Roses-1.CR2, Pink Roses-2.CR2, and so on). In the ‘Destination’ section you can choose where you want to save your
In the ‘Destination’ section, you can choose where that folder you named at the top will be saved (on your computer, or hopefully your external hard drive), and you can also have your tethered images import directly into an existing collection (see Monday’s post from this week).
In the ‘Information’ Section, you can add your Copyright or other metadata (if you’ve already created Metadata templates. Here I’m adding my copyright info to the images as they’re captured). There’s also a field below for adding top level keywords (any keywords you enter here will be applied to all your tethered images from this shoot).
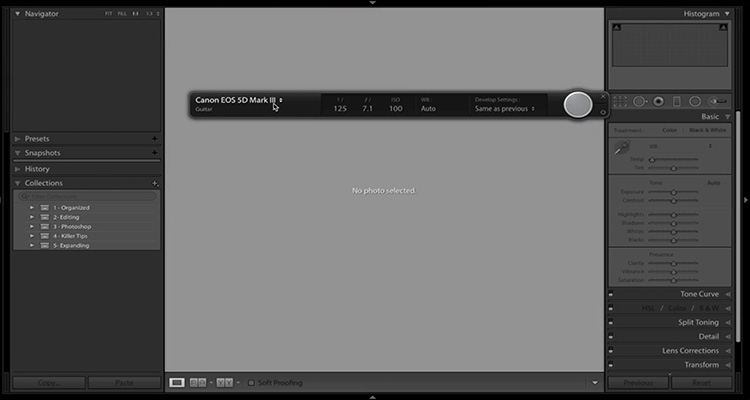
STEP FIVE: When you’re done entering info in this window, click the ‘OK’ button, and it brings up the Tethering HUD (Heads Up Display) you see above.

ABOVE: Here’s a closer look at the HUD. If you see the name of your camera on the top left, it means you’re connected, which is a good thing. If you don’t see that, check out my tethered troubleshooting tips here on the blog. To the right of that is a display of your current Shutter Speed, f/stop, and ISO, and your White Balance setting. To the right of that is a pop-up menu that lets you apply any presets you’ve created (or any of the ones that come with Lightroom) as your images are captured. To the right of that is a round button — that is actually a Shutter Button — press it and fires your camera (great if your camera is positioned in some hard to reach place, like overhead).
To move this HUD, just click on it anywhere and drag it. To hide it from view (but still, keep your tethering active), just press Command-T on Mac or Ctrl-T on a Windows PC.
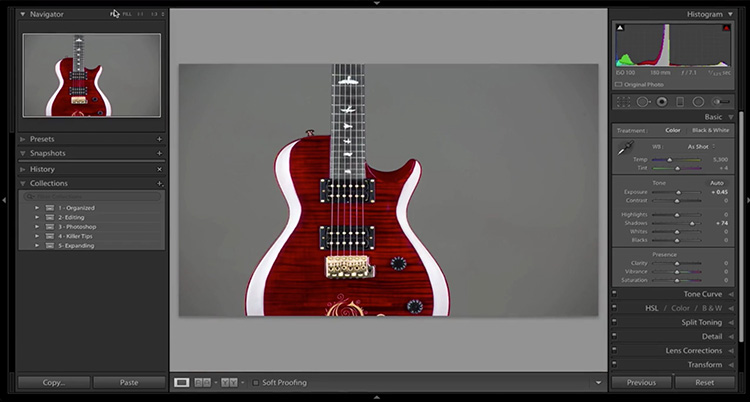
STEP SIX: At this point, I usually take a test shot just to make sure it’s working. In a few seconds, your image should appear in Lightroom. The whole idea behind Tethering is to see your images much larger than you could on the tiny screen on the back of your camera, so at the very least I double-click on the thumbnail to enter Loupe view and see the image much larger (as shown here), but if you’re going to do that, you might as well press Shift-Tab so hide the left and right sidebars so your image appears even larger, though most of the time I just hit the letter ‘F’ on my keyboard so the image appears full screen so I get the maximum size possible.
Now each time you shoot, your image will appear on screen in Lightroom. That’s it — you’re up and running.
Hope you found that helpful and that it opens a fun new way of shooting that will translate into better images because seeing the sharpness, the light, and shadows at full-screen size like that — it really makes a difference. You’ll catch stuff during the shoot you would have missed otherwise. You will fall in love with tethering.
On Friday, I’ll have a post that shows my entire tethering rig — all the hardware and set-up from top to bottom.
Have a great Wednesday, and hope to see you on my live photography show ‘The Grid’ today at 4 pm EDT.
Best,
-Scott


Dear Scott,
I am a huge fan and appreciate your tips above. I did the exact same thing but … when I click the shutter the image doesn’t appear in Lightroom or in the destination folder. It is only captured on the SD Card in the camera.
This worked a few months ago with my Canon 550D but not with my 5D Mark III.
Please help.
Just to say thank you – I’m a camera newbie, feeling my way through online tutorials and this info was exactly what I was looking for.
Hey scott,
Very good blog the great idea and your knowledge provide to all,so keep it up
Can you use either there’d capture or auto import to import into your existing folder structure?
I have my photos stores in an a year/month/day structure.
blast tethered not there’d. Sigh, …
Hey Scott – maybe I missed it, but your post doesn’t seem to say which brands of cameras are supported for tethering. It’s far from universal, right?
Mike,
The list of supported cameras is available at the Adobe website. See url below:
https://helpx.adobe.com/lightroom/kb/tethered-camera-support.html
Fernando
Thanks, Fernando. Yep, I knew that it used to be limited to Canon and Nikon, but hoped that Adobe had managed to spread the wealth a little over the last several years. Sadly, it looks like they’ve only added support for Sony (and just a few models, at that). Too bad all the rest of us are still not invited to the Lightroom tethering party. I think Scott should have mentioned this in his post.
Mike
“How to shooting tethered into Lightroom”? Really? Is this article being translated from some foreign language?