
Removing Distractions with Updated Healing Tool
Last week I mentioned using the Content-Aware Remove tool to clean up the photo I was working on, so let’s take a closer look at what changed with this tool.
[This article originally appeared in the November issue of Photoshop User magazine]
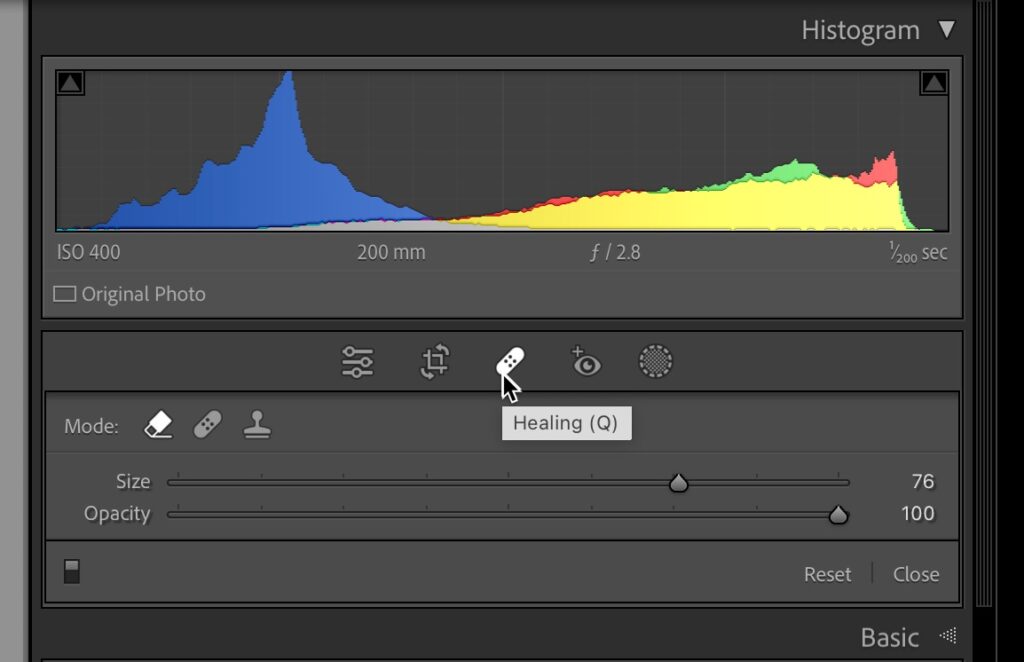
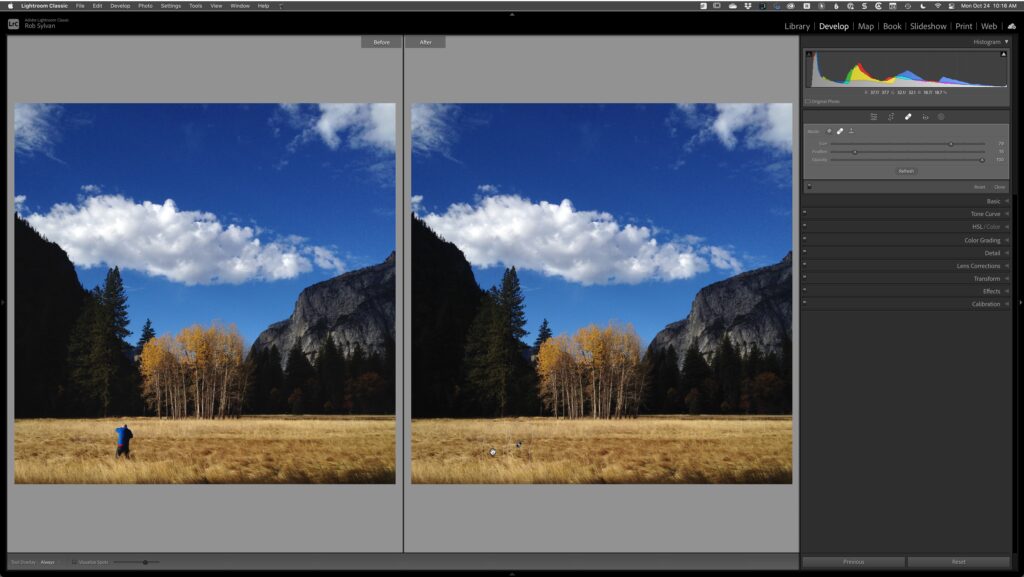
The latest version of Lightroom Classic got a big update to the tool formerly known as the Spot Removal tool, and now known as Healing. Clicking the Healing icon in the Toolstrip below the Histogram reveals the three Modes for removing the distractions from your photograph. Two of the Modes, Heal and Clone, are functionally the same as the previous version of the Spot Removal tool. While the new Mode, Content-Aware Remove, is sure to become your new favorite, it is good to remember you have these other options to fall back on if needed.
Heal and Clone
Let’s quickly review how Heal and Clone work before moving on to the new mode, as they all share the same controls for the brush used in each mode. You can press the Q key (from Library or Develop) to jump into the Healing tool, or if in Develop, simply click the Healing icon. From there, select your desired Mode by clicking its corresponding icon (hover cursor over each to see its name appear in a tooltip). The size of the Brush can be configured using the Size slider, the left and right bracket ( [ ] ) keys, or the scroll wheel of a mouse. The Heal and Clone modes also have a Feather slider to control the softness of the brush (also adjustable by holding Shift and using the [ and ] keys). The Opacity slider allows the original pixels to completely obscured when set to 100 (normal use) or partially obscured with lower values (in situations such as where you just want to reduce visibility of a skin blemish without removing it completely).

In the Toolbar below the photo there are controls for the Tool Overlay (the outline of the brush stroke left behind) and Visualize Spots. Tool Overlay can be set to Auto, Always, Selected, and Never. When set to Auto the selections made by the brush are only visible when the cursor is over the photo, with Always the selections never hide, with Selected you only see the active selection (all others hidden), and with Never you can work with the tool without ever seeing the selection outlines. Pressing the H key will cycle you between Auto and Never.
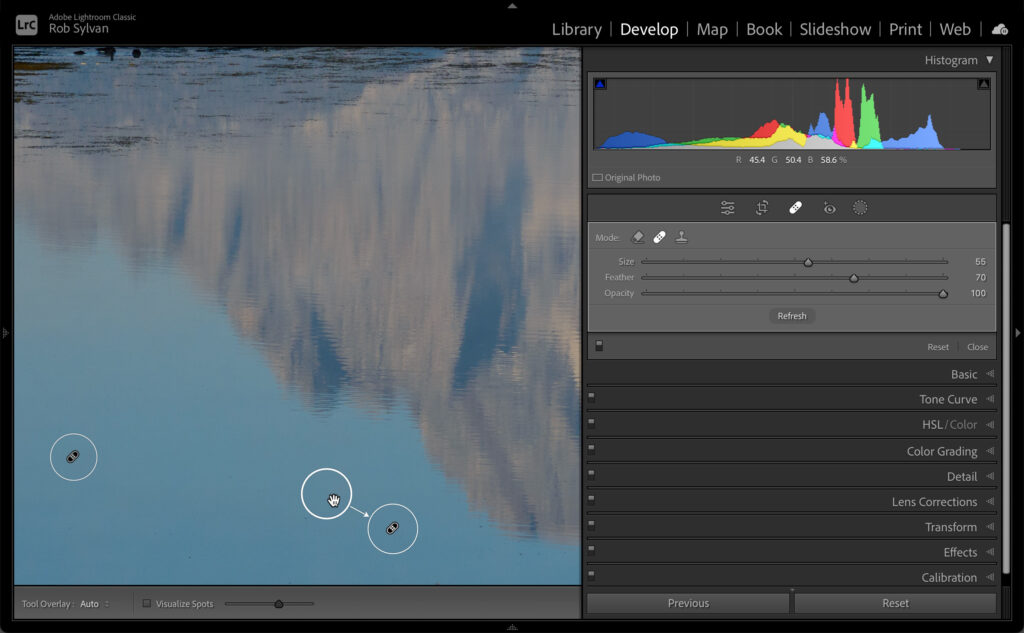
When dealing with sensor spots, most often visible in clear blue skies (and their reflections), the Heal mode still works great. Heal and Clone both use another area of the photo to affect the area you brush over. The key to both Modes is that you need a good area to sample from to apply to the area you select with the brush. Heal removes the unwanted pixels in the selection by using the lighting, texture, and shading from the sampled area to fix the problem, and usually results in a smooth blending of the new pixels and the original surrounding pixels (as long as there was a good place to sample from). Clone simply duplicates the sampled area in the place you select with the brush. I can’t say as I have ever had a use for the Clone mode, but perhaps it is helpful to others.
Sometimes sensor spots are quite visible from the outset, like the previous example, and a single click of the brush set to Heal will automatically grab a sample from another part of the photo, resulting in a circle appearing over the area you clicked and another circle showing where the sample is from (with a line connecting them). If you want to control where the sample is made from, hold the CMD key (PC: Ctrl), then click the spot you want to remove and drag to a desired sample area, then release the mouse button. You can always click and drag a sampled area’s circle to a better location on the photo as well. Clicking the Refresh button (or pressing the / key) will automatically sample from a different location each time.
Press the Delete key to delete the active circle. You can delete multiple circles by holding the Option key (PC: Alt) and dragging a marquee around all the circles you want to delete, then release the mouse to remove them all at once.
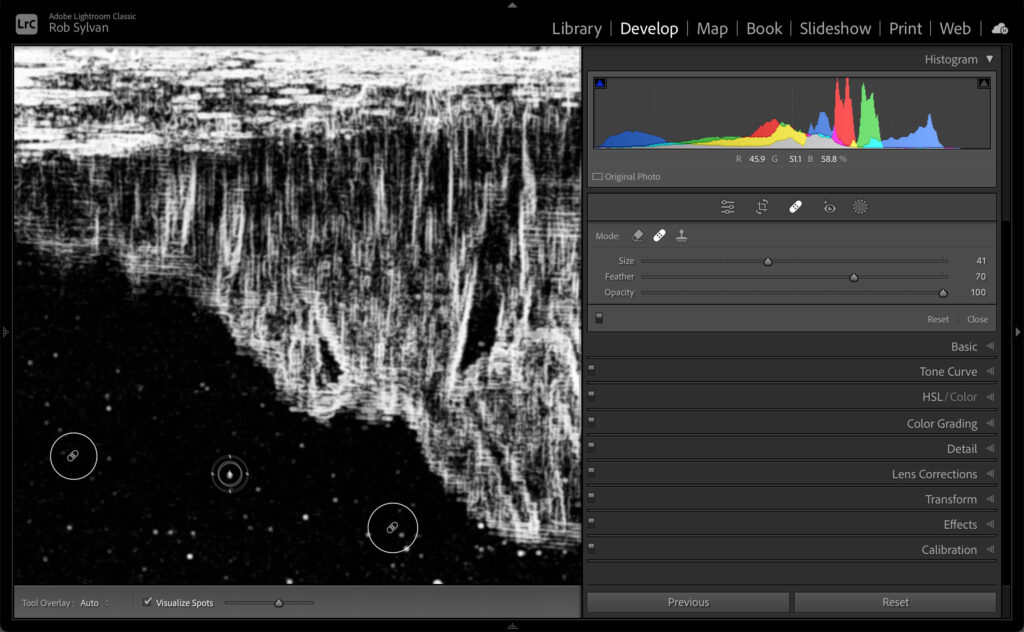
If you want to be sure you’ve removed all sensor spots check the box next to Visualize Spots to see an inverted grayscale version of the photo that makes it easier to see dust spots and other artifacts. Increasing the associated slider will reveal more artifacts and edges. This is especially useful to do before printing or displaying the image at a large size electronically.
A great way to ensure you’ve viewed all areas of a photo just using your keyboard is utilizing the Home, Page Up, and Page Down keys on your keyboard. Smaller keyboards, especially laptops, may require holding the fn key while pressing the left arrow (Home), up arrow (Page Up), and down arrow (Page Down) to achieve the same functionality. First, zoom into 100%. If the Healing tool is active, press the Spacebar, then click on the photo to zoom in. Then press the Home key (or equivalent on your keyboard) to zoom to the top-left corner of the photo. From there, simply press the Page Down key to move through the entire photo without missing a single pixel until you end up at the lower-right corner. With all spots removed, hold the Spacebar and click in the photo to zoom out. Uncheck Visualize Spots (if enabled), and you should have a nice sensor spot free photo!
This is not reserved for sensor spots alone though. If there is a good enough area to sample from in your photo you can remove all kinds of distractions. With single-click spot removals you can also continue to adjust the Size, Feather, and Opacity of the active spot after it has been applied, which can further help you refine the removal.
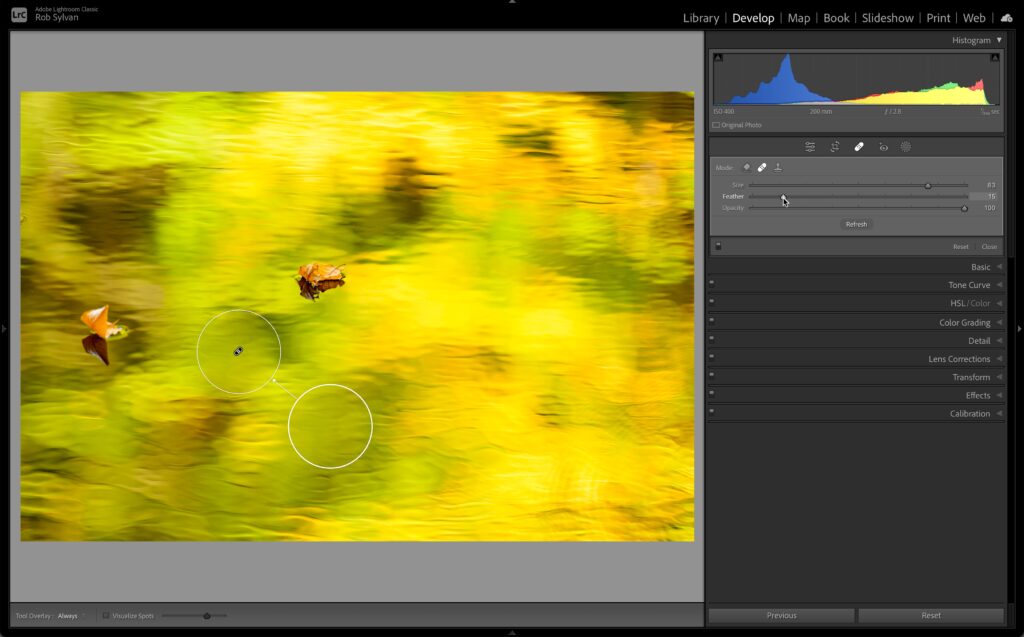
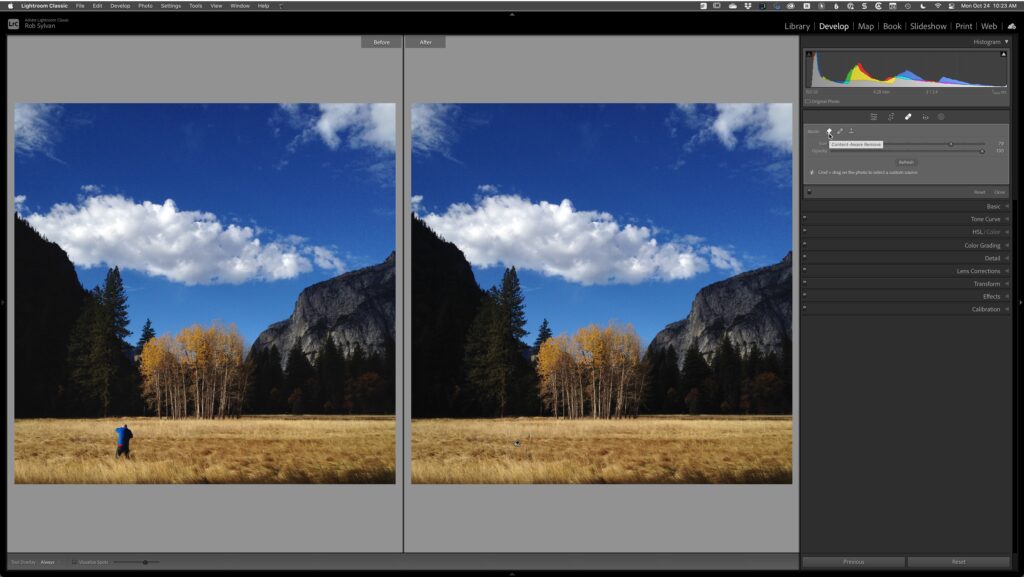
You are not limited to single-click removals though. Simply drag the brush over the object you want to remove, then release the mouse to automatically create a sample area of the same dimensions in another part of the photo. You cannot change the size or feather after the fact for non-circular spots, though you can still adjust opacity. We’ve used this tool this way for many years, but it required a good area to sample from which wasn’t always available. Even with a good sample, the final blend was not always realistic. This is where the new Content-Aware Remove can come in handy.
Content-Aware Remove
Building on the functionality we’ve explored, switch the Mode to Content-Aware Remove by clicking the eraser icon. If you have an active selection from another Mode it will update the results using content-aware technology which uses the surrounding pixels to remove the selected area. If still not good enough, click the Refresh button (or press /) to have it update the results until you like how it looks. You can press Delete to remove the selected area and try brushing again with a differently sized brush which may give even better results.
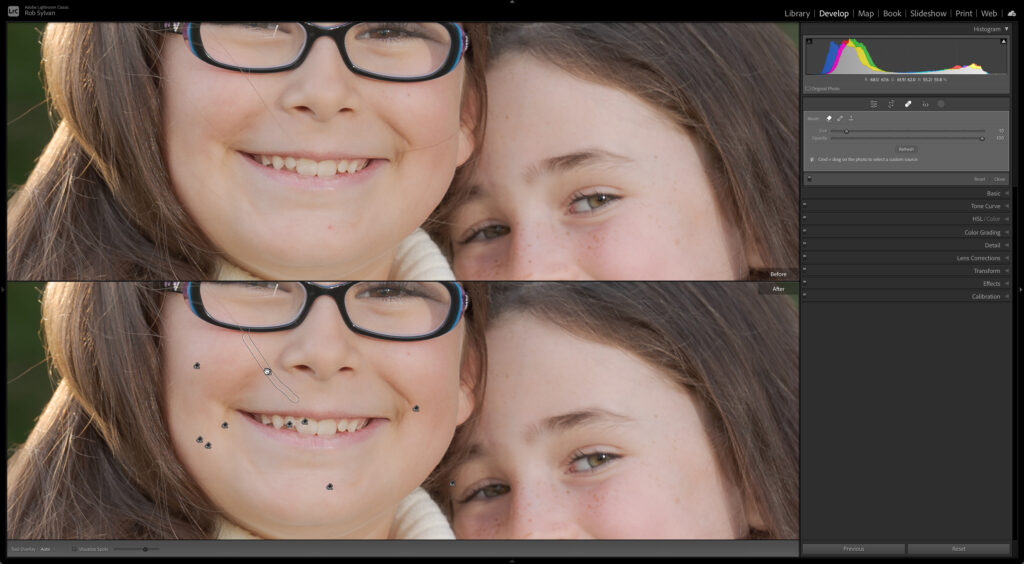
Without the limitation of needing good pixels in the same shape and size as the affected area, while drawing on the impressive powers of content-aware, you may just find it possible to more challenging retouching, such as fly-away hairs across someone’s face. Something you’d previously only consider doing in Photoshop. If clicking Refresh doesn’t yield the desired results you can also hold the CMD key and drag a marquee over an area you want it to use for its sample and see if that improves the result.
As much improved as the technology has become, it is still not as good as Photoshop when you consider Photoshop’s selection abilities and advances in content-aware useability, so you can always use the Photo > Edit In > Edit in Photoshop command for the really tough cases. That said, with this new feature you will not be doing that as much as you used to have to do.


hello,
content aware remove is a toy, not compared to photoshop, which is excellent, but compared to NIK capture nx2 remove brush existing 20 years ago and ON1 Photoraw today,…
It would like to work but we have the feeling it tries to keep the non destructive healing brush tool core which is also a nightmare.
Thanks Rob
That was one of the most detailed and inclusive descriptions of the LrC healing tools that I have seen.
Thanks again
Great article about great improvement.
My dream: combine object selection tool and content-aware remove.
These are great upgrades to the features of LR to make it work closer to PS. However, it would be nice to be able to adjust the size of the brush in PS the same way that you can in LR with the mouse’s scroll wheel.