
How To Prep a Lightroom Photo Book for Printing
Happy Friday, everybody! I’ve been getting this question a lot lately, so I thought I’d tackle it here on the blog:
“What do I need to do to prep a photo book I made in Lightroom for printing at Blurb? Do I convert the images to CYMK first? What resolution should they be, and do I need to change that in Photoshop?”
Here’s the good news:
There is no prepping for printing your photo books for Blurb. All the prep work is done for you behind-the-scenes, so you don’t have to worry about color modes, or color conversions or even changing resolution.
The only time resolution even comes into play is if you see a warning on a particular page of the book that an image doesn’t have enough resolution to print clearly at the size you currently have it. This sometimes happens if you’ve cropped an image really tight, and while originally it may be have an 18 or 20-megapixel image, after the cropping it’s down to five or six, and you’re trying to print a two-page spread with it. In those cases you’ll get a warning icon right on the page (and the fix is simply make the image smaller on the page until the warning goes away. Sometime it just needs to be a little smaller to have enough resolution for printing (the smaller you make it, the more the resolution increases), and sometimes it’ll take scaling the image down in size quite a bit, but at least you know what the fix it. Outside of that one instance, Lightroom takes care of the rest of the resolution and color issues for you.
So, here are your five steps for creating Photo Books:
- Put all the final, sharpened, ready-to-go images into their own collection
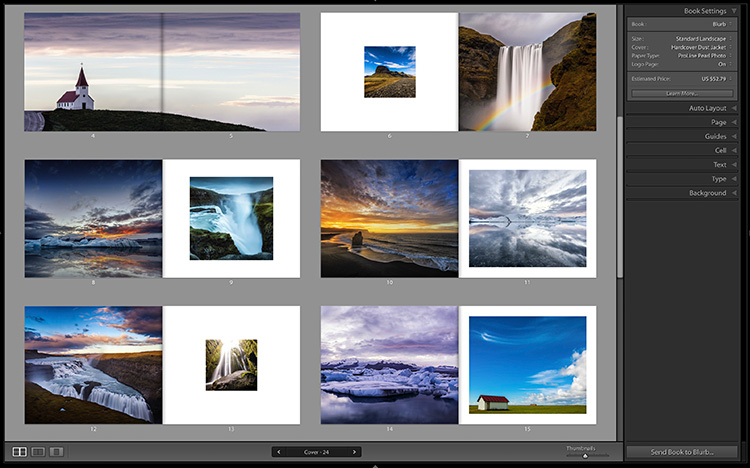
- Go to the book module and in the Page Settings panel choose the size of your book
- While you’re in that panel, choose the paper quality, and cover choice (softcover, hard cover, or hard cover with dust jacket).
- In the Auto Layout panel, hit the Auto Layout button as your starting place. Now choose templates from the pop-up menu in the corner of each page; drag and drop images where you want them; drag and drop pages in the order you want your book.
- Click the button that says “Send to Blurb” at the bottom of the right side panels. Lightroom (and Blurb) do the rest.
That’s the basic steps right there.
Note: If you’re a KelbyOne member, I have an online class that takes you through the entire process from beginning to end. This would be a perfect weekend to check it out. If you’re not already a member, this would be a perfect weekend to become one. 🙂
Hope you found that helpful (and I hope it nudges you in the direction of making your first photo book, now that you know how easy it is).
All my best,
-Scott
P.S. Shout out to the awesome folks in San Antonio who came out to my seminar there yesterday. Really fun crowd, in a really great town. Next stop: Houston on Monday!
I’m going to do this finally. This will be my “reach” goal.
Nice reminder there are other options besides making an individual print.
Thanks for the reminder about how easy it is to create a book!