
Happy Monday, everybody – hope you had an awesome Easter weekend. 🙂 Today we’re answering a question I get asked a lot on my Lightroom tour, which is essentially this:
Q. If I take an image from Lightroom over to Photoshop, and in Photoshop I add a bunch of layers, what happens to those layers when I take that file back to Lightroom? Does it flatten the layers? Is there ever a way to get them back if I need to?
A. When the file comes back to Lightroom, those layers are actually still there and fully intact. However, since Lightroom doesn’t have a Layers features, what you see in Lightroom is a composite image — as if the image was flattened (but again it’s not). Here’s a quick tutorial on the process from scratch:
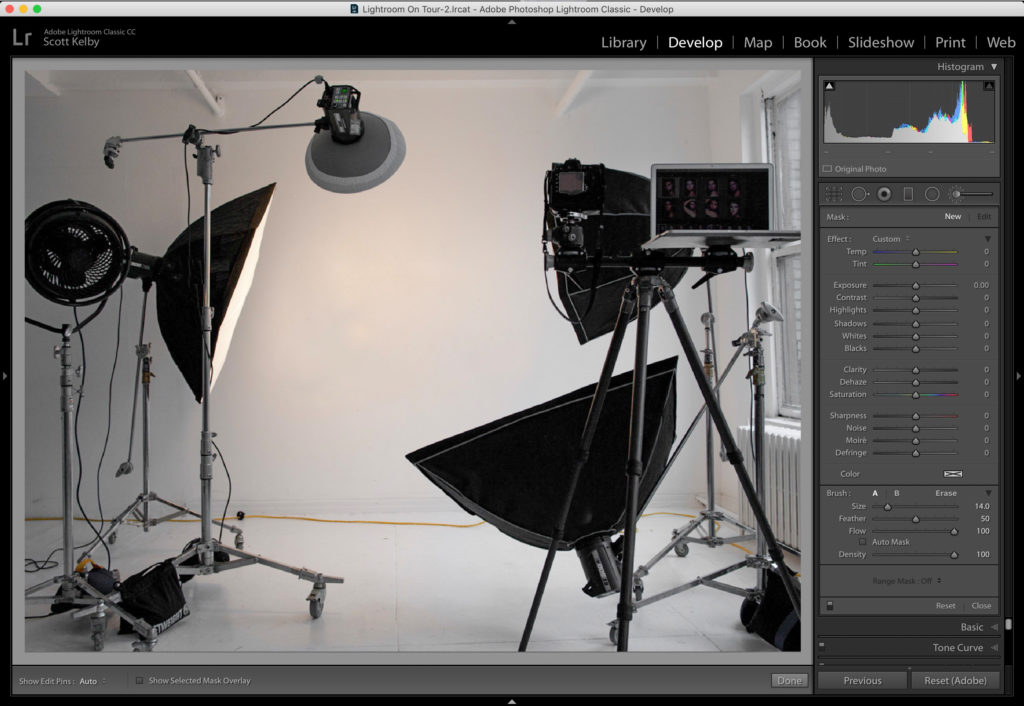
STEP ONE: Here’s our original shot in Lightroom (I positioned the lights so I could add some text in the center). I press Command-E (PC: Ctrl-E) to take this image from Lightroom over to Photoshop to add my type layers.
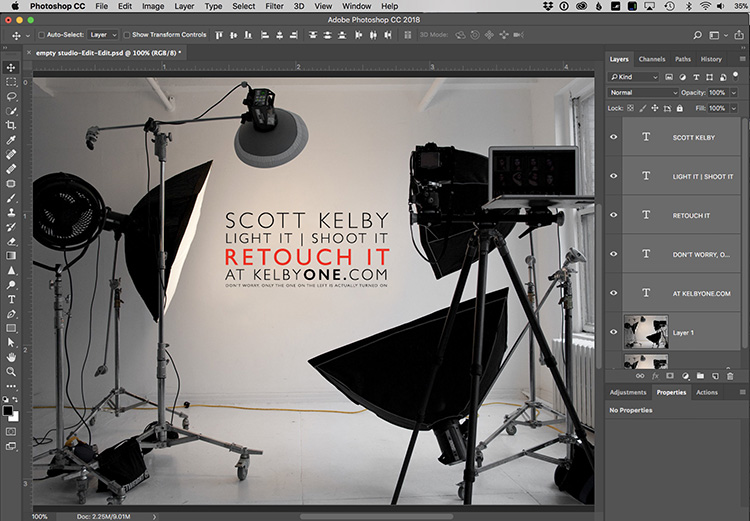
STEP TWO: Here’s that same image over in Photoshop where I’ve added six layers (five Type layers and another layer for sharpening and other Photoshop tweaks). Now that I’m done with my Photoshop edits, to take the image back to Lightroom I simply do two things:
- Save the file.
- Close the file.
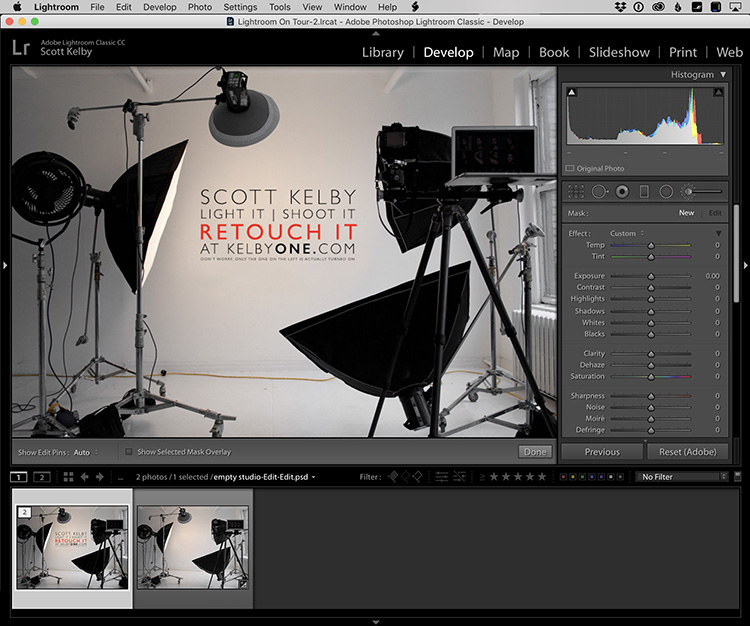
STEP THREE: Here’s the image back in Lightroom, and you can see down in the filmstrip — this Photoshop Edited file is the first thumbnail from the left (it’s a .psd file), and the 2nd thumbnail image is the original image without layers. They both appear to be flattened images.
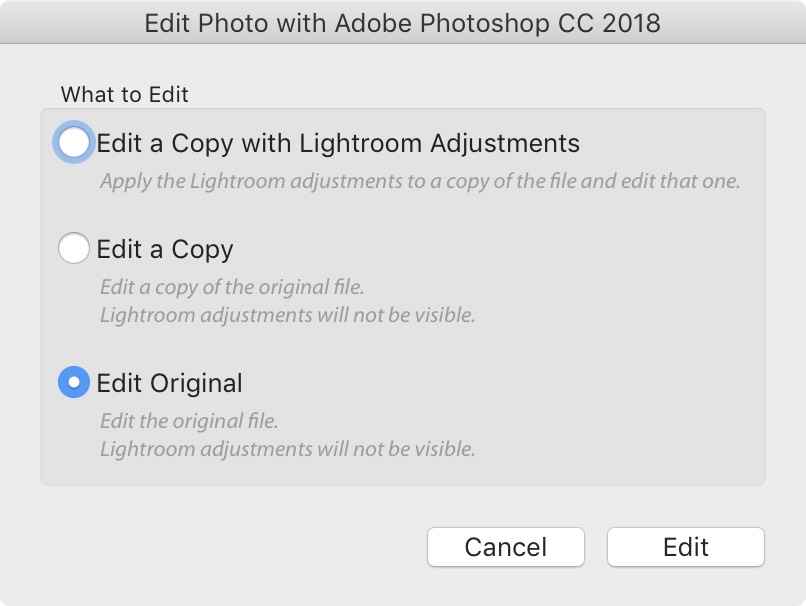
STEP FOUR: The way to re-open that layered file in Photoshop with all its layers visible is to click on the .psd file (the first thumbnail — the one with the type), and then press Command-E (PC: Ctrl-E) to take to back to Photoshop. When you do this, the dialog box you see above will appear, asking if you want to ‘Edit a copy with Lightroom Adjustments’ (if you choose this option, it ignores the layers and will open in Photoshop as a flattened image). Same with “Edit a Copy” — however, if you choose “Edit Original” (as shown here), it will open that .psd copy you make earlier and any layers that were there when you saved the file in Photoshop and took it back to Lightroom will still be there.
Above: Here’s that .psd reopened in Photoshop (by choosing Edit Original), and you can see all the layers are still there.
NOTE: This is the one and only time I choose the option “Edit Original” — When I’m reopening a copy of a file that I know has layers.
Hope you found that helpful. 🙂
Best,
-Scott

I am taking a photo class in the spring. The last time I took a class we did an image review after taking photos. The instructor looked at our images but said he would like to see our edits. Is there a way to export a photo that has edits in both LR originally and then PS and show all the those edit steps.
Not in a single image file. You’d have to export the original edited in Lightroom photo as a DNG (this will give you the original photo plus Lightroom edits) and then submit the Photoshop edited photo as well. Between the two files you’d be able to show the results of all the edits at each stage and the original photo (once it was reset).
A bit late, but … is there any indication in Lightroom that a Photo HAS layers? A Lightroom badge that means “There are layers in this Photo but you can’t see them in Lightroom” would be perfect, imho. NOT knowing that a Photo has layers could result in destroying valuable information inadvertently.
No, there is nothing like that. However, there is no way for Lightroom Classic to destroy any valuable information either. Lightroom never changes the pixels in the source photos. It can’t do any harm.
Thanks Rob — I appreciate your full and timely reply .
The problem I am addressing is that without an indication (such as a badge) _I_ have no way of knowing that the Photo file contains additional layers/information. Lightroom is an information displaying system. That a photo has layers is valuable information that, for my work, should be displayed — and even if not displayed as prominently as a badge, should be readily available.
At the risk of asking too much … what is the recommended workflow for saving and showing in Lightroom some equivalent to what Photoshop and Lightroom call “Snapshots” (though I think they are not the same thing in each program)? What’s the best way to save two or more developed-in-Photoshop-from-one-Photo-in-Lightroom-Photos in Lightroom?
Hi Kirby, I have a couple of posts on the Snapshots panel in Lightroom Classic, here: https://lightroomkillertips.com/understanding-history-snapshots-panels-part-1/
Photoshop has a snapshot function in its History panel, but Photoshop’s snapshots disappear when you close the document, so they are only useful while you are working. Lightroom Classic (Camera Raw has it too) has a much more useful snapshot function (virtual copies are similar and worth using too).
I can recommend exporting/saving the file from Photoshop with some indication that it is a layered edit. For example Photo_1(layer).psd or something of that sort. That way when you view the image in Lightroom’s filmstrip you can remember that you edited the file and it has layers. Hope this helps in some way! – Cheers!
What if you’re not rich enough to feed Adobe 20$ or more monthly?
Lightroom does so much….And I lack the vocabulary to ask what I want to know.
Mainly about masking and layers……..
It’s $10 monthly for LR and Photoshop – so no need to give them $20.00
Hi Scott.
You can open and edit a photo in Photoshop from Lightroom, save and I get it straight back in to Lightroom, but..
When I exposure blend I open several pictures from LR as smartobjects in Photoshop, but I can’t figure out how to get the results back in to Lightroom without save a new document and import again. Is there a easy way to save and get it back to lightroom just like it was one picture ?
Not if you use the Edit as smart object route. Instead, select the multiple photos in Lightroom that you want to blend and choose Open as Layers in Photoshop, which will create one new document in Photoshop with each photo on its own layer that maintains the connection to the Lightroom catalog. Then in Photoshop, convert each layer to a smart object. You will lose the fact that those individual layers are no longer raw photos (assuming you start with raw), but they will be 16 bit ProPhoto images that you can still blend together. When you are done, simply save and close out of Photoshop and this new copy will be added to the catalog automatically. Give it a test run and see if the results are comparable to the way you do it now.
Thanks for your elaborate answer!
Happy to help!
Thanks, that was a great help and right to the point.
awsome!, here’s the answer Ive been looking for so long!! .. Thank you!
Scott — very helpful, as always. I love these tips!
Small point: in Step 4, it sounds like you’re saying “Edit a Copy” ignores layers and opens in PS as a flattened image.
On my system (Win10, LR Classic CC 7.3), “Edit a Copy” opens a .psd file in PS with all its layers intact (same as “Edit Original”). The diff betw “Edit a Copy” and “Edit Original” seems to be that “Edit Original” updates the original .psd file in LR, whereas “Edit a Copy” creates a new, additional .psd file in LR.
Thanks Scott – wonderful tip
What about any changes made in LR after step 3? Will ‘Edit Original’ be still available and if so what will happen to these changes?
Edit original is always available to non-raw photos. The best way to understand what happens is to do a simple test on your own. Start with a raw photo, send copy to Photoshop with Lightroom adjustments. Edit in Photoshop, add some layers, go to File > Save, then Close. Return to Lightroom, send to Photoshop, choose Edit Original. Repeat until you see how it works.
In your scenario the changes won’t carry across to Photoshop if you select “edit original.”
Thx Adam, that’s what i thought.
Anyways, as Rob suggested, will do saome testing on my own.. but have no possibility for now… soon 🙂
Thx Scott. Why did you sharpen in PS and not LR?
(Separate Q in relation to PS – Why don’t they use the PS Spot Removal tool in LR – different article)
If I go to Photoshop I do the sharpening there because it’s easier to see the effects of the sharpen. As for the Spot Removal tool – the one in Lightroom absolutely stinks! The one in Photoshop is awesome! 🙂
I AGREE!
You left out a cool part:
If you tweak that Photoshop file in lightroom – then reopen it in PS (step 4) and make changes and save – the lightroom tweaks are still applied to the re-edited image in Lightroom. Great if you find a mis-spelled word, for instance.
Exactly. If you choose “Edit Original”. That’s why the caption says “Lightroom adjustments will not be visible” (i.e. as long as you work on the image in PS) instead of something like “Lightroom adjustments will be lost”.
It makes sense now.
Is there a possibility to (de-)activate Photoshop-Layers directly in LR like you can do in inDesign?
There is not (inDesign does lots of awesome things I wish PS and LR would do, too). 🙂
Thanks for this tip Scott – I’ve always been a big confused what to do in this situation.
My pleasure, Gary 🙂
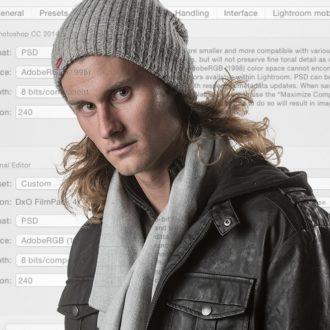
Q: LR dialogue box in preferences says that “….saving to PSD can be less efficient with respect to metadata updates. In PS you need to edit the preferences to “Maximize Compatibility” otherwise there a possibility the file cannot be read by LR…” Does this gives any problems? And when you choose to save to TIFF all the layer are flattened?
I never, ever, ever choose to save any file as a TIFF. Ever. Ever, ever. Ever. 🙂
I *always* save to TIFF instead of .PSD because the latter is a proprietary (Adobe…) format. PSD uses a kind of compression while TIFF gives you the full Monty.