
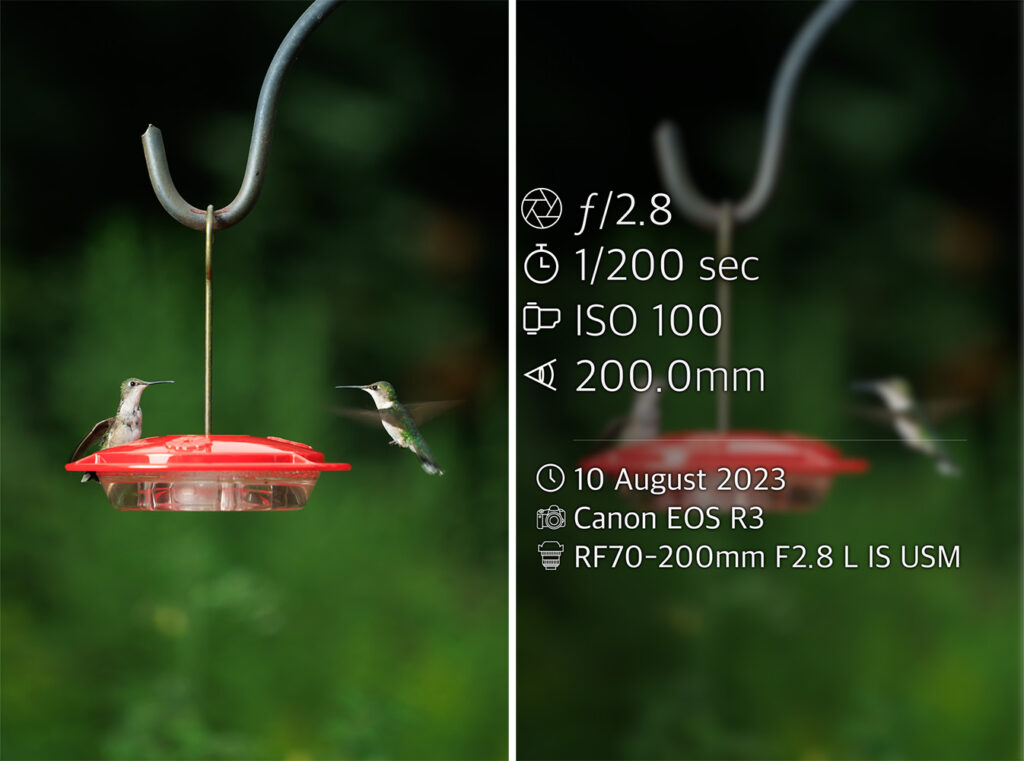
I came across a post in the KelbyOne forum recently where someone was asking if it was possible to create a version of the results from the excellent Photo Summary app but using Lightroom Classic, since that app is only available on iOS and Android. I have it on my iPhone, and while I don’t use it all the time, it is handy when you want to share camera settings along with a photo on social media. Here’s an example using the app.
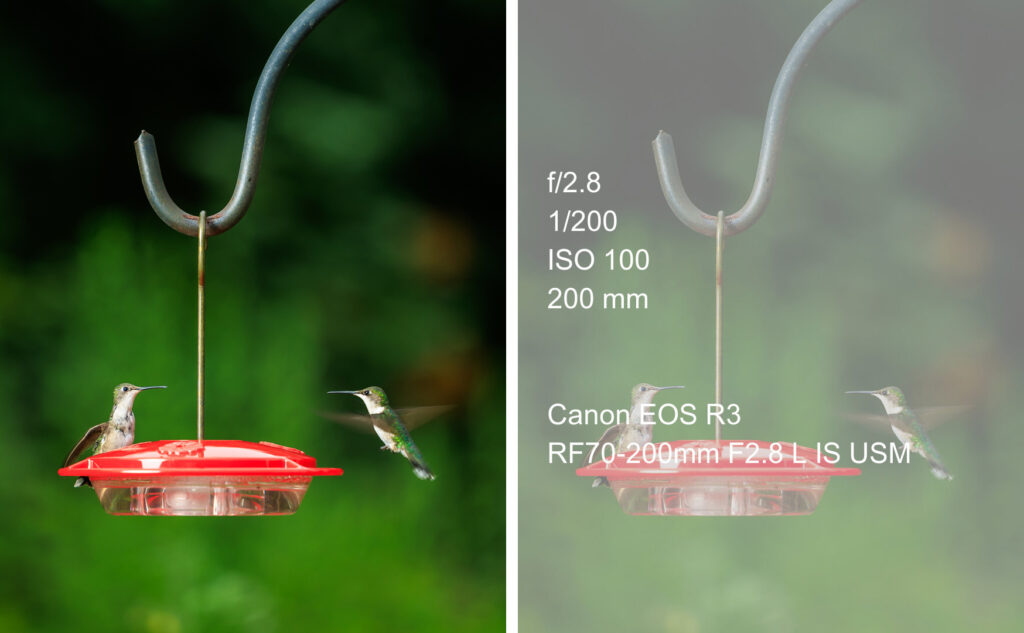
Luckily, it is possible to create a similar output, though not as pretty, using an export plug-in for Lightroom Classic. The name of the plug-in is LR/Mogrify 2, and it can be found (along with many other useful plug-ins) over at the Photographer’s Toolbox (be sure to check out the installation guide for your operating system as it is different for each). By not as pretty, I mean the resulting image will just contain the settings information without any cool graphics along with each item, but if that is sufficient for your needs, then read on …
Configuring Lr/Mogrify 2
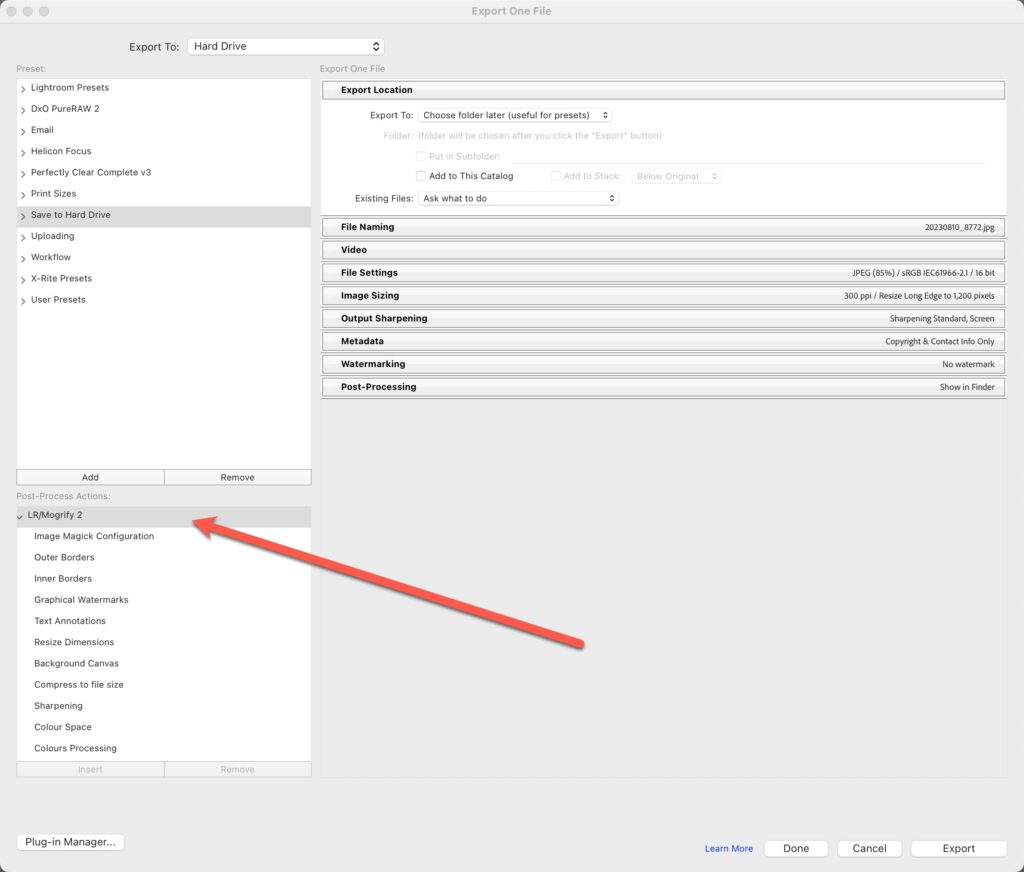
With LR/Mogrify installed you will find a new section, named Lr/Mogrify 2, has been added to the Export dialog below where export presets are stored. Within this section are all the options you can configure using this plug-in as part of your export workflow. In this example, we’ll utilize the options for Text Annotations primarily, though I did also add an Inner Border to create the opaque effect for making the text more legible and this is where you can customize to fit your needs.
Note: If you get an error message using LR/Mogrify on Mac, check out this post on the Adobe forum for a simple fix.
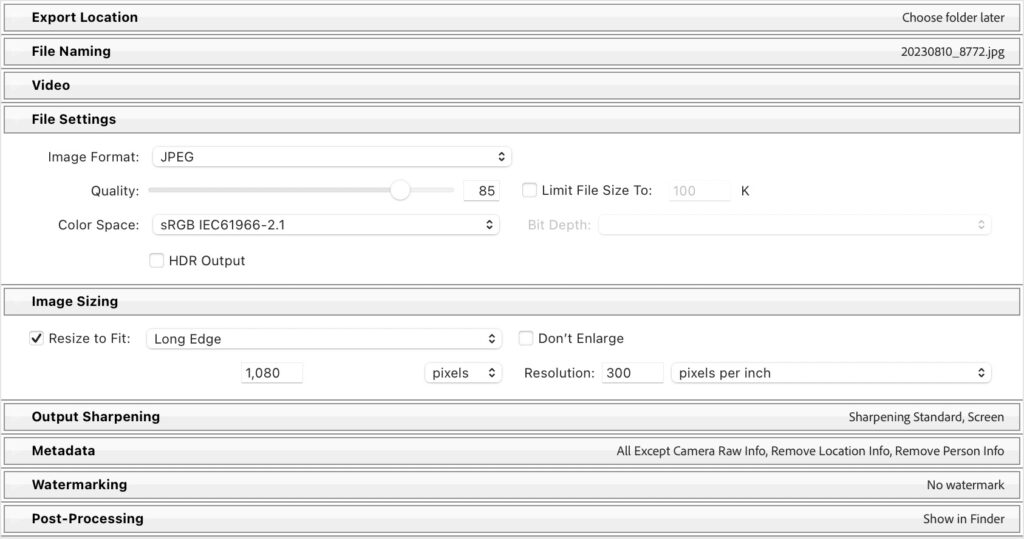
To start, select a photo to export and click the Export button to open the Export dialog (if not already open). Then, configure the desired export settings for sharing your photo, such as an sRGB JPG at a given pixel dimension (in my case I chose 1080 pixels on the long edge). We’ll come back to the Export location options in a bit.
Now, double-click the Text Annotations option under the Lr/Mogrify section to add it to the Export panels. Here you can choose a font, color, font size, font opacity, and position. This controls how the text will look on the image. You can see my settings below, but you might want to tweak to work best for your needs (also based on the size of your exported photo). Here’s where the magic part comes in, the Text Annotation feature can utilize tokens representing different metadata fields and pull that data into the text in the exported copy. In my example, I added the tokens for aperture, shutter speed, ISO, focal length, camera model, and lens.
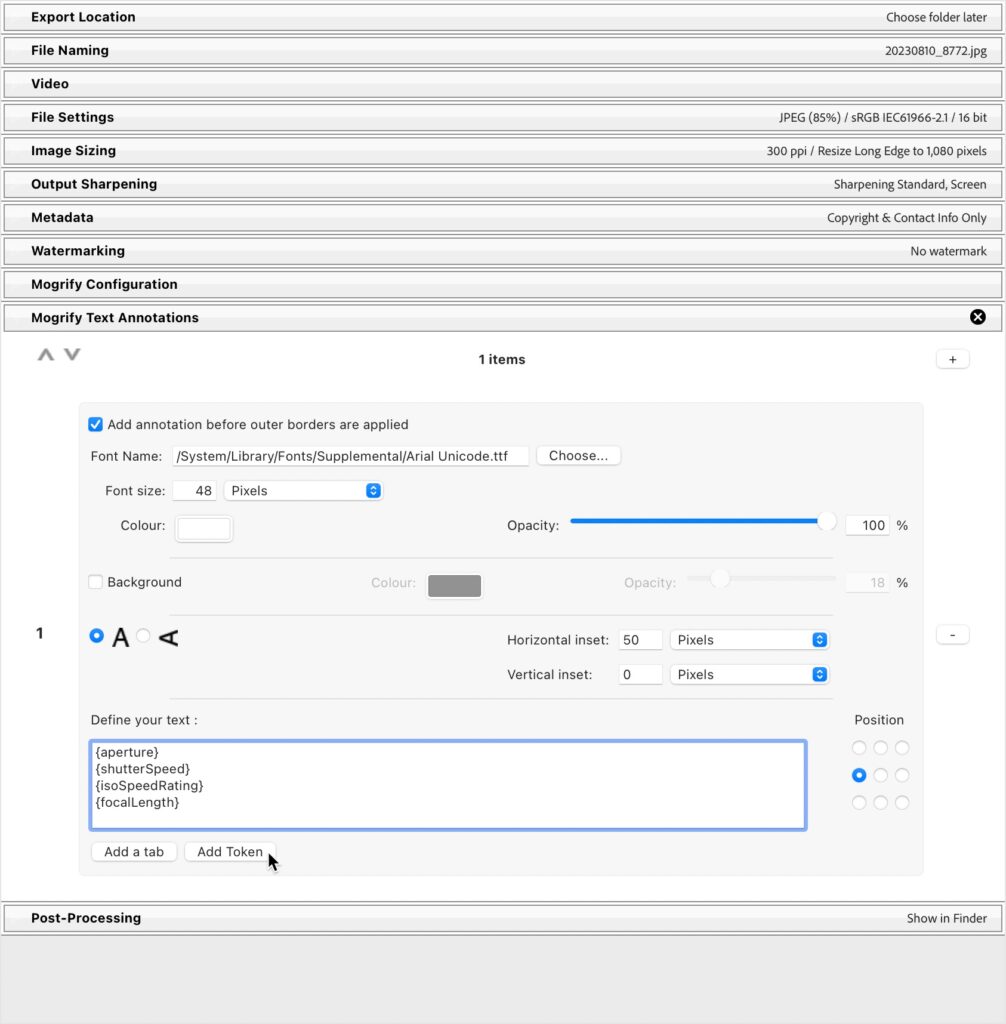
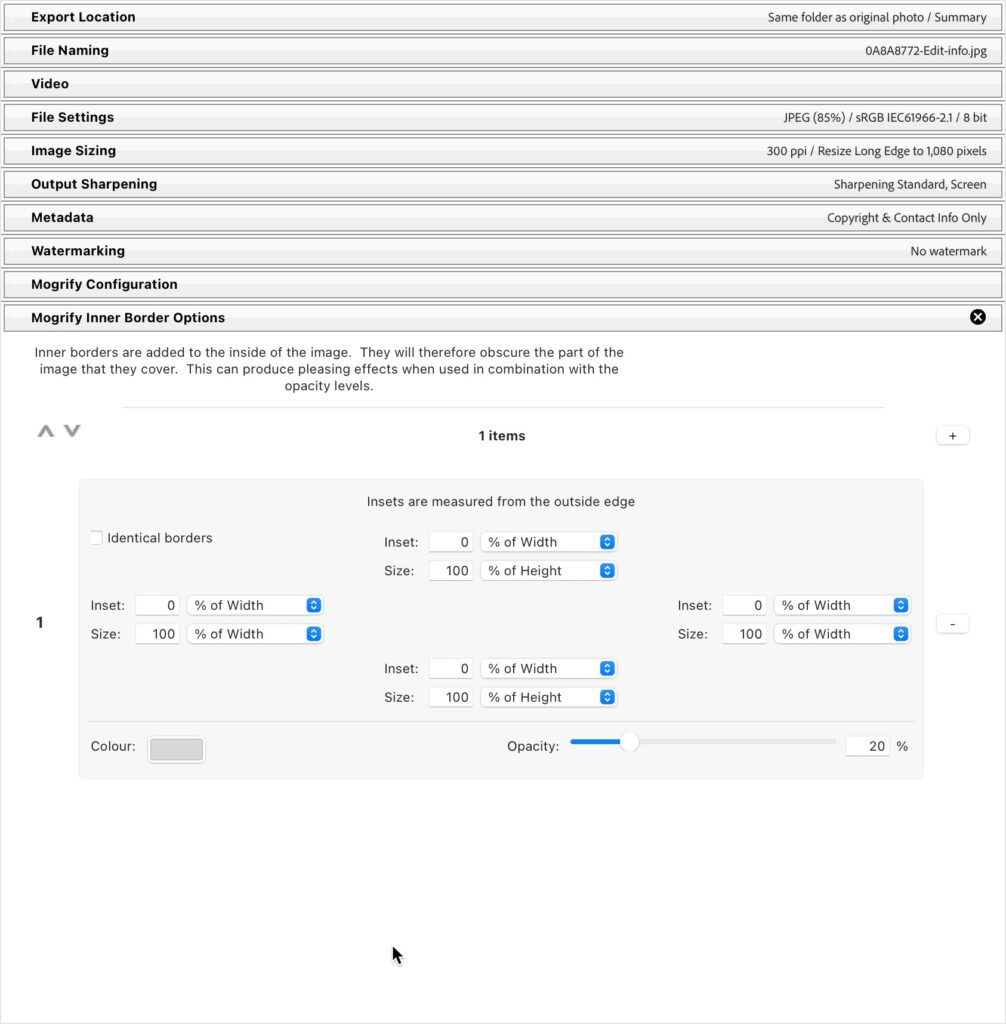
That’s the basics of displaying the same information as Photo Summary will display, but you can add more or even less based on your needs. Next, I double-clicked the Inner Border option to add that to the panel for the purpose of placing a partially opaque layer over the photo to make the text more readable. In Photo Summary you have an option for a blurred version of the photo with the text overlayed, but we can’t do that here, so this is my version of that. I set the Width to 100% on all 4 sides and set to 20% opacity.
Once configured, I suggest giving it a few test runs to dial in the settings for the text that works best for the size of your photo. Once you have the text looking the way you want, I decided to export these copies to a subfolder within the source folder and in the same move add them to the catalog. I also opted to rename the exported copies with the photo info by appending -info to the end of the file name.

I also have the Post-Processing step set to Show in Finder so a Finder window opens with the copies at the end of the export, which is totally optional. That’s really all there is to it. If you like this, then click the Add button and save that as an export preset.
To get a copy of just the photo to go with the photo summary I created a second preset with all the same settings with the following exceptions:
- I removed all of the LR/Mogrify options
- I changed the rename option to simply keep the original filename without -info on the end
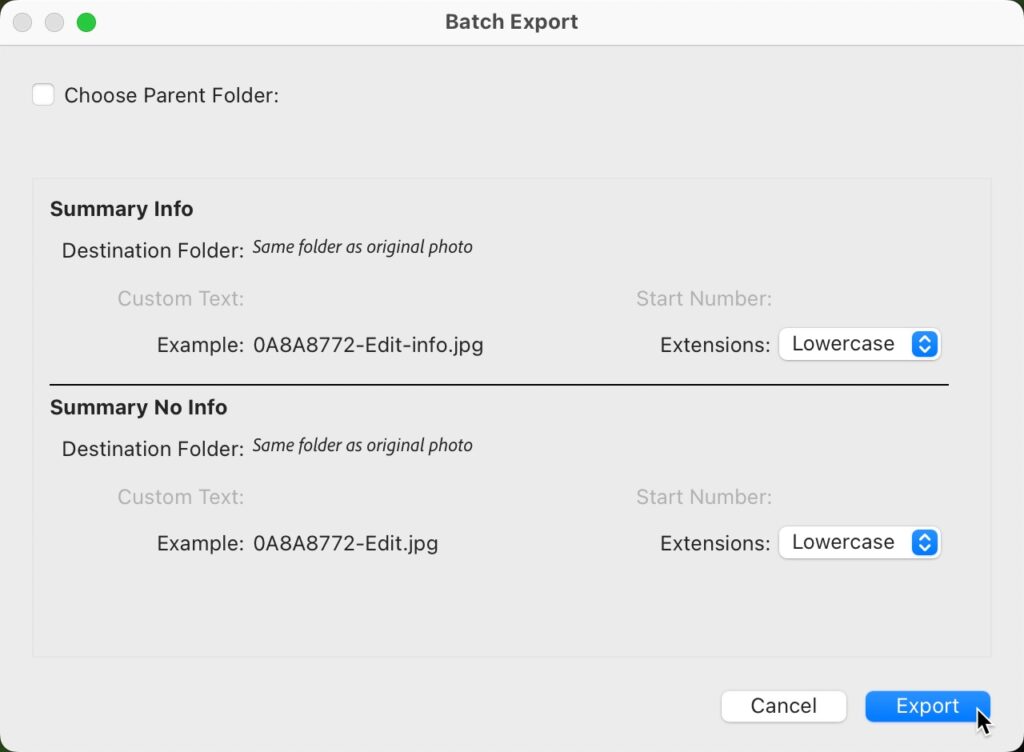
This way I can create a copy of the photo that is the same size and settings to the same location as the photo summary version. Then save that as an export preset too. Here’s the really cool part! Once you have those export presets created you can select a single photo and apply both export presets in the same export process. Check out my article on Batch Export to see how.


So clever, Rob. Thank you. I used LR/Mogrify in the distant past but didn’t keep it updated as I moved to newer versions of Lightroom. Time to resurrect it – I have a use case for this tip.