
Batch Export Copies in Lightroom Classic
For as long as I can remember people have been asking for the ability to create multiple versions of photos during export using different settings for each version. Prior to this latest update you would have to export the first round using one configuration of settings, then initiate a second export with different settings, and so on. Now, we can simply select multiple export presets to be used as part of a single export operation. The key is to first create the export presets exactly how you want them used. If you know how to do this, feel free to skip ahead, but for those of you who are new, read on.
Create Export Preset
Creating an export preset is as simple as configuring the Export window with all of the settings you want to use, then creating a preset based on those settings. Here’s a quick example for exporting sRGB JPGs resized to 1200 pixels on the long side.
Step One: Select any photo, then click the Export button in Library (or File > Export). You don’t have to actually export any copies, this is just to configure the Export dialog.
Step Two: Set the Export To drop-down menu in the Export Location panel to Choose folder later (useful for presets), because, well, it is useful for presets. You’ll see why in a bit.
Step Three: Configure the File Settings panel for JPG, Quality 85, and sRGB.
Step Four: In the Image Sizing panel, check Resize to Fit, then configure Long Edge 1,200 pixels, and set Resolution to 300 (or whatever your heart desires).
Step Five: Configure the remaining Export window’s panels to fit your needs, but the above are sufficient for this exercise.
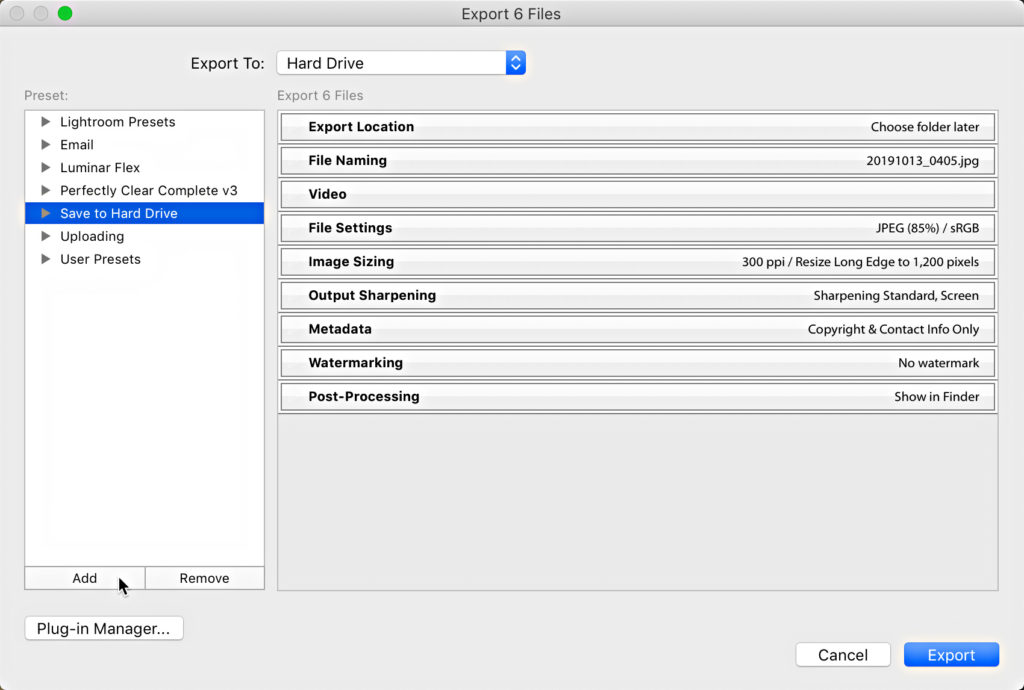
Step Six: Click the Add button (left side) to open the New Preset dialog box, and give the preset a meaningful name and choose (or create) a folder for it to be created in to keep them organized.
That’s it. You’ve created an export preset that can be employed all by itself any time you need to export a photo with those settings. In fact, you can even go to the File > Export With Preset, and select it from that menu to initiate the export process without even needing to see the Export window appear.
Note, with this latest update you will see a checkbox appear to the left of each export preset you’ve created. If you only want to use the settings in a single preset AND you want to tweak those settings as part of the process (sometimes I use export presets as convenient starting points that I then modify as needed for the job), just click on the name of the preset (not the checkbox) to load those settings AND keep them editable before exporting.
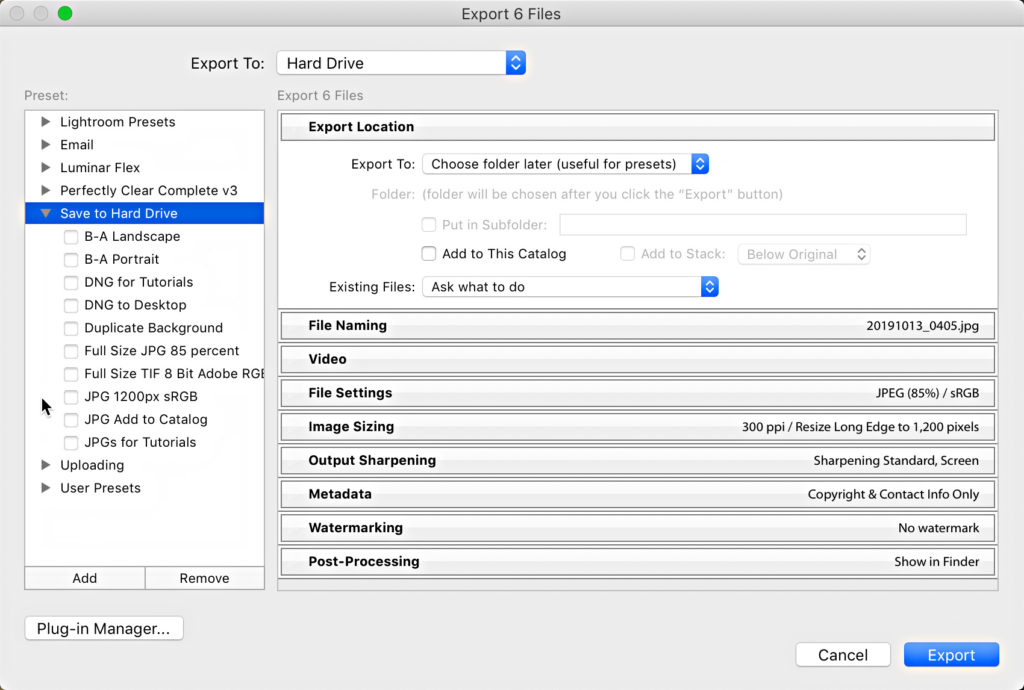
As soon as you check the box next to an export preset the panels of the Export window become read only. This is so that you can just check the boxes for any and all of the export presets you want to use, then click the Export button to complete the process. This is why you need to create the export presets first.
Batch Export
Ok, building on the example above I also created an export preset to save a full size 8 bit TIF in Adobe RGB, and now I want to select a batch of photos and use both of my export presets at once to create a JPG and TIF version of each photo in different folders. Here’s how it works:
Step One: Select all of the photos you want to include for export in Grid view of Library module, then click Export.
Step Two: In the preset section of the Export window, check the box next to each preset you want to use. I checked the box next to my JPG preset and the box next to my TIF preset. This sets the panels on the Export window to read only (and the settings shown in the panels may not reflect the settings contained in the checked presets).
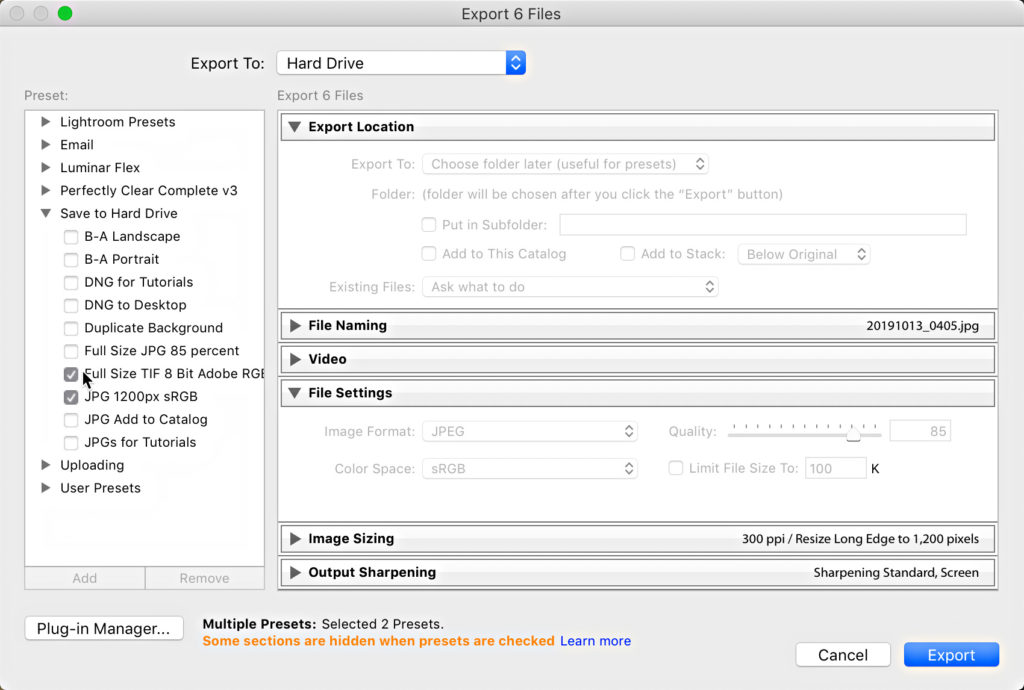
A couple of things worth noting here, first, you can’t include third-party export presets in your batch export. For example, I have export presets for Perfectly Clear (third-party software) and while there appear to be checkboxes next to those presets, they are unclickable. Second, you can’t check the boxes next to presets for emailing or burning optical media (does anyone still do that?).
Step Three: Click Export. If your preset(s) included “Choose folder later” for export location you will be presented with a dialog box for choosing (and even creating) the desired folder(s). Both of my presets used this setting, so I then needed to choose the folders I wanted for this batch. Otherwise, I would need to create a preset for each specific location I wanted copies to go. This provides flexibility.
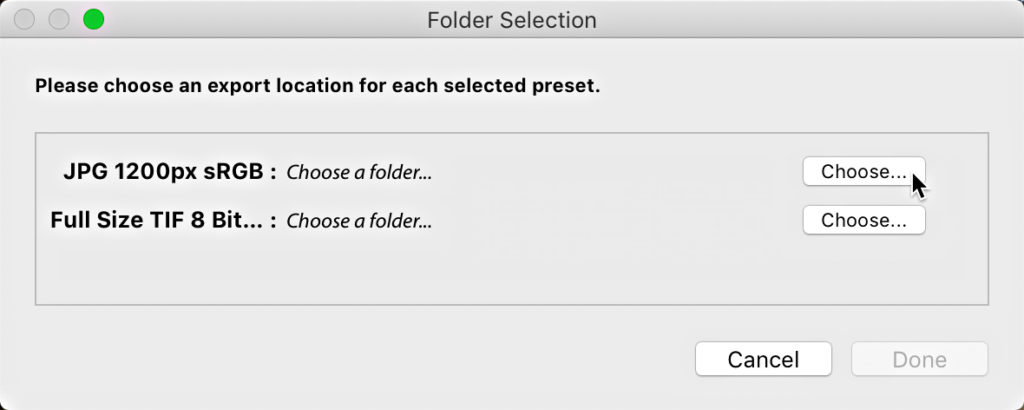
Once the export location is configured, and I clicked Done, the copies were created to my specifications and placed in the selected folders. Very cool. I encourage you to experiment with how to best utilize this added functionality in your workflow.

I can’t undo batch export. What is the process to undo that option?
Hi Nance, I don’t understand. It isn’t possible to undo the export process. What exactly do you want to do?
I found one problem with batch exporting which I would like to know if anyone else has encountered. If you have already exported some files to a folder, if you choose the same files again and export to the same location, Lightroom will not give you the option to skip pre existing files and will simply use a unique name.
The behavior is dictated by the setting you choose for Existing Files in the Export Location panel of the Export dialog. If you create a preset with the setting on “Skip” does that work?
I just noticed you can export to PSD from Classic – when did that come around and how did I miss it ????
🙂
Great information. I often export photos in different formats, particularly in different dpi configurations, and I’ve always done it is successive individual exports. Now I know better .. Thank you