Being In Control of Your Photos
Last week I shared an excerpt of an article I wrote for Photoshop User magazine that covered starting off on the right foot this year with your catalog. I wanted to follow that up with another excerpt from that article that discusses things you can do to be in control of the photos in your catalog.
Your Photos
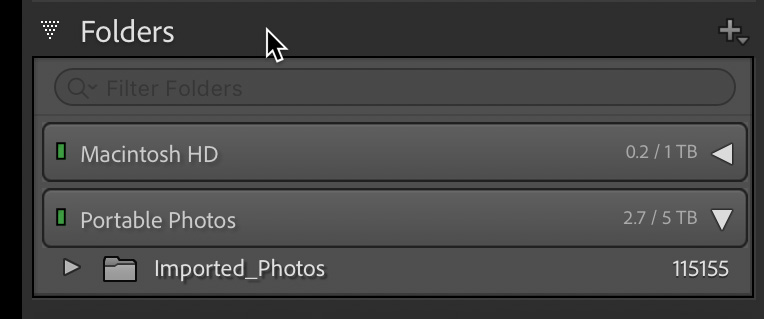
The most important component in the LrC system are your actual photos, so let’s take a few steps to ensure we are in control here too. First, you need to know where your photos are stored on your system. LrC gives a few ways to determine this, as it is not always obvious from looking at the Folders panel alone. Expanding the Folders panel you will see what are referred to as Volume Browsers, which represent the drive(s) where your photos are stored. If you have also synced your catalog to the Lightroom cloud, you may also see a Volume Browser representing your mobile device (but this is just a location on your start up drive where photos downloaded from the cloud get stored).
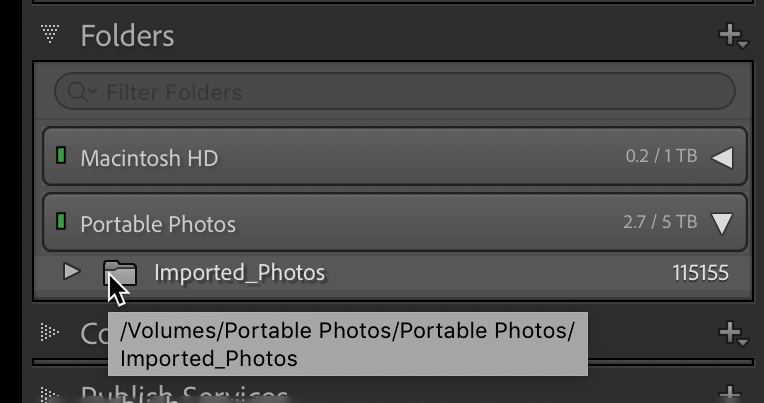
In my case, I have two Volume Browsers, one is my internal drive and the other is an external drive. Under my Portable Photos external drive is a folder named Imported Photos (on Windows you’d see drive letters). To find out exactly where that folder is on that drive I can simply hover my cursor over that folder until a tool tip appears with the complete path to that folder.
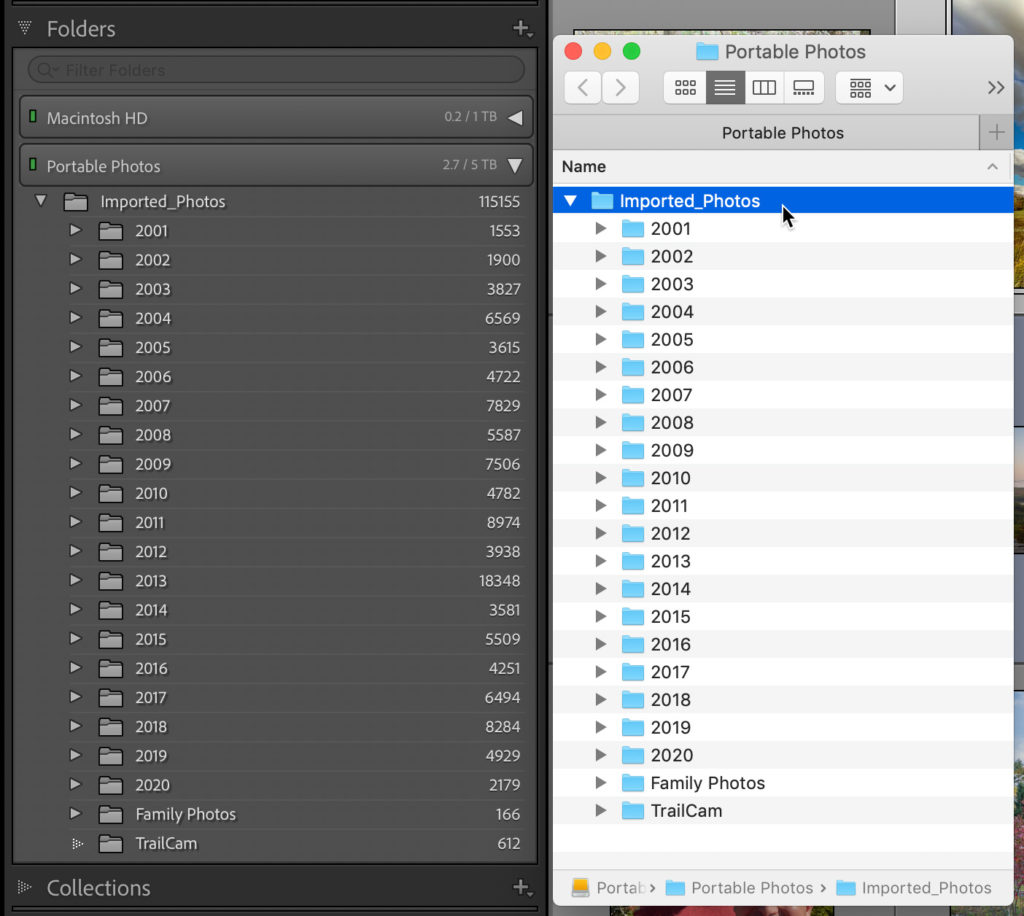
Alternatively, I can right-click any folder and choose Show in Finder (PC: Show in Explorer) to open my file browser to that exact folder. I can then compare the contents of my file browser to the Folders panel, and it should match (assuming you’ve imported all of those folders into LrC).
You can also right-click any photo’s thumbnail in the Library module and choose Show in Finder (PC: Show in Explorer) to see where that specific photo is stored. It is critical that you understand this relationship between the catalog and your photos. LrC simply refers to where photos are stored on your system by storing the exact path, from the volume name (PC: drive letter) to the individual file name (and every folder in between). If you move, rename, or delete files outside of LrC you render the path stored in the catalog invalid, and LrC responds by telling you that folders and photos are offline or missing.
Any Missing Photos?
Here’s a simple way to check your entire catalog to see if it considers any photos to be offline or missing. First, connect all external drives where your photos are stored, and if you use network storage, ensure you are on your network. Then, from the Library module, go to Library > Find All Missing Photos. That will start a process to check the entire catalog for any broken links to photos. When the process is done, you want to see this little prompt appear saying No missing photos.
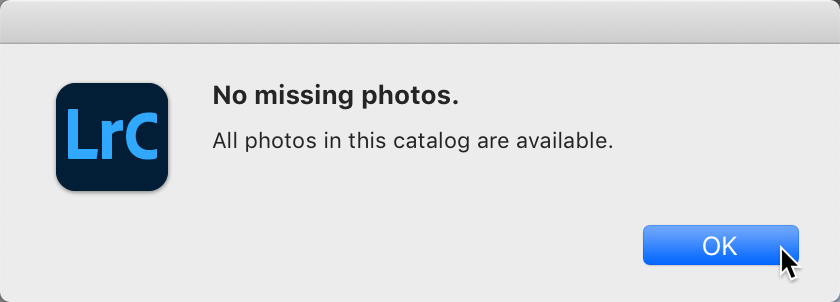
If instead, you get a temporary collection appearing full of photos it considers offline or missing, you’ll want to check out my article on what to do when photos go missing.
You can avoid this situation by ensuring that you do all of your renaming, moving, and deleting of photos and folders from within LrC. This gets the job done as well as keeps the catalog up to date on the changes you are making. One area where I see the most self-inflicted injuries happen is when people look at a long list of date-based folders created by the LrC import process, and decide to reorganize the contents of those folders (especially around the start of the new year). Here’s a simpler idea, just rename the folders to something more meaningful from within LrC. For example, I recently came across a trove of old vacation photos I hadn’t imported into LrC, so after import (using the default date-based naming system), I simply reviewed the contents of each folder then renamed the folder to add identifying information to go along with the date.
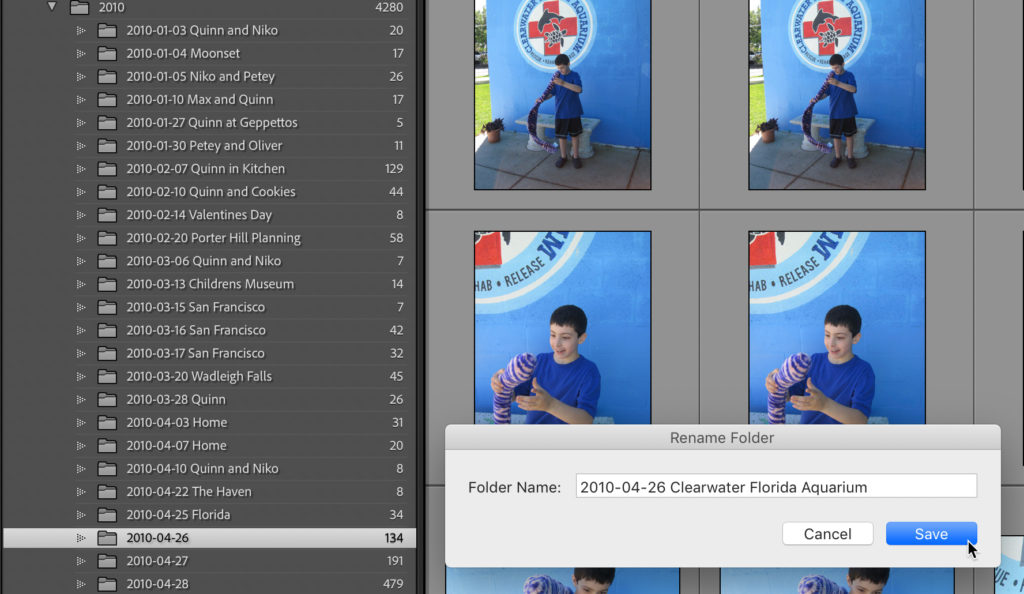
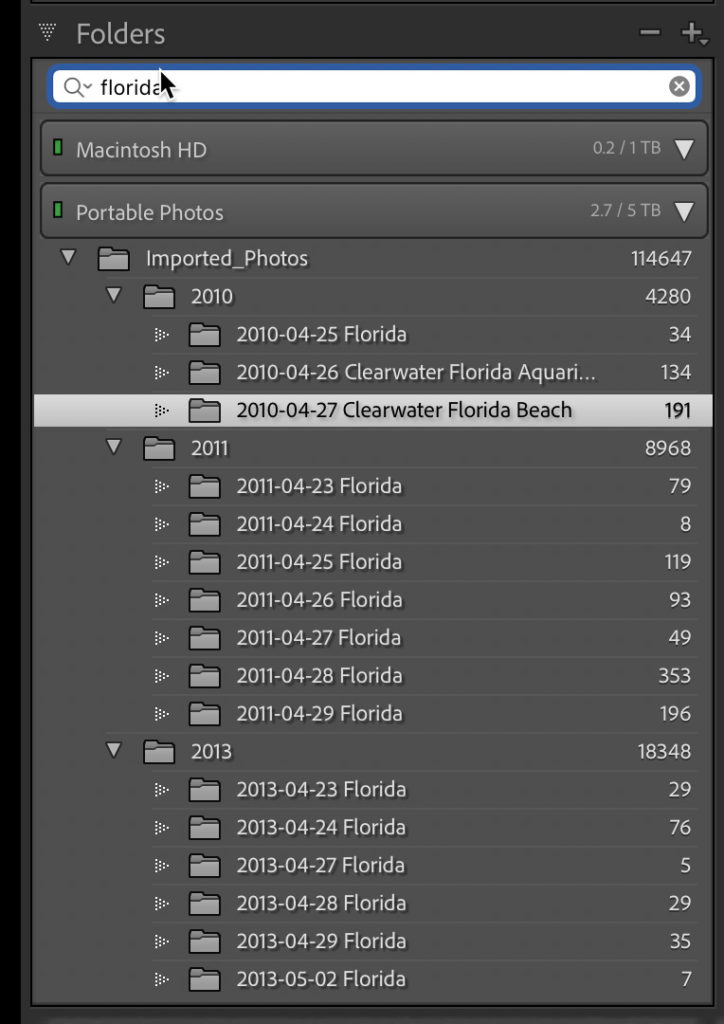
This took me several minutes, and was so much easier than re-organizing the photos into new folders. Just right-click any folder and choose Rename from the contextual menu that appears, then enter the new name in the Rename Folder dialog box, and click Save to rename the folder on disk and update the catalog. The other benefit of renaming folders is that you can then use the filter at the top of the Folders panel to quickly find folders that match what you type into that field. So, if I want to find all folders with the word “Florida” I just enter that in the field, and they all show up. Pretty handy! To learn more about the power of the Folders panel, check out my article on understanding its role.