
When Photos Go Missing
An often overlooked aspect of the import process into Lightroom Classic is that the exact location of where to find those photos on your system is written into the catalog file at that time. The path to that location is stored inside the catalog along with all the metadata embedded in each imported photo, and that is what Lightroom uses to find the source photos as you do your work. As long as you use Lightroom to do all file maintenance tasks (such as move, rename, or delete imported photos and folders) then that information is updated inside the catalog as part of the maintenance process.
The place where people run into trouble is when they move, rename, or delete photos (or containing folders) outside of Lightroom Classic, which results in the location stored in the catalog no longer being valid. What happens outside of the catalog stays outside of the catalog.
Lightroom Classic lets you know when it can no longer connect/refer to the source photos by displaying a question mark icon on the affected folders and an exclamation point icon on all affected photos (you may also notice a “Photo is missing” message displayed under the Histogram). In some cases an entire drive can be offline, in which case the volume browser for that drive will appear dimmed.
When Drive is Offline
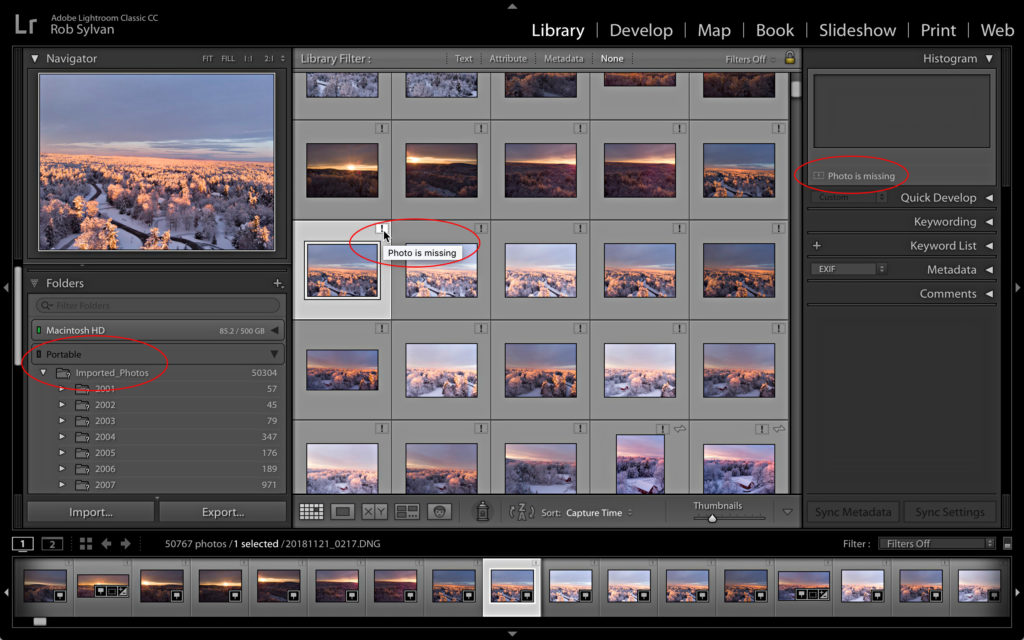
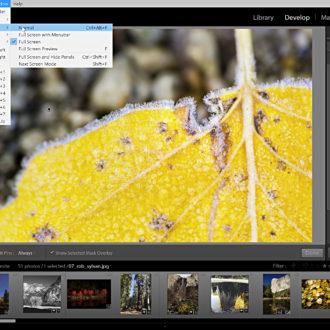
If you use one or more external drives, then you may see this quite often if/when you operate Lightroom Classic without those drives being connected (as in the capture above). As soon as you reconnect that drive to your computer, you will see the volume browser come to life and the indicator change color to reflect the amount of free space on that drive. The question marks on all the folders and exclamation points on thumbnails on that drive will go away.

Lightroom Classic was designed to operate with disconnected drives, so this isn’t a problem at all. In fact if standard-sized previews have already been rendered for all the photos on that offline drive, you can still work with the offline photos in all modules except Develop (unless you made smart previews). You can add metadata, create slideshows and even web galleries from those previews. However, you can’t export or send photos to an external editor since Lightroom Classic needs to access the actual source photo for those operations.
Unfortunately, I commonly see people facing the problem of dealing with missing or offline photos because they made a change to the path to those photos by moving, renaming, or deleting files with their favorite file browser instead of doing it in Lightroom Classic. This is where Lightroom’s reconnection function comes into play.
Removing Deleted Photos
If you deleted photos outside of Lightroom Classic, but still see the thumbnails inside of Lightroom, then this is the easiest problem to fix. Just select the thumbnails in Grid view and press Delete. Choose Remove when prompted and they will be removed from the catalog. They were already deleted from the drive, so you are just cleaning out the catalog of old references.
Fixing Missing Folders and Photos
If you use Finder or Windows Explorer or some other file browser to move a folder from one place to another, then the path stored in Lightroom Classic’s catalog is no longer valid and you will have to update the catalog with this new information. Here’s how to reconnect a moved folder:
Step 1: Right-click (or however you invoke the contextual menu) the folder displaying the question mark and choose Find Missing Folder from the contextual menu.
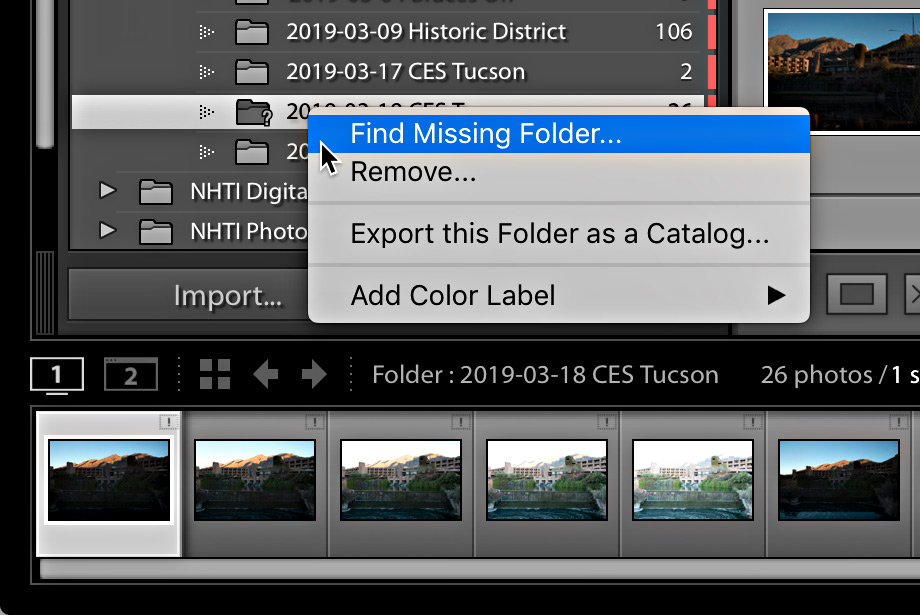
Step 2: Manually navigate to the new location of that folder (you need to know where it is) and select it. Then click the Choose button.
Lightroom Classic will update the catalog with this new location and reconnect to that folder and all the subfolders and photos contained within it.
The process is essentially the same with reconnecting moved photos. Here’s how to reconnect a moved photo:
Step 1: Click the exclamation point icon on a thumbnail.
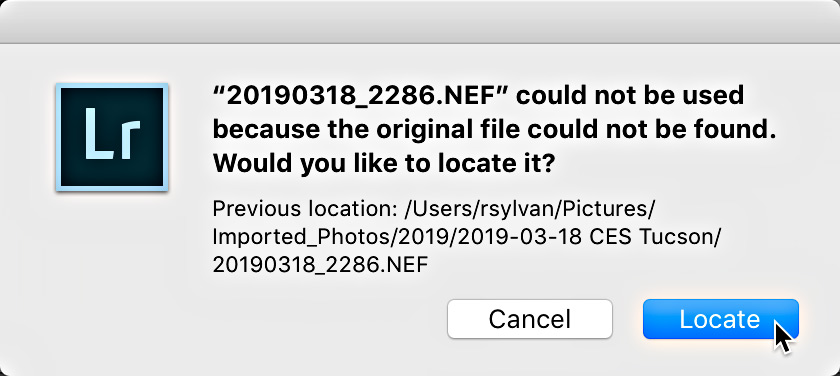
Step 2: Note the “Previous location” in the dialog that appears. This is the path to where the photo was previously stored, and it may help you figure out what changed on your system. Click the Locate button.
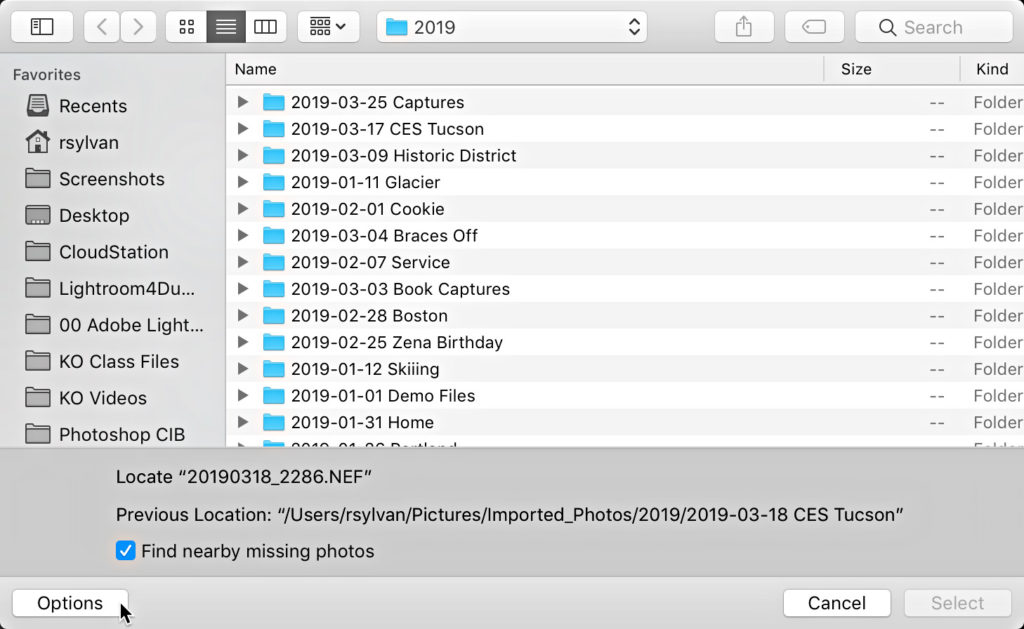
Step 3: Manually navigate to the new location of that photo (you need to figure this out yourself), select the photo, and click Select.
If you’ve moved other “missing” photos to that new location, you can reconnect them as well simply by checking the “Find nearby missing photos” box before clicking Select (click the Options button at the bottom of the window to see this option). As long as the file names of the other missing photos haven’t changed, then it will update them as well. That said, it is much easier to reconnect at the folder level, so start there if possible.

Thank you soooo much!
Thanks for this tutorial!
One question: I’ve used the “Find Missing” command but it only seems to work for the one folder I’m working in at a time. The surrounding folders don’t seem to get updated.
Is there anyway to “expand” that locate nearby photos command to the entire library?
Hi Jake, Depending on your situation and what is considered missing/offline, it is best to start at the folder level (if entire folders show as missing) and at the highest parent folder, so that by simply reconnecting that folder you reconnect all photos and folders within that parent folder. If the folders show as online/available in the Folders panel and you just have individual photos missing within a given folder, then reconnecting at the individual photo level can only “look” for nearby photos within the folder where the selected photo resides.
How do you reconnect missing photos that were renamed in the finder after post import? I was in a hurry at the time and just needed to get them in, so I renamed the files after the fact, and now I have close to 50 photos that I’ve made LR alterations to that I’d prefer to not have to redo. The thought of having to reconnect one at a time is cause for tears. Is there some way to remedy this that doesn’t feel like having to reknit the sweater? Fingers crossed!
You can either rename them back using Finder to what they were originally (essentially undo-ing what you did), or you can reconnect the catalog to each photo one at a time. As a last resort, you can remove them from the catalog (losing any work you may have done inside of Lightroom) and then import them as new photos. If you have not done any work inside of Lightroom then the last resort is the easiest and fastest option. If you have done a lot of work inside of Lightroom, then you need to pick the least worst option of renaming or reconnecting.
It is one of the most common issues that a handful number of users are facing such kind of missing photos t their gallery. They can take suggestions from iTunes error 3194 that will guide them for resolving these issues.
Thank you sooo much 🙂