Awesome Lightroom Landscape Technique We Tweak To Use On Portraits
Happy Friday everybody! Here’s what up:
When you’re lighting portraits, you want to draw the viewer’s eye using the light, and our eyes are draw to the brightest part of the image. In a portrait, that’s usually your subject’s face, and then the intensity of the light should gradually fall away (if you look at Joe McNally’s work, you’ll see many great examples of this technique — he lights like a boss!).
In our tutorial today, I’m going to take a technique that’s normally used in editing landscape images (applying Lightroom’s Graduated filter to emulate a traditional neutral density gradient filter used to darken the sky, and then trail off to transparent), on a portrait, by using it in reverse. Take a look:
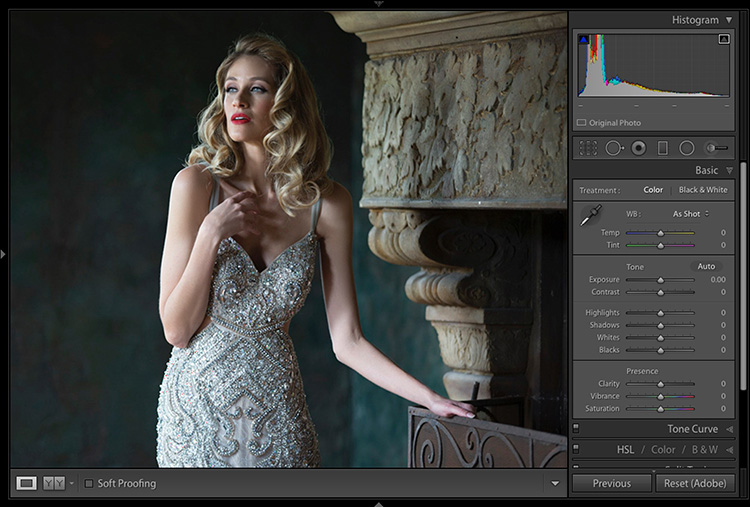
Above: Take a look at our image here. Her face is supposed to be brightest part of the image, but her arms, and her dress are so bright they’re drawing the eye. So, we’re going to darken the bottom of the image and have it slowly lighten as it goes upward until it reaches her face, where it will have no effect. It’s the opposite of what we do with a landscape photo — darkening the sky — instead we’re darkening the bottom half of the photo and having it gently return to normal once it reaches her face.
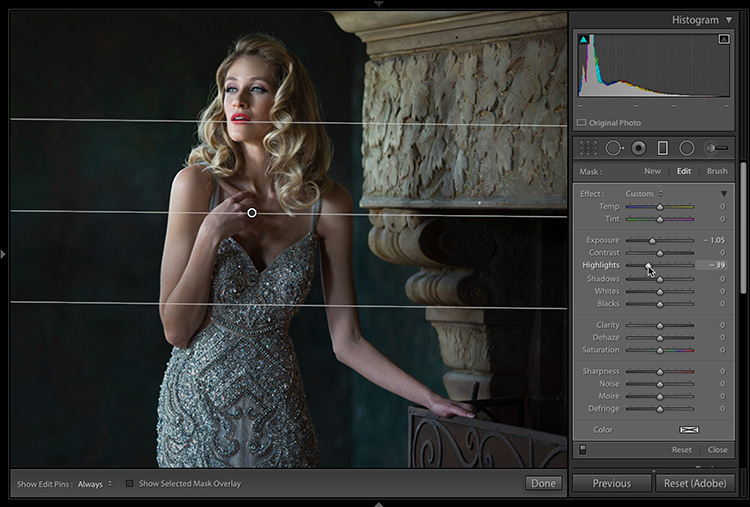
Above: In the Develop Module, get the Graduated Filter tool from the toolbar on the top of the right side panels (just under the Histogram). Double-click on the word “Effect” to reset all the sliders to zero, then drag the Exposure slider to the left a bit to make the exposure darker. Now, take the tool and drag from around the middle of the image up to her face (as shown here) to darken the bottom part of the image, and then have it graduate to transparent at her face. By the way — ignore the “Undo Add Graduated Filter” text on screen. Just my mess-up while making the screen capture.
Above: Once I did that, the dress still seems a bit bright, so I dragged the Highlights slider to the left to lower the brightest parts of that gradient, and it worked pretty well, but then the whole bottom area actually looked too dark, so I dragged the Exposure amount a little bit back to the right (as seen here).
NOTE: I exaggerated the darkening effect here so it’s easier to see in the tutorial – however, in retouching the actual image for a client, I wouldn’t make it quite so dark on the bottom half, but of course, it’s all “season to taste” with stuff like this.
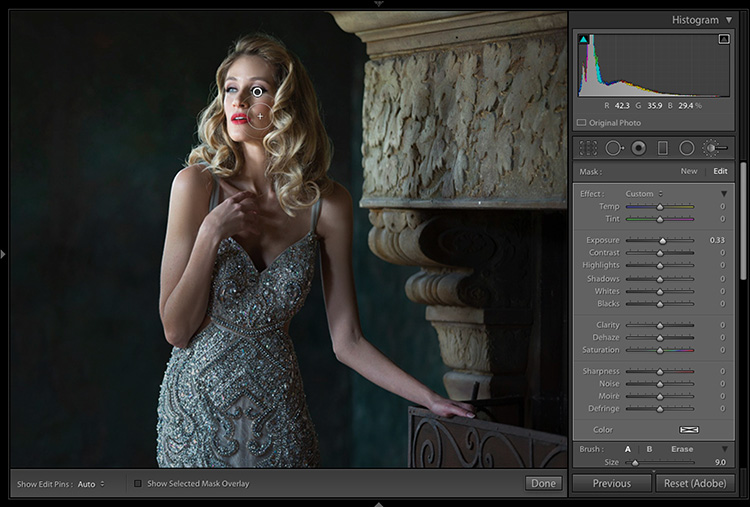
Above: When I’m done, even in situations where we don’t have this lack of fall off problem, I generally lighten the subject’s face just a little bit using the Adjustment Brush. I reset all the sliders to zero, and then raise the Exposure just a little bit and paint over my subject’s face (as shown here).
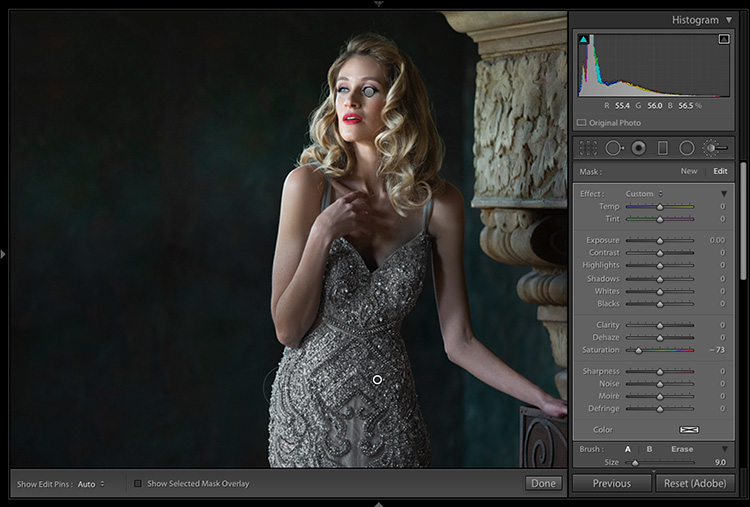
Above: I noticed one thing, and you can see it pretty clearly in the previous step — the darkening we did earlier to her dress gave her dress a bit of a greenish/bluish tint (it’s should be a silver dress). So, I took the Adjustment Brush; clicked the “New” button (since I’m going to paint someplace new, and leave the brightening of her face as is); then I reset all the sliders; lowered the Saturation amount, and painted over the dress to remove the color cast (as seen here).
Above: Here’s a final bef0re/after once I darkened the dress and arms; slightly brightened her face, and removed the greenish/bluish color cast from her dress.
Hope you find this helpful. 🙂
Have a great weekend, everybody! Stay warm. Save the whales. Eat your veggies. Etc.
Best,
-Scott

