Cool Little Lightroom Radial Tool Tip
Check this out:
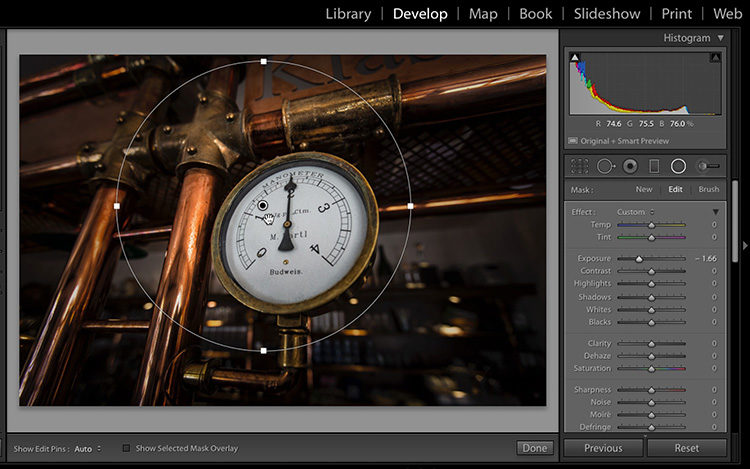
Above: Get the radial cool; lower the exposure a bit (here I took it down to -1.66), then drag it out over your image like you see here. It makes a circle (or an oval depending on how you drag). So far, so good.
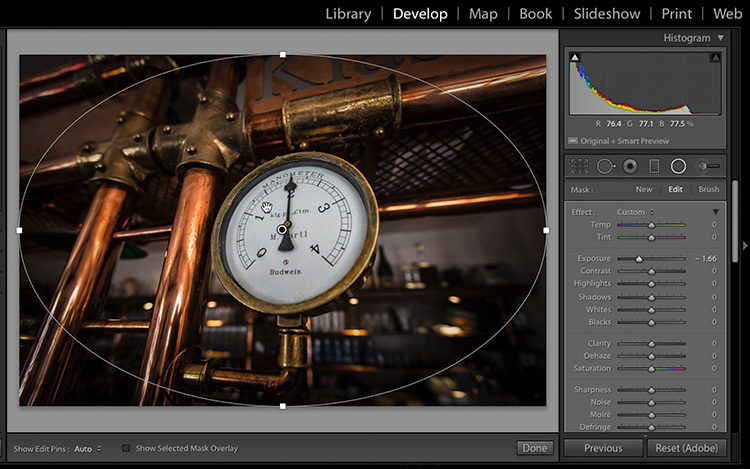
Above: Here’s the tip: If you want your oval to fill the entire image as large as possible, just hold the Command-key (PC: Ctrl-key) and double-click anywhere inside the oval.
That’s it. Short. Sweet. Awesomeness.
Do you live in Denver? Close to Denver? Have a friend in Denver?
I’ll be there with my full-day Lightroom seminar on Friday, September 22, 2017. Come on out and spend the day with me.
Hope you have a great weekend (we’re closed on Monday for the US holiday ‘Labor Day’ so come on back on Tuesday).
Best,
-Scott
Very useful info, thanks
Fantastic work Thanks for the best was very useful for me.
Zoner Photo Studio Review
This is such a nice great website with lots of good information.
This is also a very good post which I really enjoy reading.
bullion embroidery
Aussi, afficher l’image au rapport 1:2 et étirer l’ellipse hors de l’image pour la recouvrir complétement, on peut ainsi modifier toute l’image…. Pas mal pour faire un dégradé sur les bords de l’image…. On peut aussi déplacer l’ellipse pour qu’elle s’ajuste à une zone sur un bord par exemple.
Cool tips!
Very Handy! Thank you!!
I did not know…. amazing. thx.
Ok, I’m happy now – it’s hard to come up with one you don’t already know. 5-points for me!
🙂 Just saw this today 9/26. thanks that’s a big compliment coming from you !
Also: resize the oval by dragging any handler while holding the Shift key: it will be resized in both dimensions!
Trudat! Same shortcut as Photoshop.