Before we get into this, just a heads up: this isn’t a hidden feature — it’s a workaround for people who have Lightroom and Photoshop, but at least it works.
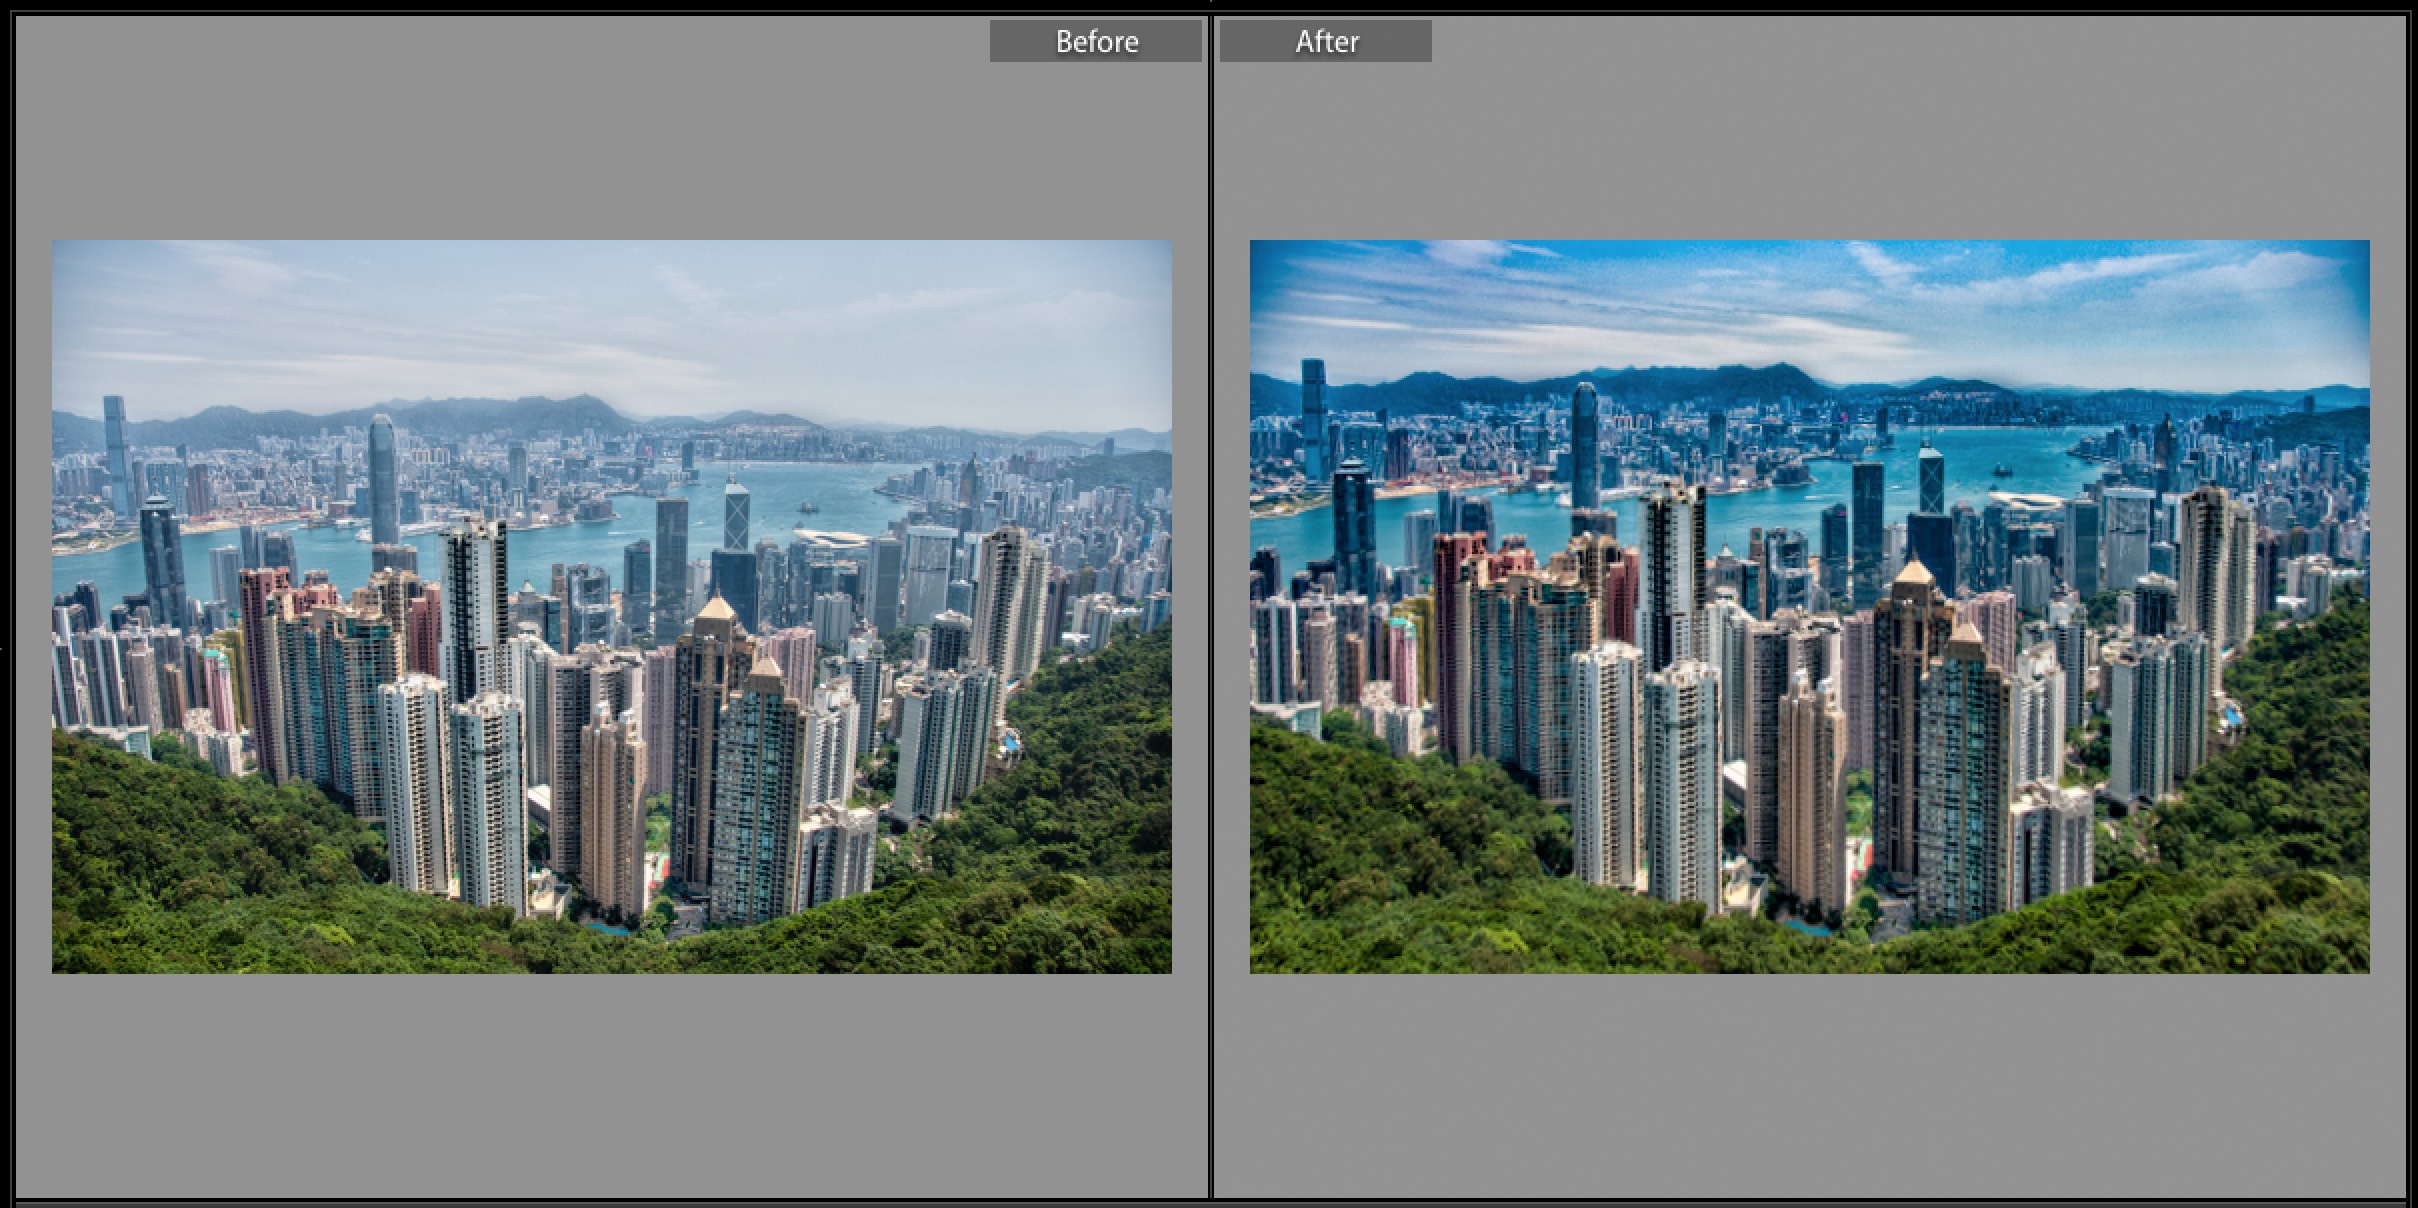
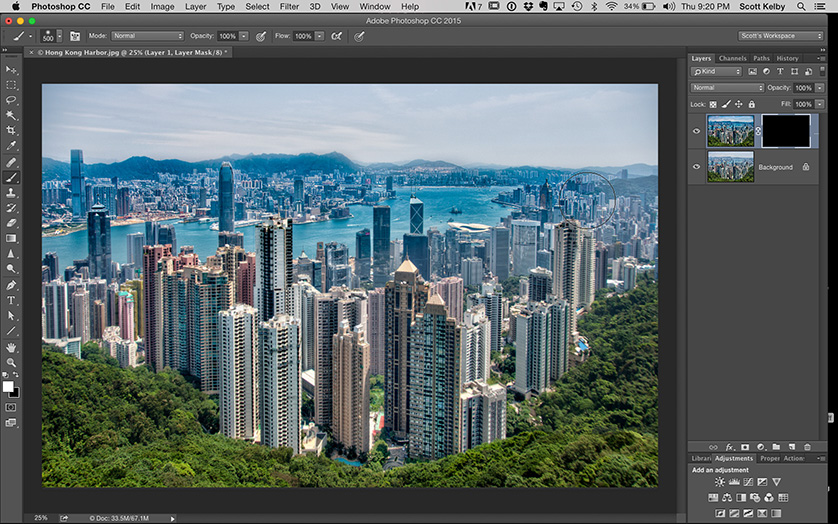
First, the problem — as awesome as the new Dehaze slider is (it’s found in Lightroom CC’s “fx” menu), the problem with it is that it applies the effect to the entire image. For example, in the shot of Hong Kong above left, the background buildings (in Kowloon) are really hazy, but as you can see from the image on the right, while the Dehaze slider pretty much cuts the haze, it also makes the sky look kinda HDR’d (in a bad way), and exaggerated the edge vignetting, and make all the building in the foreground (that were not hazy) too contrasty. That’s why it would be great to have the Dehaze slider added to the Adjustment Brush, but so far, that hasn’t happened (hopefully, it’ll be there one day), but in the meantime, here’s what you can do:
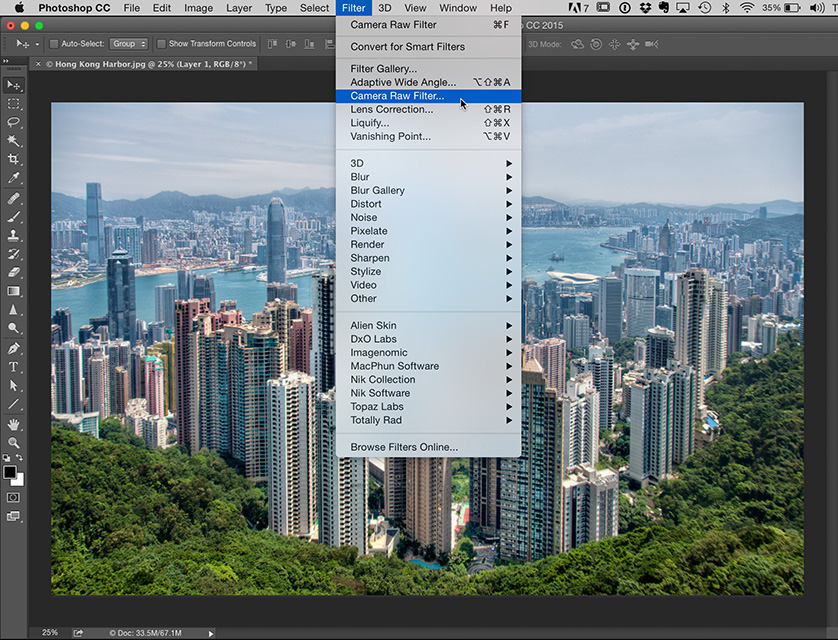
STEP ONE: Don’t apply the Dehaze slider in Lightroom. Instead, press Command-E (PC: Ctrl-E) to open the image in Photoshop CC. Now, in Photoshop, duplicate the background layer then go under the Filter menu and choose Camera Raw Filter (as shown here).
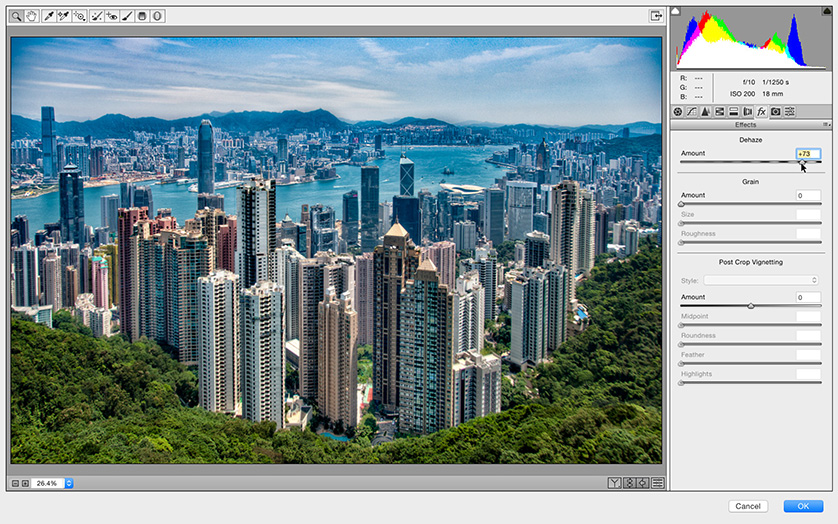
STEP TWO: When the Camera Raw window appears (seen here. By the way, this is just another version of the Develop Module, just in a slightly different layout), click on the “fx” tab right under the Histogram (seen here), and then drag the Dehaze slider to the right as shown here to apply the Dehaze effect. Now click OK to apply your Camera Raw edits.
 STEP THREE: Now we’re going to add an inverted layer mask to our duplicate layer (this is going to enable use to paint with Dehaze). Hold the Option key on Mac (the Alt key on Windows), and click on the Layer Mask icon at the bottom of the Layers panel (it’s the third icon from the left). This adds a black mask to our layer (you can see the black mask appear to the right of the layer’s thumbnail. The Dehazed layer is still there — it’s just hidden behind this black mask). Now get the Brush tool; choose a large soft-edged brush from the Brush Picker up in the Options Bar at the top of the screen. Make sure you Foreground color is white and simply paint over the parts of the image where you want the Dehaze effect to appear. In my example, I painted over the building in the background and the harbor, but not the sky or the buildings or three in front.
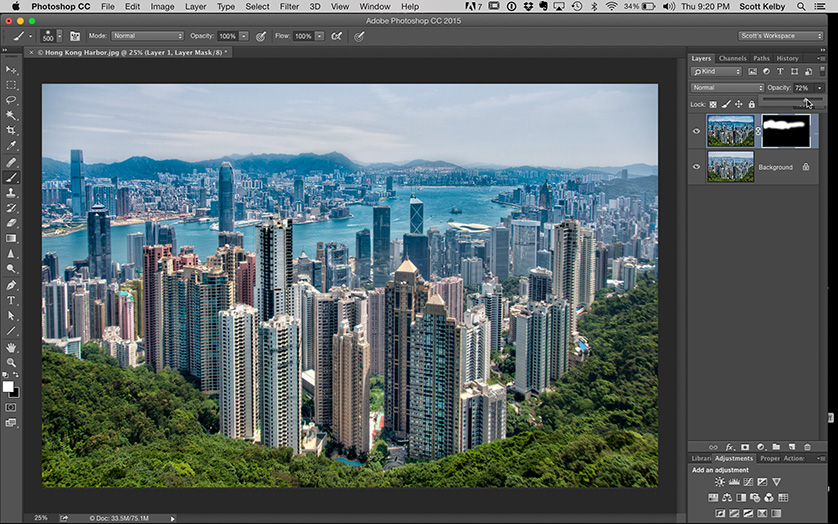
STEP FOUR: Since we applied the Dehaze filter to a layer, we can how control the amount of Dehaze after the fact, by lowering the Opacity slider (top right of the Layers panel) until it looks right. In this case, I lowered the Opacity of this top layer to 72% (as seen here). Now just flatten the image (in this case, you can just press Command-E on Mac or Ctrl-E on Windows to merge the top layer down with the Background layer). Now just hit Save; close the document, and your image returns back to Lightroom with your “Dehaze on a brush” changes all in place.
So, it definitely is a workaround, but it works.
Hope you find that helpful, and here’s wishing you a most-awesome weekend (which is better than a mostly awesome weekend). 😉
Best,
-Scott
P.S. If you live anywhere near Charlotte, don’t forget to catch RC’s Lightroom Power Tour next week. Here’s the details.