

PROGRAMMING NOTE: Today is Pre-Conference day at the Flash Photography Conference, and I’m kicking it off this morning with a “Flash For Absolute Beginners” Class at 11:15 am ET (even if you miss it, you can watch the archive of the live class for six months after the conference). It’s not too late to join us today, or for the official start tomorrow — Tickets here.
This one’s for all the folks out there who are new to Lightroom, but it’s one I still get a lot of questions on (even from long time users), which is:
“How do I save an image as a JPEG?”
If this one got past you, don’t feel bad, because if you went under the File Menu and looked for “Save As” (like you would in most any other program), you won’t find it there. Instead, it’s called “Export” and you’ll find it there in the File menu and in Lightroom Classic it’s also a large button at the bottom of the Library panel’s left side panels.
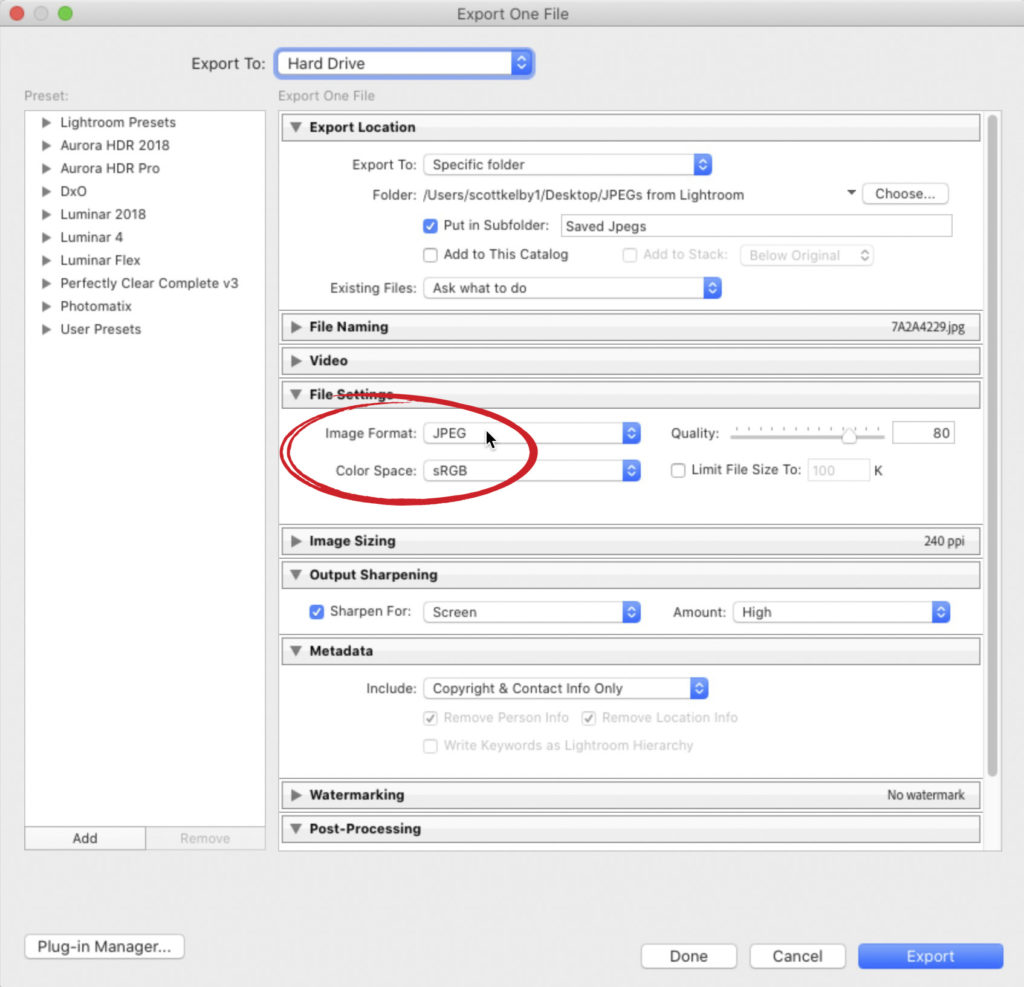
When you choose Export, it brings up the Export window (shown above). Scroll down to the File Settings sections and from the Image Format pop-up menu (shown circled above in red), choose JPEG (or whichever format you want to save your image in, you can choose TIFF, PSD, and PNG among others).
Now just click the Export button and you’re done — the file will be saved to whichever location you choose (up at the top of the window under Export Location).
Hope you found that helpful. Looking forward to seeing a whole bunch of you today at the Flash Conference this week. 🙂
-Scott


Thank you for this wonderful blog! I really appriate it!