Getting More Precise Control Over Quick Develop Settings

Hi Gang: Sorry for the late post (I had a late game to shoot last night. Didn’t get home until 1:30 am and I was too lame beat to get a post in).
This tip is how to get more precise control when editing in the Library Module’s Quick Develop panel, which instead of sliders (where you have very precise control), you have buttons (which move in pre-determined amounts when you click on them, and that’s the problem — sometimes those jumps are too big).
OK, here’s the tip:
Hold the SHIFT key before clicking the single-adjust buttons (the smaller increment) of the two. This will all make sense when you see it.
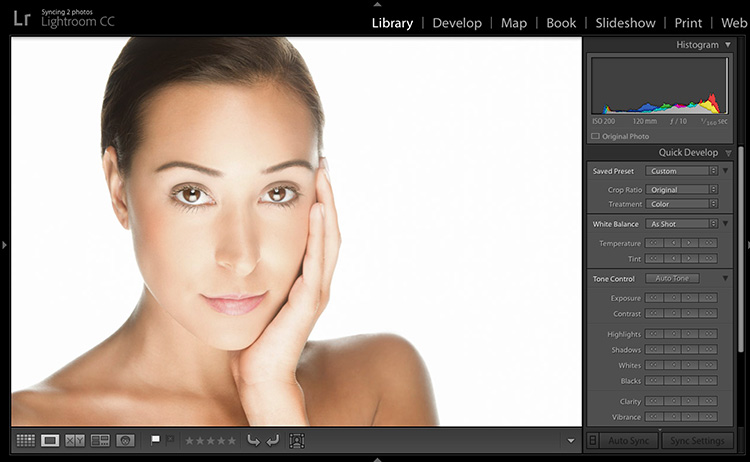
First, our original image is at the top of this post and we want to brighten it 1/2 stop in Quick Develop, which if you’ve used Quick Develop, you already know there’s no real way to do that because the the single-arrow button increases/decreases your exposure by 1/3 of a stop, and the double-arrow button increase/decrease by a full-stop each time you click it.

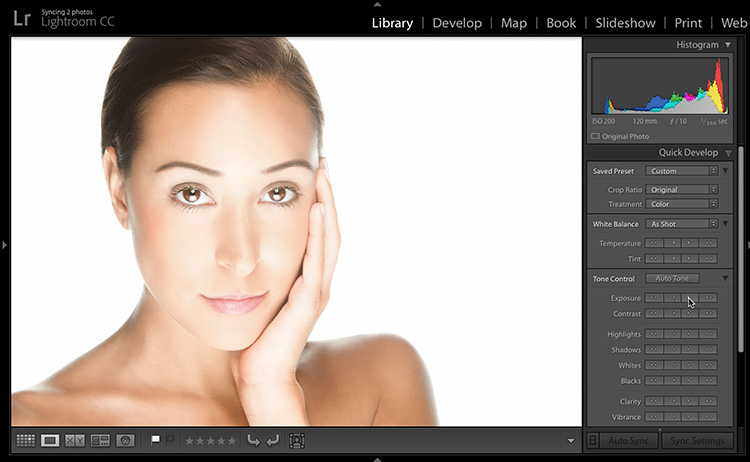
Above: Here’s I clicked the single button for Exposure, and sure enough, it increased the Exposure +1/3 of a stop (+.33 if you checked it in the full Develop Module). If I click it again, it would go to +.66, right? You would have increased the exposure 2/3 of a stop. But if you want half a stop instead (a more precise change), that’s when this tip comes in.

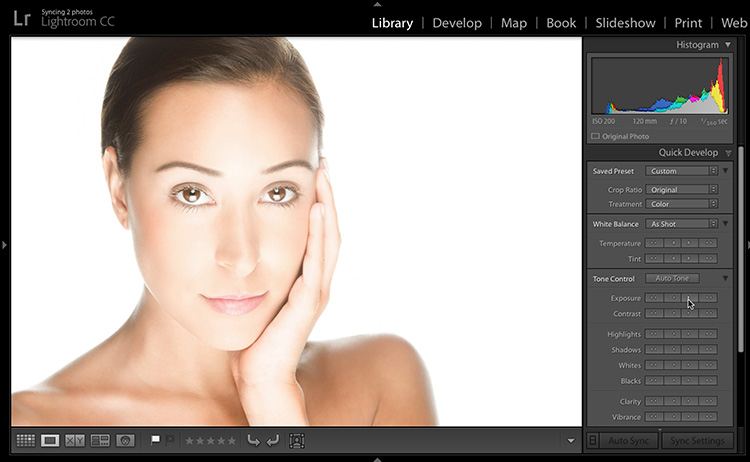
Above: Now, before you click that single-arrow a second-time, hold the SHIFT key, and it increases the Exposure half the amount — only 1/6 of a stop. So, the first click gives you +1/3. If you hold the SHIFT key and give it a 2nd click, it only increases by 1/6 of a stop, so you now have a 1/2 stop increase (1/3 + 1/6 = 1/2 or in Lightroom terms: +0.33 plus +0.17 = +0.50). By the way, I have just about exhausted the amount of math I do in an entire year, just in that one sentence. 😉

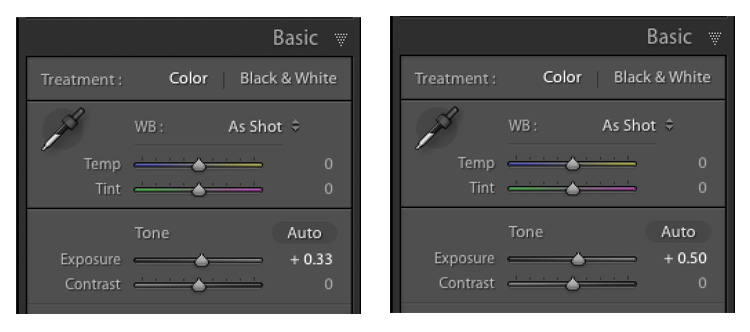
Above: If you were in Quick Develop and clicked the Exposure single-arrow once and then went to the Develop Module, you’d see the Exposure slider for that image had been increased to +0.33, as seen above left. If you held SHIFT and clicked it again (in Quick Develop) and then looked back in the Develop Module, you’d see that it added +0.17 to give you +0.50, as seen above right).
OK, so that’s the tip — finer adjustments in the Quick Develop module are just a SHIFT away. 🙂
I’m off to shoot the Dolphins game this weekend down in Miami (that’s three NFL games for me in one week. I’m going to need a day off. Or two). 😉
Have a good one!
-Scott
P.S. Photographers in Las Vegas — I’m there with my Shoot Like a Pro: Reloaded seminar in just a couple of weeks. Come on out and spend the day with me. 🙂
