
February 2020 Lightroom Classic, Adobe Camera Raw, and Lightroom Cloud Updates
I hope your 2020 is off to a great start. Adobe has just released a range of new features, new camera support, lens profiles, and bug fixes. Let’s dive in!
Heads Up!
I want to start off with a warning that one new feature replaces the old functionality for having a custom default setting for your raw photos, and as such your old defaults won’t work in this new version, so read on before updating.
New Custom Default Settings in Lightroom Classic and ACR
Forget everything you knew about how to create a custom default setting for your raw photos, and let’s get up to speed on the new system. If you depend on a custom default setting in your workflow you’re going to want to address this before you update to Lightroom Classic 9.2 (ACR 12.2). Once you install the update your old custom default settings will not work on newly imported photos (or when you click the Reset button). This will not affect previously imported photos (unless you click the Reset button).
The new system is found in the Preferences, on the Preset tab (the old menu option under the Develop menu has been removed). There you will find an entirely new panel called Raw Defaults.
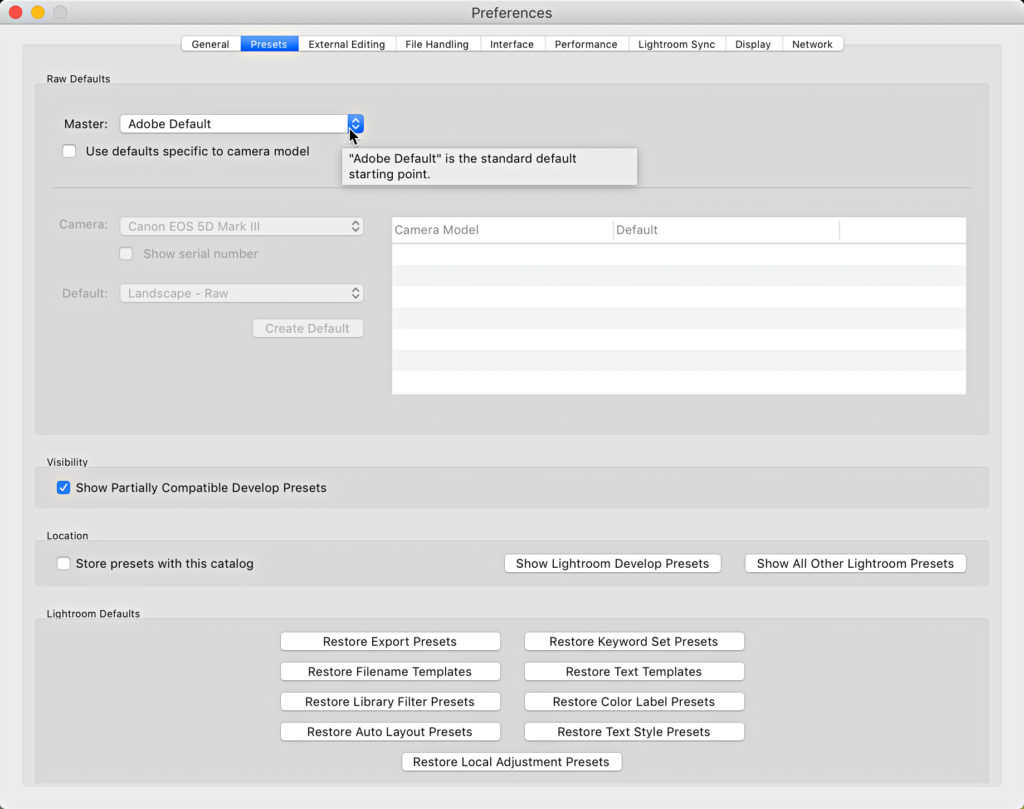
Within the Raw Defaults panel you have three basic options for the Master control:
- Adobe Default: The same Adobe defaults as we’ve had in the past. Adobe Color is the default profile, and most settings are zeroed out (with the exception of the sliders in the Detail panel).
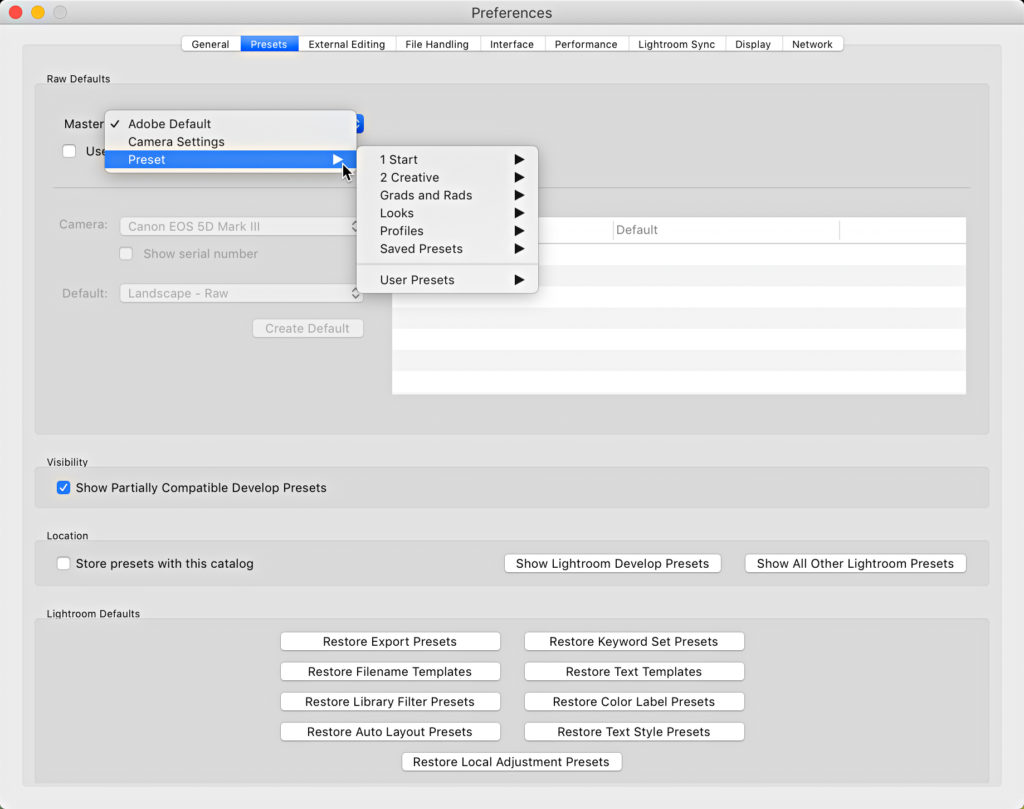
- Camera Settings: The same as Adobe Default except that a profile will be selected to match your in-camera picture style selection (instead of Adobe Color). So, if you set your camera to shoot in B&W (monochrome), choosing Camera Settings would honor that and you will see that a monochrome profile has been applied. Note, it just selects a matching profile it does not pick up any in-camera customizations you may have made to your own camera’s picture style.
- Preset: You choose a Develop preset that will be applied by default to all raw photos from all cameras. This will basically take the place of the old custom camera raw default option. You can include anything that you are able to include in a preset.
[Update – I have since learned that using Camera Settings with Nikon’s Z series camera bodies will also include additional in-camera settings beyond the profile. Perhaps this is a trend we’ll see with newer camera models as they are released? Time will tell. – Rob]
If you want to have a different default setting for each camera you shoot with, you’ll want to check the Use defaults specific to camera model checkbox under the Master drop-down menu. Once enabled, it brings the bottom section of the new panel to life.
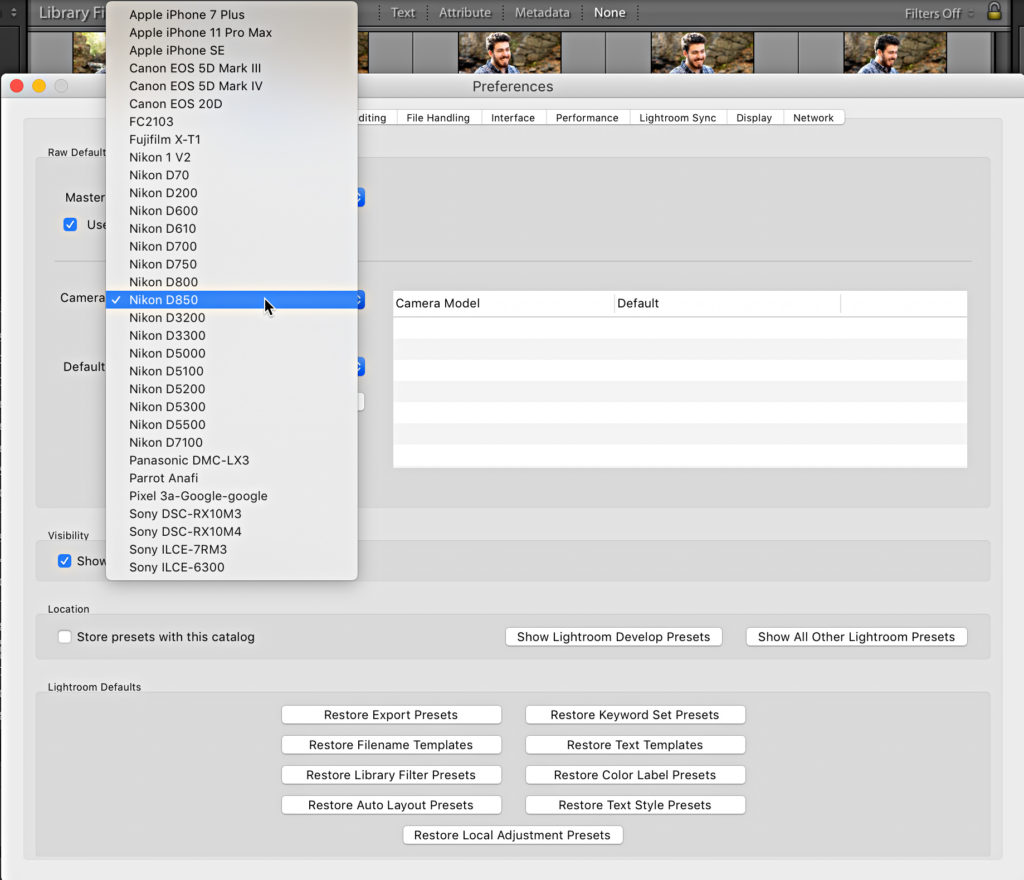
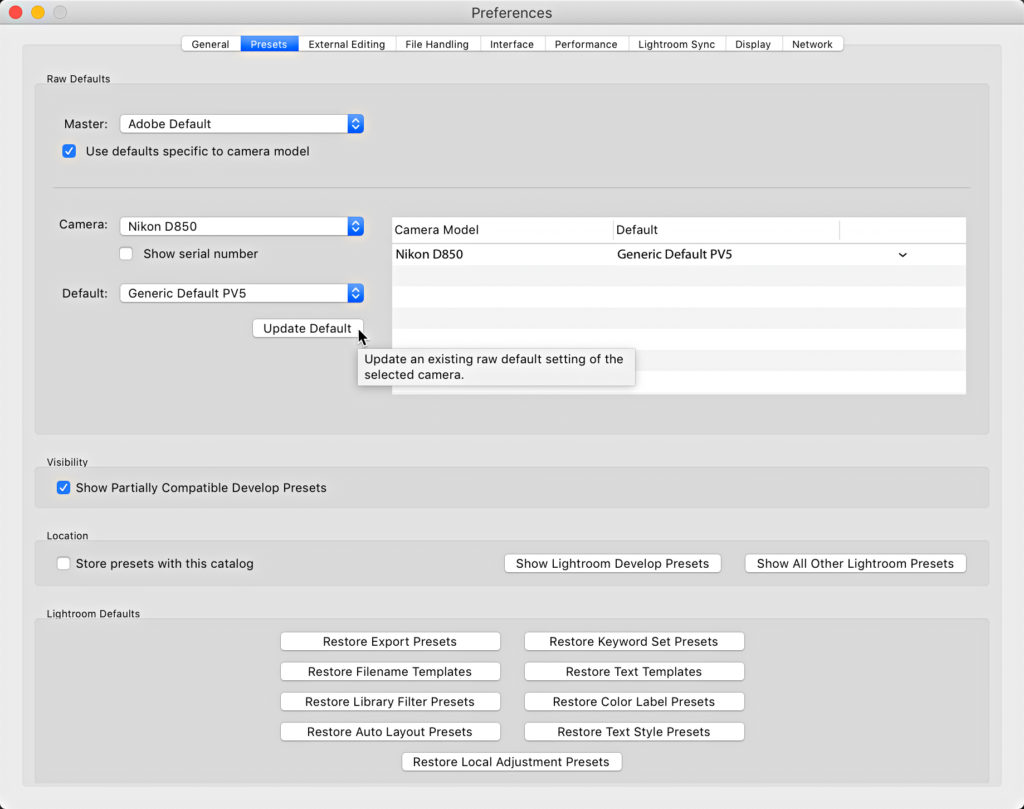
Using the Camera drop-down menu you can select the camera model you want to create a custom default setting for, then use the Default drop-down menu below that to choose from the same three options I outlined above, but for that specific camera only. Once configured as desired, click the Update Default button to add that configuration to the panel. Note, if you need to set your defaults based on camera body serial number, check the Show serial number box and you’ll be able to choose each camera body individually.
My recommendation for anyone who currently uses a custom default setting is to create a Develop preset that does the same thing. Meaning select an unedited raw photo from the camera with the custom default setting, and click Reset (before updating to this new version). Any settings still applied are part of your custom default setting. Note which settings are included. Then create a preset and only check the boxes in the Create New Preset dialog box that correspond to the settings you want to include in your custom default. Name this new preset something obvious (like Custom Default) so that you can easily find it when you want to configure it on the Preset panel of the Preferences after you update to 9.2.
When you create your custom default preset you can leave Treatment & Profile unchecked if you want to let it pick a profile based on your in-camera picture style choice. However, if you want to always use a specific profile then you’ll want to include that in your custom default preset by first selecting it in the Basic panel and then checking Treatment & Profile when creating the preset.
One final note, the old shortcut for resetting to the Adobe defaults (useful if you had a custom default setting using the old method) has been discontinued in this latest update. So pressing Command + Shift + R (PC: Ctrl + Shift + R) does the same as just pressing Reset, which is to reset the photo based on the settings you’ve chosen in the Raw Defaults section of the preferences. If you want a way to get to all zeroed settings and the Adobe Color profile, then you’ll want to create a preset that does that, and just click the preset when/if needed.
Now with More GPU
Lightroom Classic and ACR will now be using the GPU for lens corrections and adjustments made in the Transform panel to improve performance. If you are on a Mac (10.15 or higher) and have an external GPU, that eGPU will now be utilized when using the Enhance Details function.
Lightroom Classic Only Updates
Lightroom Classic got a lot of attention in this update, and I’m hoping it is a sign of Adobe’s commitment to continually improving and growing this application. Here’s a roundup of what else was added to just Classic.
We now have support for importing PSB files! That’s been requested for a long time, so glad it finally made the cut. With our cameras only increasing in resolution, not to mention the ability to merge multiple frames into giant panoramas, we’re all seeing larger and larger file sizes. Since PSD files top out at 2GB and TIF at 4GB, there may be instances where you’ve needed to use the large document format PSB. Unfortunately, up until now PSB was not supported by Lightroom Classic so you couldn’t import those into your catalog. Well, now you can. PSB still face the same limit for import as any other photo, which is that it can’t be more than 65,000 pixels on the long side or more than 512 Megapixels total.
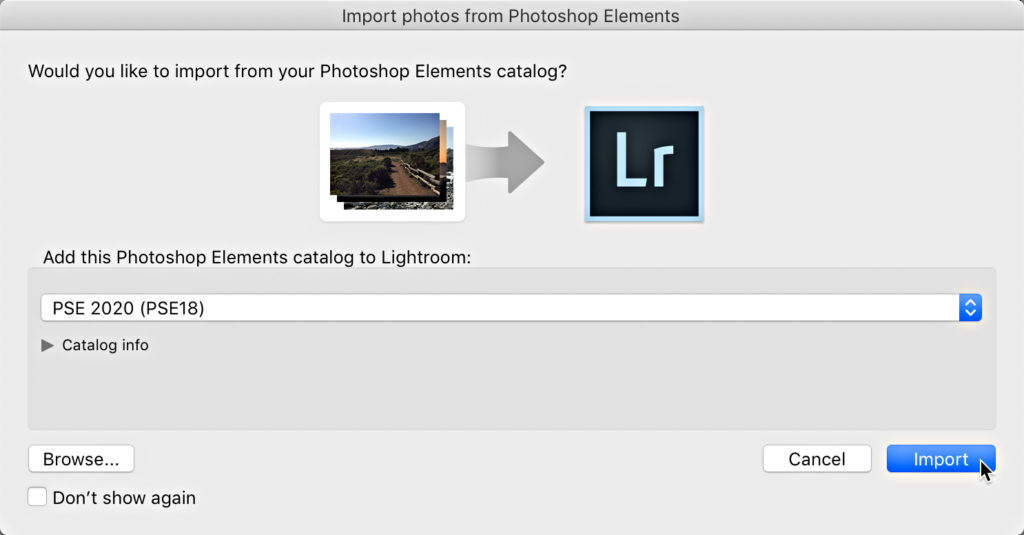
If you are (or were) a Photoshop Elements 2020 user, you can now import your Photoshop Elements catalog into Lightroom Classic. Welcome!
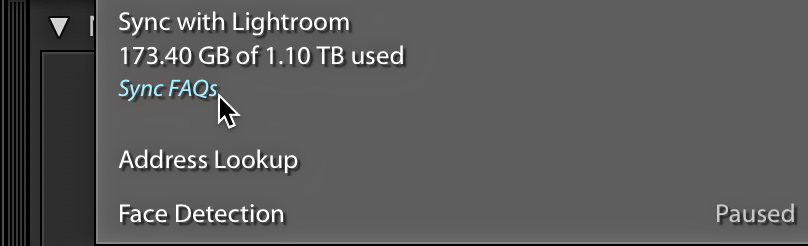
Adobe has finally released an FAQ on syncing your Lightroom Classic catalog with the Lightroom cloud. I’ve been a huge fan of this workflow for years (and have written about it here quite a bit), but ever since the waters got muddied back in 2017 we’ve lacked clear guidelines from the mother ship. Here’s hoping this new resource answers your questions so that you can get the most out of what this offers.
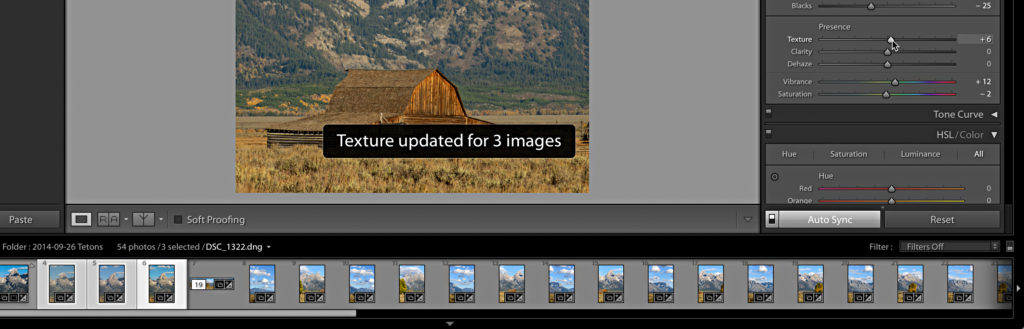
Along the lines of un-muddying the waters, the Auto Sync button got a boost in visibility to help you see that it is enabled (you can even say it glows). Once enabled (and glowing), you’ll also see a message bezel appear informing you that whatever setting you just adjusted was just applied to x number of (selected) photos. That should go a long way toward preventing unwanted auto sync of settings being applied. If you are super confident in your ability to suss out when you have enabled Auto Sync and no longer want to see those helpful messages, go to Preferences > Interface and uncheck Show Auto Sync notifications.
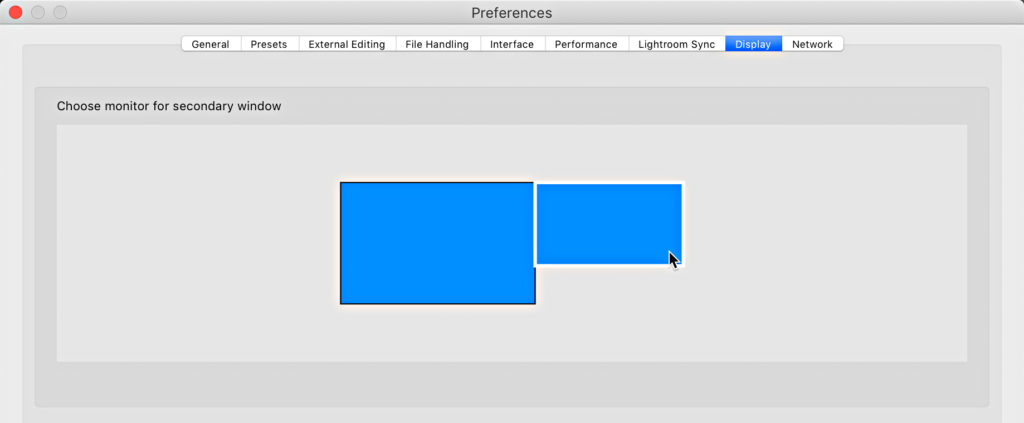
Multiple monitor users will find this last Lightroom Classic only feature helpful. Especially if you have more than two monitors. If you only have a single monitor, well, you can just skip ahead (no one is judging you). Open up the Preferences again and note there is a new Display tab in there. On the Display tab you can choose which monitor you want Lightroom Classic to use for its secondary display when you turn that on. This puts you in control of placing that secondary display window on the monitor that makes the most sense in your workflow.
Ok, let’s see what’s new in the cloud.
Lightroom Cloud for Mac and Windows
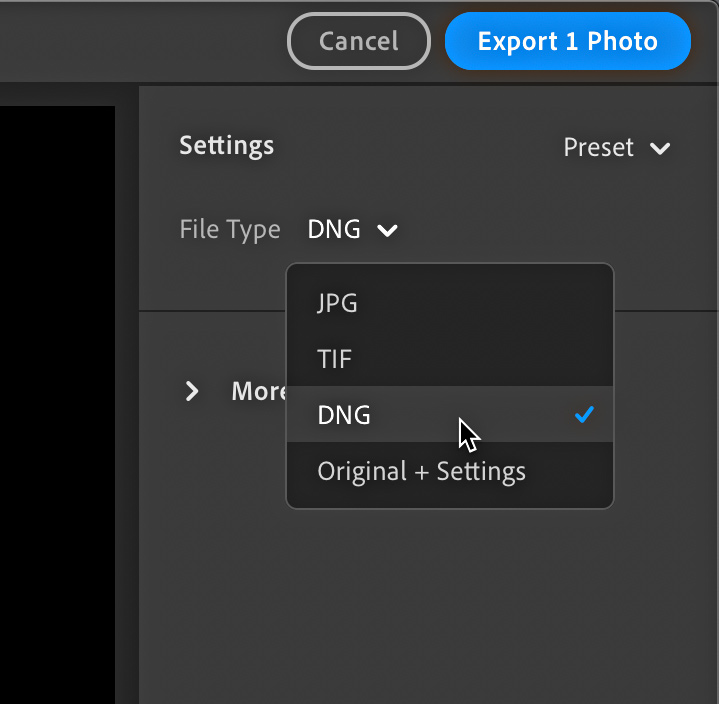
The desktop app for the Lightroom cloud have caught up in its ability to export DNG copies if needed. So now you have the ability to choose from JPG, TIF, DNG, or Original+settings.
The HDR Merge and Panorama Merge functions gained the ability to run the merge function without displaying the respective dialog box when you use the new keyboard shortcut (this also works in Lightroom Classic):
- Panorama Merge: Ctrl+Shift+M
- HDR Merge: Ctrl+Shift+H
To access this “headless” merge, first select the photos you want to merge, then press the respective shortcut, and the merge happens in the background using the previously used settings. This is really helpful when you have a lot of sets to merge, and you just want to queue them all up in the background.
Lightroom for Android
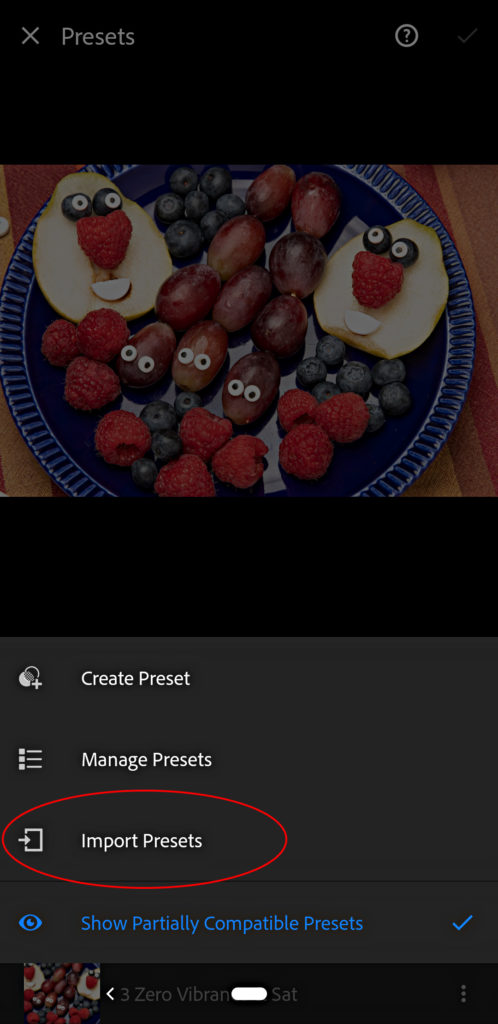
Starting with the Android platform, we now have the ability to import presets right into the mobile app instead of having to go through the Mac or Win version and waiting for the presets to sync. This also means that mobile only users don’t have to resort to importing DNG files with settings just to manually make a preset from those settings. This feature will be coming to the iOS app in a future update.
Lightroom for iPad
A small, but potentially useful feature has been added to the Lightroom for iPad app. You can now view two apps at the same time in a split screen view. For example, here I have both the Lightroom app open to editing mode while also viewing my web browser pointed at LightroomKillerTips.com (where else?).
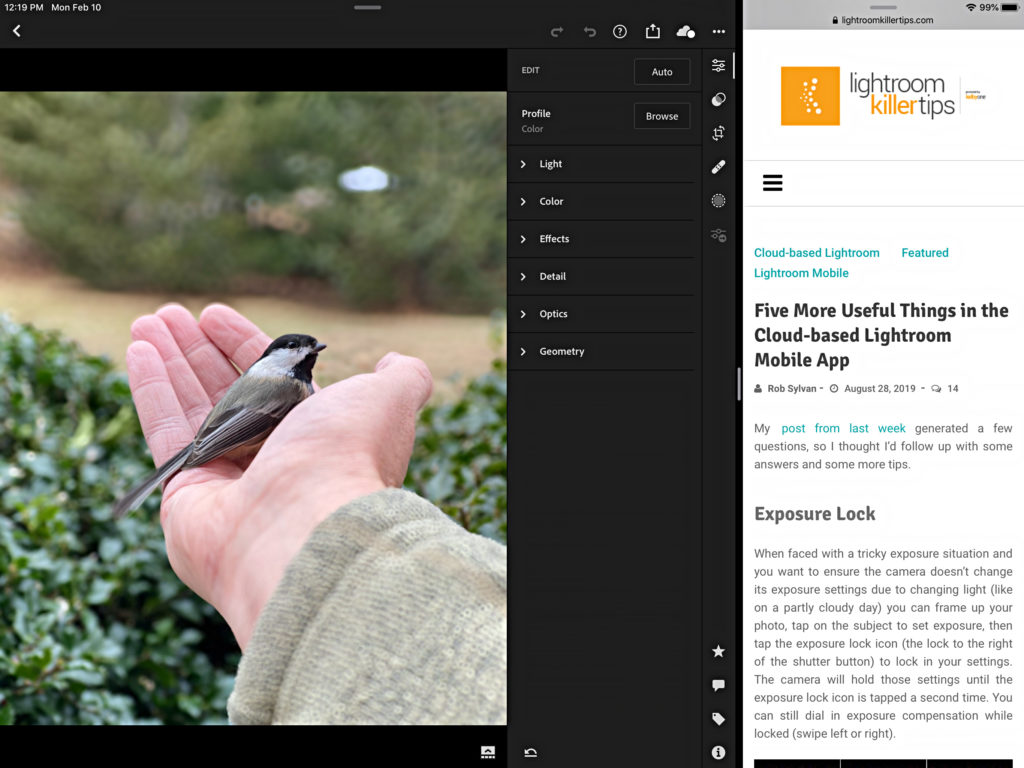
The trick is to have the Lightroom app open, then swipe up from the bottom to reveal the Dock. Then press and hold the app you want to open for a moment, then drag that app icon up to the right or left side of the screen to jump to split screen view. You can then drag the divider left or right to dole out how much screen real estate each app gets to have. Drag that divider all the way to edge to switch back to single app view.
All of the above mentioned programs gained support for new cameras as well as new lens profiles. Be sure to visit Adobe’s own announcement about the updates to get their take on the release (and what lies ahead). Adobe also maintains its own list of new features that’s worth a visit.


The update bites but your article was helpful. Wished I had read it before updating.
This new release has really messed up my defaults.
I used to have specific settings for things such as noise reduction set for specific camera, ISO and lens combinations and this new preference setting seems to only allow me to have one preset that applies to each camera?
Not good for software that I rely on to make a living from.
Yeah, the process for creating ISO specific defaults has gotten more complicated. See here: https://helpx.adobe.com/lightroom-classic/help/raw-defaults.html#SetrawdefaultsspecifictoISOvalues
Hi, I need help. I have a workflow of using the ipad and saving my raw files on my computer, but, if I import directly to my ipad, I have the option to synchronize my ipad to my computer, but when importing my raw files to the computer, they are also downloaded from the cloud and duplicated, and I waste a lot of time because I have to wait for all to download and I can’t start synchronizing other things, when I already have the raw ones on my computer, I would like only to synchronize the settings, What I can do?
Are you using Lightroom Classic on your computer? How much cloud storage do you have?
OK Finally got through to Adobe. The guy checked out my problem of Lightroom Classic crashing on sign out. He said “Yes” it’s a problem with the latest update to version 9.2 Feb 2020. it also happened to him on his computer. It’s bug I guess and he thanked me for reporting it and said they will fix it in the next update. Hope that will not be a long time. He said I was the only one reporting the problem so far. It happens on 2 PC’s here.
Update Lightroom Classic yesterday. Problem: When signing out it also closes the program. Same problem on 2 PC’s. Waiting to speak to someone now at Adobe to find out why this is happening. Listening to their bad music. They must be real busy, no one is coming in. Anyone else having this crash problem?
Hello,
I don’t doubt these updates are great for some people but we are still waiting for more develop tools like local HSL, better content aware erase brush, blending modes, better luminosity masking, solo mode for presets and LUT (no need to close all of them to open new category), compatibility with iphone MOV video files (recognized in premier elements).
marc
I’ve read several blogs about this update, and yours was the best, most helpful write-up. Thanks very much, Rob.
Thanks Rob!
Hi Rob,
Nicely Done! Great explanation of these new features.
Dennis
Great article
Great and well written update Rob. Thanks, Dale