
Clearing Out Old External Editors
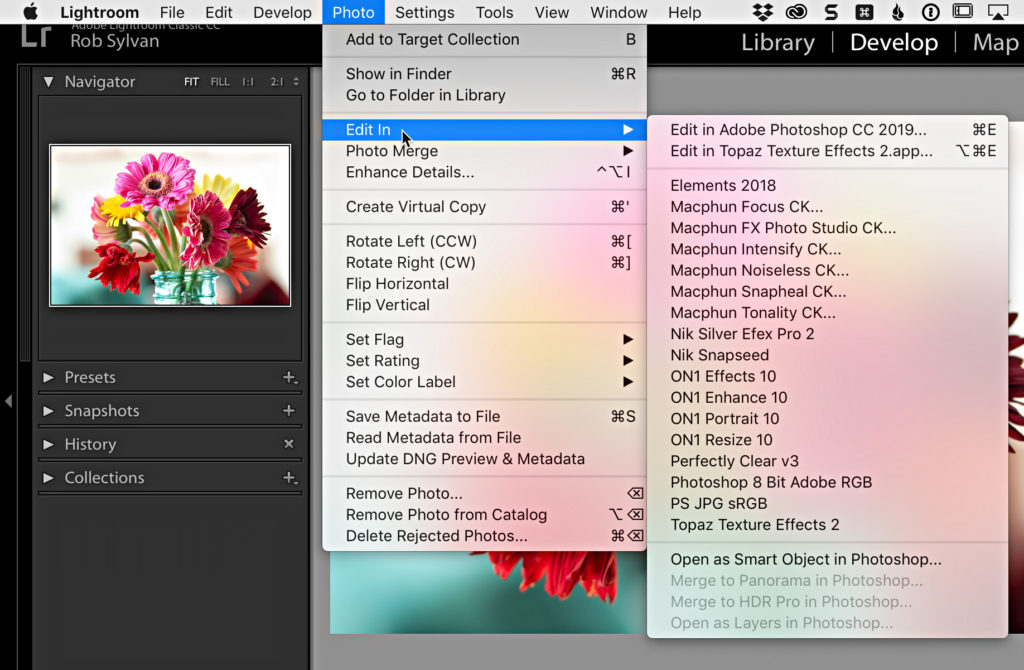
Over the years I’ve installed and tried many different third-party image editors from companies like ON1, Nik, Topaz, Perfectly Clear, and the like. Typically, when you install a product like these they will add an external editor preset to Lightroom Classic to make it easier to send a copy from Lightroom to a particular image editor. However, uninstalling the image editor may not remove the corresponding external editor preset from Lightroom. You may have even made a few custom external editor presets yourself that you no longer use. As a result, you may have a bunch of these old presets that are no longer useful and just take up space in the Photo > Edit In menu. Let’s go over how you can clean that menu up.
One at a Time
If you just have one or two that you want to get rid of, or maybe you just want to rename or edit the settings, you can do that from a somewhat hidden option in the Lightroom Classic preferences. Head to Lightroom > Preferences > External Editing (PC: Edit > Preferences > External Editing), and look at the lower half of that panel, under Additional External Editor.
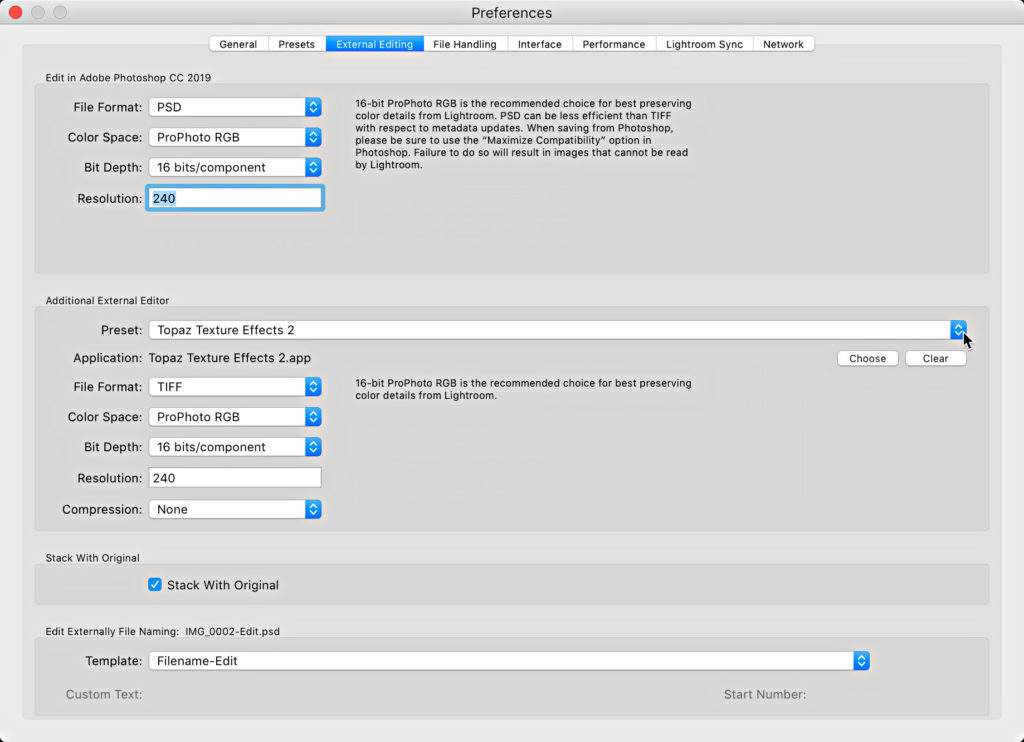
If you click the Preset drop-down menu you can select any one of the existing presets from the list, and then (here’s the secret), click that Preset drop-down a second time and you will see the option to delete the selected preset (along with Rename and other options) near the bottom of the list.
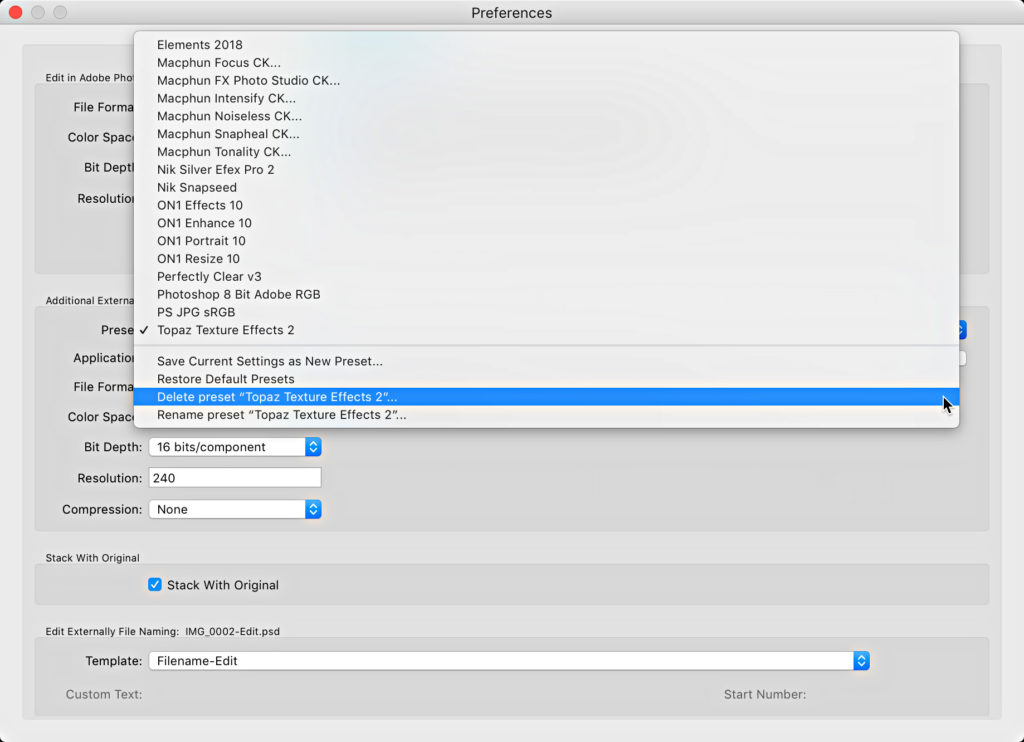
Choose Delete to say good bye to the selected preset. You’ll see a prompt with a Delete button and a warning that this can’t be undone, so if you are certain you want it gone, click Delete. Repeat that process if you have a couple of others to prune out of the list. However, that can be tedious for more than a couple.
Bulk removal
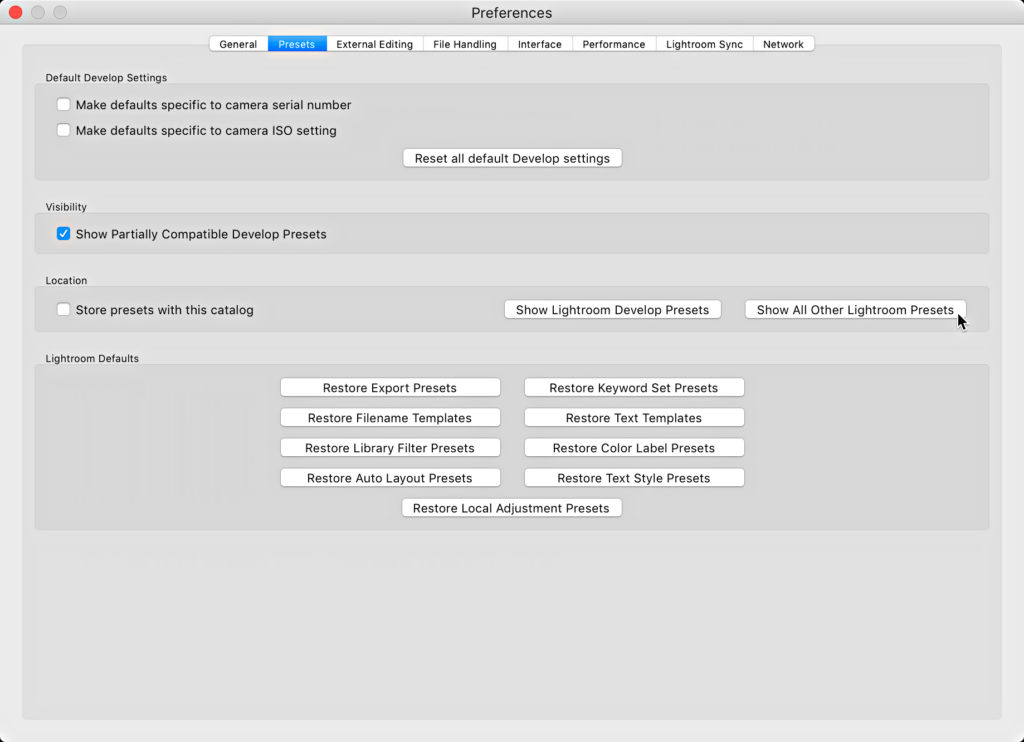
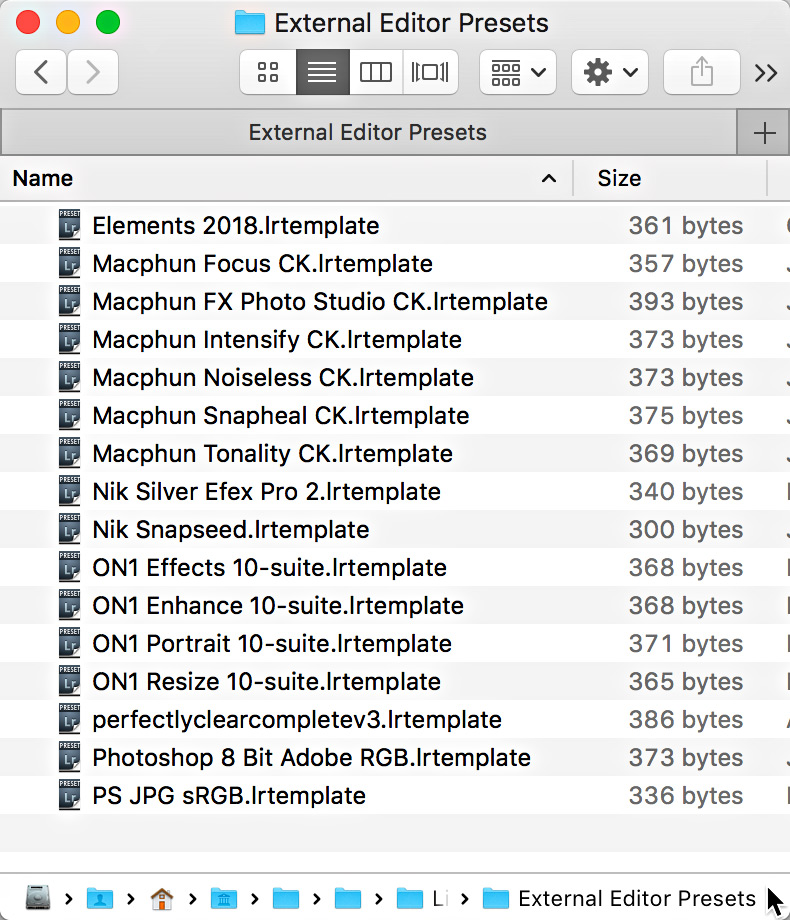
If you want to really clean house, then click over to the Presets tab of the Preferences while we have it open. Then look in the Location section of the panel for the Show All Other Lightroom Presets folder button. Click that button, which will open your file browser to a folder named Lightroom. Navigate within that Lightroom folder to the External Editor Presets folder and open it. Within that folder you should see all of the external editor presets that appeared in the Edit In menu.
Select any preset files you want to remove and delete them. This does not uninstall the related program. It simply removes the function from Lightroom to send a copy to the corresponding image editor. You’d have to go through the actual uninstall process on your operating system to remove a program you no longer want/use.
Once the presets have been removed, close the file browser windows, then restart Lightroom Classic for the changes to be reflected in the program.


Thanks, Rob. This was driving me crazy.
If I have already download the programs on trail, and it’s been over a year, am I can’t seem to try it again before I purchase. Is this correct? Thank you,
Patty Sharp
Hi Patty, I assume it may depend on the specific software and that company’s policy. You might check with them?
Thank you! I think I may need more help! I can see Luminar but I can’t delete it. Luminar has really messed up my system and I really can’t find out why its still showing up. Can you you help? I have the latest Adobe CC and the most up to date operating system for Mac as of now.
If all that is showing is the preset for the external editor to open Luminar, then you can ignore it as long as the program is uninstalled, that preset in Lightroom Classic doesn’t do anything. That said, if you select it in the additional editor preset drop-down, then click that drop-down menu a second time, do you see the option to delete it?
Thank you – very helpful.
Very helpful; bit what about menu items above the line. In your case. Edit in Topaz Texture Effects 2app? I have an old on above the line under edit in Photoshop that I’d like to get rid of.
Er. Lightroom IS a ‘third party’ editor 😉
Er. Not RELATIVE to Lightroom. Context is key.
Thanks, Rob. I needed to do some housecleaning and this did the trick!
This is super helpful! Thank you for all the details.