
A Quick Portrait “Finishing Move” in Lightroom

Hi Gang (and Happy Monday). 🙂
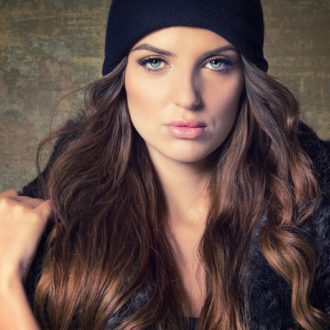
This isn’t some earth-shattering Lightroom secret or anything, but it’s something that I do to a lot of my portraits, kind of as a finishing move, and while it’s subtle, I think it’s important. I get a lot of questions about these finishing moves, so I thought I’d share this one here today. It’s about a very quick way to brighten just your subject’s face, which is something (as I said), I do a lot. The original image is above.

STEP ONE: Get the Adjustment Brush; double-click on the word “Effects” to reset all the sliders to zero. Now I drag the Exposure slider to the right to about +1.00 or so (doesn’t have to be exact at this point), and I paint over the subject’s entire face and the top part of their neck (as shown here).

STEP TWO: Now I drag the Exposure slider back to the left until the lighting looks realistic (usually that +1.00 is too much), and in this case, it looked about right to me at+ 0.57. This bit of brightening does three things: (1) it helps create a look of “fall off” in your lighting (2) it draws your subject’s eyes to your subject’s face, and (3) brightening the face is usually somewhat to very flattering to your subject.

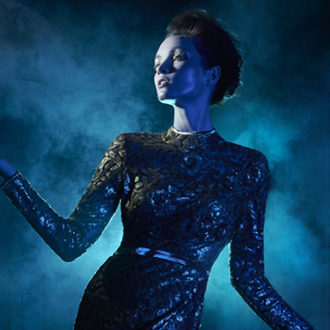
Above: here’s a before (left) and after (right) to adding that little bit of extra light on the face.
OK, that’s all there is to it (told you it wasn’t an earth-shaking technique, but if you like it, and it makes your portraits look even a little better, it’s worth it, right?).
Hope you find that helpful.
Take care,
-Scott
Don’t have LR….how can these steps be done in PS?
I don’t have LR….is there a similar procedure for PS?
Scott, if I may, I’d like to suggest using the radial filter tool instead. The effect is a bit more subtle around the edge and you have more control over the falloff, making it appear more natural as a key light. It also minimizes the possibility of most people keeping the auto mask feature on for the brush which would be bad, causing blotchy results as it picks up some hues and not others.
One more option (depending on the original brightness of the image) would be to reduce the brightness of the entire image and then paint back in the brightness on the face.
One last thing… With the new LR6/CC, the radial filter can be copied and pasted along with other settings. You can then easily relocate the pin if the face moves slightly. This is very useful for those who may shoot more than one picture in the same light. Which is hopefully all of us!
Cheers!
The swirl, just like on Seinfeld.
where is adjustment brush?
Thanks for sharing Scott. I have been doing this for some years, yet seem to forget to mention it when I am doing a class. Now I will be reminded
Brilliant! I probably should be embarrassed to say that I just used it on a few cat photos to test it out, but I am not. Definitely a nice little touch to brighten the subject very subtly. Thanks Scott!
I like this idea. I also like to slide the shadows to the right and then, maybe drop the highlights of makes the forehead or nose too shiny.
Thanks, Scott. Short, sweet and simple. Another tool to use to enhance a photo.
Florian
Scott, I have just started working with Lightroom (usually work in Photoshop). Where is the Effects word I click on. When I tried this I ended up lightening more than just the face. Thanks
Just reduce the size of the brush and see if that helps. Use the ” [ and ] ” keys to affect the size.