Brightening Eyes in Lightroom (ala Kristina Sherk)
Hi everybody, and a happy Friday it is! On Wednesday my guest on “The Grid” was none other than the “Shark Pixel” herself, pro retoucher Kristina Sherk, and we were doing retouching blind critiques. During the broadcast, Kristina talked about a quick fix in Lightroom for brightening eyes, and I thought I’d share it here (especially since it’s different, and faster than the way I normally do it using the Adjustment Brush).
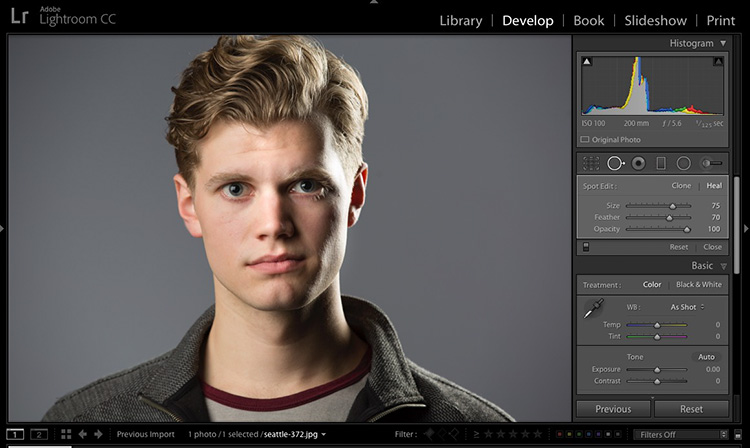
ABOVE: Take a look at our subject — his eyes are kind of gray and flat-looking and need to be brightened up a bit (not a bunch — just a bit).
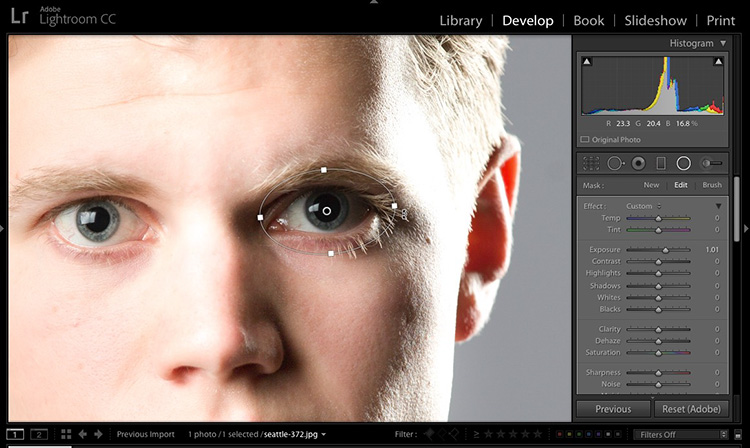
STEP ONE: Get the Radial Filter tool (from the toolbar just under the Histogram) and drag out an oval around one of your subject’s eyes (as seen here). We want to brighten the eye a bit, so double-click on the word “Effect” in the Brush panel and it resets all the sliders to zero. Now drag the Exposure to the right a bit, as seen here (at this point, it doesn’t matter how far you drag — you’ll be able to adjust it afterward). By default, this brightens the area outside of the oval (his face, his hair, the background, etc.) which is just the opposite of what we actually want — we want to affect the area inside the oval — his eye — not outside of it.
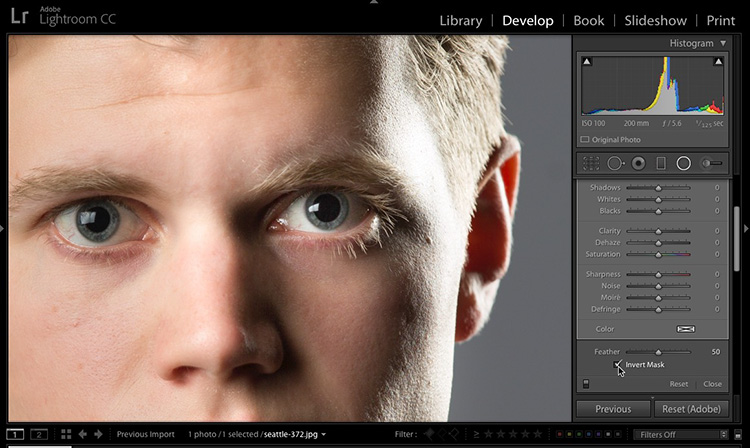
STEP TWO: Scroll to the bottom of the Brush panel and turn on the checkbox for “Invert Mask” (as shown here) so now it affects the area inside the oval (his eye) instead of outside the oval. As you can see here, now it’s too bright, but that’s OK — remember, that’s the arbitrary amount we chose earlier. We can dial in the right amount in the next step.
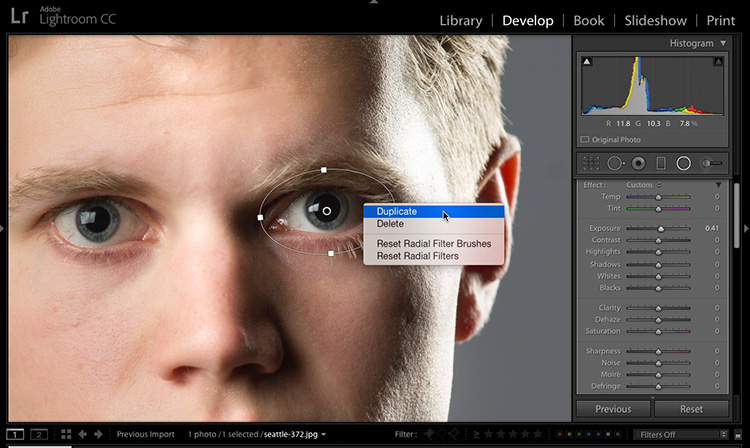
STEP THREE: Grab the Exposure slider and drag to the left to dial in the amount of brightness that you think looks right to you (remember — we just want to brighten it a bit). Here I lowered the amount from +1.01 down to +0.41 (making his eye area not quite a 1/2 stop brighter). Now, let’s copy this oval over to the other eye. Right-click inside the oval, and when the pop-up menu appears, choose Duplicate (as shown here). This makes a duplicate over and it stacks it directly on top of the first oval, so don’t be surprised if you see the eye get much brighter, as it’s stacking up the brightening.
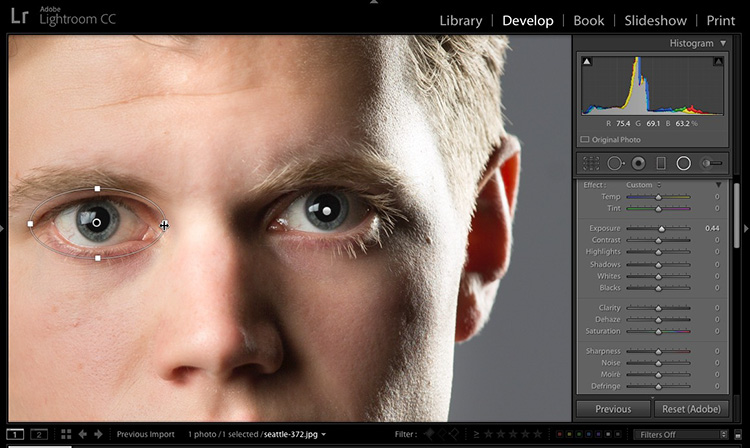
STEP FOUR: Click and drag on this top copy of the oval and drag it over to the other eye. The nice thing about this is — you have separate brightness controls for both eyes, so the eye that is farthest from the light (the eye on the right) you can brighten a bit more than you’ll need for the eye fully in the light on the left. Here I set the exposure for the oval on the left eye to +0.44, then I click back on the right eye and increased it to +0.75 so the two look balanced.
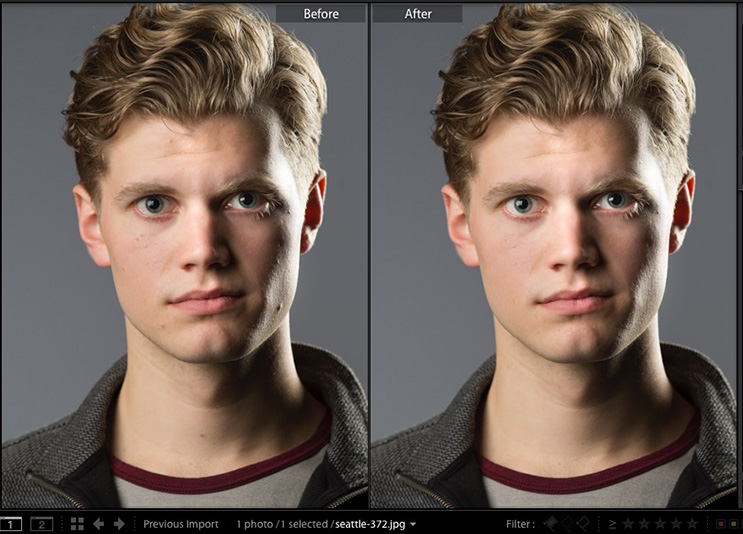
Above: Here’s a before and after of the subtle eye brightening (remember, it was supposed to be just a bit brighter — not a ton brighter). Thanks to Kristina for sharing this technique on The Grid!
More Lightroom Retouching on the way
Kristina taped a full-length course for KelbyOne today on Portrait Retouching all in Lightroom, and my crew in the studio were already raving about how great Kristina was, and what she showed. I’ll let you guys know when it comes out (it’ll probably be four weeks or so).
Hope you all have a great Weekend (I’m shooting the Bucs/Raiders game on Sunday — #GoBucs). 🙂
Best,
-Scott
P.S. The next stops for my seminar are in Denver and Las Vegas next month. Hope I’ll see you there.