
This is one of those things that’s so easy to fix, but makes such a big difference – especially if you shoot wide angle lenses a lot (though it helps with longer lenses big time, too. Here are those two clicks:
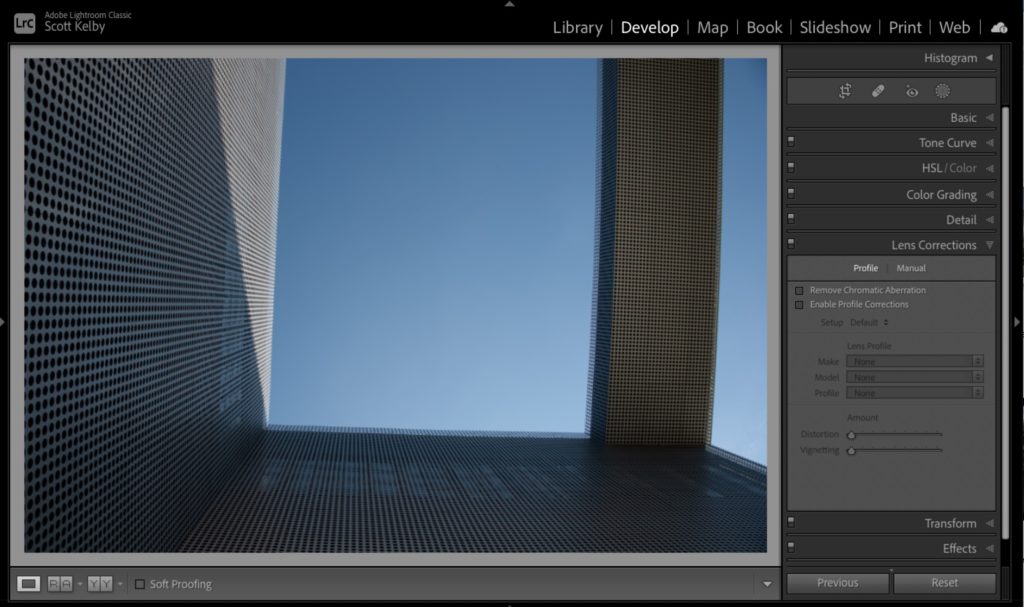
Above: here’s our original image and you can see the lens issues – the column on the right is bowing outward; the wall on the left isn’t straight, not to mention that the photo is crooked.
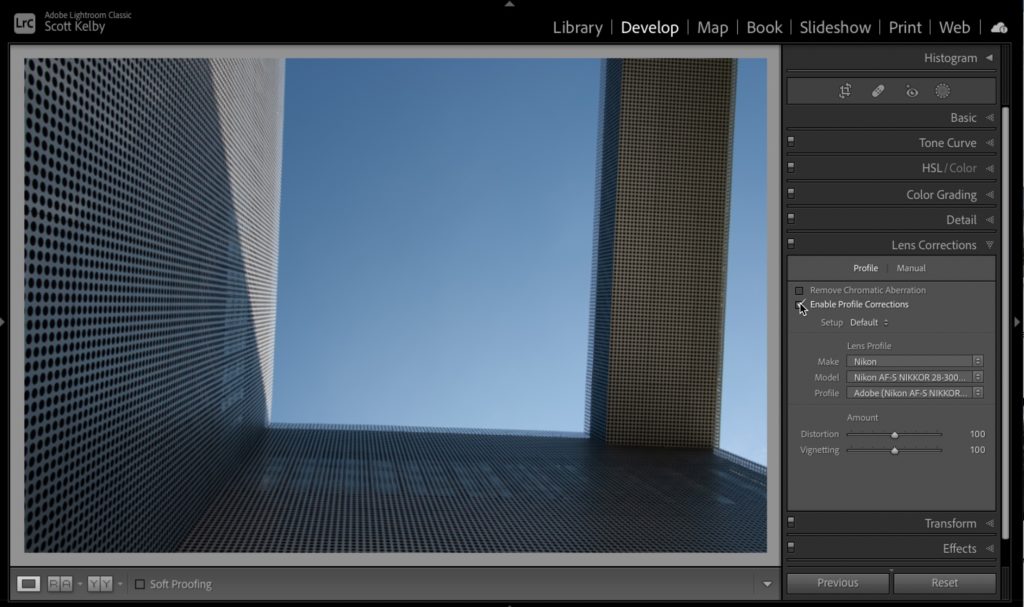
FIRST CLICK: Go to the Lens Correction panel (it’s called the Optics panel in Lightroom ‘cloud’ version), and simply turn on the checkbox for “Enable Profile Correction.” Lightroom will go to its internal database of lens correction profiles and apply the appropriate correction, and now look at the column on the right, and wall on the left. Perfectly straight. NOTE: If for some reason it doesn’t automatically find your profile, I did a post about what to do right here.
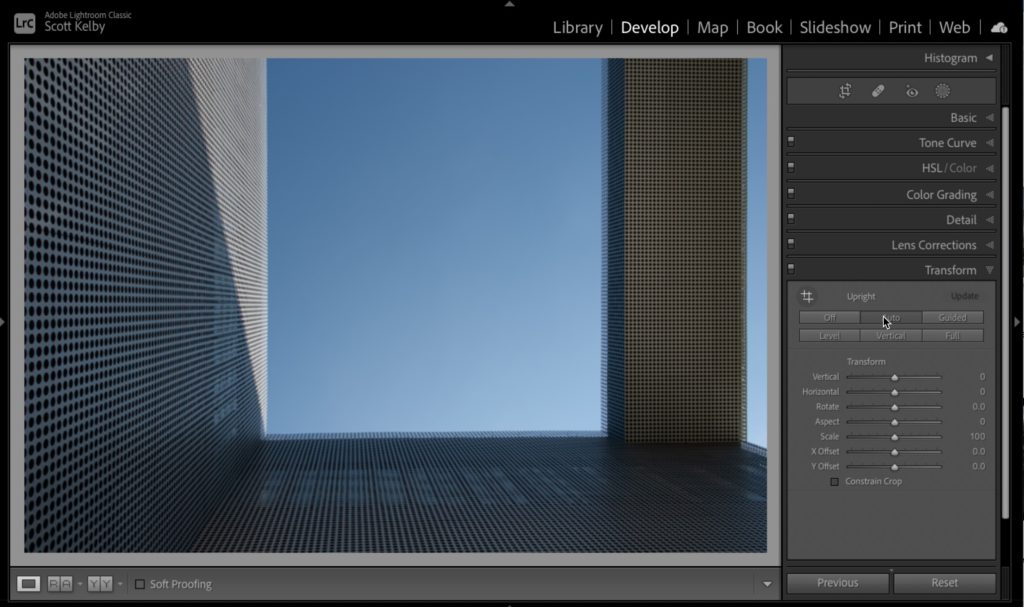
SECOND CLICK: Then go to the Transform panel (it’s called the “Geometry” panel in Lightroom ‘cloud’ version). and click the Auto button 9as shown above), and that’s generally all you have to do, and you can see what those two clicks did for this image. Also, you can create a Preset for these two clicks and have them automatically applied to every image as you import them (here’s a link on how to do that).
Hope you’ll give this two-click lens correction a try – I think you’ll be surprised what a difference those two clicks can make. 🙂
-Scott
P.S. I have a pretty cool little Photoshop tutorial today over at my other blog. It’s a short video, but it’s got some really handy techniques in it for cleaning up background from product shots (but you’ll find other ways to use these techniques). It’s over at scottkelby.com

