
We’re heading into the weekend with a simple to use, but powerful time-saving technique — applying the Develop module preset of your choice automatically when you import your images, so when they appear in Lightroom; they already have the preset applied. Here how to set it up (it’s easy).
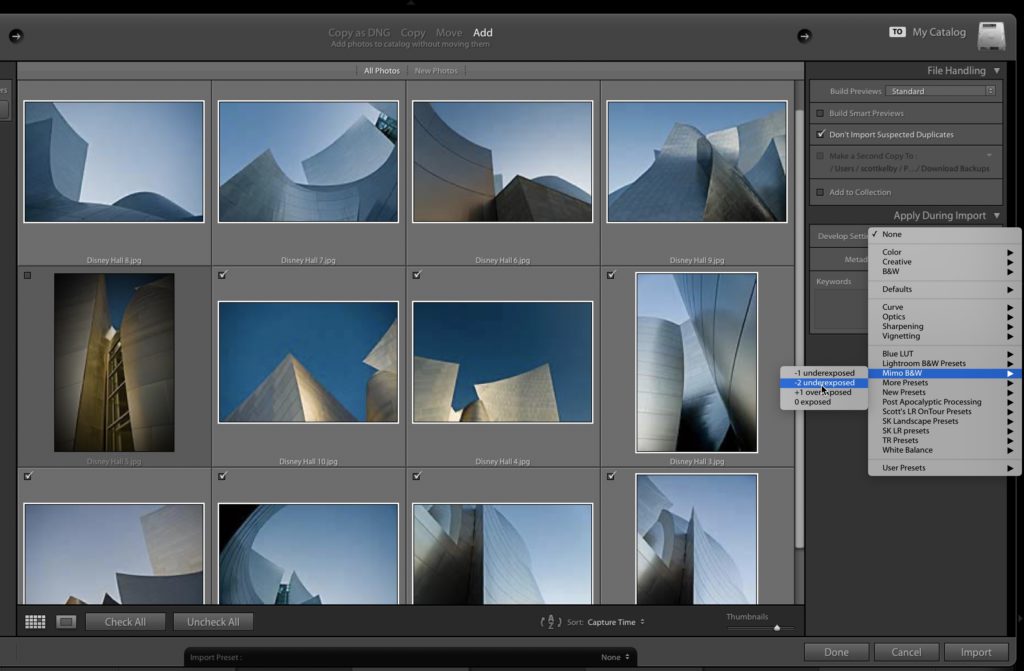
STEP ONE: In the Import window of Lightroom Classic, on the right side of the Import Window you’ll see a panel named “Apply During Import.” At the top where it says, “Develop Settings” click and hold on the pop-up menu directly to the right of that and it brings up a menu with all your installed Develop Module presets. Just choose the want to apply on import from the list (as shown above). That’s all there is to it.
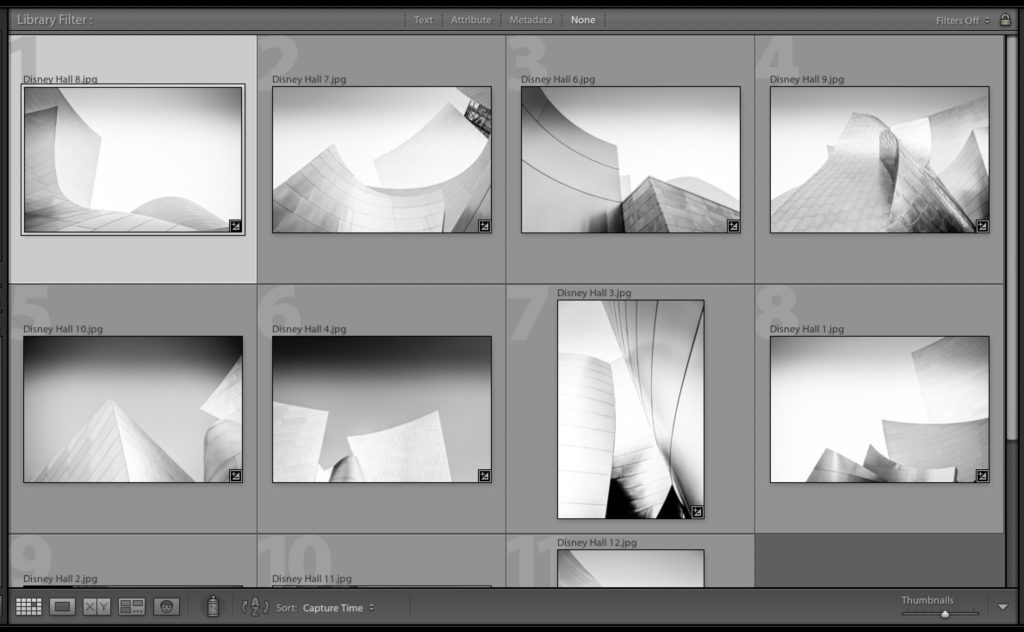
STEP TWO: This really isn’t a step — it’s more like a result. When your images appear in the Library module, your images will already have that preset applied, as seen above where the preset converted the images to black and white and applied a number of other edits as well.
There ya have it. Short and sweet, and a big timesaver.
If you like Spiral Staircases like I do (which is a lot)…
Then check out the Adobe Spark page I just posted with my favorite spiral staircase photos from around the world, with the story behind them, some behind-the-scenes photo, camera settings, and more. Hope you get a sec to check them out (here’s the link).
Here’s wishing you a fantastic weekend; a safe and happy one, and I hope to see you back here next week. 🙂
-Scott


Hi Scott,
You have missed this one: https://duckduckgo.com/?t=ffab&q=quinta+da+regaleira&atb=v214-1&iax=images&ia=images&iai=https%3A%2F%2Fep1.pinkbike.org%2Fp5pb10672464%2Fp5pb10672464.jpg
Cheers
I actually did photograph that one when I was in Portugal (my friend Dave was with me and he was the one who really wanted to see it). It’s interesting for sure, but just not very pretty, so I didn’t include it. You can see my shot of it here: https://spark.adobe.com/page/ywTQVM9vwMYEc/ 🙂
Amazing tutorial, trying these to my photos in lightroom
I’ve found a difference between the White Balance processing in ACR vs LR Classic.
In ACR you can grab the WB picker and draw a rectangle to make the sample area as big or as small as you want.
In LR CC, you cannot do that.
The ACR treatment way of doing things is much nicer. Not sure which point should be the best WB selection point? Draw a rectangle, take an average.
It’s brilliant.
Best
Paul
PS I tried to use the Contact form on your web page but it borked.
I use a box on another tool too, works out better IMO. Wish they’d adopt that in LR Classic.
One thing you can do in LR Classic is scroll your mouse with the ALT key pressed in to modestly increase or decrease the number of pixels the loupe is considering. There’s also a Scale slider that does the same thing when the WB tool is active.