What To Do When Lightroom Can’t Find Your Lens Profile
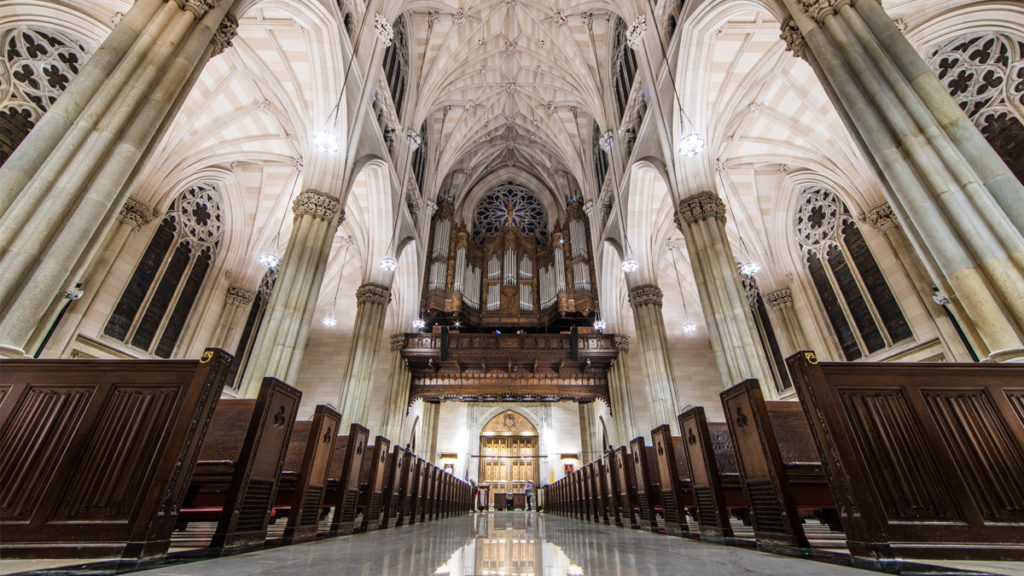
Let me know if this has happened to you (I can’t be the only one, right?). If you’ve ever had an image that needed a lens correction (maybe it had barrel distortion or edge vignetting), and when you went to the Lens Corrections panel; turned on “Enable Profile Corrections” (as seen above), absolutely nothing happened. It’s probably because Lightroom wasn’t able to figure out which make and model of camera you used so it couldn’t apply the appropriate lens profile to correct it. That’s why the fields for Make, Model and Profile all say ‘None.’
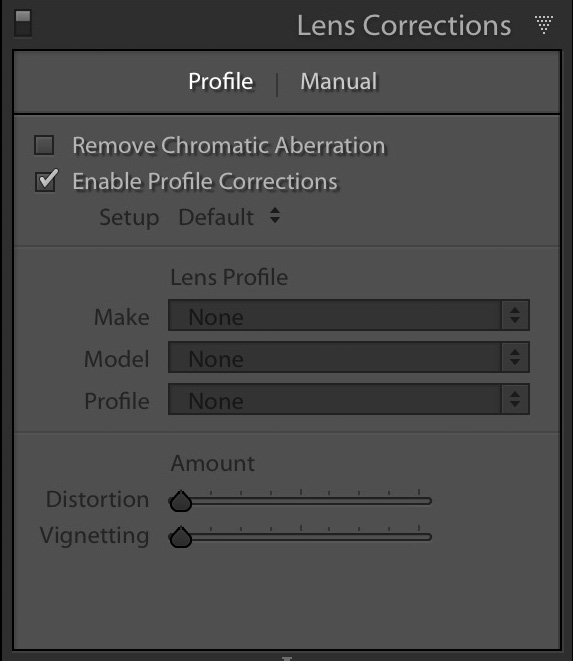
Now, you’re probably thinking, “Wait — right up under the Histogram it lists the lens, f/stop and other EXIF data — how could it not know which make and model of camera and lens I used — it lists the fact that I used a 14mm lens right there?” Ahhh, this is another of life’s great mysteries (and maybe one day somebody at Adobe will explain this to me but until then, at least I can tell you how to fix it).
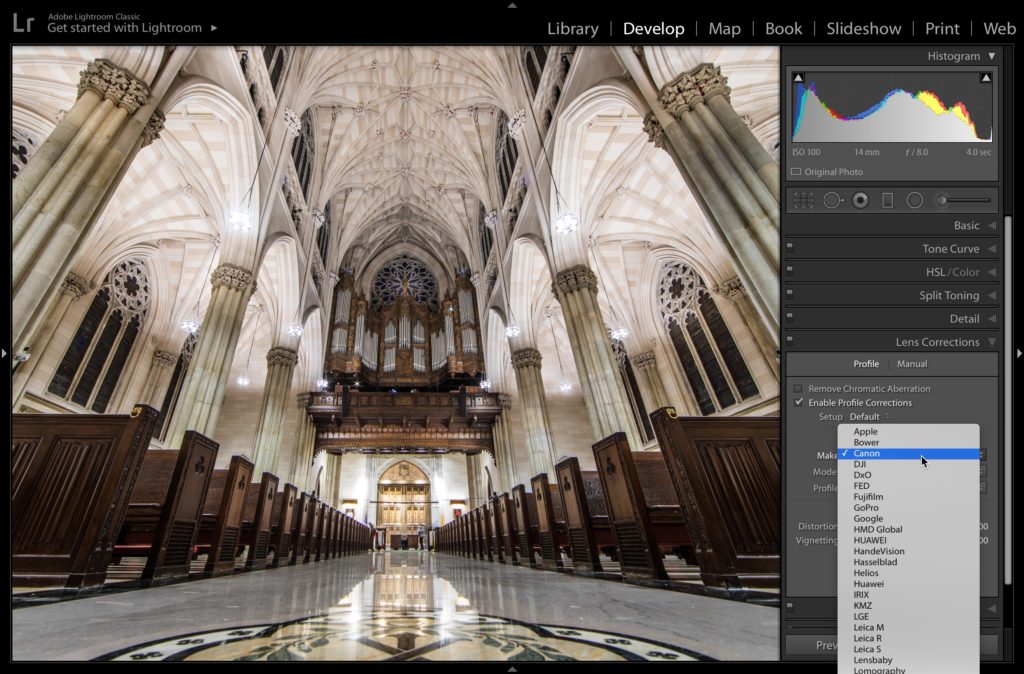
STEP ONE: All you really have to do is click on the Profile tab at the top of the panel, and in the Lens Profile section, the Make, Model, and Profile are all set to None. All you usually have to do is to choose your camera’s Make (from the Make pop-up menu, as shown above) and that’s it — it now suddenly knows “Oh, you shot this with a Canon camera.” and then it not only suddenly knows the model camera you shot it with, but it now instantly finds the appropriate lens profile within Lightroom’s built-in collection of lens profiles, and the correction is applied. You choose the camera make — it does the rest. Pretty sweet.
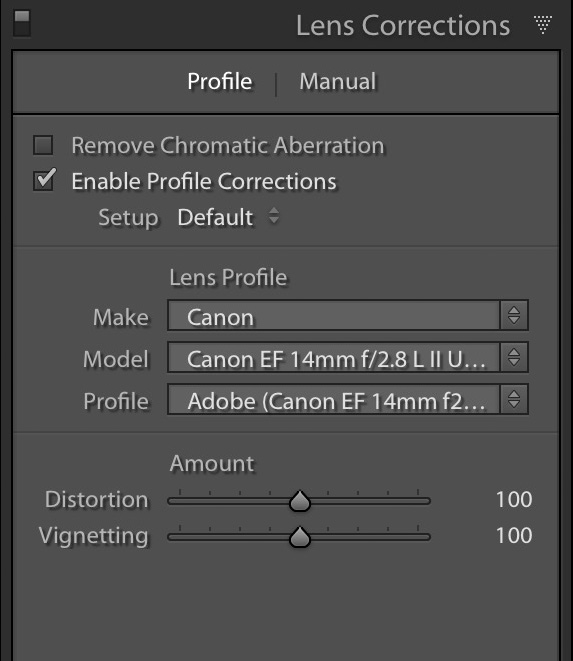
STEP TWO: That usually does the trick, except sometimes it doesn’t actually have the exact profile for your lens (Lightroom has a huge built-in library of lens profiles, but it doesn’t have them all, especially if the lens you’re using is a relatively new lens and Adobe hasn’t had a chance to add it to the database during a free update), so it chooses one that it thinks is pretty close, and sometimes it works really well, and sometimes it’s a mess (especially when it applies a fish-eye correction profile, which is sometimes will do if you used a super-wide angle, like my 14mm). Read on.
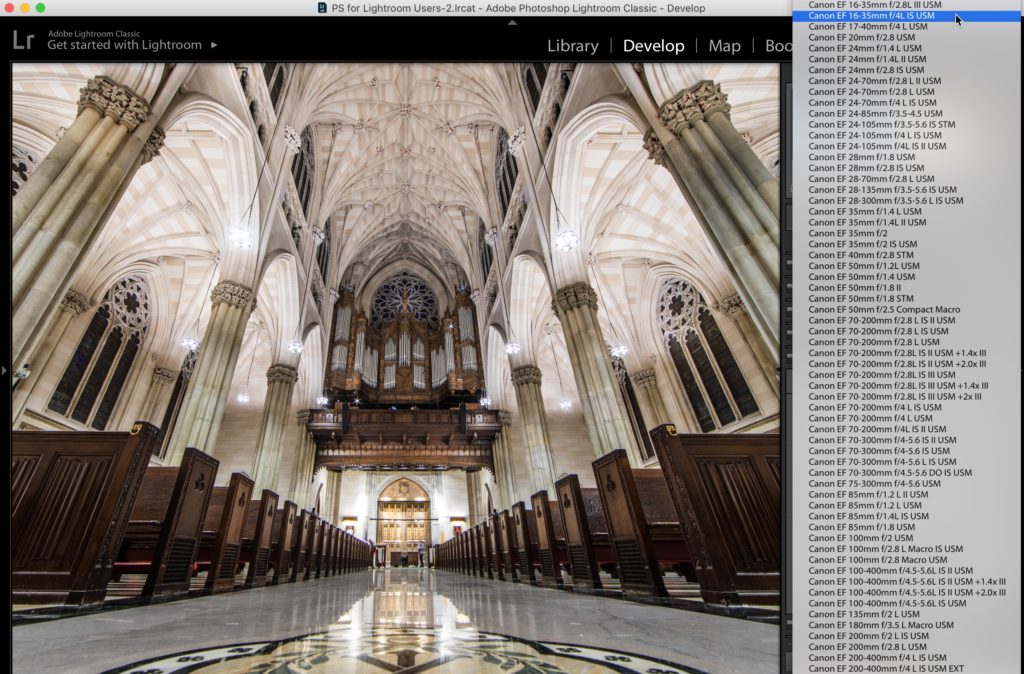
STEP THREE: If Lightroom doesn’t have the right profile for your lens (and undoubtedly as some point this will happen), if you click and hold on the “Model” pop-up menu, it lists other profiles you could choose. What I do is try and find which of these profiles looks best for correcting my image. In this case, the one that looked best for correcting my lens problem was the 16-35mm profile. That’s not the lens I used (I used a 14mm prime), but the correction worked pretty well anyway, so I’m set. (Note: in reality, there is a 14mm Canon prime profile, and it works great, but I just chose that, there wouldn’t be a tutorial here at all today…so…well, there ya go.
Hope you find that helpful. 🙂
-Scott
P.S. Over on my blog today I posted the replay of my Webcast from Monday. Thousands of photographers have already watched it, and I think you’ll find it super helpful in figuring out what kind of images you want to make, and then how to go about actually making them. It’s a real eye-opener, and the feedback has been off the charts. Here’s the link (it’s free for everybody).


My new version of Lightroom Classic no longer has Pentax lens for Lens Correction. How do I download and add these profiles?
Art, It would be my guess that the profile for your camera is being automatically applied already and that is why you don’t see one.
I’m guessing that at some point I must have messed up my LrC and it no longer identifies my Panasonic GH5 lens profile as “built-in.” However, LrC does recognize the built-in profile if I open a photo on my friend’s laptop. Any advice on what settings I might have turned off/on that would prevent it from seeing the built-in profile of my mirrorless camera and how I can undo my mistake so it makes the embedded corrections again? Thanks
Hi Scott,
I shoot with an Olympus OMD-EM1 ll and Olympus is not listed in the “make” section. It does list it in the metadata so I’m not sure why it wouldn’t be available in the make section. Is there a fix for this or do I have to wait for LR to add it?
Also, I attended the 2 day Lightroom conference and learned so much! Thank you! I would not have been able to attend in person so I was thrilled to be able to join virtually.
Jodie, It is likely that the lens profiles are built in for that camera (as they are for most, if not all mirrorless cameras). In other words, there’s nothing more for you to do in Lightroom for lens profile.
Hello Scott
when I select the lens profile Lightroom has already found it. But what I have to do when LR don’t finds my lens profile. In Photoshop CS6 (Camera RAW 9.1.1) the profile is OK – but LR 6.1.4 (Camera RAW 10.1) the profile is missing. To which folder I have to copy the lens profiles that LR can red it?
Regard
Diddi
This is really only helpful if you own main brand gear. It doesn’t address how to fix the problem if you shoot canon but use sigma and tamron. I feel if there was info on that it might be useful to much more of the audience. Otherwise good info!
Zach,
I have 4 Sigma Lenses that I use with my Canon 7DM2 and each one has a profile in both LR and ACR. My Sigma lens are 10-20mm, 18-300mm Macro, 150-600mm, and 24-70mm. They all have profile in LR and ACR. So, you might need to use Sigma from the drop down under Lens Profile. I also set up a preset that does this automatically.
Hope that helps,
Dennis
Hi Scott – Great post as always. I have a Sony A7III and for several lenses the camera embeds the corrections into the RAW file so there’s nothing for Lr to do! Drove me crazy until I worked out what was happening 🙂
I also wanted to share a testimony with you – Several years back I was having a bad time with hard, hard work choices, moving elderly parents and at the last minute my camera completely died…. I was not in a good place, so for a break one evening I locked myself away from it all and tuned into The Grid. You offered 2 free tickets to your Shoot Like A Pro 2 tour and I won one. So amidst all the madness I took a day out, went up to London, thoroughly enjoyed the day with you (amazing) then met my daughter beside the river for a meal. This single day reset my mental state and I had a great year. I believe that this was the blessings of a loving God to orchestrate all of that… so thank you for being part of a turn-around… Nest time you’re in London I promise I pay!! 😉 Thanks again
Paul, your story just made my day!!! I cannot tell you how happy I am that you shared that with me. May God’s blessings continue for you and your family. Stay healthy, and I hope to see you again next time I’m in London. Cheers. 🙂