
Wrapping Up Lightroom Mobile Week: New Collection Layout
Hi Gang, and happy Friday!
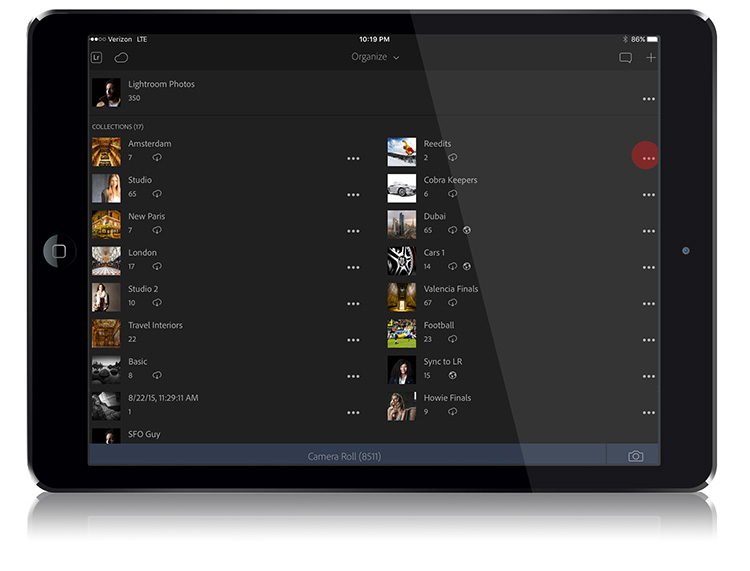
We’re wrapping up “What’s New in Lightroom Mobile Week” with a look at what is probably the most visible change to LR Mobile — the redesigned Collections panel. Instead of just seeing one or two very large square thumbnails (which looked nice, but caused lots of scrolling if you have more than just a few collections), you now have much smaller thumbnails and you can fit a lot more collections on screen at one time, which cuts down on your scrolling big time. (See a comparison below).
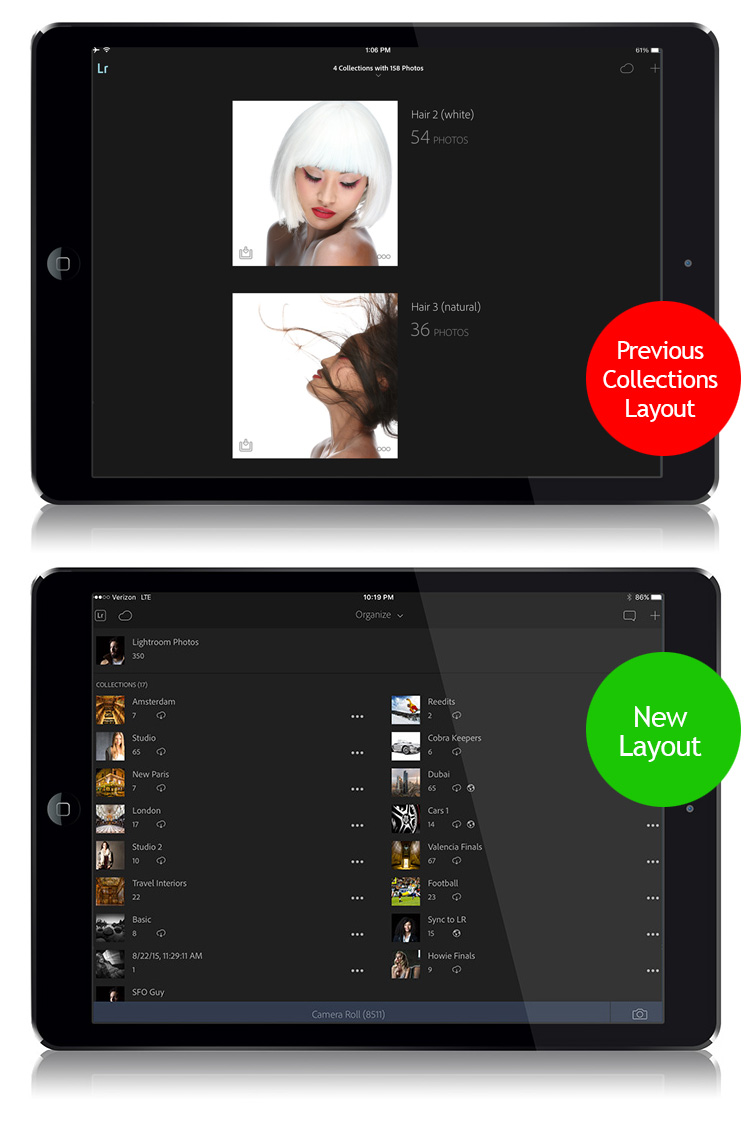
Above: In the same space where only two collections fit, now we can fit 18, plus access to the new in-app camera (bottom right corner), and access to your device’s Camera Roll (across the bottom). With the new thumbnails being so much smaller, it looks like they could have fit three columns across.
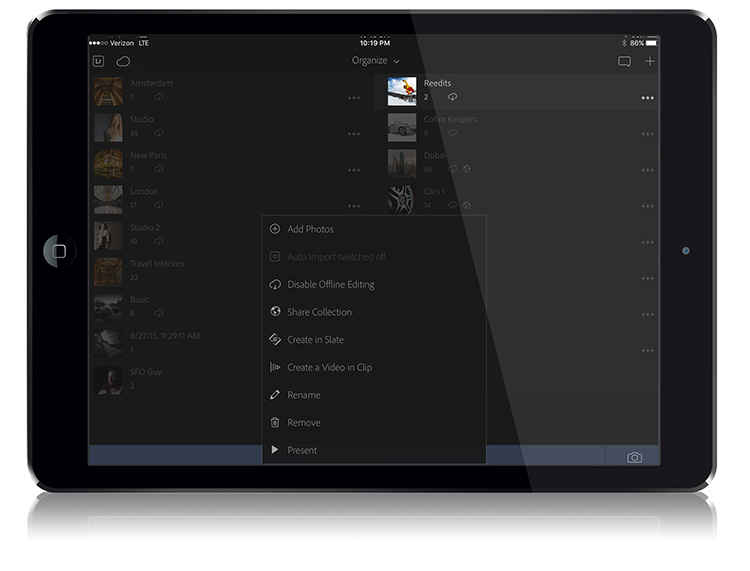
The way you reach a collection’s options has changed slightly two. Since the thumbnails are so much smaller, they moved the “three dots” [ • • • ] that you tap to reach these options off the thumbnail itself and move them to the far right of the collection’s name (previous, the large thumbnail tile just “flipped around”), and it brings up a list of options, including accessing Present mode (the mode you go into before handing somebody your mobile device to swipe through your images — it keeps them from accidentally changing anything).
Another big new feature
Adobe added a very cleverly designed version of the “Targeted Adjustment Tool” found in Lightroom Desktop, for boosting/desaturating individual colors, or for tweaking black and white conversions based on color.
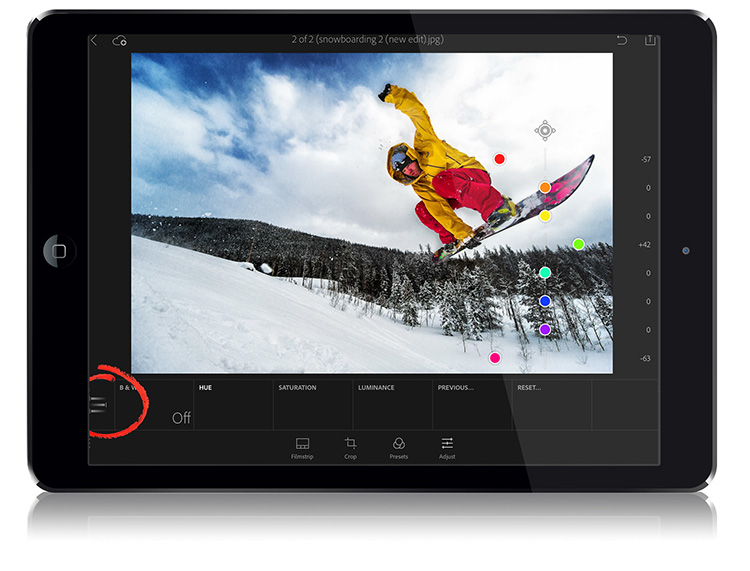
To access this new feature; click on the Adjust icon (along the bottom of the screen), then tap once on the lens icon on the far left and from the pop-up menu that appears choose B&W / Color to bring up the series of color “dots” you see above. They appear in a straight vertical line, and you tap and drag them left or right to adjust each color individually. Like in the Desktop version, you can use these sliders to adjust either the Hue, Saturation or Luminance – just tap on the adjustment tile along the bottom for what you want to change, then drag the color sliders.
Okey Dokey — that’s the main stuff Adobe added in this most recent update (and they’ve been bringing over LR Desktop features at a pretty good pace, and LR Mobile has become a really robust editor, which is a great thing).
Hope you all have a great weekend (I’m shooting the Bucs/Giants game on Sunday), but in the meantime, #rolltide.
Best,
-Scott


This LR Mobile series; it has been extremely helpful. Which of your collections has a mysterious Lightroom Photos thumbnail as its header? There are 350 people in your example. I’m having trouble figuring out where the photos / totals on my iPhone, for example, come from because they don’t directly correspond to or relate to the collections below them. Besides being annoying, it’s also taking up unnecessary storage space. Any chance that it’s picking up information from other photos on the iPhone, like those in Google Photos or the like? Thanks again for all your help.
Is the new collections panel available only on iStuff? I have the android app and the old version is still there. Am I missing something.
In LR Mobile, tap the Share button and choose to Save the image to your Camera Roll – you can upload it using the regular Instagram App. Hope that helps.
thanks
Scott,
Many thanks for this LR Mobile series, very useful. Do you have any idea what the Lightroom Photos thumbnail at the top, above the actual collections relates to? I think in your example above it totals to 350. On my iPhone etc I can’t figure out where it is drawing its photos / total from as it doesn’t directly equate to or relate to the collections below it. Just find it a bit annoying and it must be using a little extra storage space. I wonder if it’s somehow picking up from other photos on the iPhone e.g Google Photos? Thanks again.
Gary
After you make adjustments in LRmobile how do you get how do you get then to Instagram