
When Photoshop Does It Better (retouching tip)
Happy Tuesday everybody. OK, enough chit chat — let’s get to work! I try to do as much of work as possible in Lightroom but there are times where Photoshop either does it faster or better, and today I’ll show you a case where Lightroom doesn’t get nearly as good as result as Photoshop doing a similar task.
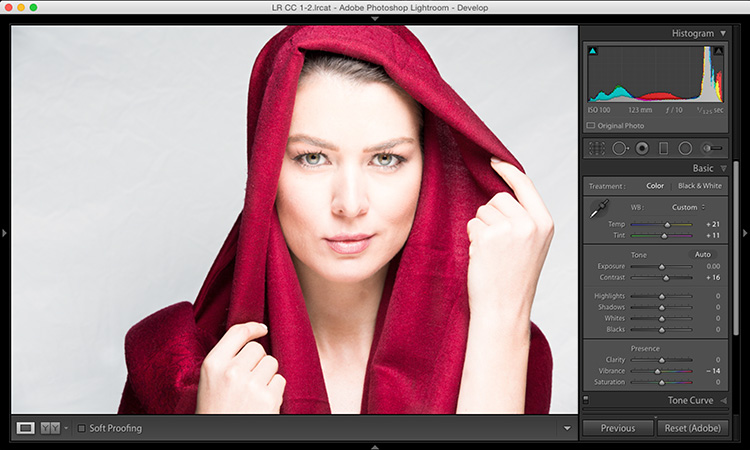
Above: In the portrait you see here, her face is supposed to be bright and that’s supposed to draw your eye, but her hands and arm and not supposed to be nearly that bright. This is something I would quickly fix in post production but in the next step you’ll see what the problem is when I do that in Lightroom.
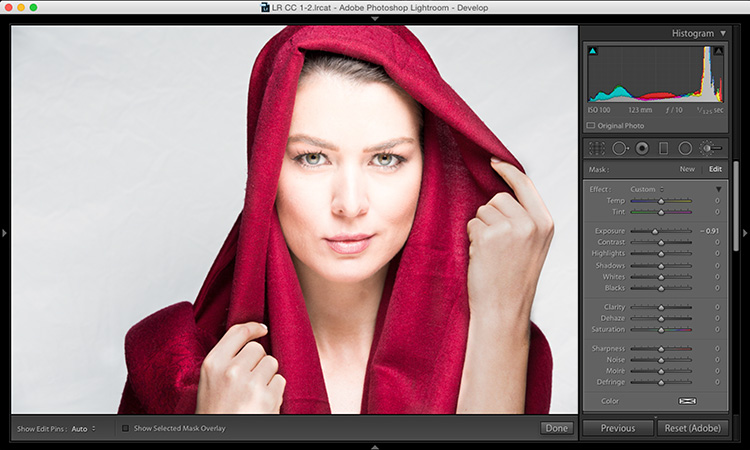
Above: When you darken the exposure on her hands and arms by painting over them with the Adjustment Brush and lowering either the Highlight slider or the Exposure slider, it acts as through you’re painting over her skin with dark gray. I’ve read a number of users complaining about this exact same situation — her skin doesn’t look natural — it looks kind of grayish. That’s why I usually jump to Photoshop for stuff like that and use an entirely different technique.
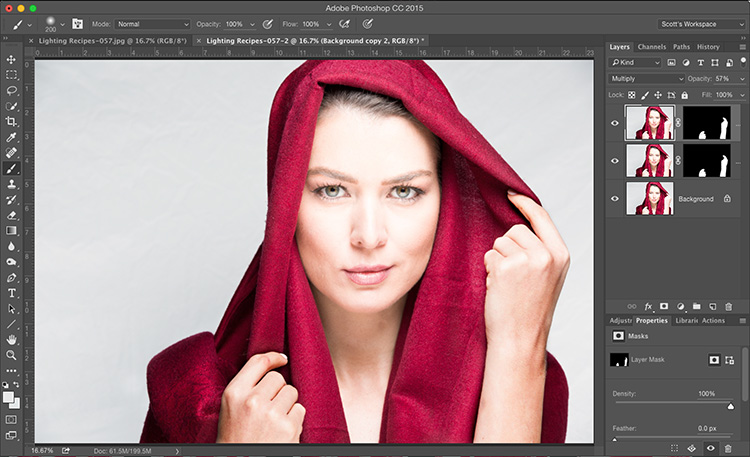
Above: In Lightroom I pressed Command-E to take the image over to Photoshop. There I duplicated the Background layer and changed the Layer Blend mode to Multiply to create a darkening effect. Then I added a black Layer Mask to this layer (you do that by holding the Option key on Mac, or the Alt key on PC, before you click the Layer Mask button). That hides the darker Multiple layer behind a black mask. With the Paint Brush tool, and my Foreground color set to White, I painted over her hands and arms and result looks much more natural — no graying or discoloration. Once I painted it all in, I thought it was still a little bit too light, so I duplicated that Multiple layer, and that doubled-up the effect. Of course, now that seem too dark (that’s how life works, right), so I lowered the Opacity of the top layer until it looked about right to me.
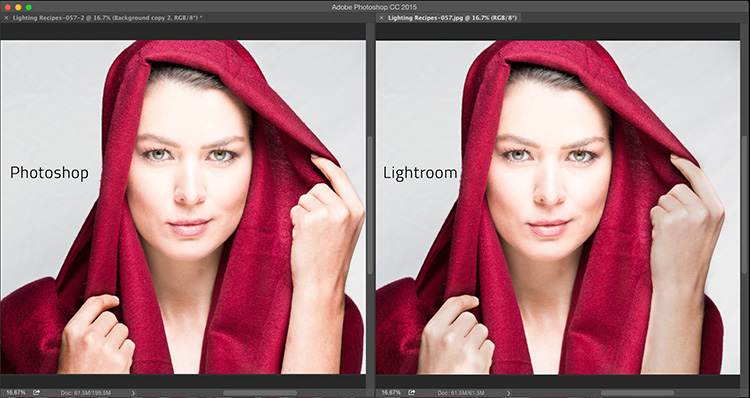
Above: Here’s a side-by-side with the Photoshop retouch on the left, and the darker gray-looking Lightroom version on the right, and you can clearly see the difference.
NOTE: If you don’t have Photoshop, obviously you can’t jump over and do this, so try this instead (sometimes it works well, but it just depends on the image): In Lightroom; with the Adjustment Brush; lower the Exposure amount a little bit, but raise the Contrast amount quite a bit (between 80-100, but again, it just depends on your image) and that does a better job than just darkening the Exposure or Highlights in most cases. Hey, if you don’t have Photoshop, it’s worth a try, right?
Hope you find that helpful!
Best,
-Scott
P.S. Don’t know if you saw the post over on my blog yesterday, but I’m really delighted to announce that none other than Matt Kloskowski himself will be joining us at the Photoshop World Conference in Vegas this summer, teaching in our Lightroom track. Joining Matt are both Serge Ramelli and Trey Ratcliff. Did we add some awesome instructors or what!!! Come out and spend a few day with us learning more about Lightroom, July 19-21 – photoshopworld.com


Scott, by reading at this article, It’s no doubt that you’re very well knowledgeable about Adobe products. I always enjoy reading articles like this one, it gives me more knowledge on how to do this and that on Adobe Photoshop. This one should be read by newbies.
Great Work i love it Scott
Hi!Scott when I have same trouble on the LR,I change color temperature as well.It often works.
Thanks Scott, i always appreciate any tips to make my images look better or make editing quicker.
As Garry says – change the colour of he adjustment brush. You can even pick the colour of the models skin, so you are in effect, using the same ‘multiply’ effect that you used in PS
Hey Scott. Thanks for the tip. TBH, I’m not a huge fan of retouching the LR. Maybe it’s me but I find it easier and more comfortable t retouch in PS.
I have a question that is totally unrelated to this tutorial! I’m on a Windows PC. I have all my photos in a folder called Photos (!) and inside that, i import all my photos into appropriate subfolders. I did an import and forgot because LR remembers the previous import settings, it put the folders into the previous subfolder. I did some editing and then noticed that they were in the wrong folder. So i went onto my Windows desktop and dragged the files into the correct subfolder. Then i synced the folder in LR. The photos were fine but my edits were gone.
When this happens next time (there will be a next time!) how can i move the original photos and also get LR to carry over the Develop module edits?
Many thanks!
Suman
Thanks for this tip, big help to me.
Thanks – that grey tone makes me crazy!
I tend to add some white to the increased exposure for skin. I’ll have to try the multiply method in PS.
Thanks Scott – these little tips have helped me tremendously! Appreciate all the info and tidbits you share!!
That wasn’t to an impressive LR job Scott!
Radial filter:
Haze +50
High light -10
That doesn’t do a bad job (neither does the other setting I have at the bottom of the post), but why would you use the Radial Filter instead of the Adjustment Brush? There’s no way to contain the spillover?
I’ve found that if I warm the color balance of the adjustment brush just a little bit it removes the grey.
Scott, you are the real pro among us. Very few, at least not me, can compete but the girl’s arm looked terrible after your LR adjustment. I copied and just draw a long, slightly tilted and narrow radial oval around her arm to see what happened with a two adjusts and they came out a lot better. Sure there would be some slight spill over dependant on the settings and the radial shape.