

This is something I’ve covered in my Lightroom books for years, but a lot of folks haven’t taken advantage of Lightroom’s ability to using two monitors, so you can work on and search through and edit down on one screen and also see a huge, full-screen version of your photo on another. So, I thought I’d include an excerpt here, because beyond just using two monitors, there are some very cool things you can do with it, once it’s set up (and here’s how to set it up).
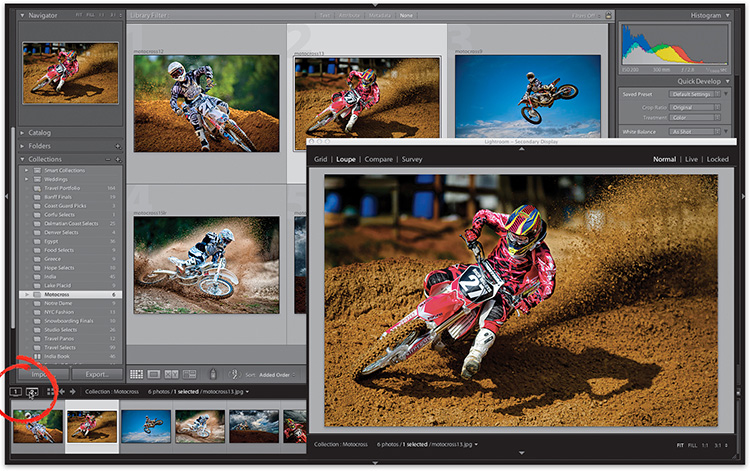
Step One: The Dual Display controls are found in the top-left corner of the Filmstrip (shown circled in red here), where you can see two buttons: one marked “1” for your main display, and one marked “2” for the second display. If you don’t have a second monitor connected and you click the Second Window button, it just brings up what would be seen in the second display as a separate floating window (as seen here).
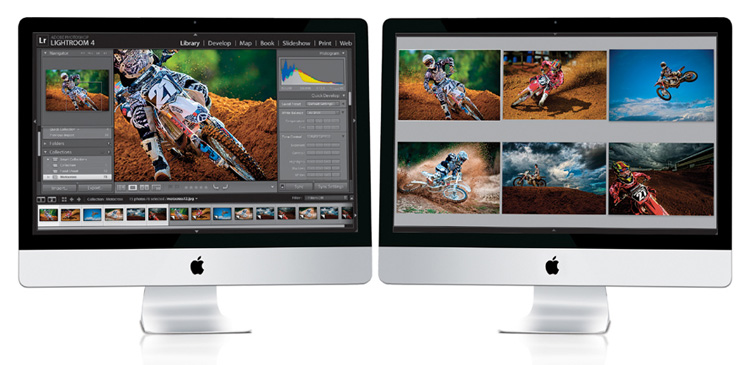
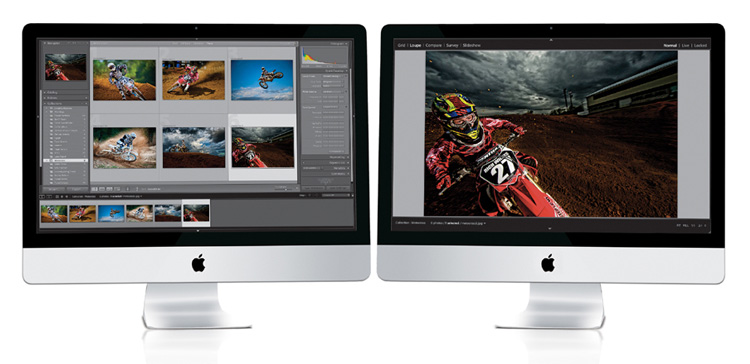
Step Two: If you do have a second monitor connected to your computer when you click on the Second Window button, the separate floating window appears in Full-Screen mode, set to Loupe view, on the second display (as seen at the top of this post). This is the default setup, which lets you see Lightroom’s interface and controls on one display, and then the larger zoomed-in view on the second display.
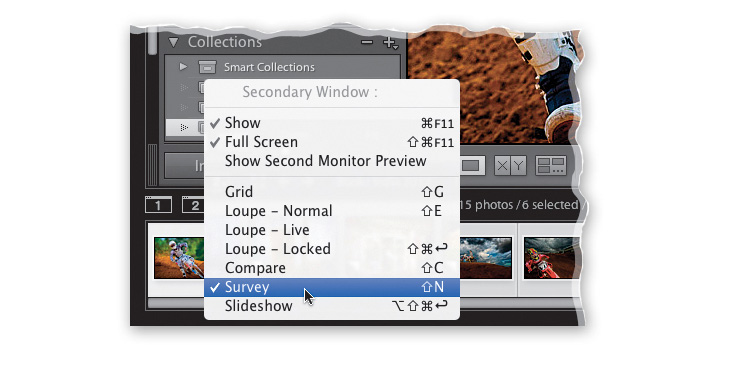
Step Three: You have complete control over what goes on the second display using the Secondary Window pop-up menu, shown here (just click-and-hold on the Second Window button and it appears).
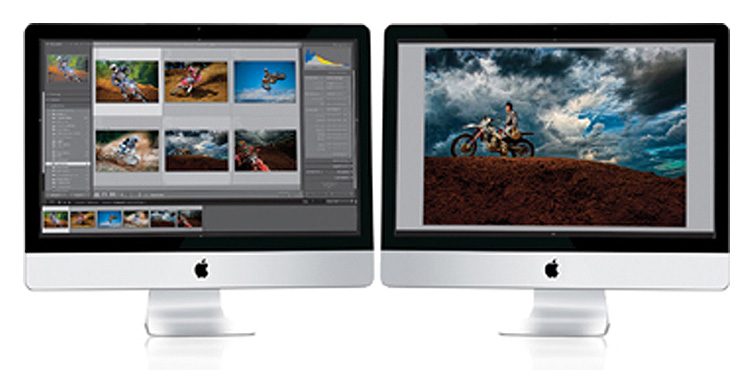
For example, you could have Survey view showing on the second display, and then you could be zoomed in tight, looking at one of those survey images in Loupe view on your main display (as shown below). By the way, just add the Shift key and the Survey view, Compare view, Grid view, and Loupe view shortcuts are all the same (so, Shift-N puts your second display into Survey view, etc.).

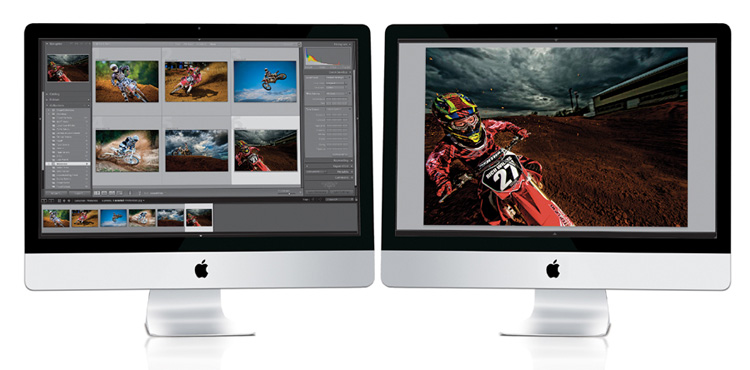
Step Four: Besides just seeing things larger with the Loupe view, there are some other pretty cool Second Window options. For example, click on the Second Window button and choose Loupe – Live from the Secondary Window pop-up menu, then just hover your cursor over the thumbnails in the Grid view (or Filmstrip) on your main display, and watch how the second display shows an instant Loupe view of any photo you pass over (here, you can see on my main display the first photo is selected, but the image you see on my second display is the one my cursor is hovering over—the fifth image).
Step Five:
Another Secondary Window Loupe view option is called Loupe – Locked and when you choose this from the Secondary Window pop-up menu, it locks whatever image is currently shown in Loupe view on the second display, so you can look at and edit other images on the main display (to return to where you left off, just turn Loupe–Locked off).
Step Six: The navigation bars at the top and bottom of your image area will be visible on the second display (as seen above). If you want those hidden, click on the little gray arrows at the top and bottom of the screen to tuck them out of sight, and give you just the image onscreen (as seen below).
Hope you found that helpful, and here’s wishing you a really fun weekend. 🙂
Best,
-Scott
P.S. I’m in Denver today with my Lightroom Seminar, but next month I’ll be in Phoenix and Houston. Hope I’ll get to meet you there.
Would be great to have two library windows open!
I don’t see any value in this function. In Photoshop I can move the image I am working on to a second monitor, for me my Cintiq tablet, and work on it. In Lightroom you can’t do anything with the image. My cintiq is 12″ great for working on one image, not so great for dragging LR over to and working on an image.
This a major fail Adobe
Hi Scott,
I have 3 monitors and the second window display “ALWAYS” appeared on the third monitor. Any possibility that ADOBE provided a solution for this issue already instead of dragging the windowed second display to the second monitor? Thanks
And for those of us who don’t have 2 monitors, or are mobile and on the road, there’s an awesome ipad app calledDuet Display that can turn your iPad into a second monitor. It’s a fantastic app.
Hi Scott,
and thanks for your hints. But with the two monitors I’ve troubles for years. Config as follows: first monitor: enlarged view, edit view. Second monitor: grid view. For example: I have three photos selected. When I want to assign the color red to these three photos on the 2nd monitor, only the first photo gets the color. So I have to click every photo and assign the color. Same with rating.
Do you have a hint what goes wrong here?
Heh. Had to chuckle. First thing I did was move this over to the second window so I could follow the instructions and try it out with LR in my main wi… Oh wait… Guess I’ll be sticking to single window LR for now…