
I got a question this week about how to create export presets in Lightroom Classic for different watermarks, and I thought it would make for a good tutorial. I’m just going to cover the process of creating Export dialog presets, but you can check out this video from Scott on the watermark editor if you need that aspect too.
Step One: Select at least one photo for export. You can select as many photos as you want/need, but if you are only going through the steps to create the preset then a single photo will do.
Step Two: Click the Export button to open the Export dialog.

Step Three: Configure the Export Location panel based on where you want the exported copies to be saved. There are a couple of ways to approach this section.
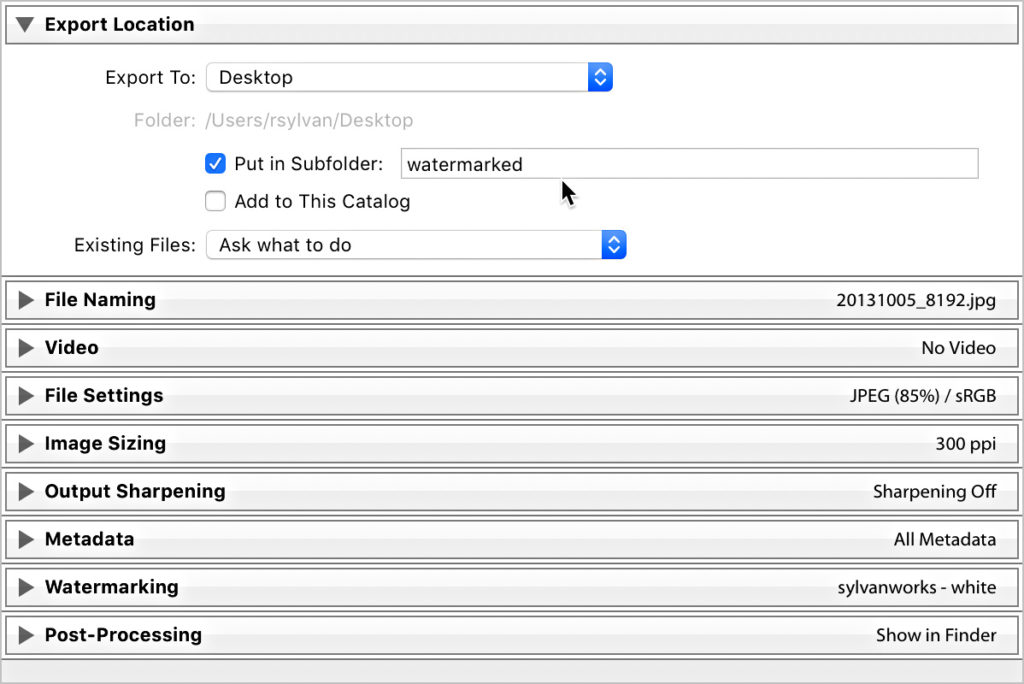
One option is to select a specific folder that becomes the designated location for all watermarked copies. This could make it useful to find those watermarked versions when uploading to a website or adding to an email or whatever your next destination may be for those photos. In this case, click the Export To drop-down menu and choose a specific folder or maybe your desktop. In my example I selected Desktop and then configured the dialog to create a subfolder on the Desktop called Watermarked.
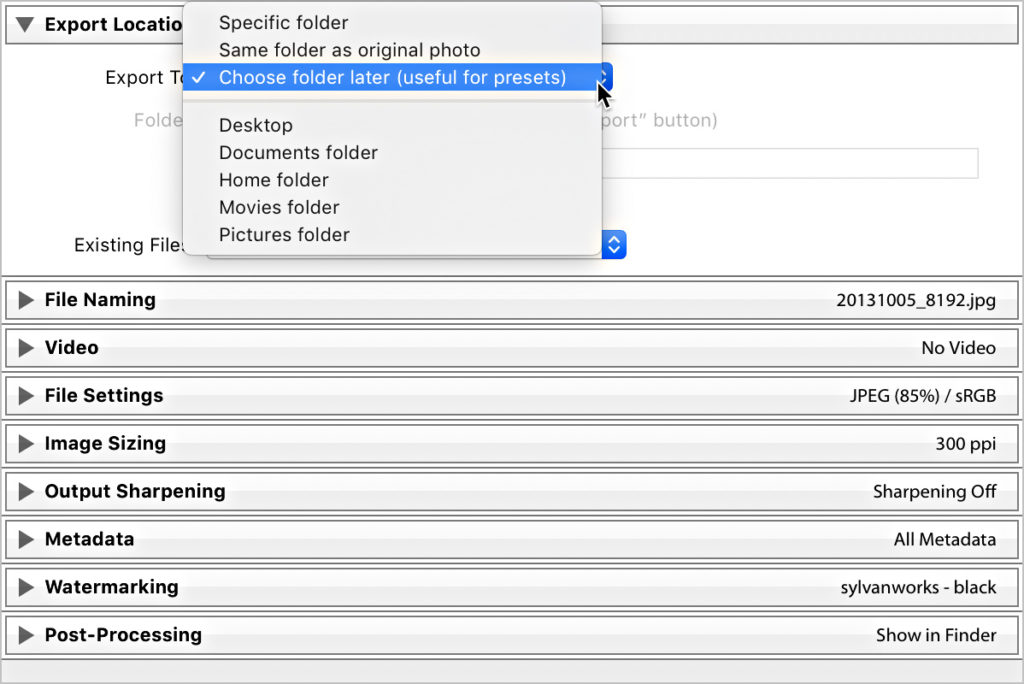
Another option is to set the Export To drop-down menu to Choose folder later (useful for presets). This way you don’t have to hardcode in a destination into your preset. Each time you export with your preset you will be prompted to choose a destination for the copies at that time.
Choose whichever option suits your needs the best.
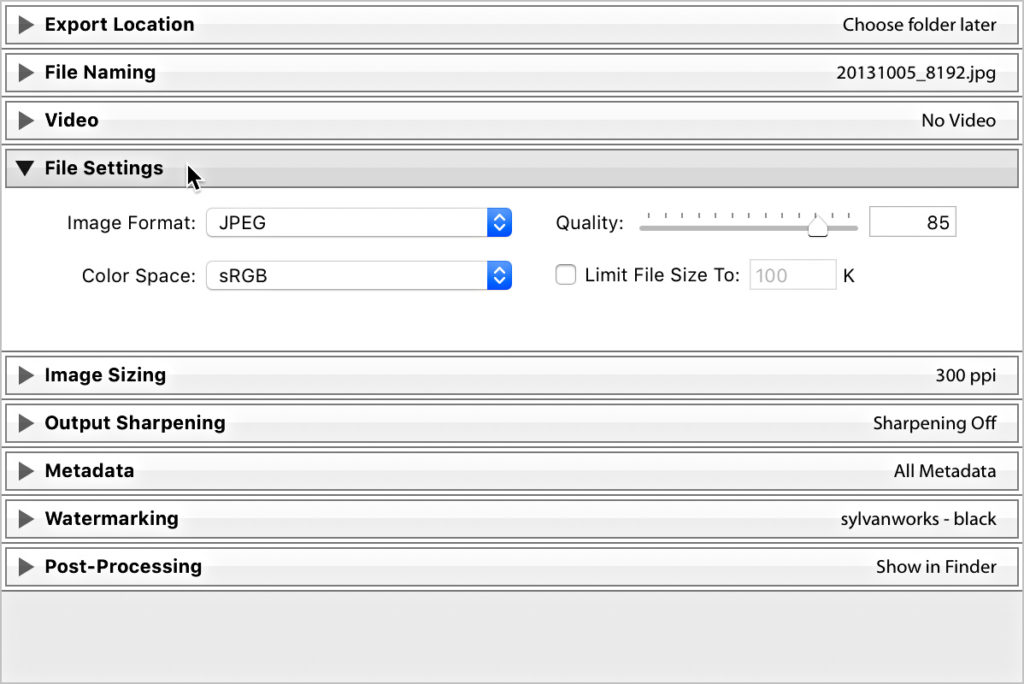
Step Four: Jump down to the File Settings panel and choose your desired file type, color space, and any other setting specific to the chosen file type (like Quality for JPG). It is safe to assume that JPG is the most likely choice, and in that case sRGB is the safest color space choice. I find that a Quality setting of 85 provides a nice looking file and a much smaller file size than 100.
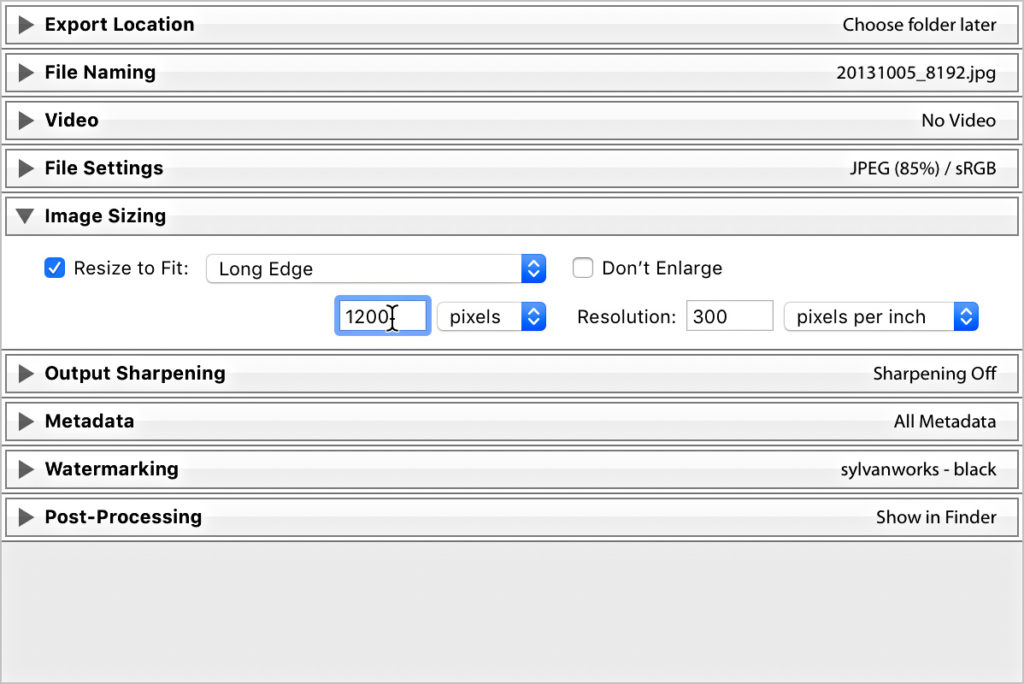
Step Five: Expand the Image Sizing panel and configure based on your specific output needs. There is no one right answer here. In my example I set the Long Side to 1200 pixels, which is suitable for a lot of web/sharing situations. You can read my thoughts on that darn resolution field.
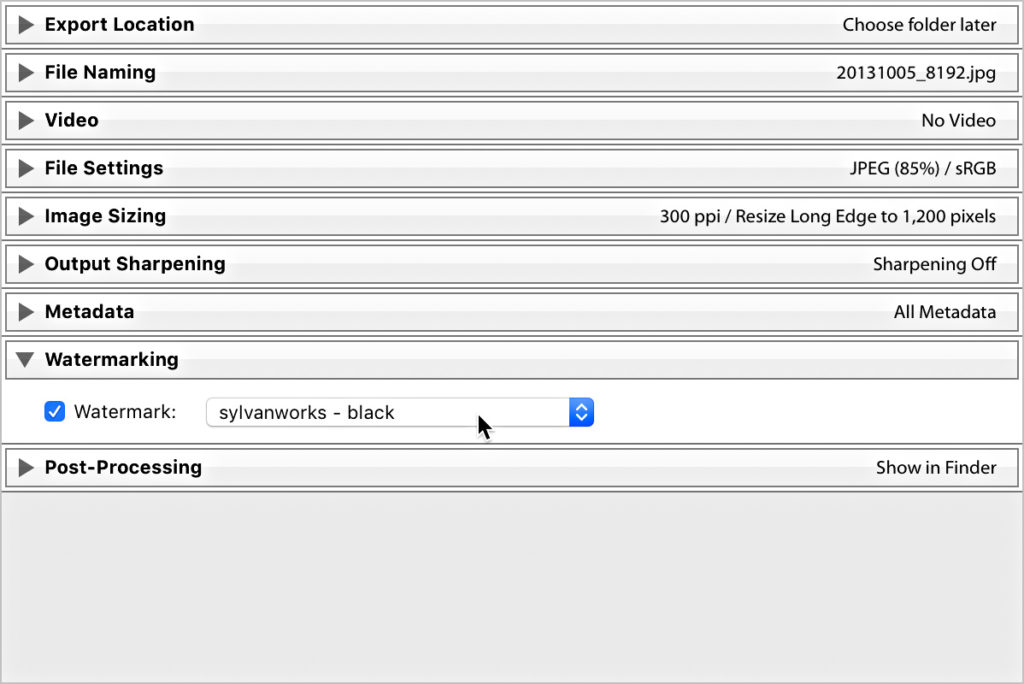
Step Six: Jump down to the Watermarking panel and choose your watermark preset (refer to the link at the top for the tutorial on the watermark editor if needed). If you are like the person who sent in the question, you may have more than one watermark (like a white and a black version). If so, then you’ll repeat the process of creating the export preset with each watermark.
Step Seven: Configure all remaining panels as desired. You’ll notice that I skipped over some panels, like File Naming and Metadata. I didn’t skip them because they are not important, but simply because there is no one answer for all export situations. Simply configure them the way you want them to be configured for your preset.
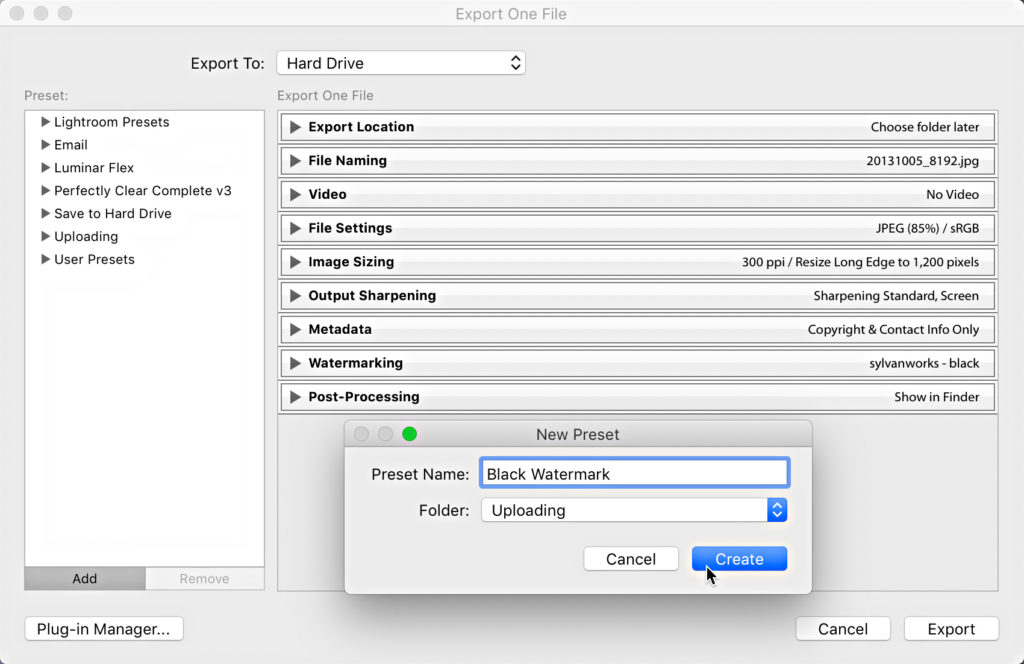
Step Eight: Double-check all of your settings in each panel, then click the Add button under the preset section of the dialog. This will open the New Preset popup window where you can enter a meaningful name for your preset. I also recommend placing your preset in a logical folder to keep your export presets organized. Click Create to complete the process and your new preset is ready to go.
As I mentioned, if you have more than one watermark that you’d like to create a preset for then you’ll need to reconfigure the Export dialog to include that preset, then click Add again to create a new preset.
One last tip, once you’ve created your export presets you can access all of them via the File > Export with Preset menu, which will apply all of the settings in your preset without even opening the Export dialog.


Is there a way in the export menus to export to a collection/collection set? On import you can get lightroom to put your images into one, but I’m stuffed if I can find a way to specify a route out after/during export.
No, that’s not possible. However, when you export and check the box to add to catalog a special collection will appear in the Catalog panel showing the photos added via the export. You can then select all of those photos and add them to a collection manually pretty easily. Hope that helps!
Not just me being daft then. Thanks Rob