
Retouching Portraits in Lightroom, Part 3
Before we get to the article – some quick news. My all-new book, “Light it, Shoot it, Retouch it” (for flash), is finally here, and my publisher has an absolutely insane one-day sale on it. All the details are on my daily blog today at scottkelby.com – hope you’ll check it out (and get the book for nearly 60% off).
Retouching Teeth, Hair, and Eyes
It’s our third installment of this new retouching column (well, I’m not sure it’s quite “new” anymore). Last week, we looked at using a skin-smoothing technique and how we could use that to create smoother transitions of tones on our subject’s face, and we got to use some of the new Person Mask Options. This time, we’re going to dig in a little deeper on using these options for a variety of retouches.
RETOUCHING TEETH
The interesting thing about this one is that Teeth masking is often invisible. The choice of masking teeth only appears in the Person Mask Options panel if your subject is smiling, which makes sense when you think about it. Here, take a look:
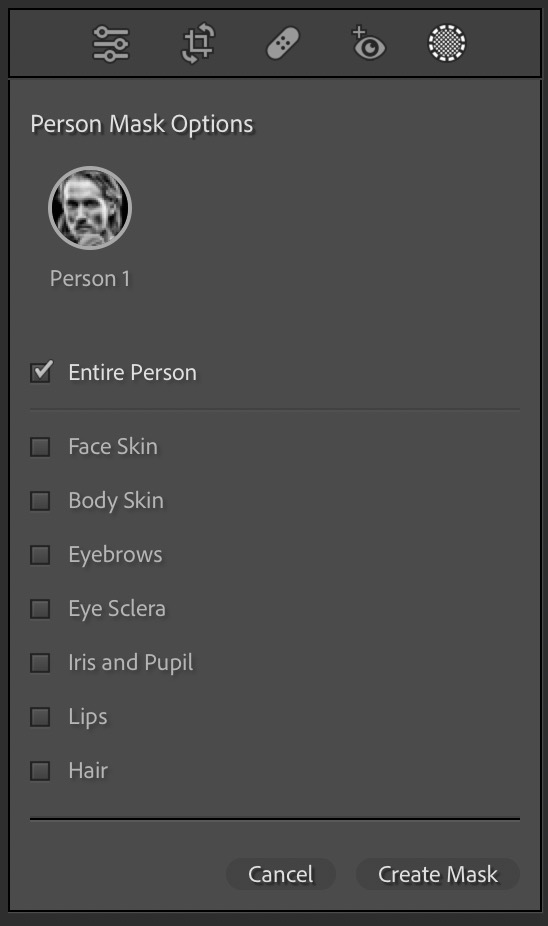

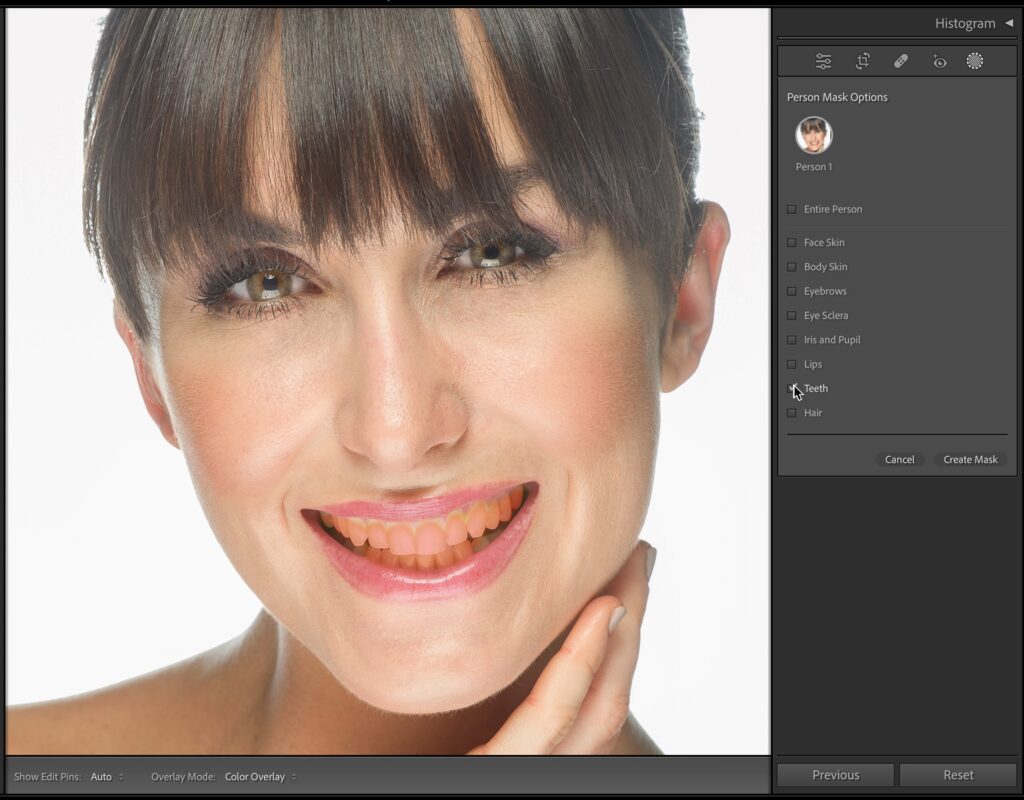
STEP ONE: After clicking on the Masking tool, then clicking on the Person thumbnail in the People section, go ahead and turn on the Teeth checkbox to select only your subject’s teeth (as shown here), and then click the Create Mask button to mask them. (KelbyOne members can click here to download this image for practice purposes only.)
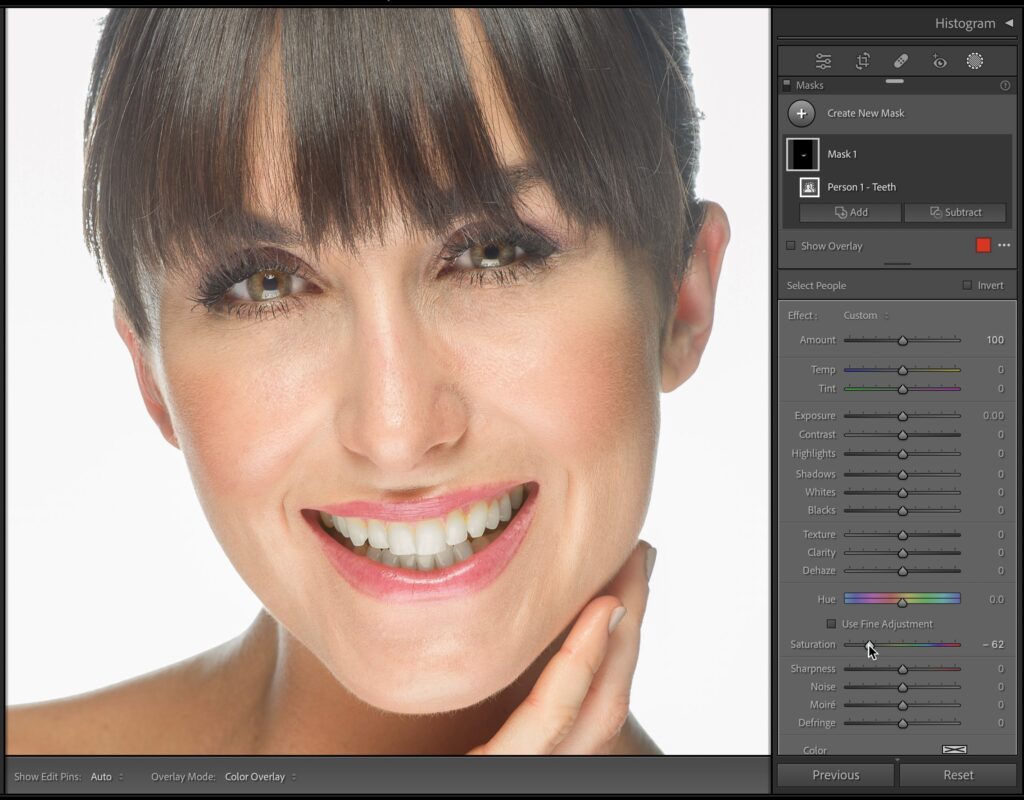
STEP TWO: Your subject’s teeth will appear with a red tint when they’re masked but, as soon as you drag a slider, the red tint goes away. So, let’s start by removing the yellowing from the teeth by scrolling down in the adjustment sliders to Saturation and drag- ging this slider to the left. Drag just far enough to remove the yellow. If you desaturate the teeth too much, they’ll turn gray, so don’t go all the way over to the left (here, I dragged it to –62).
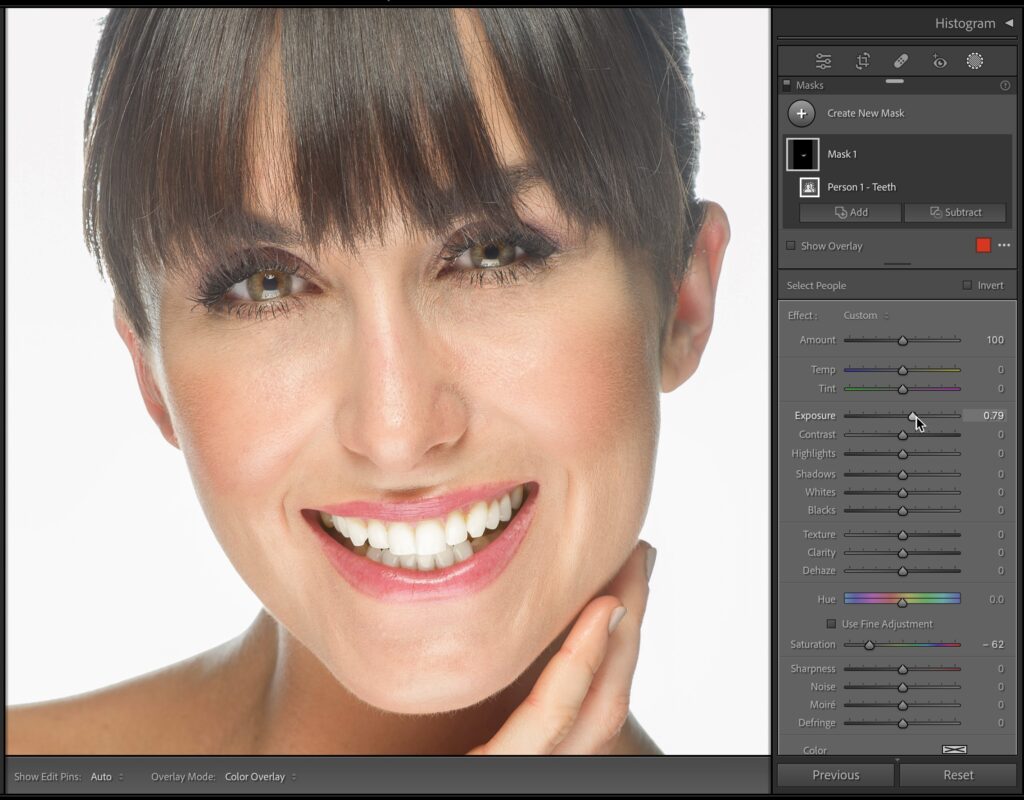
STEP THREE: Now, let’s brighten the teeth a bit by going up to the Exposure slider and dragging it to the right (0.79 here), which does the trick.
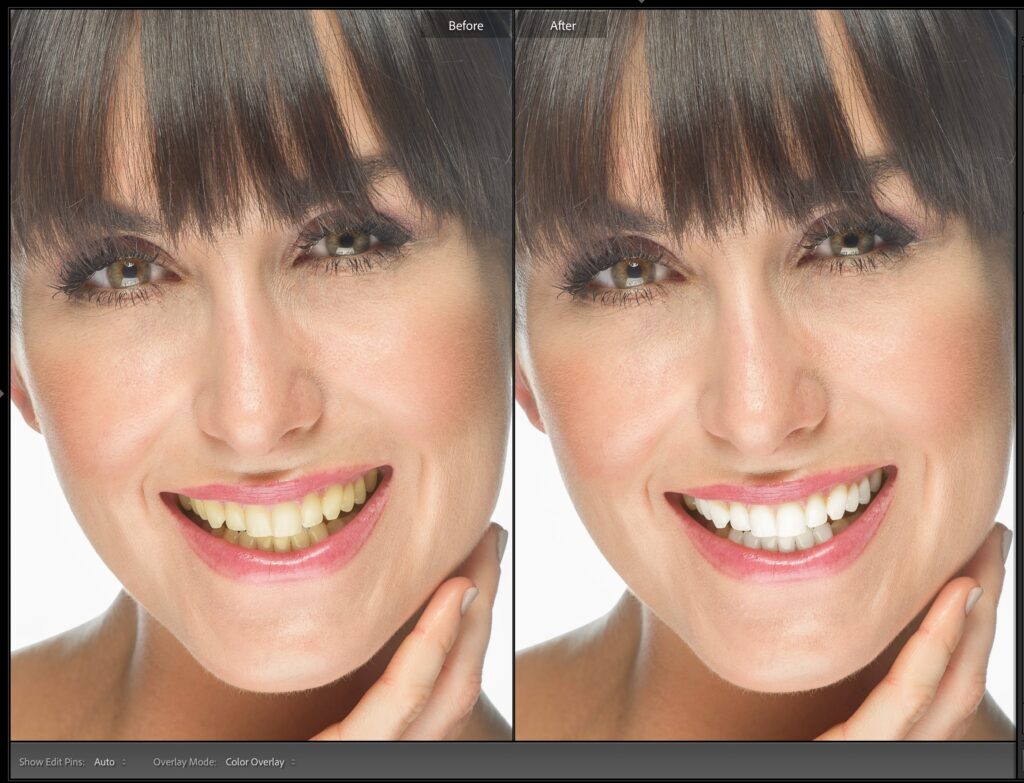
Here’s a before/after. That was super easy, right? Okay, let’s try another retouch.
RETOUCHING HAIR
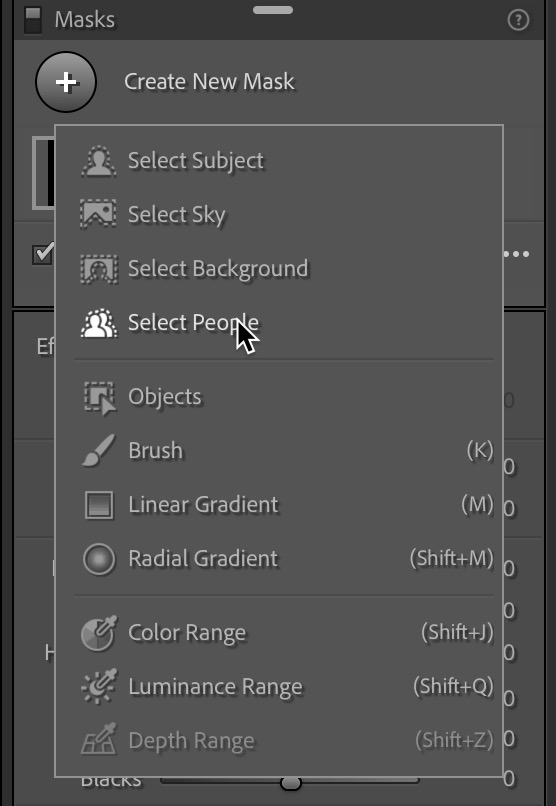
STEP ONE: Go to the top of the Masks panel, click on Create New Mask, and from the pop-up menu, choose Select People (as shown above).
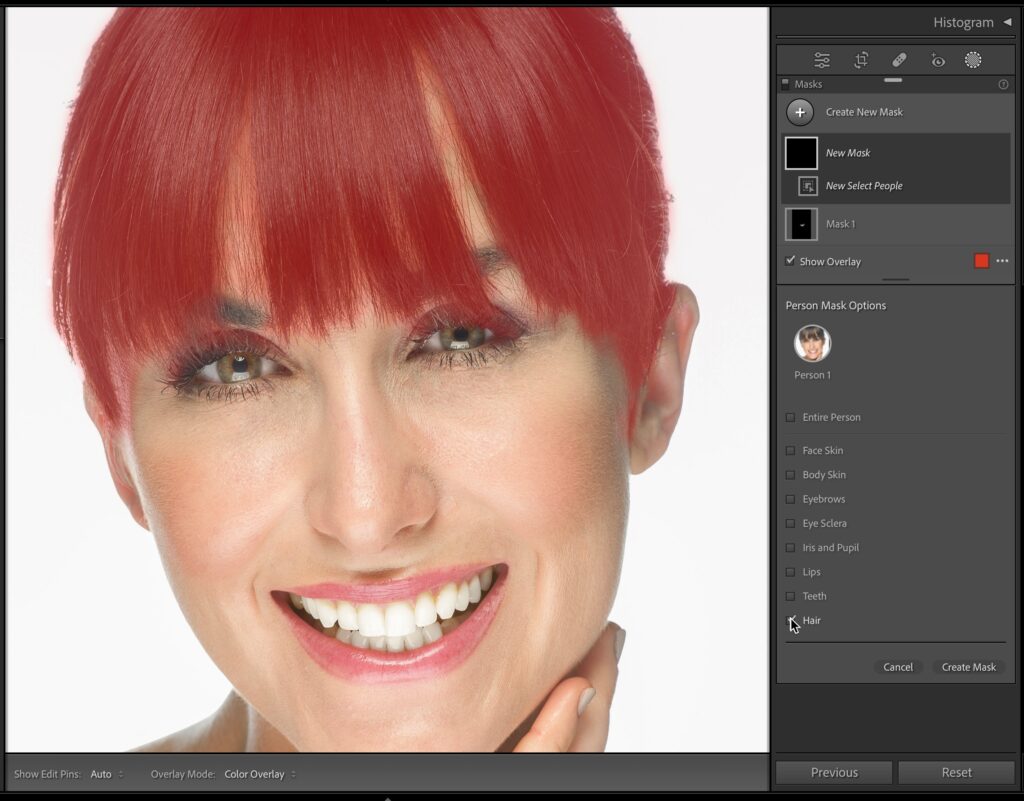
STEP TWO: In the People section, click on the circular thumbnail of your subject to bring up the Person Mask Options again, but this time, turn on the Hair check- box. Now, click the Create Mask button at the bottom of the panel to select your subject’s hair (as seen here). I know, the red hair looks pretty good, but that’s just the red-tint overlay; we’re going in a different direction.
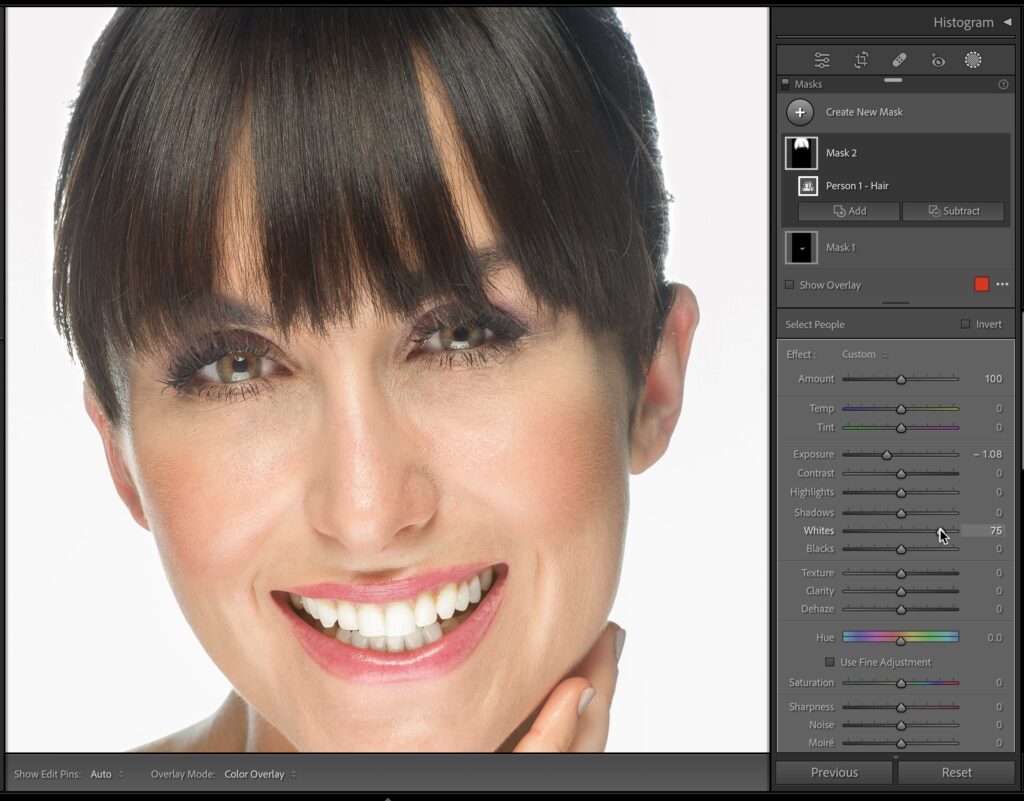
STEP THREE: Let’s darken our subject’s hair by dragging the Exposure slider to the left (here, I dragged it to –1.08, so a little more than a stop darker). Next, let’s bring out the highlights in her hair by dragging the Whites slider to the right (here, I dragged it over to 75.) If you don’t think that’s enough, you can drag the Highlights slider over to the right, as well: your call.

Here’s another before/after (you can get a before/after by pressing the Y key on your keyboard), showing just the hair changes we did. Okay, up for one more? Let’s go!
RETOUCHING THE WHITES OF THE EYES
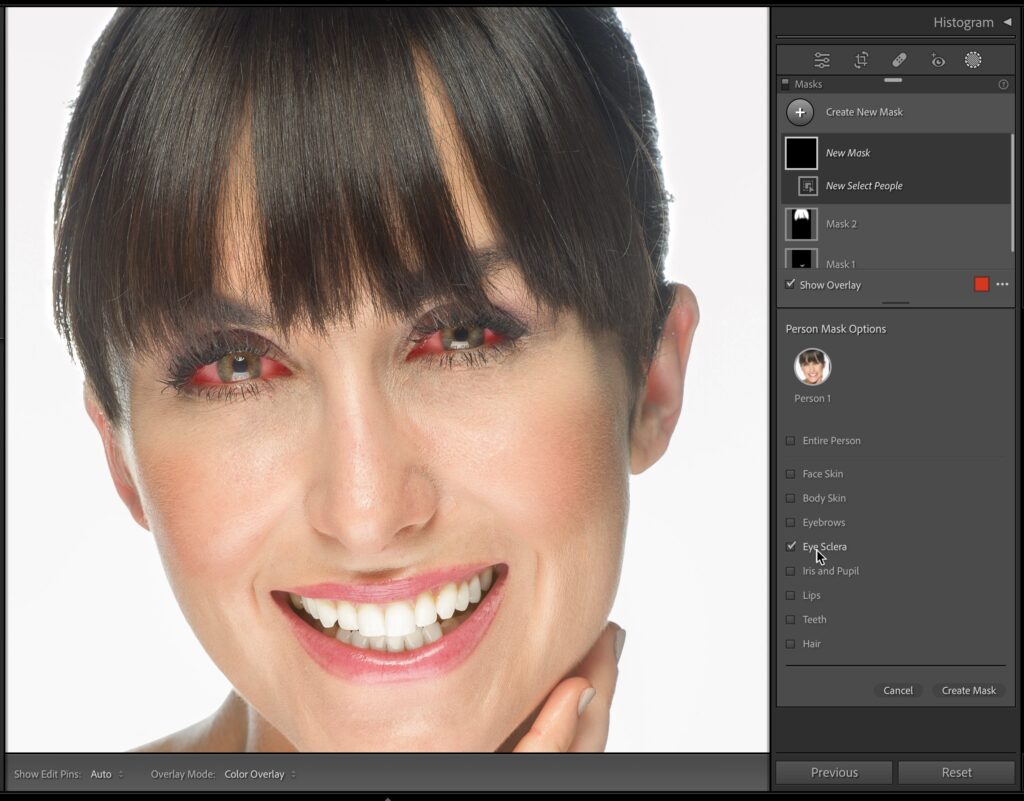
STEP ONE: Go to the top of the Masks panel, click on Create New Mask, and from the pop-up menu, choose Select People. Click on the Person thumbnail of your subject. In the Person Mask Options panel, turn on the Eye Sclera (the whites of the eyes) checkbox (as shown here), then click the Create Mask button. This adds a red tint to the eyes (that’s the red-tint overlay mask you see again).
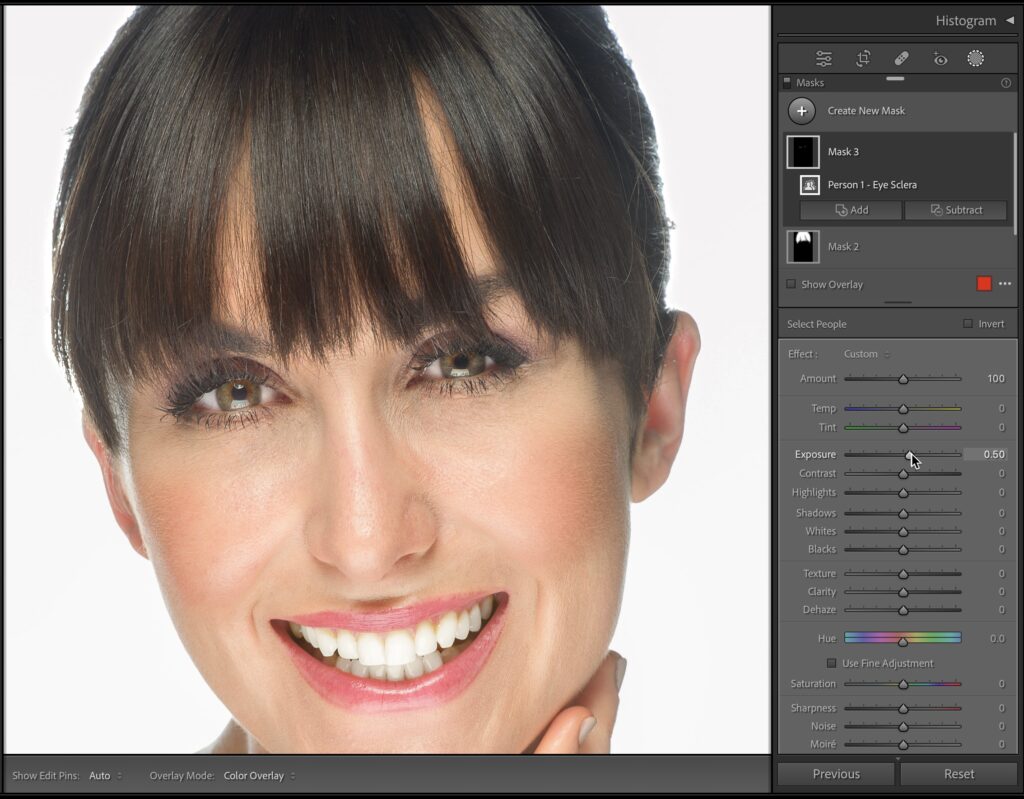
STEP TWO: We’re going to brighten the whites of the eyes here because I think they’re a little dark (probably because her bangs block the light a bit). But, before we just grab the Exposure slider, I want to give you a heads-up: over brightening the whites of the eyes is one of the most common retouching mistakes photographers make when they first start retouching, so be careful to avoid that. In this case, we just need a little brightening, maybe just half a stop, so drag the Exposure slider to the right to 0.50, and you’re done. If you go much farther, she’ll have “alien eyes,” so we’re better off under-retouching the brightness here than over-retouching it.
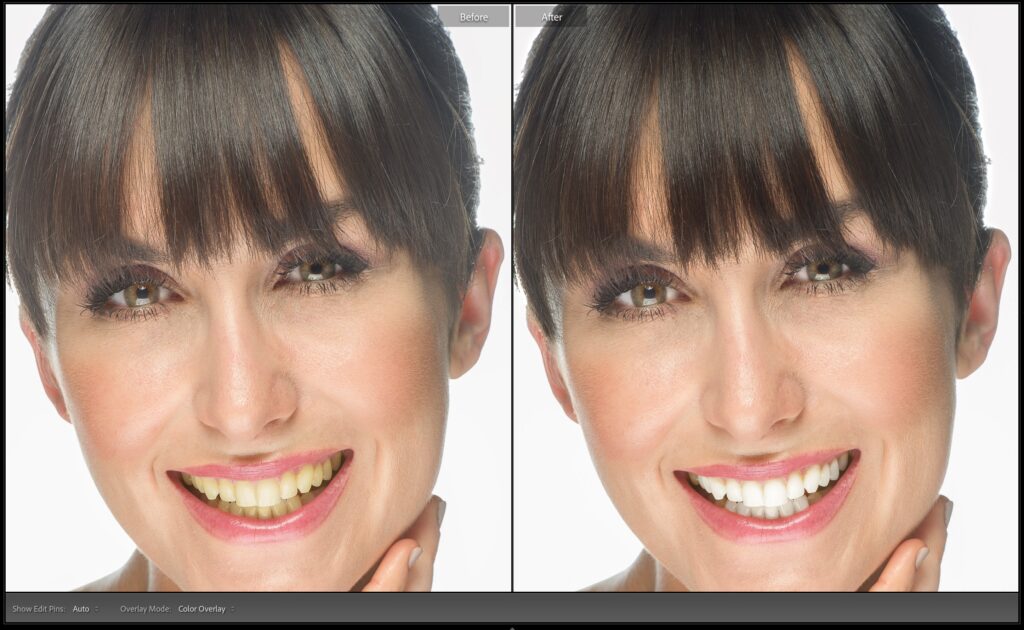
Let’s look at a final before/ after of our retouching. All simple stuff, all easy to do, but it does make a difference.
Next time, we’ll dig a little deeper into the world of retouching portraits in Lightroom. See ya then. Have a great weekend, everybody!
-Scott


Good information. Another time saver is when you select people you can check all of the persons features that you want to work on and it will create multiple masks at once, one for each feature that you checked.
Great point (and absolutely spot on). 🙂
Nice, simple and easy to follow Scott. Especially like the hair enhancement, so easy yet it makes a big difference.
Thank you, Matt. 🙂