Greetings from beautiful Seattle, where today I’m wrapping up the last Lightroom seminar in my week-long West Coast visit. I’ve had such a great time so far – seeing lots of familiar faces and making new friends along the way. I’ve got a red-eye flight home tonight where I’m gonna Zzzzzzzzz big time! 🙂
Hey, before we launch into this — my friend and colleague Erik Kuna did a guest post today over on my personal blog on how to shoot the Eclipse. He has some great insights and techniques – here’s the link to check it out.
Today just a quick tutorial on how to remove any purple and/or green Chromatic Aberrations. It’s really simple – here’s what to do:
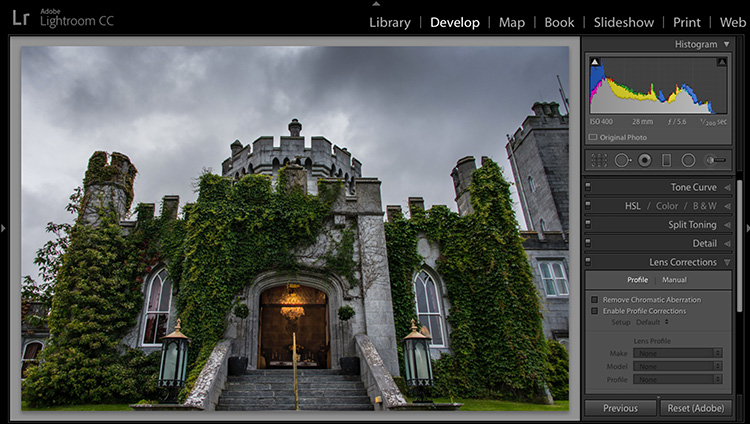
Above: Here’s our image. When it fits onscreen like this, you can barely see if there’s any fringing problem at all.
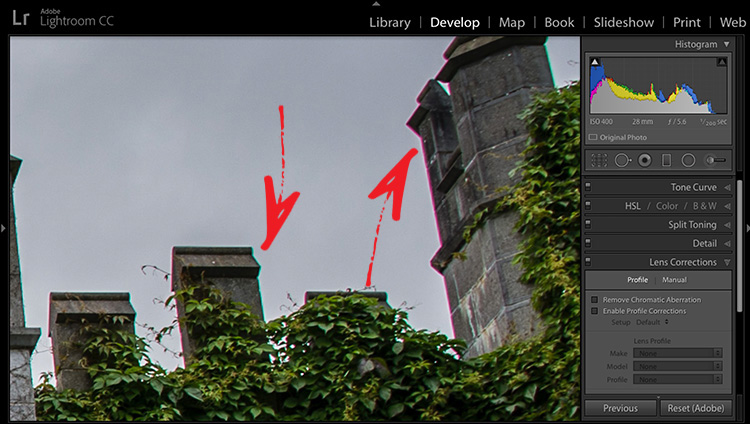
Above: When you zoom into full size or tighter, you can really see the purple on the side of the tower on the right and on the chimney on the left. If you see that, here’s what to do.
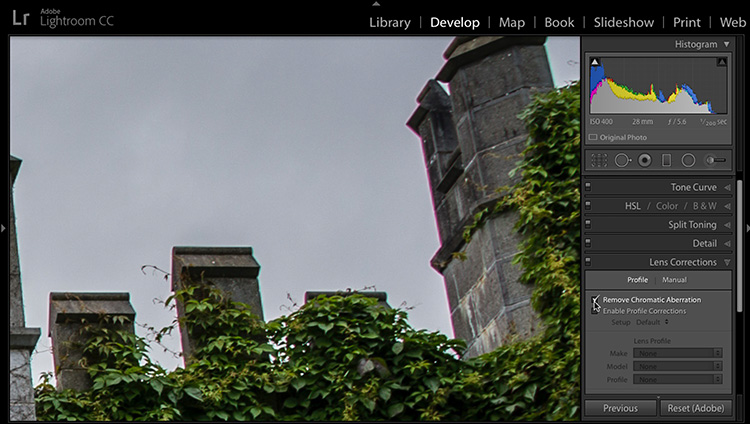
STEP ONE: Depending on how severe the Chromatic Aberrations (color fringing) appears, this might be a one-click fix — just go to the Lens Correction panel; click on the word “Profile” to show its options; then turn on the Checkbox for Remove Chromatic Aberration (as shown here). That alone might just do the trick. In this case, it looks like it reduced the fringing by about 1/2, but it’s so strong in this image, you can still see it, so we have to work a little harder.
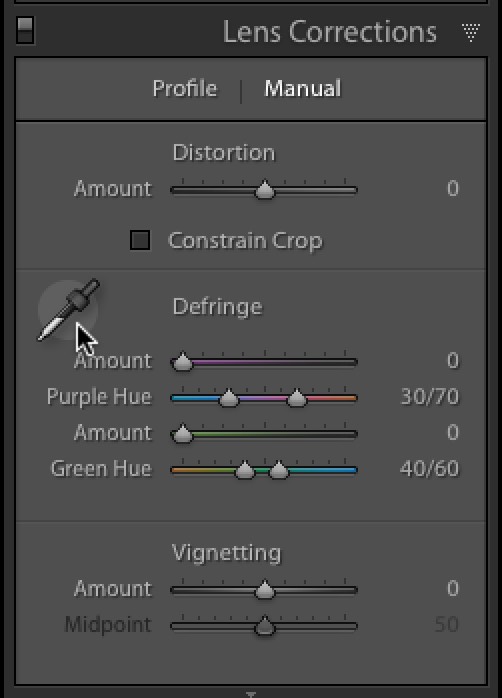
STEP TWO: Click on the word “Manual” to show its options, and click on the Fringe Color Selector Tool (that’s it above – it looks just like the White Balance eyedropper tool).
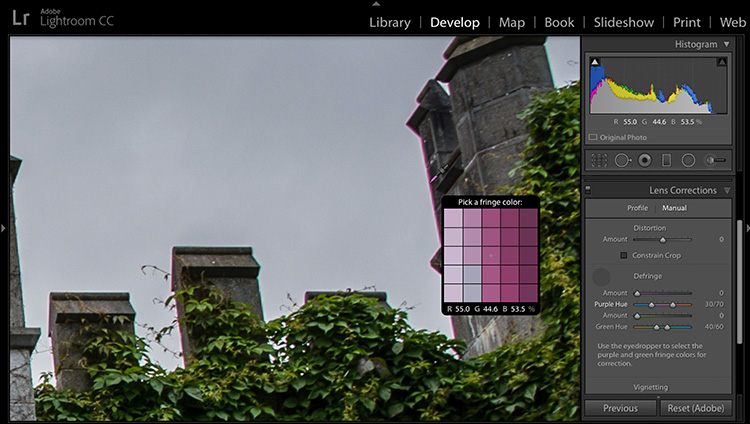
STEP THREE: Move your cursor right over the visible fringe as shown above. The tool has a pop-up Loupe that magnifies the pixels your cursor is currently hovering over, so you can more easily target just the purple fringe. When you get right over it, just click once to target that color.
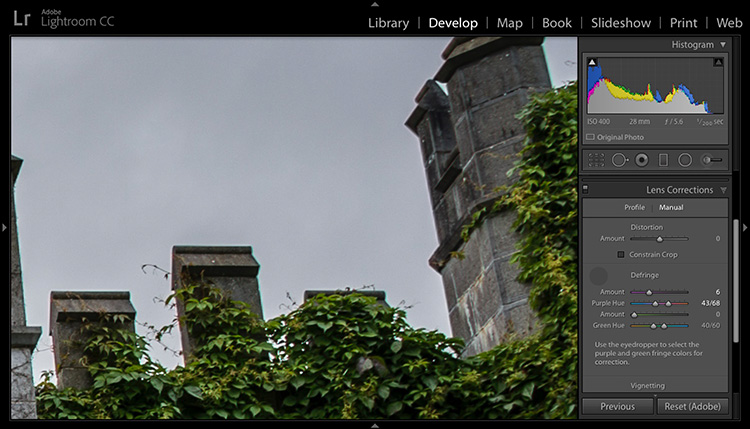
STEP FOUR: That pretty much did the trick for the purple fringe, but there’s still a little green fringe, so take the tool and click on that green fringe along the right side of the chimney to select that area. If you still see any left over (of either color) you might have to increase the amount of Defringing over in the Lens Correction panel by dragging the Amount slider to the right for either the Green or Purple or both.
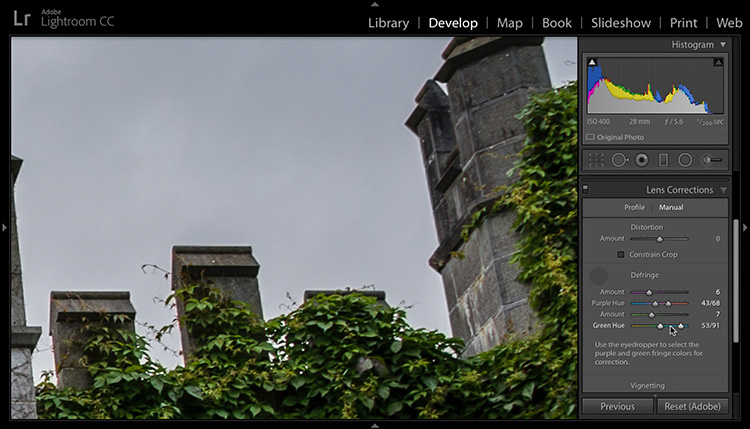
STEP FIVE: If you still see any left at all, you also might need to drag the Green Hue or Purple Hue slider to the right or left until you see the fringe go away. I usually don’t have to go this far to get rid of fringe, but maybe 1 or 2 times out of 10, I have to drag those Hue sliders, so you’ll need to know that’s a possibility. 🙂
Hope that helps. Looking forward to meeting a bunch of you here today in Seattle.
Have a great weekend, and here’s to getting a good night’s sleep. 🙂
Best,
-Scott


