Quick Tip For Dealing With ‘Overlit’ Flash in Portraits
Hi Gang, and happy Monday. Here’s a quick tip I use when I over-light a portrait (hey, it happens). It uses a part of Lightroom you already know, but you just might have not thought to use it in this fashion, so I thought it was worth sharing.
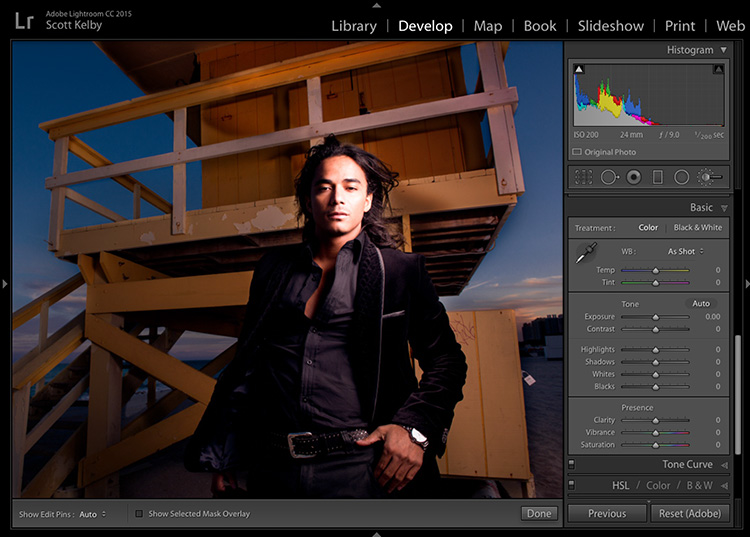
Above: Here’s a shot taken at sunset where I clearly overlit my subject. It’s not supposed to look like I aim a Home Depot flashlight at his head, which is pretty much what this looks like — it’s way too bright (I just simply had the power of the flash up too high).
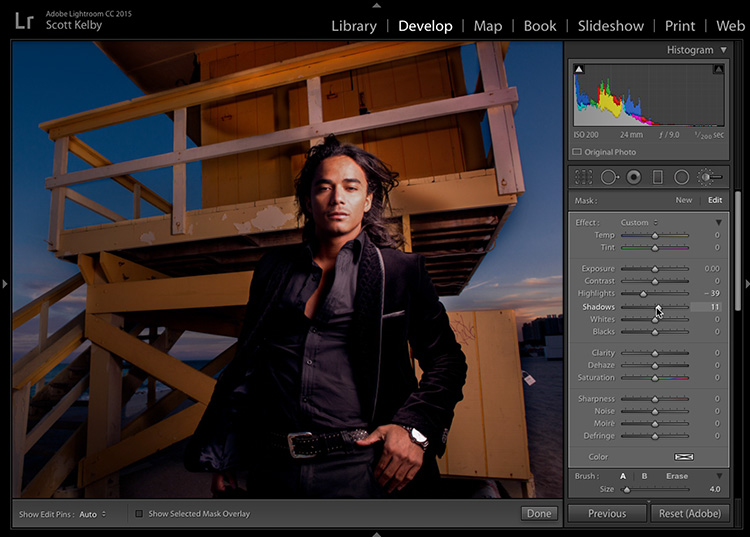
Above: Get the Adjustment Brush; double-click on the word “Effect” at the top left corner of the panel to reset all the sliders to zero, then drag the Highlights to left a bit, and increase the shadows a little bit (as seen above). I went a little farther than I should here to illustrate the point, but at least you get the idea.
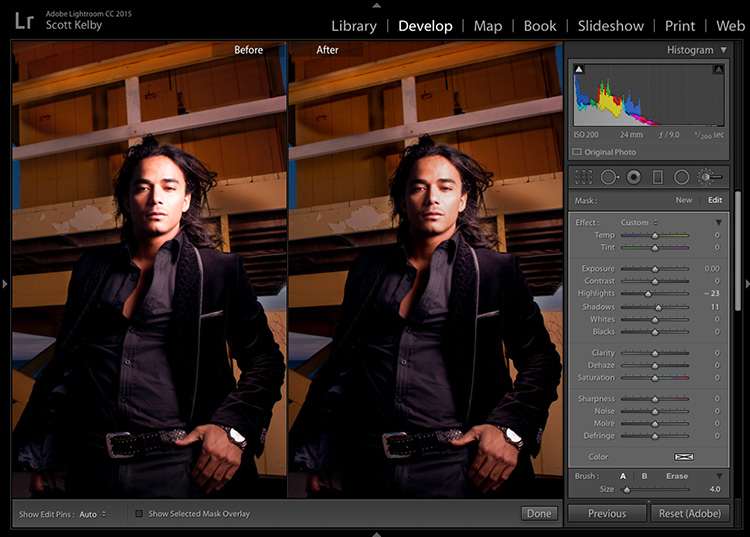
Above: Here’s a before and after, after I toned down the Highlight amount to something more reasonable (in the previous image, I had it set at -39 but I adjusted it so it looked more natural and wound up at -23 on the Highlights). Again, it’s a simple little move, but I think it’s worth doing in situations like that.
NOTE: Lighting Stuff
I should have noticed that I was over lighting the image and turned down the power of the flash during the shoot, so in reality I shouldn’t have even had to deal with this in post at all, but there’s a bigger problem: I lit this portrait from the wrong side. You can see that the sunset is out over the water, and the light would have been coming from that direction, so and I should have lit it from that side which I think is a bigger issue in this case than the easy-t0-fix in Lightroom over lighting problem. Just thought it was worth mentioning.
If you get a chance…
I did a post over on my blog today about some of the cool stuff happening at the Photoshop World conference this summer, and of course, we have a ton of Lightroom training there as well (all day, everyday, in fact), so if you get a chance, I hope you’ll pop-on over and check out the latest news.
Hope you have a great Monday (I know, that’s easier said than done). 😉
Best,
-Scott
P.S. Next week I’ll be in Birmingham, UK at The NEC for “The Photography Show.” I’ll be speaking on the “Super Stage” next Monday and Tuesday and I hope I get to shake your hand and say “Howdy!” while I’m there. Details on the event are here (it’s my first time, but everybody tells me it is an awesome show, so I’m really excited to be speaking there!).


At sunset, lighting changes very very quickly. The last thing you should do is calculate the fill. You should then recalculate it every minute of shooting.
It’s also virtual
It’s A Best Classifieds Site In India,Provide A Audelt Services. Online dating websites Classifieds Site In India are first rate for finding a accomplice to have fun with in real life. It also makes it simpler to find the proper woman.
http://www.vopoe.com/
Interesting post! This is really helpful for me. I like it! Thanks for sharing!
Wow your site is especially sensitive Really sweeping enchanting information. thanks
Good article, but it would be better if in future you can share more about this subject. Keep posting.
I loved the game
Awesome work you have done here, I am very happy to read this nice post. You are a great writer and give us much information.
This one is really such a amazing post and i am so delighted to be here and to read this perfect post.
This is great, That’s a great website, it really is what I was looking for, thank you for sharing!
All the best blogs that is very useful for keeping me share the ideas of the future as well this is really what I was looking for, and I am very happy to come here. Thank you very much
I used to be suggested this web site through my cousin. I am not positive whether or not this put up is written by way of him as nobody else realize such designated approximately my problem. You’re wonderful! Thank you!
I hope there will be many articles or like this article
let’s play wingsio
click to play abc
play the best free games slither io
Mind blowing Job
let’s play abcya games on my site
click happy wheels to play for free
let’s play slither.io games
and play more games happy wheels! please click happy wheels to play crazy games
Thanks for sharing. I have really liked your writeup.
Thanks for the best blog.it was very useful for me.
keep sharing such ideas in the future as well.
this was actually what i was looking for,and i am glad to came here!
Regarding your comment about lighting from the wrong side, Scott, I don’t get it. It looks like the sunset is on the righthand side of the photo (same direction as the flash): that’s where the sky glow is brightest and where the clouds are more brightly lighted from the setting Sun. What am I missing?
Thanks for taking time to share
Enlighting piece
Delightening piece, actually.
Boom.
informative piece for photographers
Thankyou for sharing
Hiya, I am really pleased, I have found this details.
This type of overlighting can easily be due to working too slow and doing things in the wrong order. It may well not be an issue with an error in calculating the fill.
At sunset, lighting changes very very quickly. The last thing you should do is calculate the fill. You should then recalculate it every minute of shooting. If you calculate the fill first and then work on the pose the lighting will be different when you get around to actually shooting.
Yup it happens. Good tip!
overNighting ??? two places….
Darn autocorrect. ;=)
I assume you man over-lighting and not overnighting… 🙂
And Lightroom rather than Photoshop. 🙂
I’ve got to stop drinking before I write these posts. 😉
Dummest tip ever ! adjust highlight slider. Come on Scot. What next ?! R key for crop ?!
Hold on! You can just hit the R key to access the crop! Dude, you just blew my mind. You have just made my life easier. It is nice to know there are people like you to teach someone who is new to Lightroom these things. Thanks again, you are a life saver!