
Portrait Retouching in Lightroom, Part 5 (Remove “Hot Spots”)
It’s installment #5 in my Lightroom retouching column, and while last time we looked at retouching wrinkles, this time around, we’re looking at a related technique, which is reducing hot spots (those shiny areas on your subject’s face that almost look kind of sweaty). Obviously, unless you’re photographing an athlete (or somebody that should be sweating), this isn’t usually a good look, so let’s look at how to deal with it (and a few other little things while we’re at it).

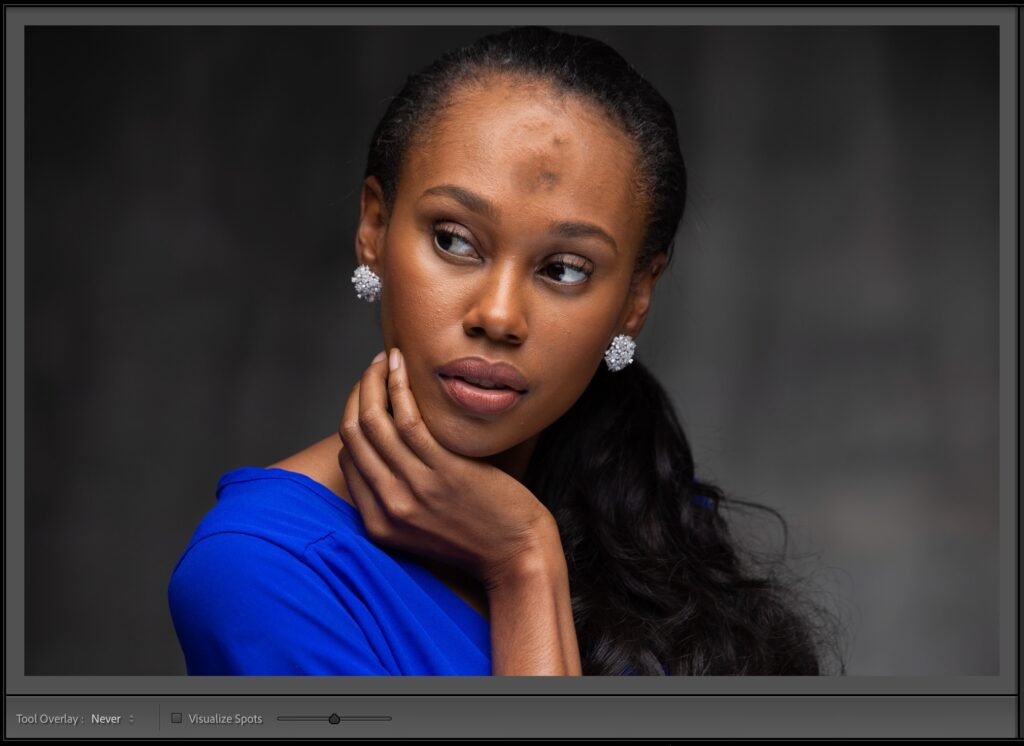
Here’s our original image, and you can see the large hot spots on her forehead. I think the highlight going down the bridge of her nose is a bit hot as well, so let’s at least deal with those two.
(You can download a JPEG version of this image for practice purposes only using the link below):
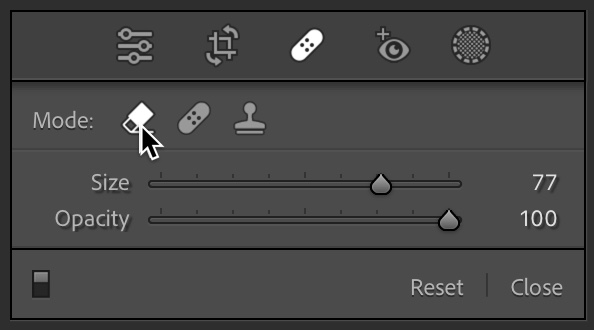
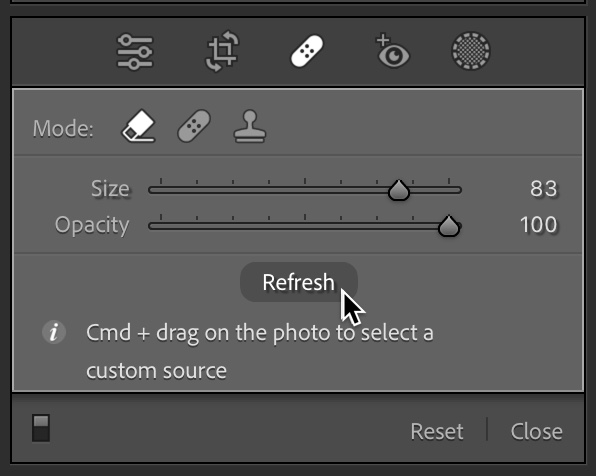
STEP ONE: Click on the Healing tool in the toolbar at the top of the right side panels (its icon looks like a bandage), and then in the list of healing tools, click on the only one that actually does a decent job most of the time, Content-Aware Remove (it’s the first one, as shown here). This is the only one of the three that uses Photoshop’s Content-Aware technology to do its thing, and it’s usually pretty decent (not nearly as good as Photoshop’s Healing Brush, mind you, but way better than any tool we’ve had in Lightroom before).
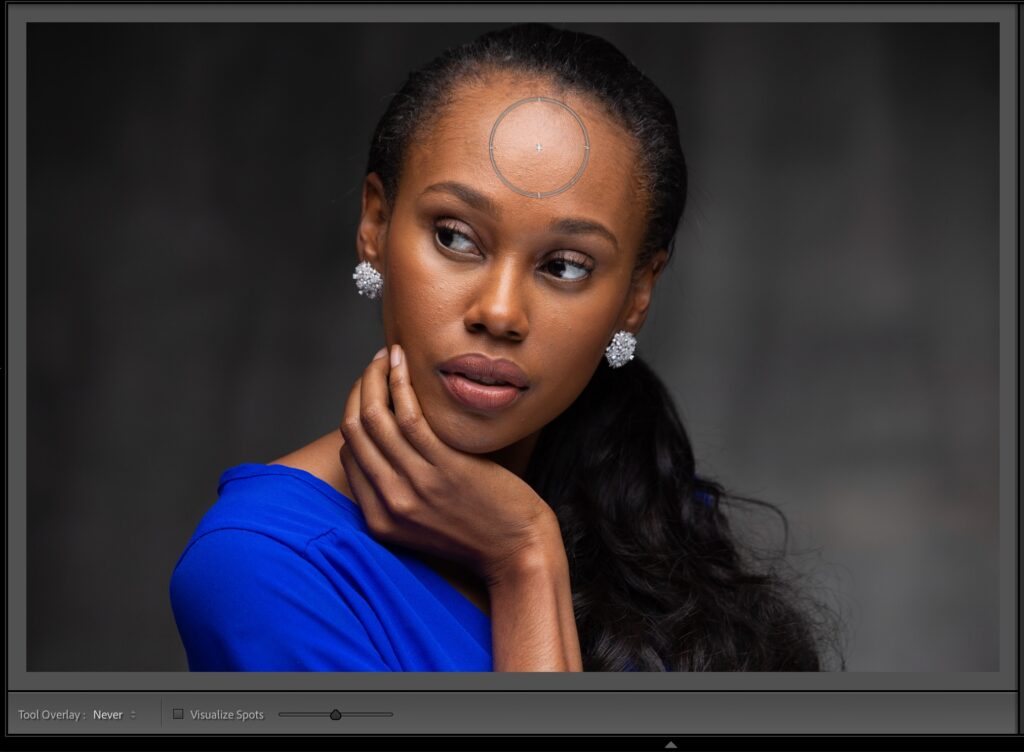
STEP TWO: Make your brush size larger than the hot spot on her forehead. It’s a pretty large hot spot, which will create a problem because it needs a clean area from which to sample. And, because what we’re removing is nearly the size of her forehead, the Healing tool won’t have much area to sample from, but we have what I hope will help. For now, let’s just get that brush to the size we need it (as shown here).
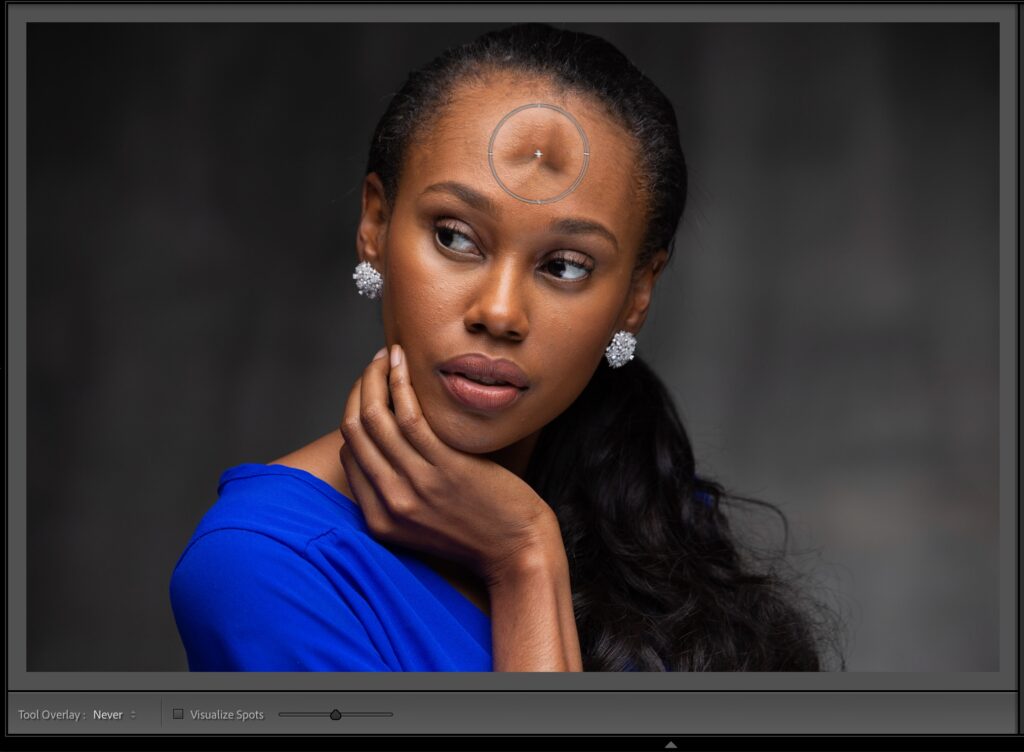
STEP THREE: Now go ahead and click once to remove the hot spot, and, well, it’s as I thought. Because there’s so little area left on her forehead from which to sample, it didn’t work out well (as shown here). The area it sampled from didn’t have enough of a clean skin area to make a decent removal, but all hope is not lost.
STEP FOUR: Go over to the Healing options panel (just below the Histogram on the right side panels), and click the Refresh button (you can also just press the Forward-slash key [ / ] on your keyboard), and it will choose a different area from which to sample.
STEP FIVE: Well, that’s certainly looking better, but it’s not great. We’re not done, though. Let’s try clicking that Refresh button again and see how that looks (it will pick a different area from which to sample when you click it again like this).
STEP SIX: I think this try is probably worse. So, let’s hit that Refresh button once again and see if we have better luck.
STEP SEVEN: Just when you thought it couldn’t get any worse, it did! Okay, let’s try Refresh again.

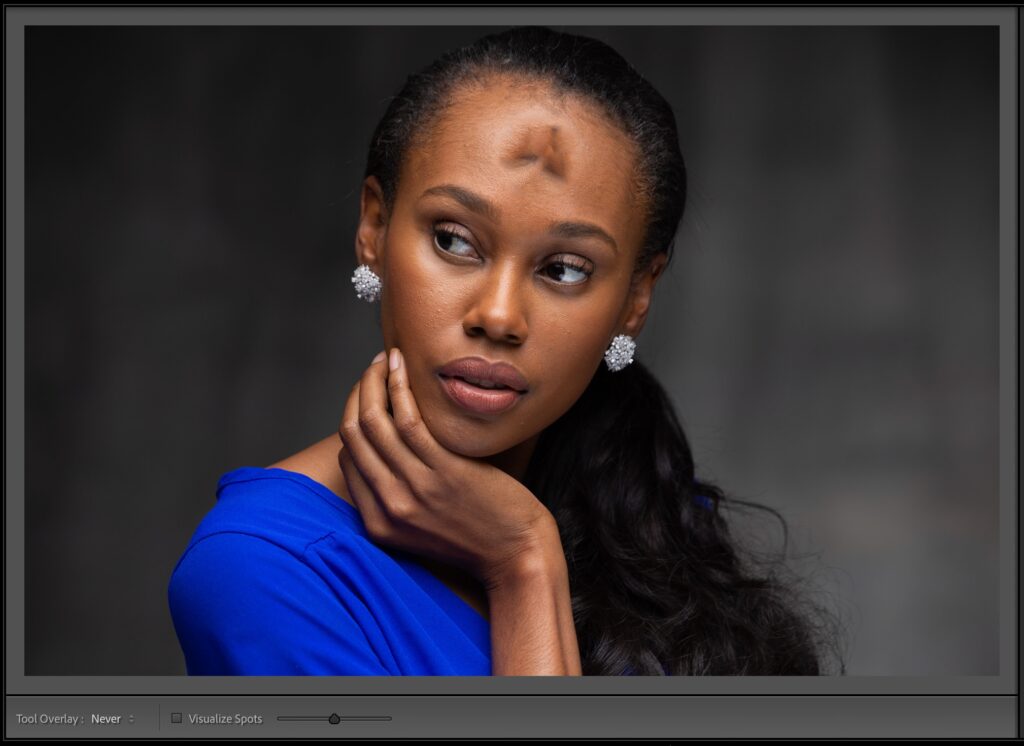
STEP EIGHT: Yikes! Well, let’s do this: keep clicking Refresh until you get back to at least something as decent as where we started back in Step Five. So, just click it a few times until you get something that you can work with.

STEP NINE: Okay, this is about as good as we’re going to get in this case, but at least I think we can work with this version.
STEP 10: Here’s the plan; go to the Healing options and drag the Opacity slider all the way to the left to zero. This will bring the Hot Spot fully back as if we had never used this Healing tool at all, as shown in the bottom image on the left (the Opacity slider here kind of works like “undo on a slider”).
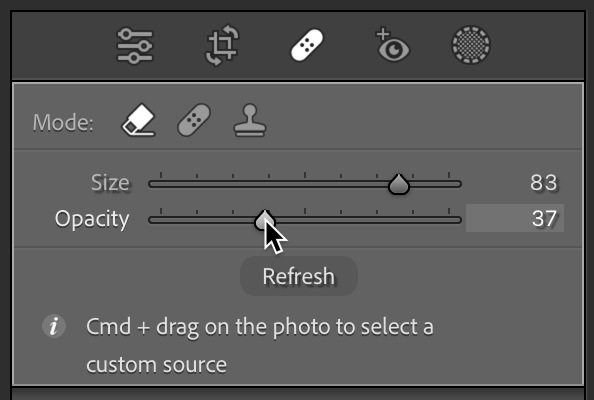
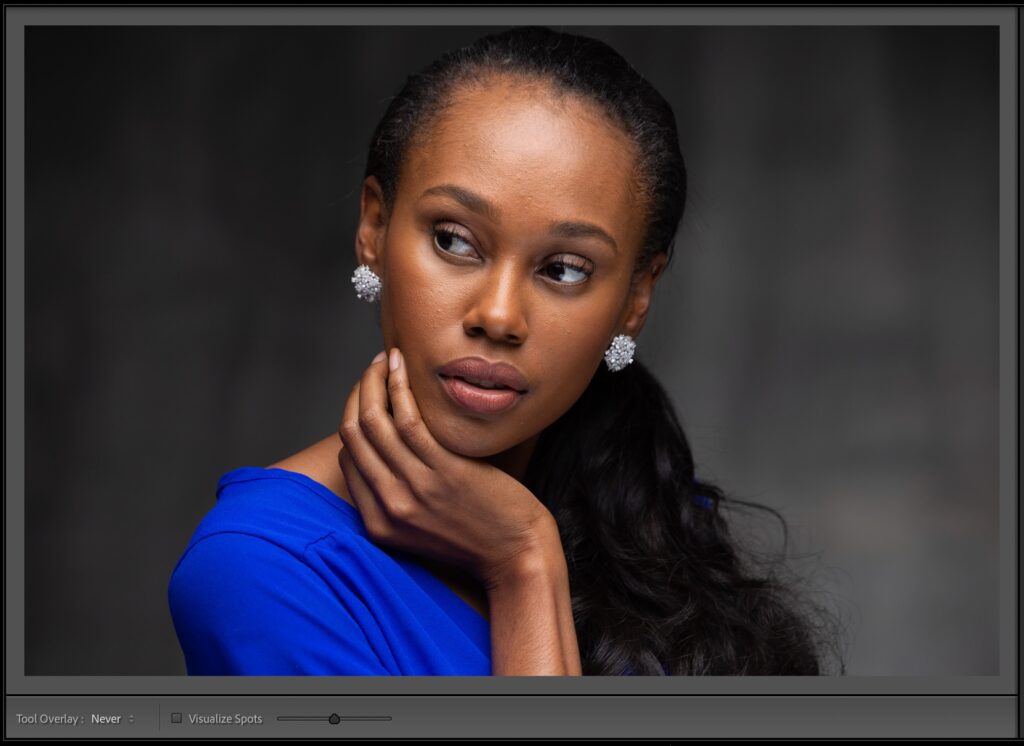
STEP 11: Now, slowly drag the Opacity slider to the right (as shown below), and keep an eye on your hot-spot area as you drag. Keep dragging it until the shiny, sweaty part goes away, but the nice highlight stays in place (after all, we don’t want the highlight to go away, just the sweaty, shiny look). Here, I had to drag it to the right to around 37% (you can see the result in the image at the top of the next page). If you drag any farther, you start to see the bad sampling appear and what looks like a bruise on the right side of her forehead (it’s not a bruise; it’s that bad sampling), but this was far enough to get rid of the shiny look and still look natural.

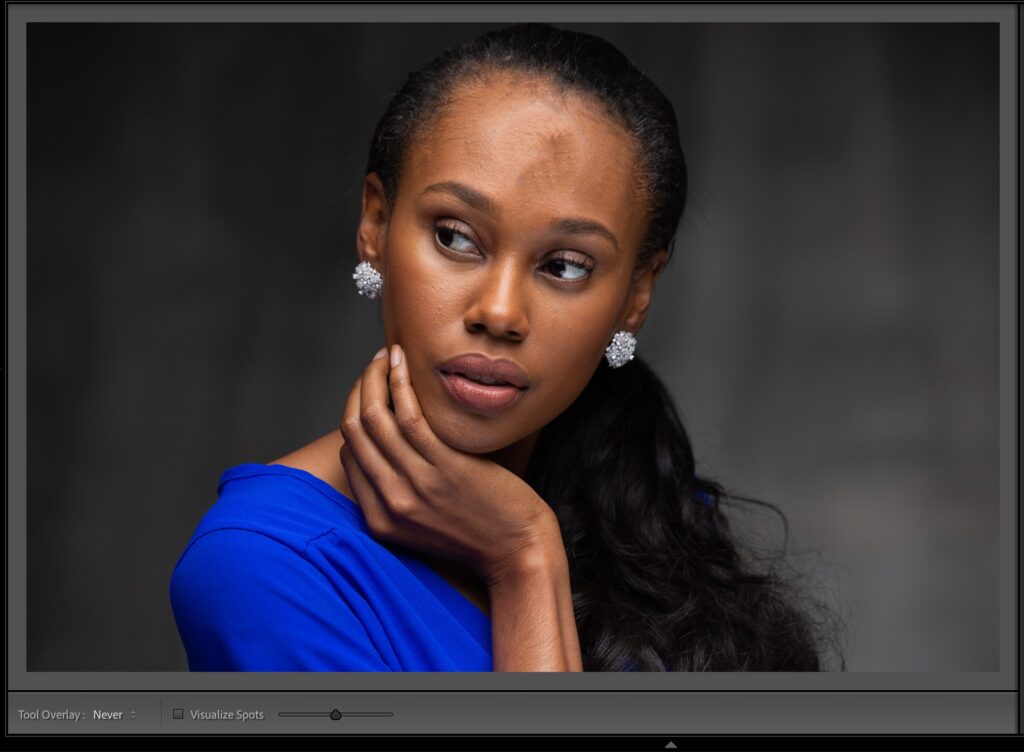
STEP 12: Here’s the image after removing some of the shininess from her forehead while keeping the highlights in place. Now let’s do the same things for the highlight going down the bridge of her nose.
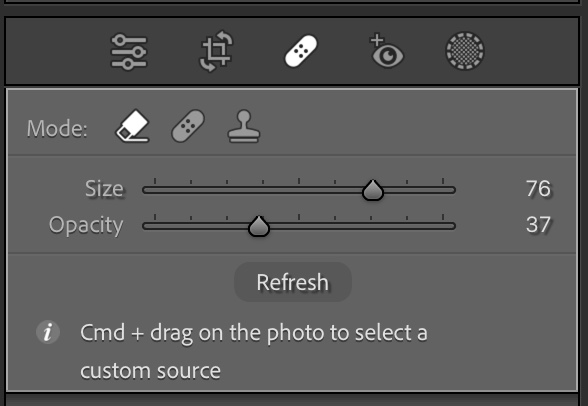
STEP 13: Your Opacity settings will still be at 37% (it’s sticky, meaning whatever setting you used last stays in place), so you can just paint a stroke down her nose and let’s see how it does.
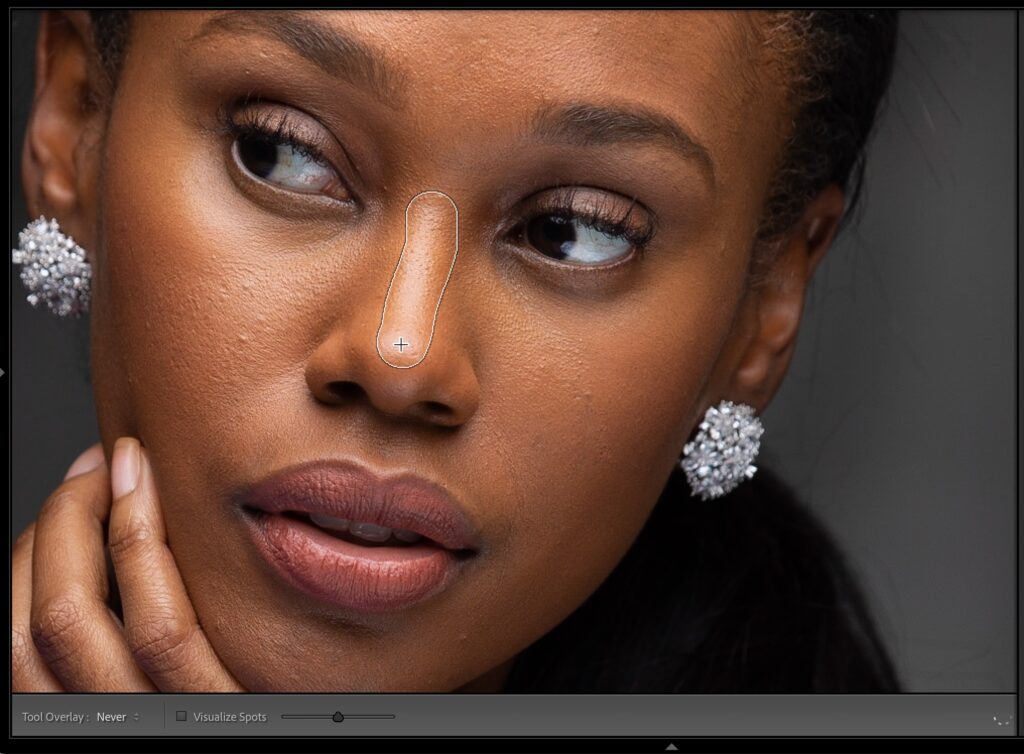
STEP 14: Make sure you scale the brush size down to where it’s just a little larger than the highlight you want to remove on her nose and paint down the bridge of her nose (as shown here).

STEP 15: Here, you can see it did a pretty decent job the first time out. If it didn’t pick a decent sample spot, remember you can click the Refresh button and have it try again.
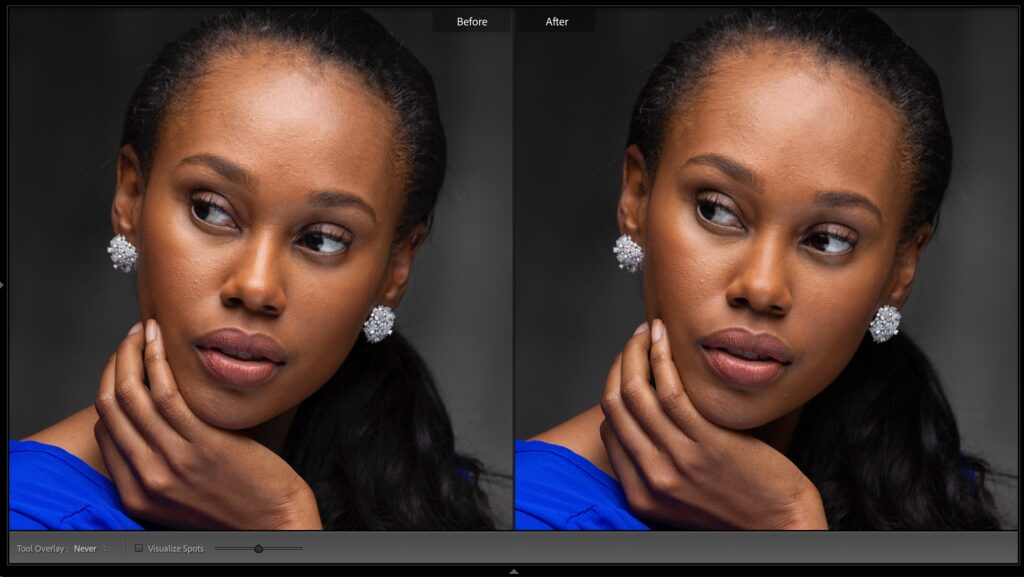
STEP 16: Below is a side-by-side of the before and after. No, it’s not a retouching that “hits you over the head” with a night-and-day difference, but that’s how retouching should be. The retouches should be fairly subtle but effective overall in reducing the issue, so it doesn’t distract the viewer or show the subject differently than they’d appear while standing in front of you.
Okay, that’s it for this time. Next time, we’ll continue our portrait retouching journey.
Have a great weekend, everybody! 🙂
-Scott


Very simple retouching and yet effective, thanks for the information
Ditto. Image download does not work.
Hi, Brian. Sorry – my fault – the download link is there now. -Scott
It says that Kelby One members can click to download a version of the photo for practice purposes. But the link is not activated on any computing platform, whether iPhone, iPad, or desktop computer.
Sorry – my fault – the download link is there now. -Scott