
October 2018 Lightroom Classic and Lightroom CC Release
It’s just about the one year anniversary of Lightroom’s rebranding to Lightroom Classic and Lightroom CC, and today Adobe is releasing the next version of Lightroom Classic (8.0) and Lightroom CC for Mac/Win (2.0), along with updates for Lightroom CC on iOS and Android. whew. Let’s dive in!
Lightroom Classic 8.0
Lightroom Classic is still front and center in my workflow (though I do love Lightroom CC on mobile a lot), and I’m glad to see Adobe is maintaining their commitment to keeping it updated with new features, camera support, and bug fixes. I think it is safe to say that the days of splashy new versions packed with new features every 18 months are behind us. Instead we’ve gotten new features, camera support, and bug fixes every two months. This update does come with a new version number, but it is an incremental growth over version 7.5 in keeping with the pattern we’ve seen throughout the year.
New Process Version
The process version is the secret sauce for processing our photos, and this is something that should continue to evolve and improve. Process Version 5 will be the default for newly imported photos from now on (until it changes), and it brings improvements to image quality in high ISO raw photos and an improvement to the rendering of negative Dehaze. I’m not really one to use negative amounts of Dehaze, but comparing the same amount of Dehaze to a photo using Process Version 4 (top) to the new Process Version 5 (bottom) does show an improvement in retaining color and contrast for the same slider value.
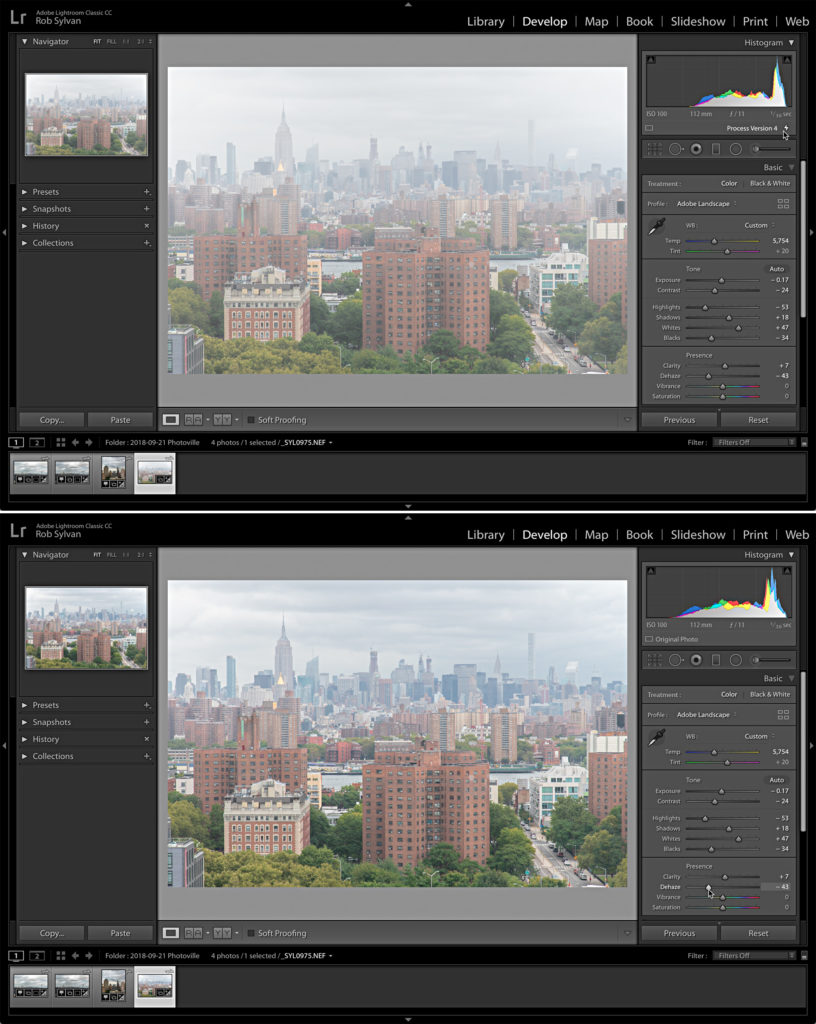
You can change process versions via the Camera Calibration panel to test it for yourself. Current photos with older process versions will not be changed by Lightroom. You can change them manually if you wish, but you do not have to do this. You’d only change the process version of a previously edited photo if you want to leverage the new features added to the latest process version. I’ll probably only do this in rare cases to old photos, but I see no problem moving forward with Process Version 5 as the new default.
Single Step HDR Pano
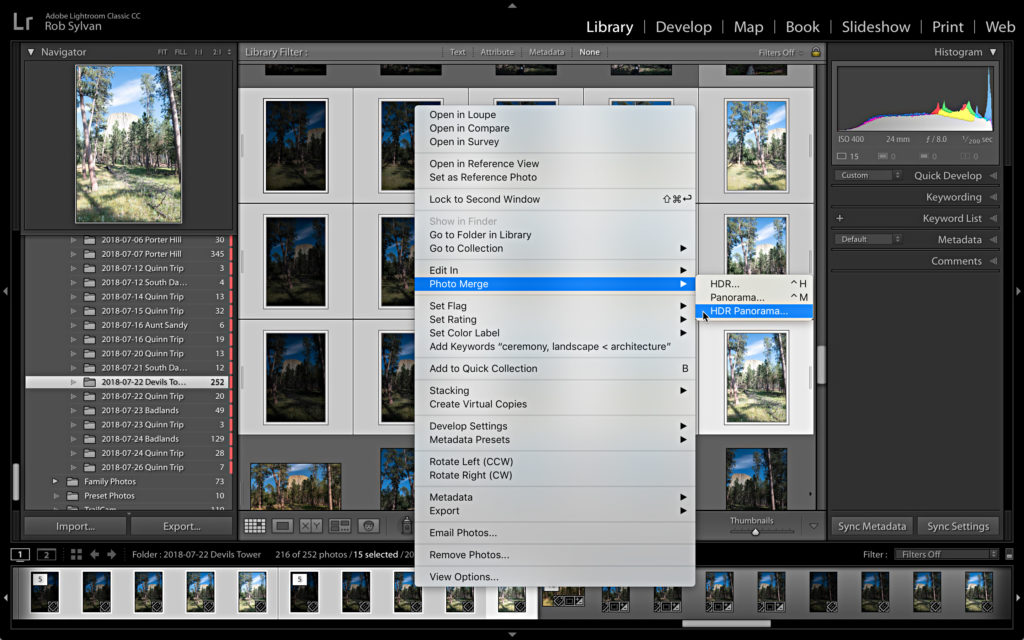
Ever since we gained the ability to merge to HDR and Pano within Lightroom I’ve shot a lot more HDR and panoramas, often just to create higher resolution images of more typical aspect ratios (as opposed to the true panoramic aspect ratios). If the situation seems to call for it, and I have time, I’ll even shoot for HDR and panorama at the same time. While the merge to HDR and pano functions made it relatively easy to first combine all the brackets into HDR images, and then merge all the HDR images into a pano, it has just gotten so much easier. Now all you need to do is select all the frames from your HDR pano, then right-click one and go to Photo Merge > HDR Panorama (or via the Photo > Photo Merge menu).
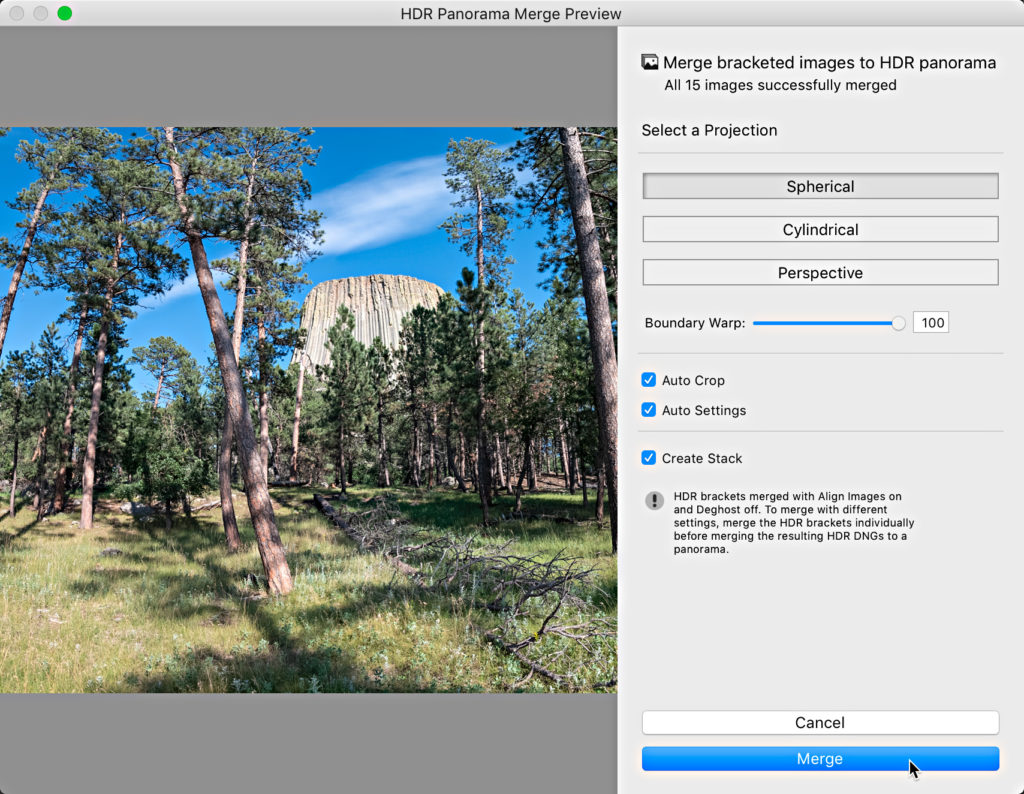
Classic takes them all into the new HDR Panorama Merge Preview dialog, where you can select a projection, perform boundary warp, auto crop, auto settings, and stack all the images together. Note, if you need to use Deghosting you’ll want to do it the old way and merge each HDR bracket individually so you can control the Deghosting settings (this dialog does not apply any). Clicking merge saves out the final HDR panorama. This will save me a lot of disk space by skipping the individual HDR image stage.
New Range Mask Option
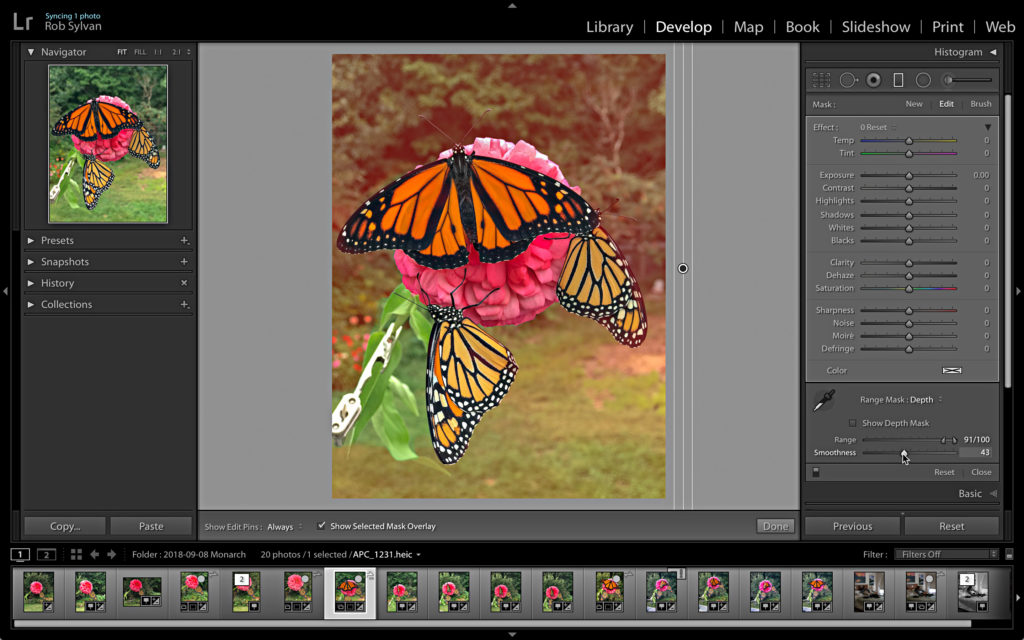
If you have a dual lens iOS device that can create HEIC photos with embedded depth map data, then you can leverage the new option added to Range Mask in the local adjustments (Graduated Filter, Radial Filter, and Adjustment Brush). The camera in Lightroom CC for iOS gained a new Depth Mode as a tech preview during the last update, which allows you to create those types of photos right in Lightroom CC. Everything created in my Lightroom CC app downloads to my Classic catalog automatically. Selecting one of those photos, I can apply a local adjustment, then choose Depth from the Range Mask drop-down menu.
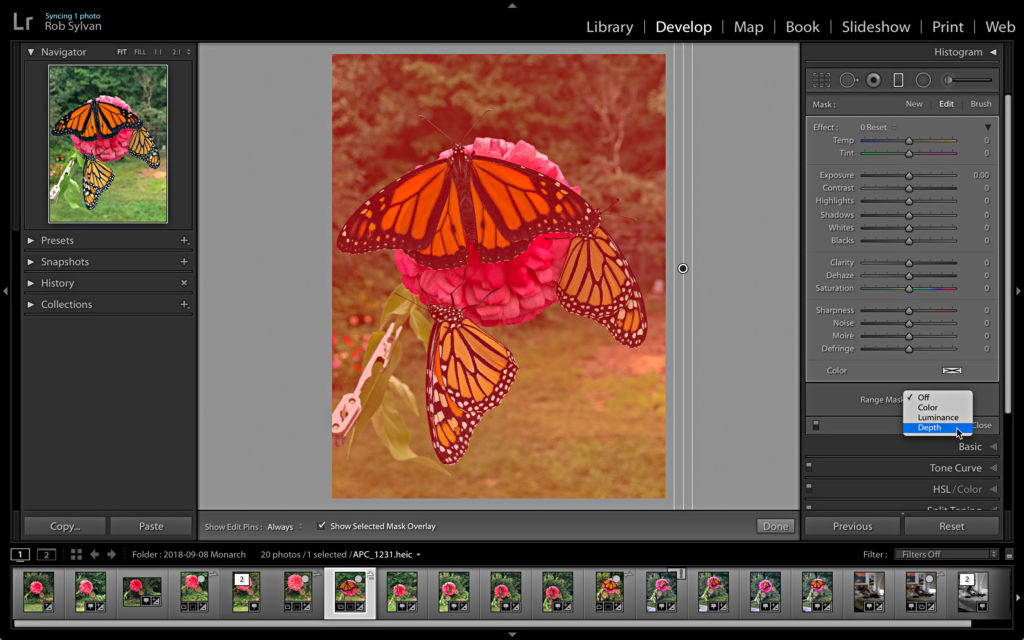
This will reveal the new options associated with this type of mask. Due to the depth information contained in this photo, I can now limit the range of the mask based on that information. This provides a whole new level of control. I’ll have to explore this in a tutorial for another day, but from what I’ve seen so far it is very promising!
Note, you’ll only see the new Depth option when a photo with depth information is being edited.
Improved Tethering Experience
Some much needed attention has been given to the tethering experience for Canon. If you are a Canon shooter and shoot tethered you should see greater overall stability and an increase in transfer speeds. Adobe has stated that similar improvements are coming for Nikon in a future release. Here’s a link to all camera’s currently supported for tethering. The Canon EOS M50 and the Rebel T7 have been added in this release. They’ve also updated the online user guide for tethering to include new options for Canon shooters.
Lightroom CC 2.0 (Mac/Win)
New things came to Lightroom CC for Mac, Win, iOS, and Android too.
Share Tab
The new Share tab makes it easier to access all of your shared albums, whether you’ve created them here in Lightroom CC, Lightroom Classic, on mobile, or even within lightroom.adobe.com.
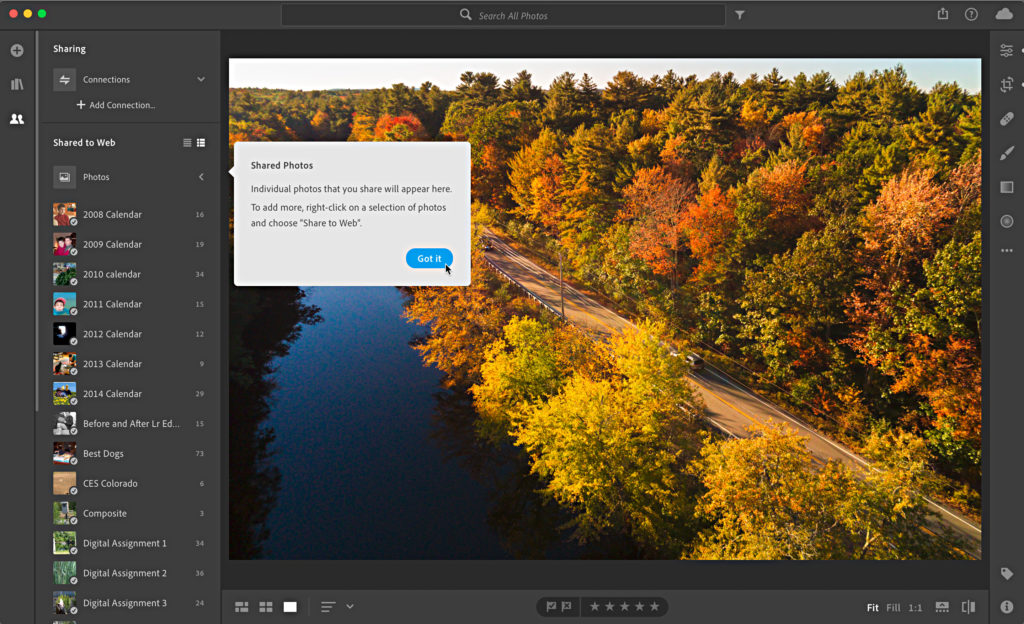
The new Connections tool at the top of the Shared tab gives you the ability to create a connection with your Adobe Portfolio, and easily share albums to it. Adobe promises to continue to develop this feature to add connections to other online services (such as printing).
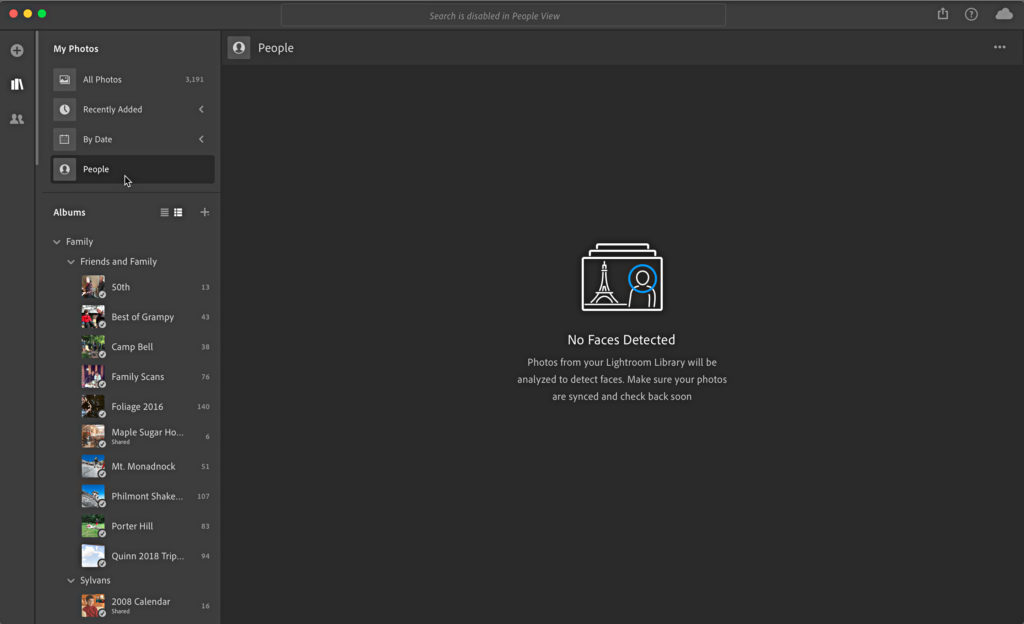
People View
In the My Photos section of the left panel is a new People view tab. Leveraging the Adobe Sensei powered search, imported/synced photos are now analyzed for faces, and photos of the same person are grouped together to make them easier to find. At the time of this writing it was still crunching through my photos, so I look forward to test driving this when it is done.
[Edited to add: It looks like it is taking a little while for the indexing of people to complete, so have some patience if you are still seeing the screen below – Rob]
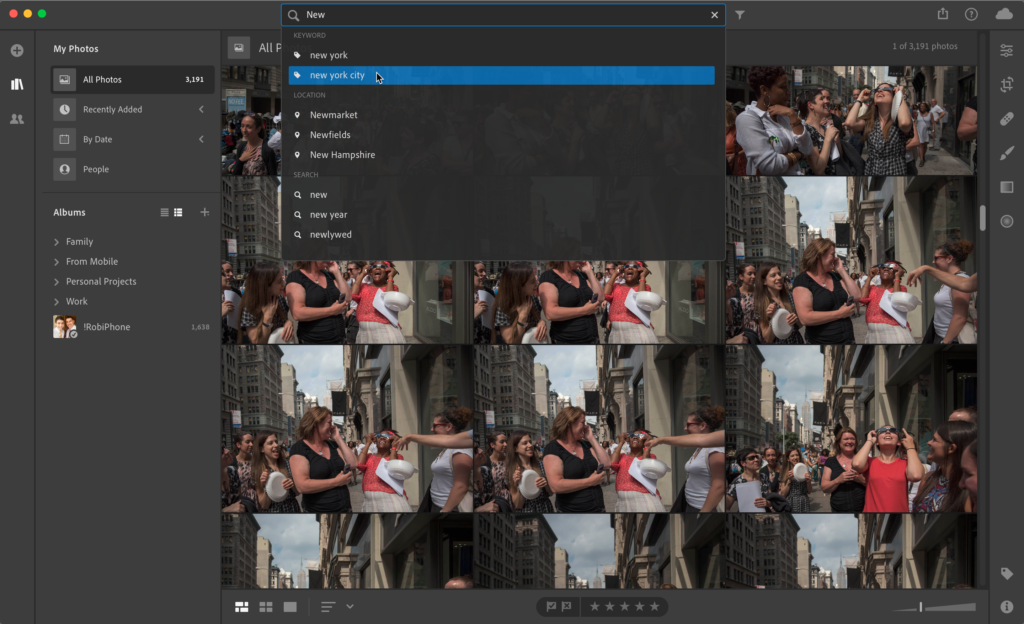
Improved Search
The search also gained a new autocomplete feature that can suggest various bits of metadata (keywords, locations, camera, lens, ISO, etc.) based on what you have typed so far.
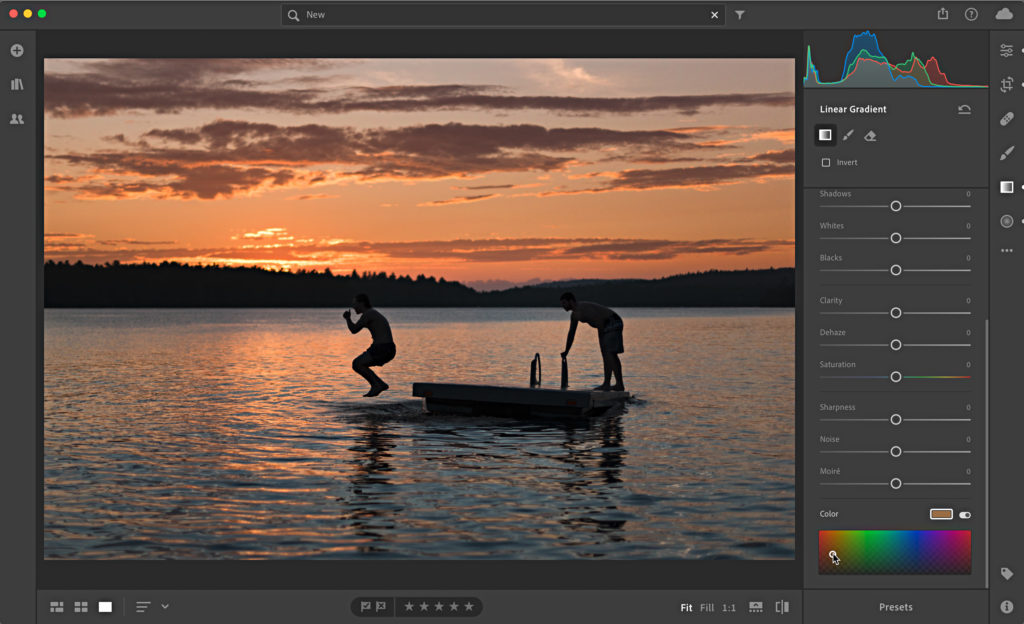
Color to Local Adjustments
I didn’t even realize this wasn’t already included, but Lightroom CC’s local adjustment tools now have the Color swatch for hand coloring/tinting your photos as part of the adjustment.
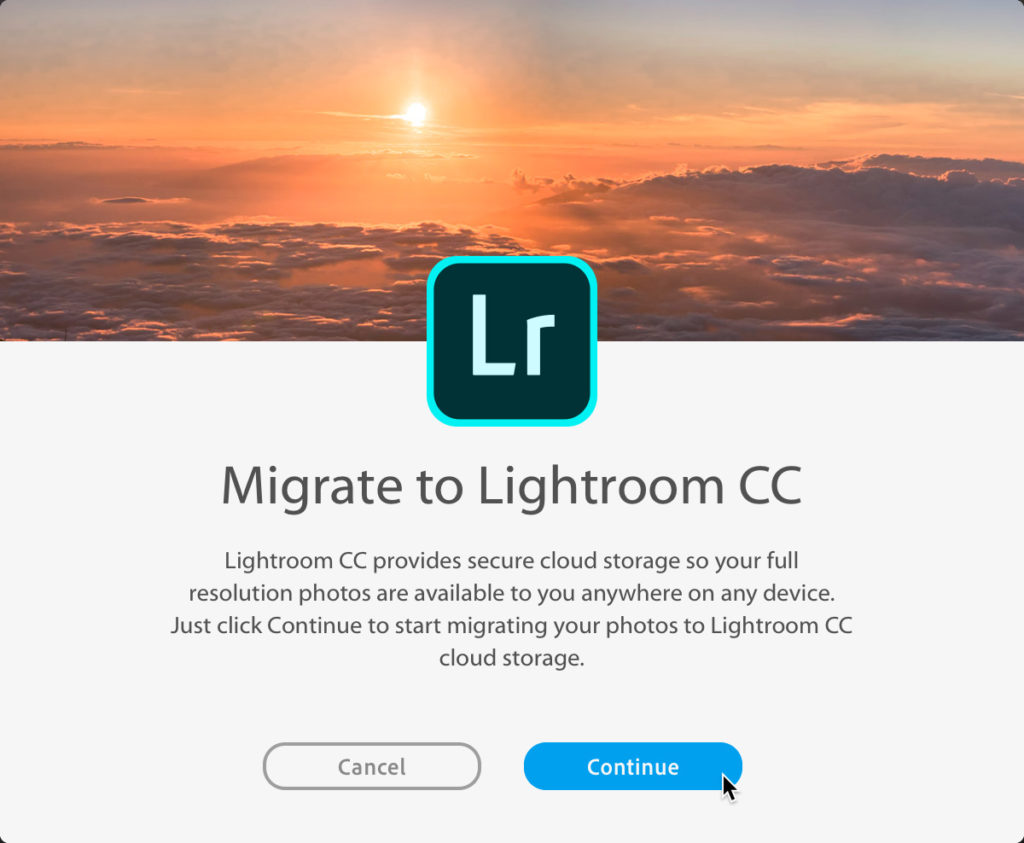
Migrate Apple Photos
If you’ve used Apple’s Photos app, and want a way to migrate your photos out of there and into Lightroom CC, you now have that functionality. Located under the File menu.
Lightrom CC for iOS and Android
The same People view and search improvements have been added to Lightroom CC for mobile devices as well. In addition, there are a few new guided tutorials (under Settings). The HDR capture on Android has also been improved.
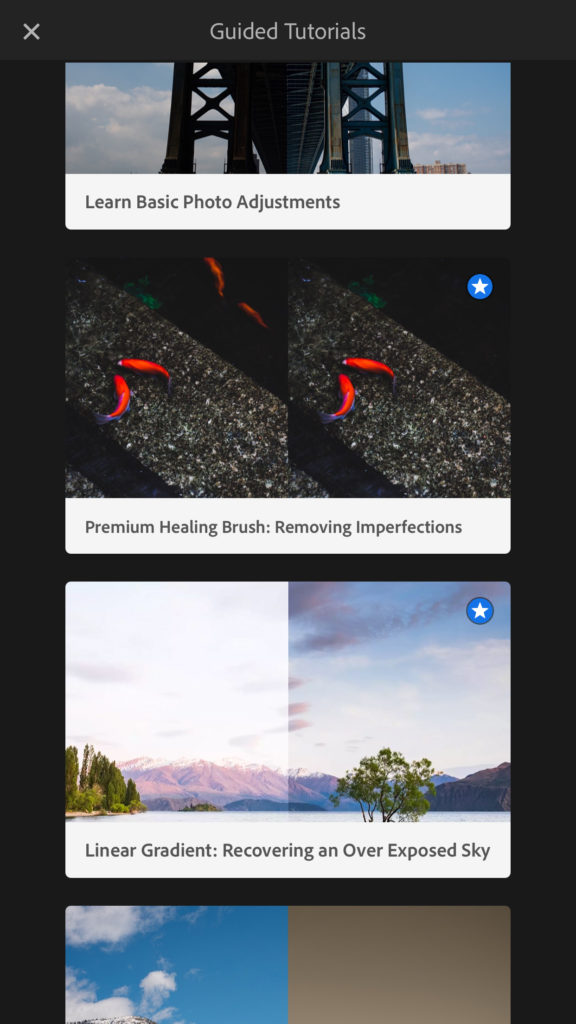
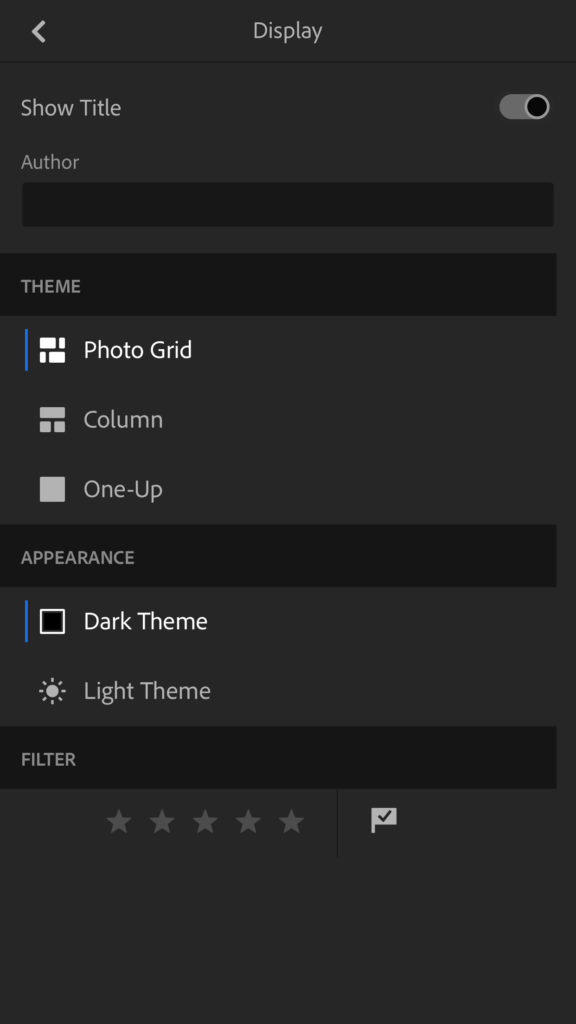
iOS and Android also gained access to improved display options when sharing your albums to the web. On a shared album, tap the tri-dot menu and tap Share to Web. Under Share to Web tap Display to access options for changing the theme, appearance, entering author info, and filtering what photos appear based on flag or rating.
New camera support and new lens support has also been added across all applications. Adobe Camera Raw is also being updated to version 11, so keep your eye out for that update as well. There’s a lot to absorb, and remember that the apps become available on a rolling basis, so if you don’t see it yet, just give it some time. Updates for mobile can take longer due to App store approval process.


I’m becoming very motivated to switch to ACDSee.
https://digital-photography-school.com/acdsee-photo-studio-ultimate-2019-review-face-detection-and-recognition/
I was hoping to see lens correction profiles for the iPhone XS and XS max. Seems like I will have to wait a little longer.
I am getting more and more frustrated and angry with the built in obsolescence by Apple and Adobe. First Apple won’t support the older machines (MacPro 4.1) with the new OS and now Adobe won’t support older operating systems. We are being blackmailed into purchasing new hardware when in fact the hardware we have is more than sufficient. This is nothing more than conspicuous consumerism. I raised this Issue with Skylum (then MacPhun) upon release of Aurora 2017 and they stepped it back and supported El Capitan OS, kudos to Skylum. I guess I’m done with Adobe and switching over to Skylum products in total.
Hi Dave, I fully agree with you over this but I got around the issue by flashing my Mac Pro 4,1 to a 5,1. Doing this allows you to install OSSierra and hence the newly updated Lightroom and Photoshop versions.
There is a perception here that supporting older machines and operating systems is merely a matter of choice. It is not. Newer machines with increased processing power and features enable application software to do things that were impractical or impossible on older systems. Sometimes applications have to be re-written to run under the newer environments, making them incompatible with older machines.
There comes a point, then, in order to support older environments, there needs to be two versions of the application. As this process continues, it becomes three, etc. This means that development and all the other efforts must be split among the existing team. This means either fewer people on each team or hiring more people. Not just hiring people, but hiring people well versed in older technology who are not only dwindling, but getting older and wanting more than the entry-level pay offered.
And they’d be doing all this for a rapidly decreasing market that will eventually disappear. Does that make any business sense? No. The “progress” you are complaining about is what has allowed us to do things today we could not have dreamed of years ago.
This is a business whose point is to make a profit. How long should any software company support older technology? I still have a machine running XP. Should I expect support for all the new applications on that platform? Of course not. Some applications simply could not do what they do on older machines because of new functionality.
I’ve been an IT guy since CP/M was the standard operating system. In one move IBM wiped out my investment in those systems and the s-100 hardware it ran on. This is the nature of the business.
You’ll find that even Skylum will have to abandon support for your system eventually.
All true, BobHg7.
From another old I mean “longtime” IT guy.
Hmm, I don’t see any improvements with the new process version (I don’t use negativ dehaze). And for none of my iPhone X HEIC images is the new range mask enabled. The new HDR/Pano is for no use for me. So I don’t understand why this will be a new Version 8 of LR? I see zero improvements for me. What I found out is that the performance is really bad, espacially using the spot removal tool.
You’d only have that depth information in your iPhone images if you were using the camera in a mode that engaged both lenses. Try the Depth mode in the Lightroom CC app on your phone.
Thanx Rob. Works in portrait mode.
No more update for Mac OS El Capitan 🙁 Thank you Adobe
hello,
thanks for the infos.
Unfortunately, nothing new for blur filter/slider in graduated filter, categories of presets to sort presets, hsl in local adjustments, better erase tool, better luminosity masking
Does Adobe CC, OnOne, and Nik correctly work with the new Mac OS Mojava? Is this addressed in this version?
Thanks
Can’t speak for OnOne or Nik, but here’s Adobe’s document on compatibility: https://helpx.adobe.com/x-productkb/global/macos-mojave-compatibility.html
Thanks Rob – nice rundown. It would be great in “Merge to…” if they’d add focus stacking for the LR Classic platform – I do it as much as I do panos and hdrs…sometimes a lot more often… save a few steps and startup of PS itself.
Here is the official feature request: https://feedback.photoshop.com/photoshop_family/topics/why-not-focus-stacking-in-lr
Make sure you vote for it!
Agreed, Bob. Thanks, Rikk!
Vote Early – Vote Often
Thanks for monitoring here Rikk. Good function, surprised it’s not there already 10+ years into the product life. I load the files as layers and do it by hand now. It would be great to select a set, background them via the “shift” Merge to… and go get the next set and come back to them all completed later.
Still no native support for Sony tethering in Lightroom. SMH!
I believe that is at least partly on Sony.