New Options in the Lightroom Classic to Photoshop Workflow: Part 2
Following up from my previous post, let’s wrap up this look at the new options for sending photos to Photoshop from Lightroom Classic.
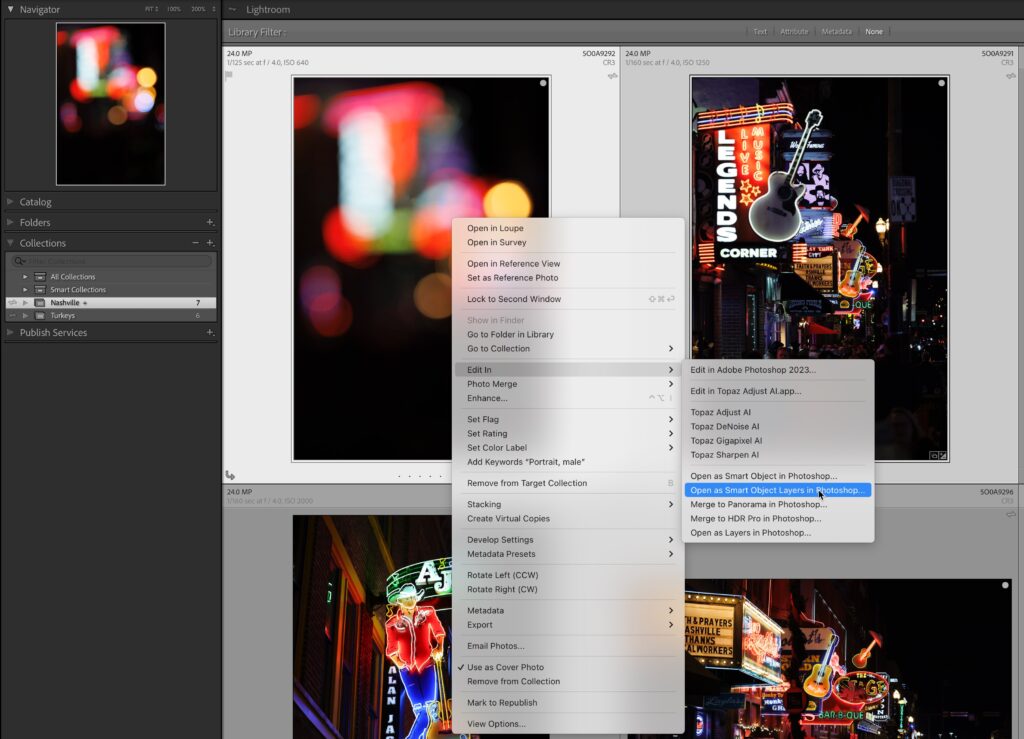
Open as Smart Object Layers in Photoshop
For my next photo I want to use blending modes to combine two raw photos into a multiple exposure effect, and I don’t need the Beta version of Photoshop for this, so I went back to the External Editing tab of the LrC preferences and switched back to Photoshop 2023. In my experience so far, I have not needed to restart LrC after changing that preference, but if you find the wrong version of Photoshop opening, restarting LrC would be the first thing to try. Also, it would be worth quitting the version of Photoshop you don’t want to be used.
I have these two photos in a collection from that trip to Nashville, so I selected the collection in the Collections panel first, then holding down the Command key (PC: Ctrl) I selected the two photos I wanted to open as layers in a single document. Once selected, you can use the Photo menu or simply right-click one of the photos and choose Edit In > Open as Smart Object Layers in Photoshop from the contextual menu. You’ll note that all the options requiring more than one photo will only be accessible when you have more than one photo selected in LrC.
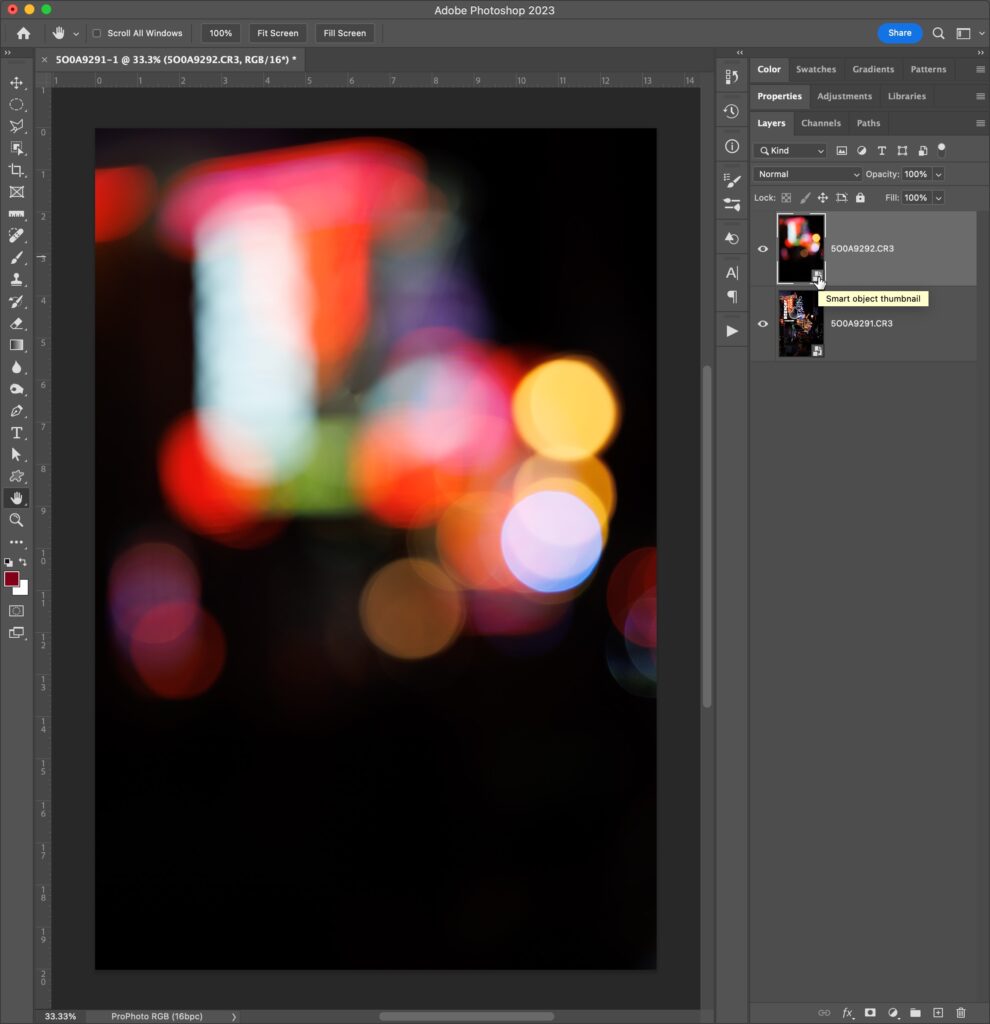
When you open a photo as a smart object layer in Photoshop a full resolution copy of the source photo, in this case both raw photos, is embedded in each smart object layer. This gives you the power of being able to edit that full resolution data in Photoshop if needed, and since it is embedded in a smart object layer, it can remain a non-destructive edit (meaning you can always go back to the original data). Note, this creates a brand-new file (TIF or PSD based on your External Editing preference settings) and any edits you make to the smart objects are completely separate from the source photos back in LrC.
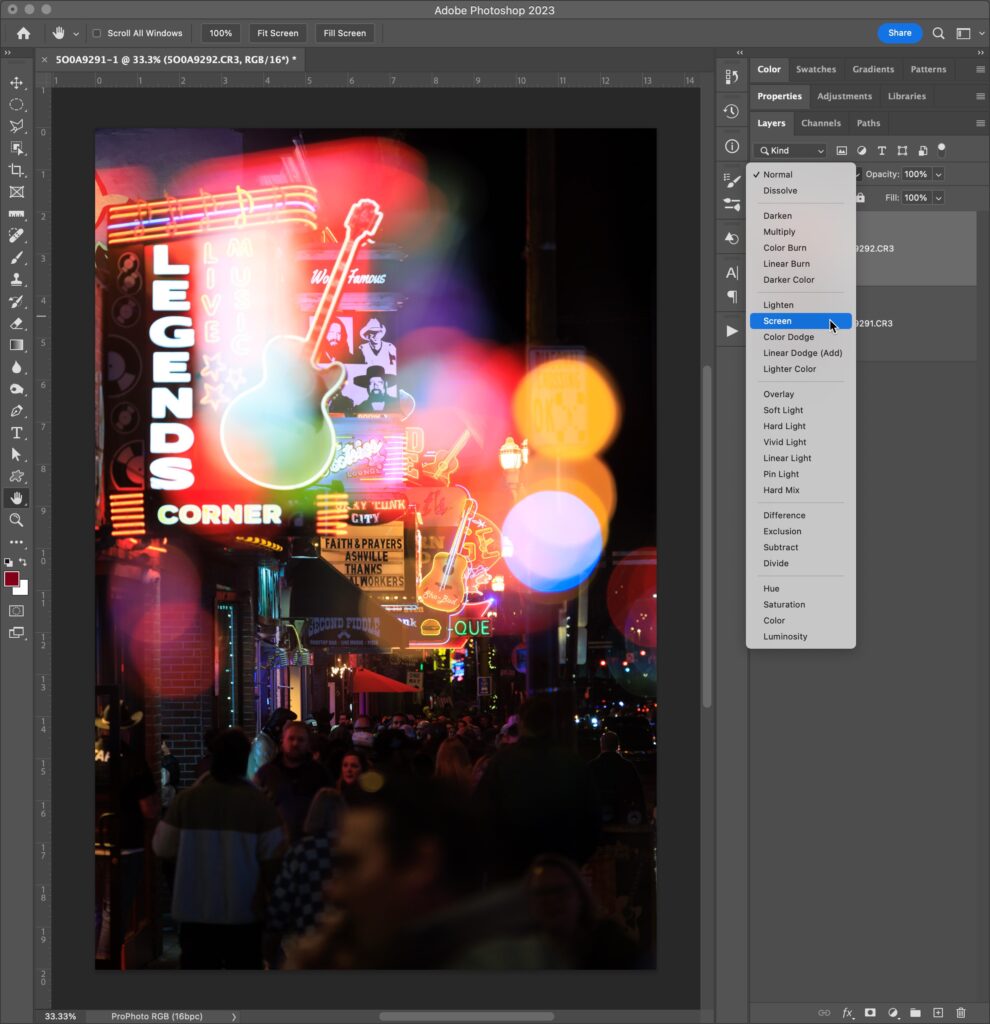
Simply double-click the smart object layer icon in the Layers panel to edit the raw data in ACR. Any edits you already applied in LrC will be present, but you can take this photo in any editing direction you choose based on your project. For this example, I am changing the Profile to something more vibrant and boosting the Vibrance and Saturation sliders as well. Click OK when done editing to save your work and exit ACR.
The changes you made will update in the smart object. I like the way that looks, so I’m going to open the other smart object layer into ACR and apply the same adjustments, click OK, and return to Photoshop. With those edits made, I just need to change the blending mode on the top layer to create my multiple exposure effect, and possibly reduce the opacity of that layer to dial in my desired look.
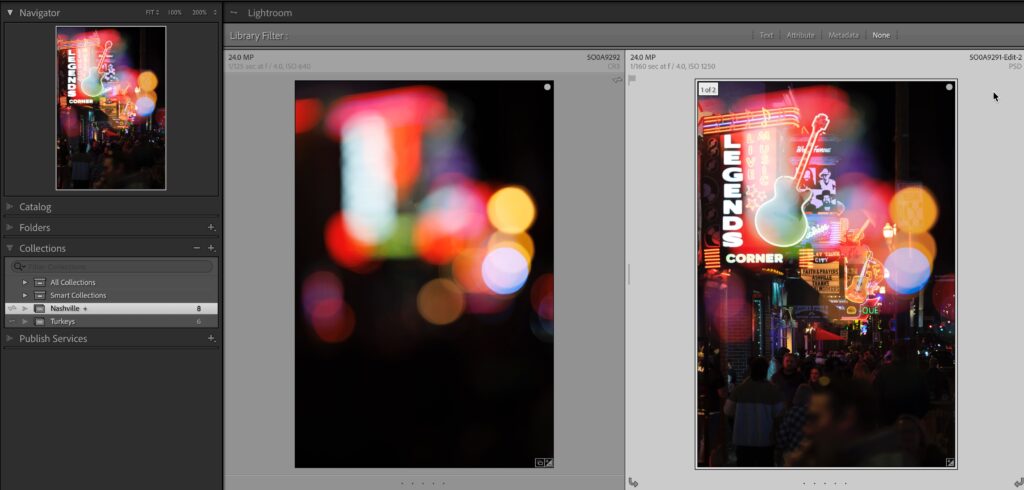
With the edits finished, I use that File > Save command in Photoshop, then close the photo before switching back to LrC where I find the new copy has been added to the catalog and the collection I had selected from the start.
If you want to dive deeper into using LrC and Photoshop together I recommend checking out my article “Refining Your Lightroom Classic to Photoshop Workflow” from the January 2022 issue of Photoshop User Magazine. Photoshop remains my favorite and most used plug-in for LrC, and I hope you will find it as powerful and indispensable as I do.