
My Experience Photographing the Comet
You’ve probably heard about Comet C/2020 F3, aka NEOWISE this week as it has finally made its debut in the evening skies of northern latitudes. If not, earthsky.org has a nice write up about it, and tips for finding it in the sky. I wanted to share my experience attempting to photograph it on Sunday evening, as well as how I used Lightroom too.
Tips For Preparation
After doing a bit of reading up on it, I tried to think about possible locations that met the following criteria:
- within an hours drive from where I live
- unobstructed view of the sky to the northwest
- publicly accessible after dark
- relatively dark skies (low light pollution)
- safe for standing around in the dark waiting for the magic to happen
- bonus: has some interesting foreground elements
Fortunately, I live in a relatively rural part of southern New Hampshire so there isn’t a lot of light pollution compared to major population centers. However, there aren’t a lot of locations with clear views of the northwest horizon. I finally did settle on a location in southern Maine, that is about a 45 minute drive from home, and due to its elevation has a pretty clear view in almost all directions. I did have to hike in about a mile, as it is closed to cars after dark, but that was a small price to pay.
Once you’ve figured out your location I recommend getting there before sunset to scope out a safe location, any possible foreground elements, getting your camera set up on tripod, going over camera settings, locking focus on something in the distance (I used the clouds) and then turning off autofocus, and making yourself comfortable. I’m a mosquito magnet, so I also prepared for their onslaught as well since you’ll be a sitting duck during their peak feeding time.
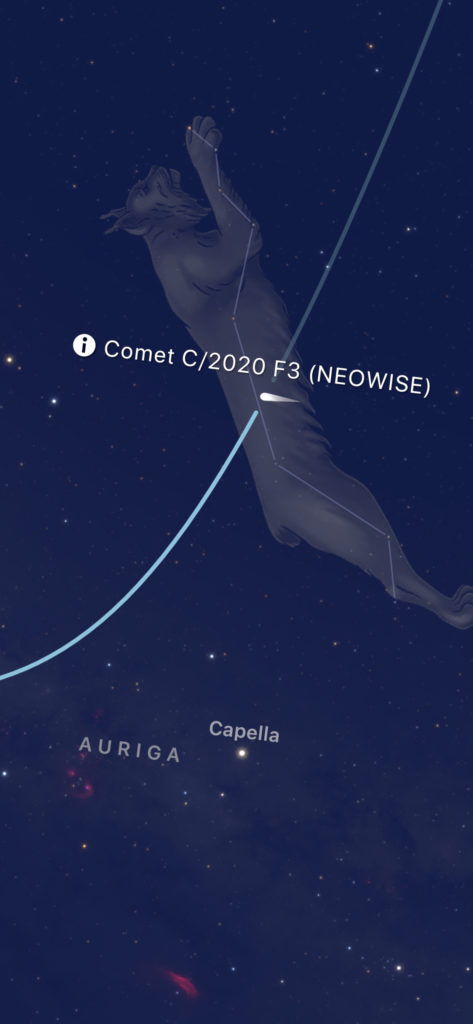
I also used an app called Sky Guide to help locate the comet in the sky before it was visible to the eye. There are undoubtedly other apps that do the same, and it really made all the difference in giving me confidence of where to point the camera even though I couldn’t see the comet at the time.
Prepare to Wait
As photographers, we’re used to waiting around for the right moment, so hopefully that part won’t be hard (or surprising). The sky has to be dark enough for it to be visible to us and our cameras. I watched the eastern sky to see the first stars appear, and then slowly, as the sky darkened, I saw more and more appear directly above, and finally to the west. Look for the Big Dipper in the west, which is probably the most well known and easily spotted constellation in the sky. Once you can see all of the Dipper, you are getting close to go time.
The problem is that the comet is low on the northwestern horizon by this time, which is still just about the brightest part of the sky.
You’ll have to wait at least an hour, if not more, after the sun has set for the sky to be dark enough to see the comet. In my hour of waiting I enjoyed watching the bats appear, then the fireflies, and even a passing luna moth. The comet may be the reason you are out there, but you may spend more time waiting than shooting, so do yourself a favor and savor that time outdoors under the night sky.
Go Time
So, after an hour had passed since the official time of sunset I strained my eyes to the northwestern sky and could not see anything remotely resembling a comet or any of the photos I had seen of it so far. My camera was pointed where the app said the comet should be, but I couldn’t see it, so I thought, just press the shutter and see what happens.
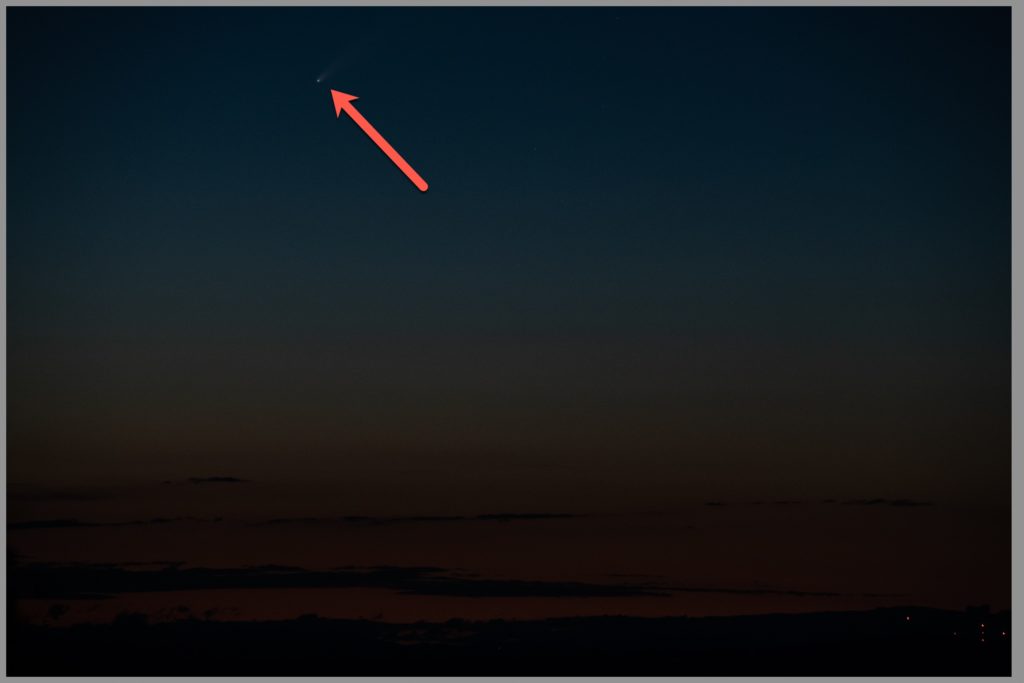
Lo and behold a tiny little comet appeared on my LCD! The shot above is straight out of camera, so that’s what I saw on the screen. I looked through the viewfinder, but couldn’t see anything. I was shooting with a Nikon D850 and a 70-200mm lens at 200mm. That photo was exposed for 1 second, f/6.3 at ISO 1600. Though I couldn’t see it, it was obviously there, so using the previous photo as my guide I nudged the camera around a bit trying to get a better frame one photo at a time.
As I nudged the direction the lens was pointing I also started nudging my camera settings. Increasing the duration of the exposure to 2 seconds, while opening up the aperture a little to f/5.6 and lowering the ISO to 500. Since the sky was getting darker I hoped I could exaggerate the visibility of the comet, the surrounding stars, and sky with the slower shutter even if the stars started to trail. I had never photographed a comet before, and I was thrilled at seeing it more clearly each time.
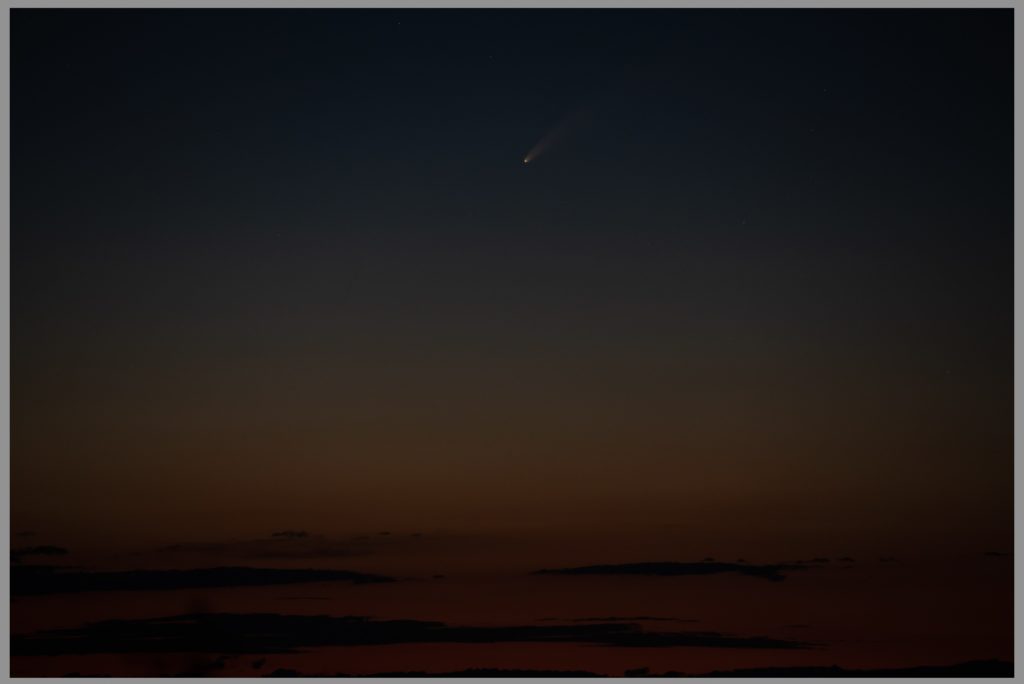
I also decided to flip the camera vertically, and then really drag out the shutter to 15 seconds. This was about 90 minutes past sunset now. Even after all that time, it was still a challenge to see the comet with my eye alone. If I hadn’t known about the comet and looked up at the sky in the same location, I doubt it would have registered as something other than another star. I don’t say that to diminish its significance, but to set expectations when you are looking for it.
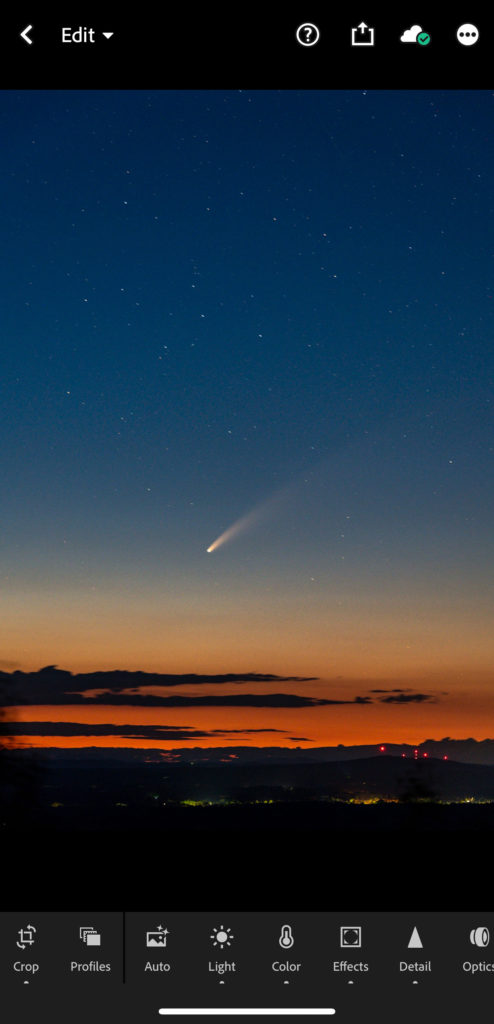
The clouds were starting to move across that part of the sky, and I had bit of walk back to my car, so I decided to pack it up for the night and consider that my scouting mission. After shutting off the camera, I popped the card in my iPhone’s card reader, imported just the last photo (raw of course) I took into Lightroom, did a quick edit, and shared out to my Facebook friends before heading to the car.
Edits
When importing into the Lightroom app on my phone, a copy of the original raw photo is available locally for editing, and then is uploaded to the Adobe cloud storage, where it then becomes accessible on any of my other devices using the Lightroom app, and also eventually downloaded into Lightroom Classic. When I got home, I opened up Lightroom Classic, and the original downloaded to the location I designated in my preferences, along with the edits done on my phone. I really like that aspect of the Lightroom cloud to Lightroom Classic workflow.
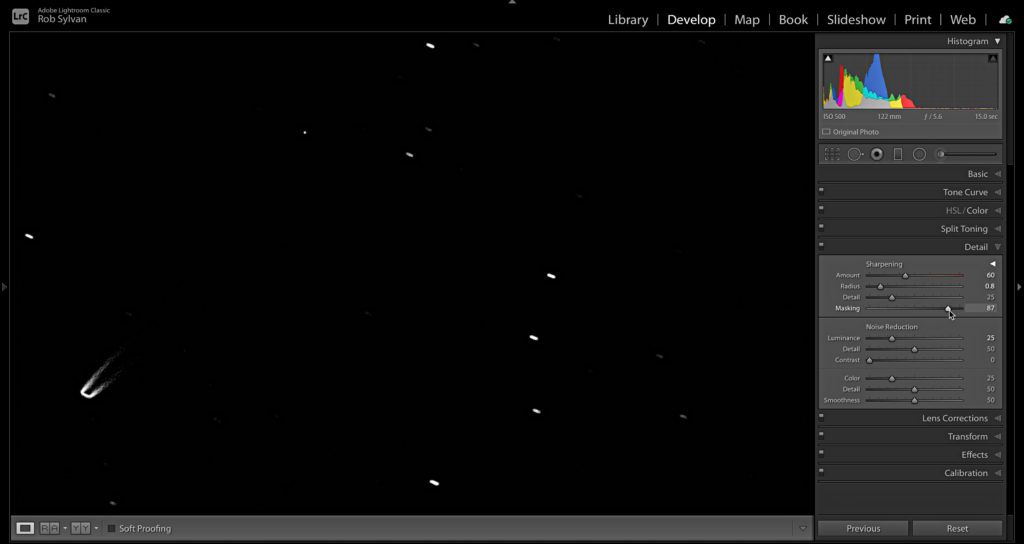
The next day, I took a closer look in Lightroom Classic and refined the edits I made with more attention to detail. Specially, in the Detail panel, where I could zoom to 1:1 and use the Masking slider to avoid sharpening noise (hold the Alt/Option key as you move Masking to see the mask which shows areas in black don’t get sharpened), as well as using the Luminance noise reduction slider to clean things up further.
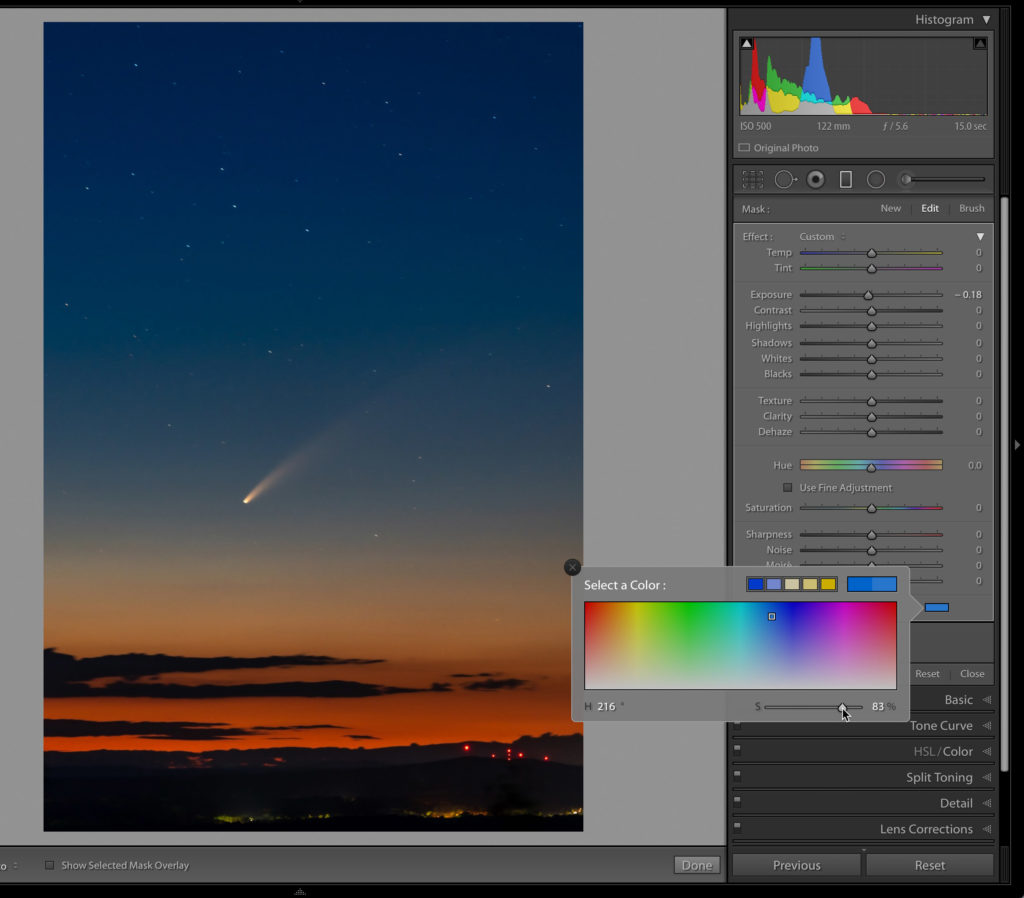
I really liked the transition from the dark blue of the sky down to the darkening orange of the sunset, so I played with adding two graduated filters that added color sampled from the photo to enhance the difference a little more. The top graduated filter sampled from the blue of the sky, and the bottom from the sunset.

To sample color from the photo, click the color swatch in the graduated filter tools panel, then without releasing the mouse, drag the eye dropper out onto the photo to sample. As you move the cursor around you’ll see the color under it represented in the color picker. Once you’ve chosen a color, release the mouse. You can then use the Saturation and hue controls in the color picker to fine tune as desired.
I learned a lot from that first mission, and I’m watching the weather for clear skies each night this week, and for the rest of July, to go back and try different settings, different foregrounds, and enjoy more time out under the sky. I hope you get a chance to do the same.


Good job, Rob! It’s funny how a lot of media outlets and blogs are advertising the comet as visible with the bare eye, when in fact it’s barely visible and you need a lot of preparation, a telephoto lens and photography skills (plus editing) to actually see it.
FYI – Here’s a short video I did the other day showing a technique to deal with star trails in Photoshop. https://youtu.be/75zVDFcu5QE
Craig, that’s very clever! Thanks for sharing.
Hi Rob,
Wow, that’s great shot! Thanks for all the info and post processing tips. Unfortunately, I’d have to drive a long ways to get out of light pollution.
Dennis
Thanks, Dennis. You don’t need to be in a total dark sky, just do the best you can close to home. I’ve seen some photos of it over large cities.