
Lightroom Classic Masking Hack for Selecting Reflected Skies
Ok, I’ll admit right away that this is not pretty, but I thought it was interesting enough to share. Perhaps someone will figure out a more elegant solution (like Adobe), and I’d love to hear it. That said, here’s the problem and a proposed solution (aka kludge). The new AI based tools for selecting subject and sky are fantastic and work really well for their stated purpose. However, there are some photos where the sky is also reflected in a body of water and it would be really helpful if that could be automatically selected too. For example, this photo.
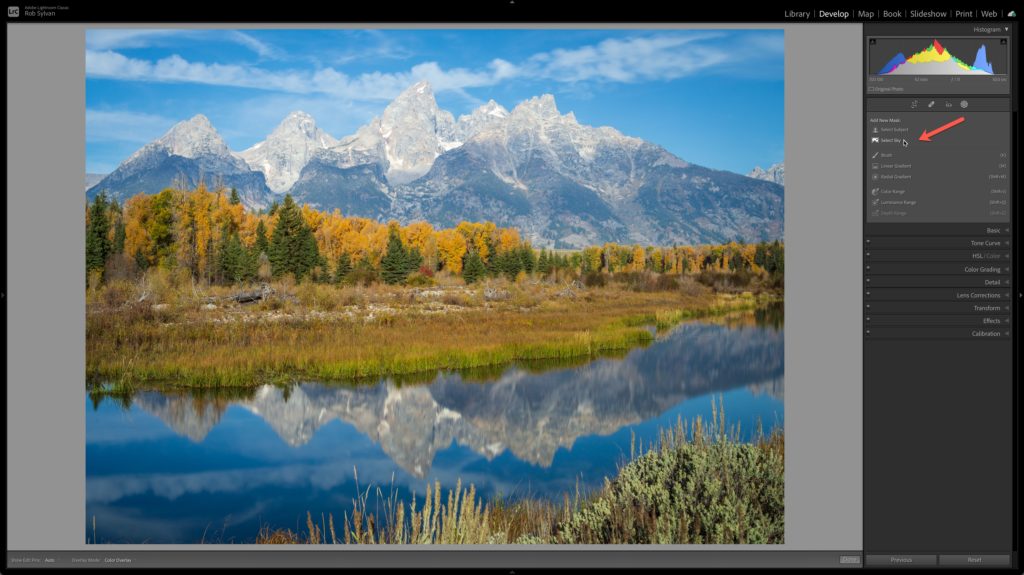
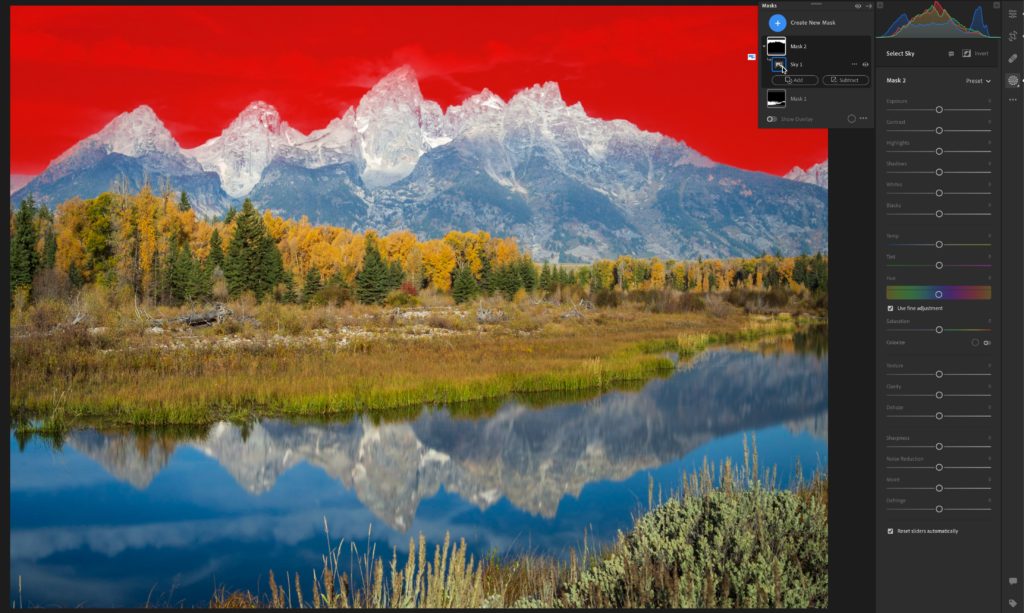
I can click Select Sky, and that works great for the actual sky, as it should.

But wouldn’t it be cool if it could also detect the reflection of the sky in the water below and select that in some automated way? I may not want to apply the same exact settings to the reflection as the sky itself, but a way to automatically select it could be helpful (sure, you can always brush over it and fiddle).
I thought, what if I flip the photo vertically so that the reflection was on the top of the photo and the sky was on the bottom, then click Select Sky? I tried that, but the AI was too smart and still selected the actual sky at the bottom of the photo.
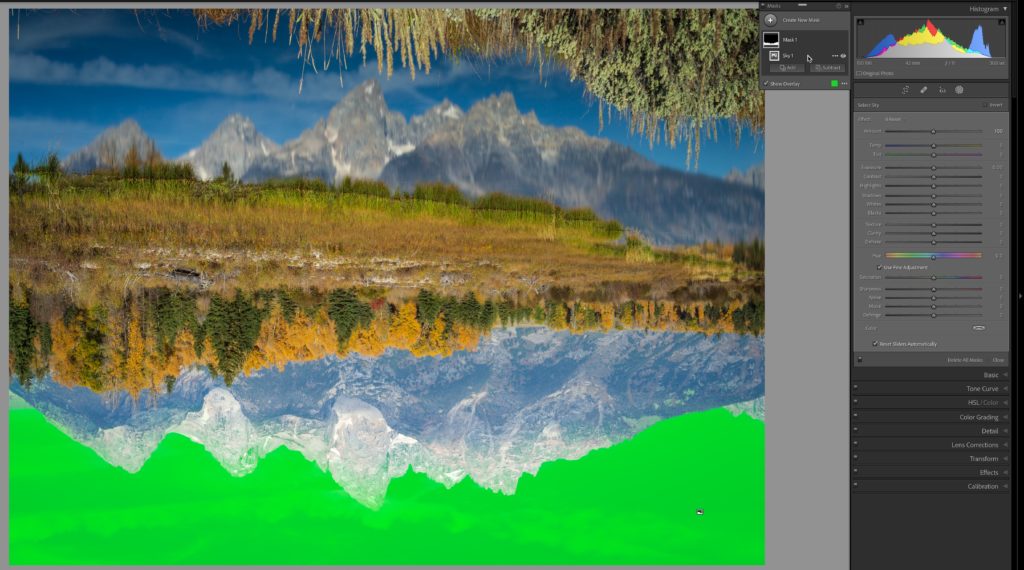
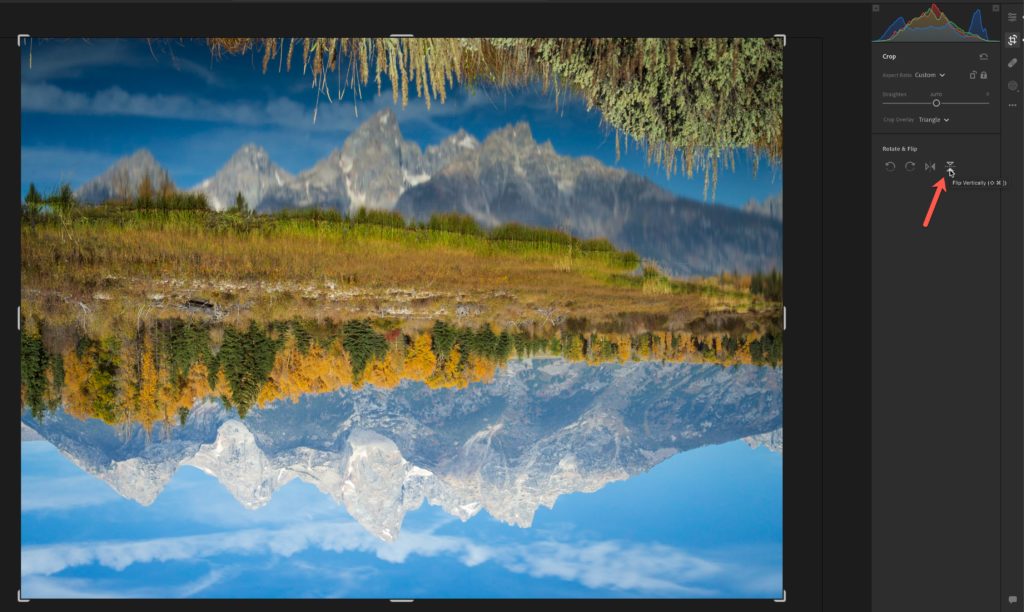
Then, I thought, I wonder if Lightroom (cloud) could be tricked into selecting the reflection in a flipped photo, so since my collection was synced to the cloud, I switched to the desktop version of Lightroom, opened the photo in the Crop tool and flipped it vertically there.
Then, clicking the Masking icon to exit the Crop tool I choose Select Sky on the flipped photo, and … well what do you know? It worked!
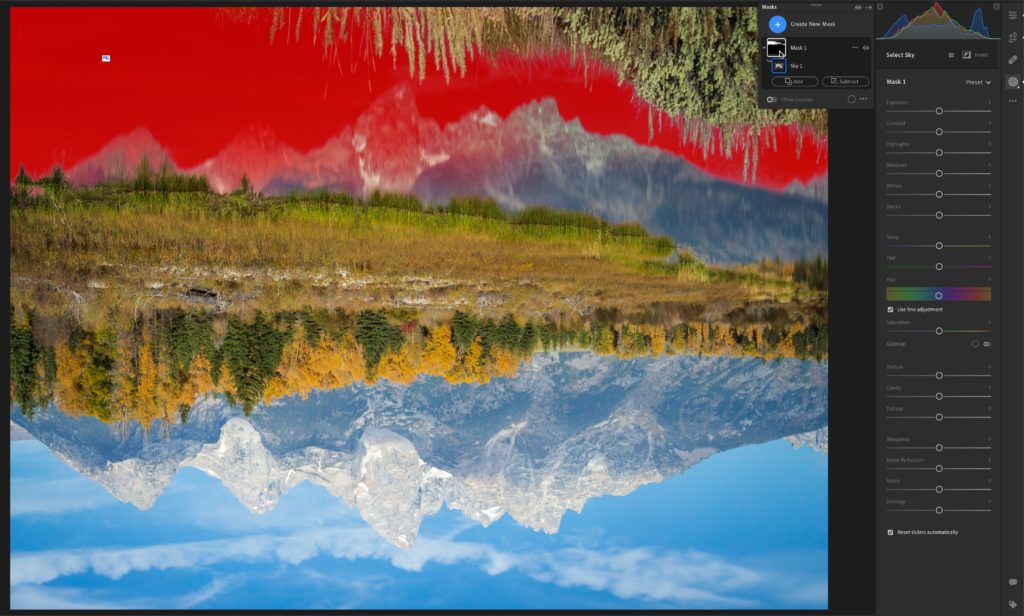
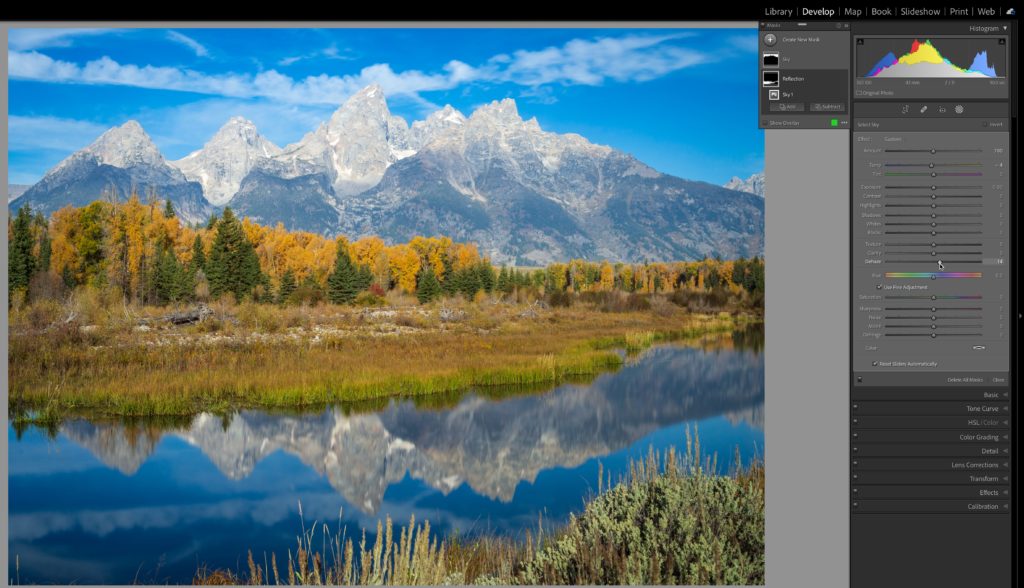
Then I went back to the Crop tool and flipped it back upright, hopped back to the Masking tools and choose Create New Mask, and Select Sky, and it selected the actual sky.
Now I had a mask for the sky and for the reflection! I named them both (double-click the mask to rename), and switched back to Lightroom Classic. Once the sync was up to date, I opened the photo back in Develop and both masks were ready for me to make desired adjustments independently. Pretty cool!
What if I don’t use Lightroom cloud?
Well, it turns out this same workaround works in Adobe Camera Raw too. So, you could either open the original raw file directly into the Camera Raw plug-in (first use the Metadata > Save Metadata to file command in Lightroom Classic to write from the catalog to the photo’s metadata) and create your masks there, then click Done to exit ACR. Back in Lightroom Classic, use the Metadata > Read Metadata from file command to import the changes made in ACR into LrC.
Alternatively, you could use the Edit In > Open as Smart Object, which embeds a copy of the source photo in a Smart Object layer, which you could then open into ACR in Photoshop and do the flip dance to create the masks. However, this method results in a new copy that will be TIF or PSD with a copy of the original raw embedded in the file, so you won’t see the masks on your source raw photo in LrC. I didn’t say it was pretty.
I think the sync to cloud and back is the best option I’ve found so far. Why does it work in Lr and ACR but not LrC? I don’t know, but wonder if it is due to the different ways they handle flipping a photo vertically? Just a guess since Lr and ACR are similar in how they do it. Let me know if you find something better.


Keeper,
No, that doesn’t changed anything (based on what I’ve tried, anyway). I think LrC figures out what the sky is no matter how you orient an originally horizontal photo.
Dan
I have found this pretty helpful. Many thanks!
Hi Rob
Interesting article. It made me take a shot at coming up with a kludge too. My idea was unsuccessful; however, I did make an interesting discovery on a couple of my images that maybe you could try out too on some of yours.
What I found was if the images are vertical (portrait orientation), LrC has no problem selecting both the actual sky and the reflected sky. And actually it did a better job of selecting the reflection (it spilled over into some of the subject toward the top of the image, but not in the reflection of the subject). With a quick search of my catalog, I was able to find three vertical images that had a sky reflected in a body of water. Select Sky selected both sky and reflected sky for all three images.
I found similar horizontally-oriented images but Select Sky did not select both actual and reflected sky. I tried cropping those images into a portrait orientation but no luck with Select Sky. When I cropped the vertical-oriented images to a horizontal composition, Select Sky did select both actual and reflected sky portions of the image.
I thought this was interesting behavior, and thought you would like to know.
Regards,
Dan Roeder
What happens if you turn a landscape-oriented “landscape” photo with both sky and reflected sky in it, 90 degrees? Is LrC then able to recognise both sky and reflected sky? …