Taking an Image From Lightroom to Photoshop and Back
Morning, everybody! I’m up in Richmond, Virginia for my seminar today, and looking forward to seeing everybody.
I had a Lightroom question at my seminar in Dallas, and it’s one that I get a lot so I thought I’d cover it here today, and that is…
“How do I take an image over to Photoshop for some editing there, and once I’ve taken it over there, how do I get it back?”
Let’s cover the round-trip experience for a typical thing you might need to jump to Photoshop for (in other words, to do something Lightroom can’t do). Here we go:
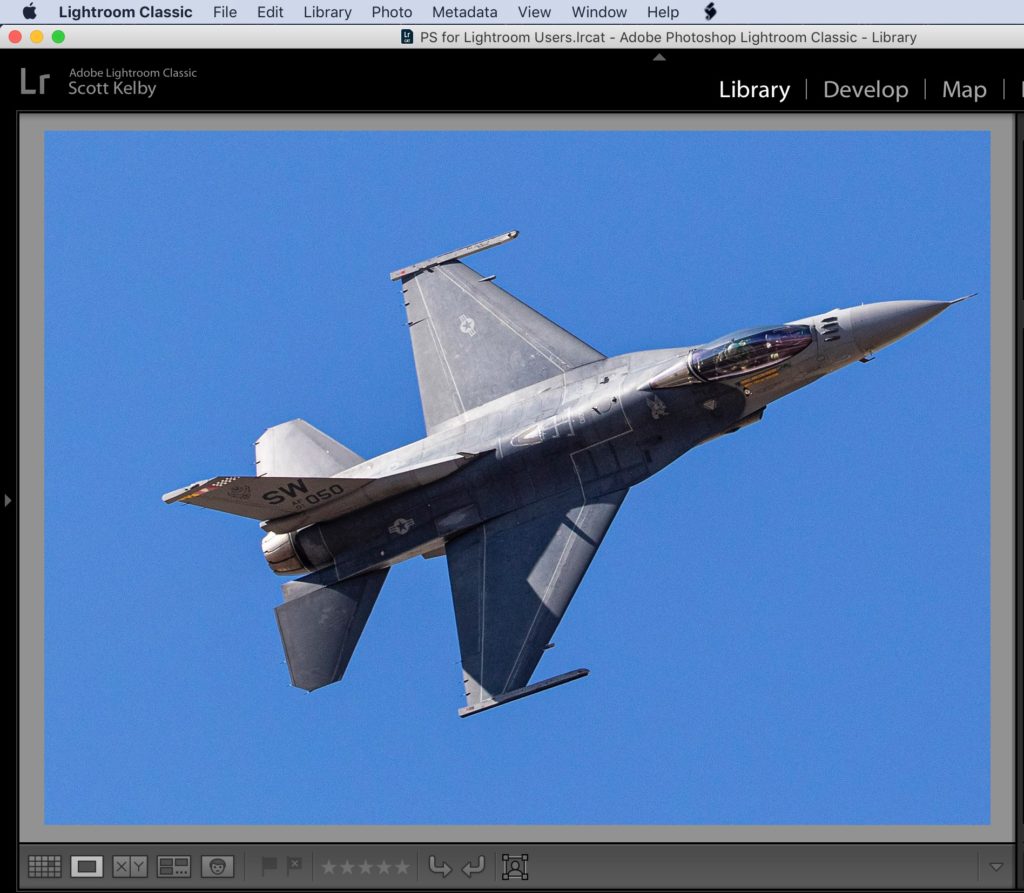
STEP ONE: Here’s our image in Lightroom, and the problem I want to address is the fact that the jet is too close to the edge of the frame on the right side (compositionally, you want to leave some space for the jet to “move into,” and unfortunately, that space is behind the jet on the left, instead of in front of it to the right. Time to head over to Photoshop.
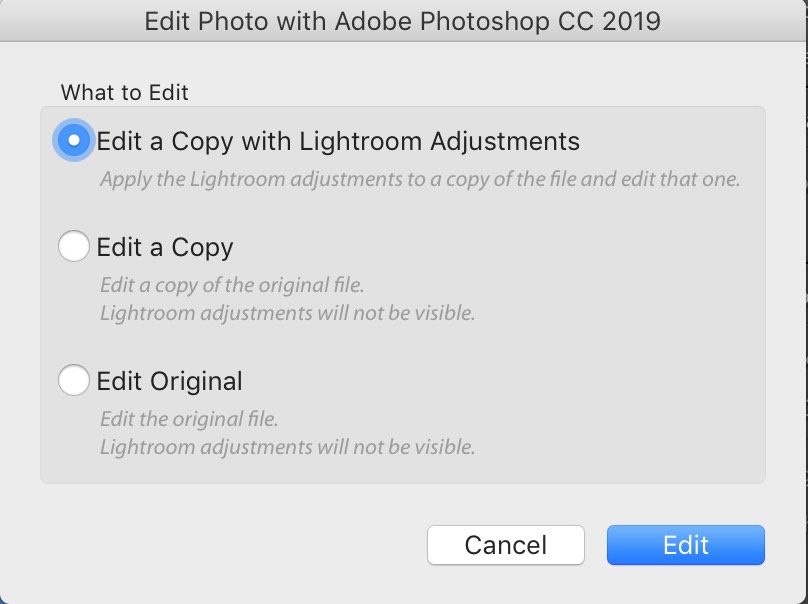
STEP TWO: Press Command-E on Mac, or Ctrl-E on a Windows PC and if you shot in RAW, your image will just appear over in Photoshop (it loans Photoshop a copy of your image). If you shot in JPEG mode (or TIFF), the dialog box you see above will appear, asking you how you want this image to go over to Photoshop. I pretty much always choose the top choice: “Edit a Copy with Lightroom Adjustments.” That way (1) It makes a copy of my image, so my original JPEG is protected; (2) It keep any changes or edits I made in Lightroom intact as it moves over to Photoshop. Again, you will only see this window if you shot in JPEG or TIFF mode on your camera.
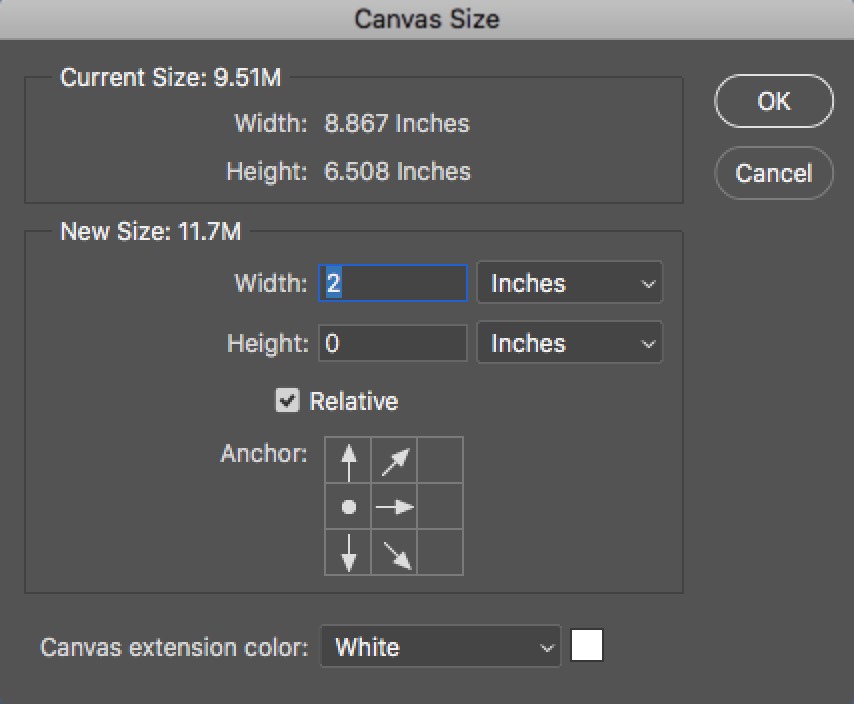
STEP THREE: Once you’re over in Photoshop, to add more space in front of the jet you’ll have to go under Photoshop’s Image menu, and choose Canvas Size, which brings up the window you see here. I chose to add 2-inches to the right side of the image (as seen above).
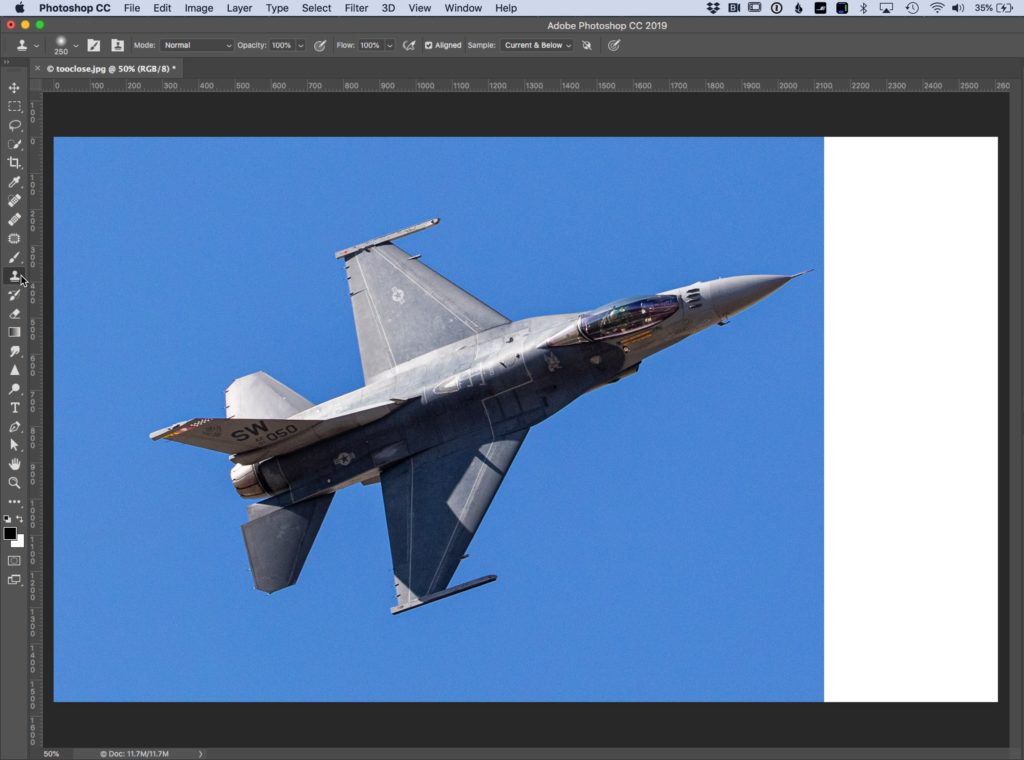
STEP FOUR: When you click ‘OK’ in that Canvas Size dialog, it adds that two-inches of white space you asked for on the right side of the image.
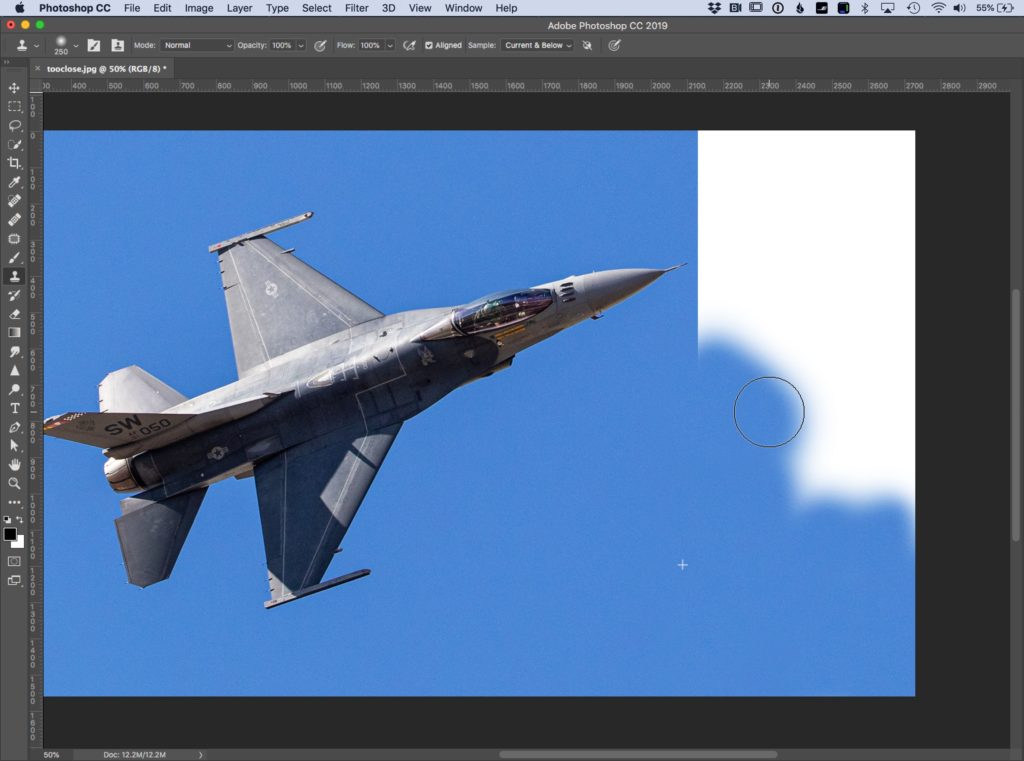
STEP FIVE: We’re going to clone that blue sky over into that white space, so get the Clone Tool (as shown here); Option-click (PC: Alt-click) in a clear area of the sky and paint over that white area, as seen above.
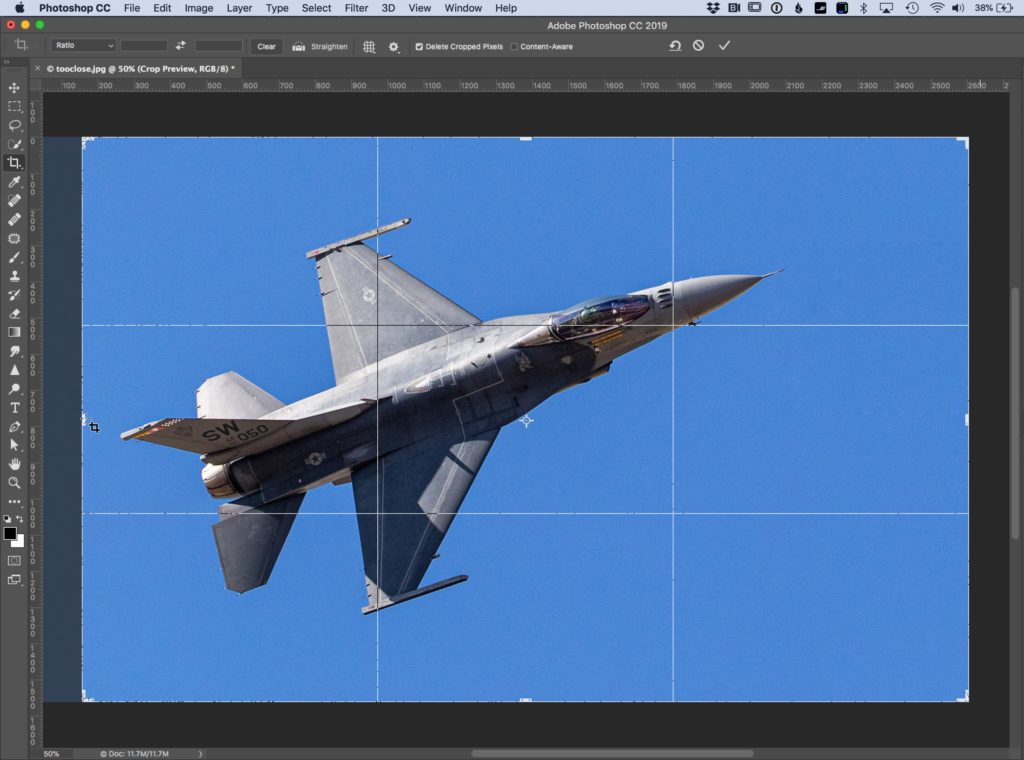
STEP SIX: Once you’re done painting in sky to fill that white canvas area, it’s time to re-crop the image (well, that what I would do anyway, so there’s no so much space behind the jet). Can you use Photoshop’s Crop Tool or you can wait until you get back to Lightroom to do it there (the advantage of doing it later in Lightroom is — you can undo it, or readjust your crop any time), but in this case, I did it in Photoshop.
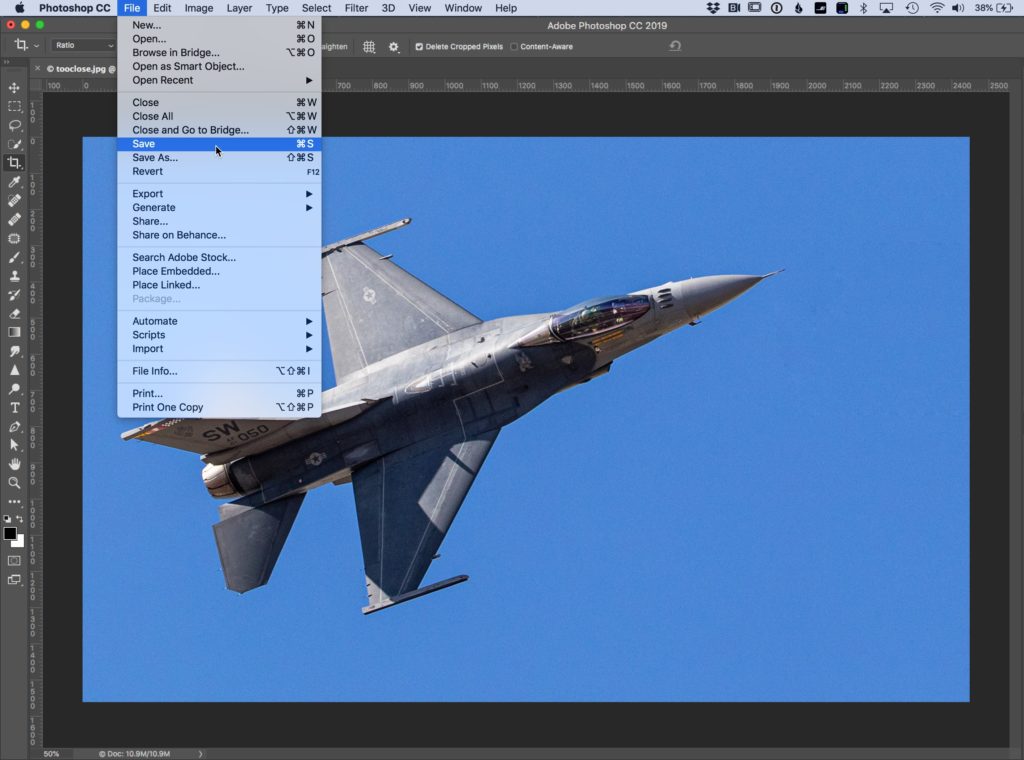
STEP SEVEN: To get your ‘Edited in Photoshop’ image back to Lightroom is actually super simple: just Save the image (as shown here), and close it. That’s it — save and close.
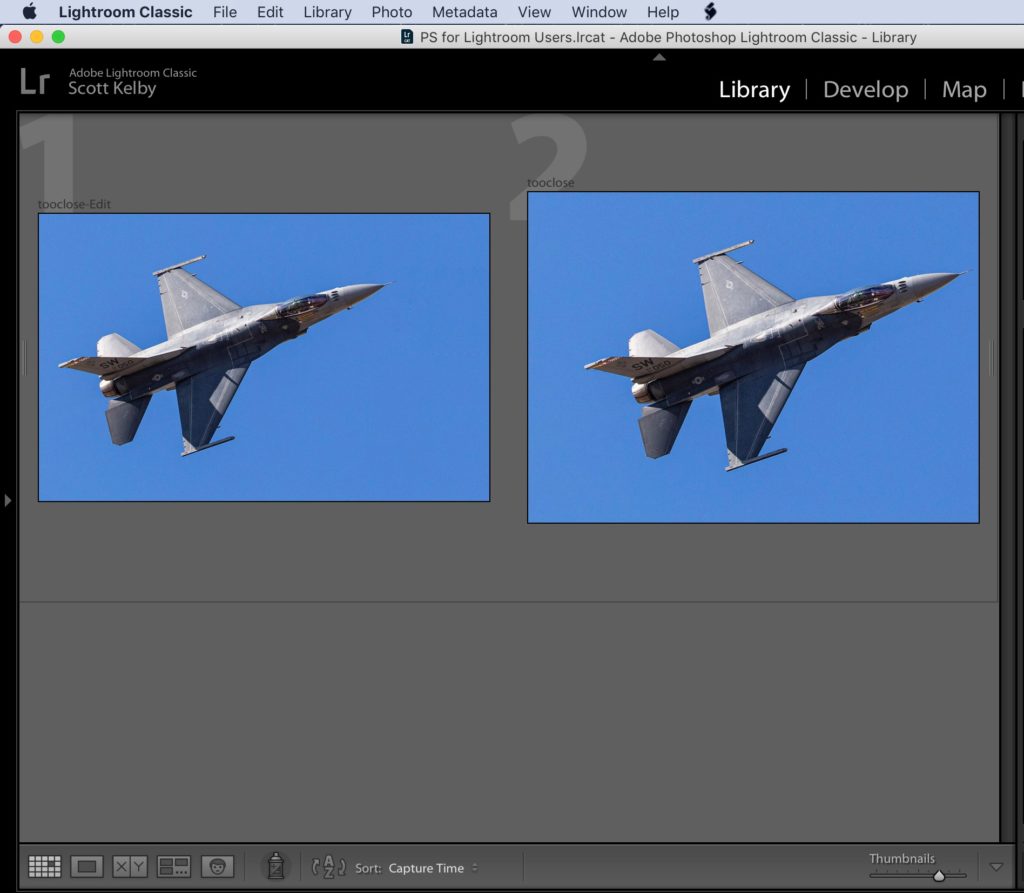
STEP EIGHT: Once you do that, your edited image appears back in Lightroom alongside your original (that’s the edited and cropped version on the left, and the original on the right.
Hope you found that helpful. 🙂
Don’t forget to stop tomorrow for my latest “Lightroom in 60-seconds” video. 🙂
-Scott



Excellent. I did a screen-grab and practiced on your fighter-jet image. Very helpful. Had never used the “Relative” check-box in the Canvas Size dialogue — something I would not have expected to learn in this tutorial! Very helpful, as always, thank you!
If you want a Tif image that’s 5x your original raw image be my guest. I prefer to do my Lightroom work and then be done with it. After that I do my photoshop work to the exported jpeg or the origjnal raw and I’m finished. No need to go in circles.
You don’t need a TIF image at all — You can choose to send over a dramatically smaller PSD without losing any quality. It’s in Lightroom’s Preferences.
You can also set the Bit Depth to 8 bit, which will reduce file size even more (if that is the primary concern).
I find that if I have to do a “SAVE AS” from Photoshop……( because I’m making several different versions of the same shot)….. Those new versions don’t show up automatically in the original Lightroom folder or collection . I seem to always have to go to the original folder and do a “Synchronize Folder” command to make them appear in the folder and then re-add them to the collection .
Is there a better or quicker way to do this?..
Thanks
GS
Nope. Just know that using Save As makes new copies that are not connected to Lightroom, so yes, you have to import them afterward and synchronize folder is the fastest way to do that. You would have to manually add them to the collection too.
is it normal that sometimes when we launch photoshop from a collection and come back to LR, psd doesn’t appear in the collection so we need to use “open in folder”…
Double-check that you actually had a collection selected, and not the parent collection set. If you have a collection selected, then the copy will be added to it, but if a collection set was selected you’ll see the same photos (plus others), but the copy will not be added.
How do you reopen it with layers intact in photoshop?
select “edit original” for the psd and it opens the psd in photoshop with all its layers
This round trip is very interesting when it comes to color spaces. In Photoshop I set the working color space to that of my display (calibrated) and embed this color space when saving in Photoshop. This is the only way I found to preserve the colors. Is there a better way dealing with color spaces when using Lightroom with Photoshop?
Lightoom’s dialog for settings whren using an external editor also requires to set some things. It would be interesting to see your settings Scott.
Hey Scott,
Thanks for this Tip. I’ve used it a lot. However, I have a question about all the copies that you end up when using LR Plug ins and back and forth to PS. Sometimes I end up with 3 or 4 edited copies. Taking up lot of desk space. Am I doing something wrong here? Is there a save way to eliminate some of those copies?
Oh, are you coming to San Antonio any time soon?
Thanks,
Dennis
Sorry … I meant to say “Safe Way” not save way.
Dennis
Thank you, the adding space and cloning is a superb tip.