
Intersect Mask
The new/upgraded Masking functionality in Lightroom Classic (and friends) has been very positively received so far. There’s one aspect, Intersect Mask, that seems be a little harder to understand on first look, so I thought it would make a good topic for a deeper dive. However, let’s first take a step back to the previous version, Lightroom Classic 10.4, to see if that can help us as we move forward.
Previously we had Range Masks
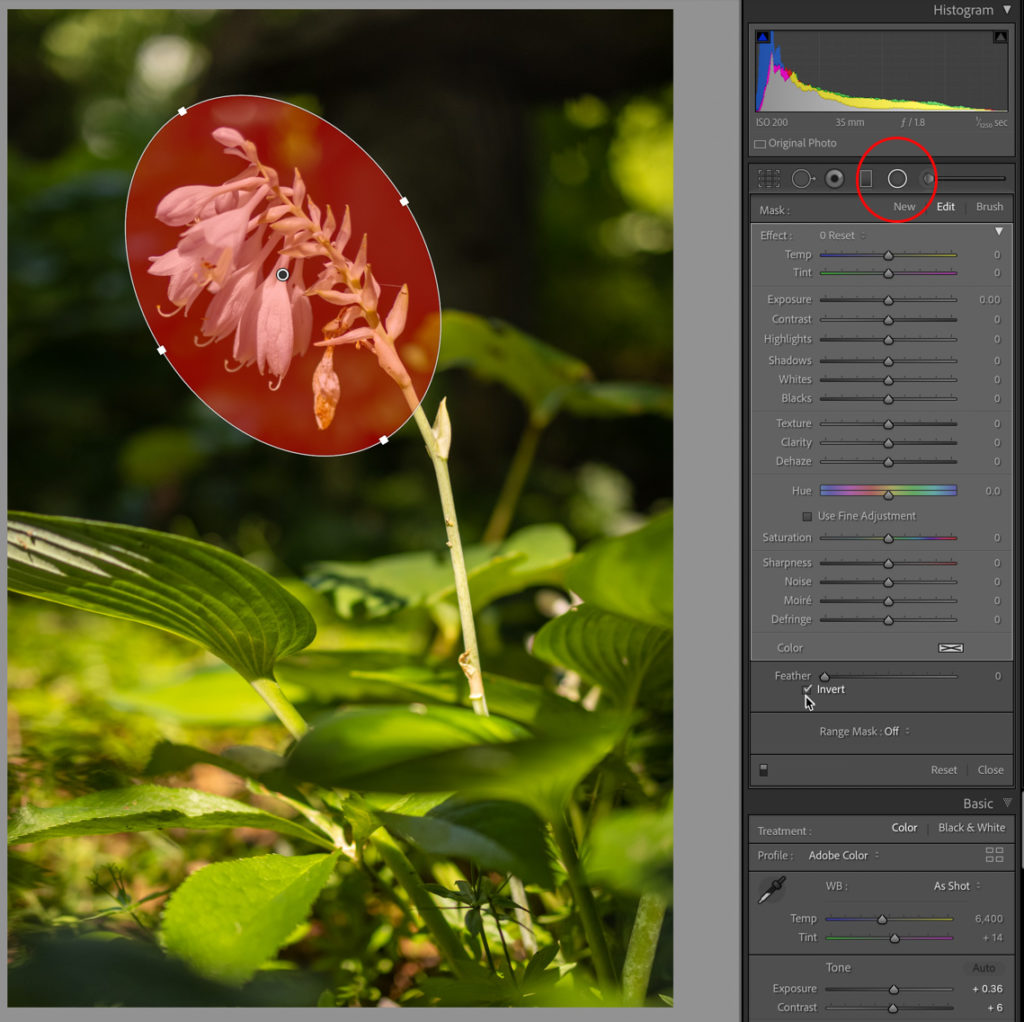
In the prior version of Lightroom Classic (10.4), within either the Graduated Filter, Radial Filter, or Adjustment Brush, we could refine the affected area by applying a Color or Luminance Range Mask. Here’s a simple example, let’s say I wanted to affect just the flowers of this hosta (I think) plant. One approach might be to grab the Radial Filter, and place an inverted oval (so it affected the inside of the oval) over the flowers, like this.
Then, clicking the Range Mask drop-down menu I could choose Color, and sample colors within the flowers to refine the mask to only affect those colors within the Radial Filter I had drawn.
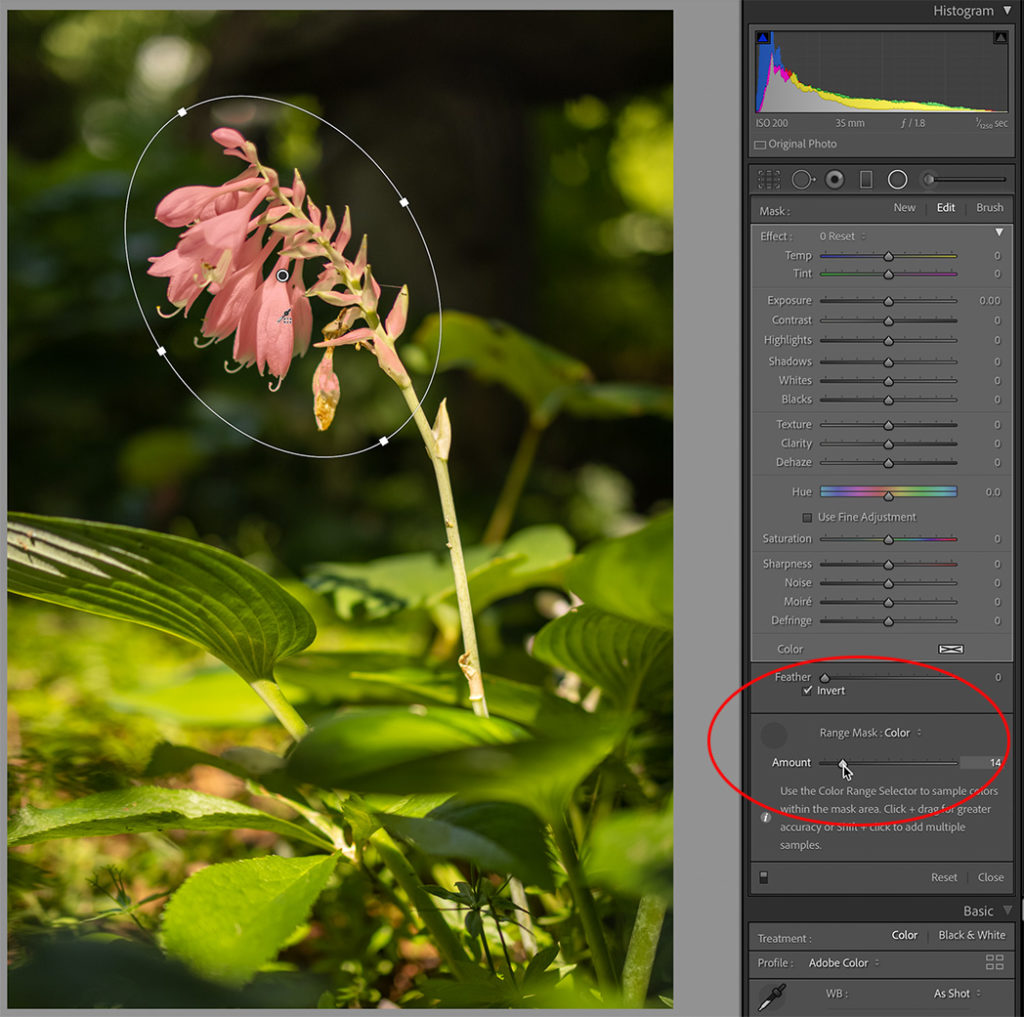
Only pixels within the area defined by both of those tools are masked. Once I finalized my mask, I could then dial in the desired settings I wanted to apply to the affected/masked area. Let’s look at how to do that in the latest version of Lightroom Classic with Masking.
Along Comes Masking
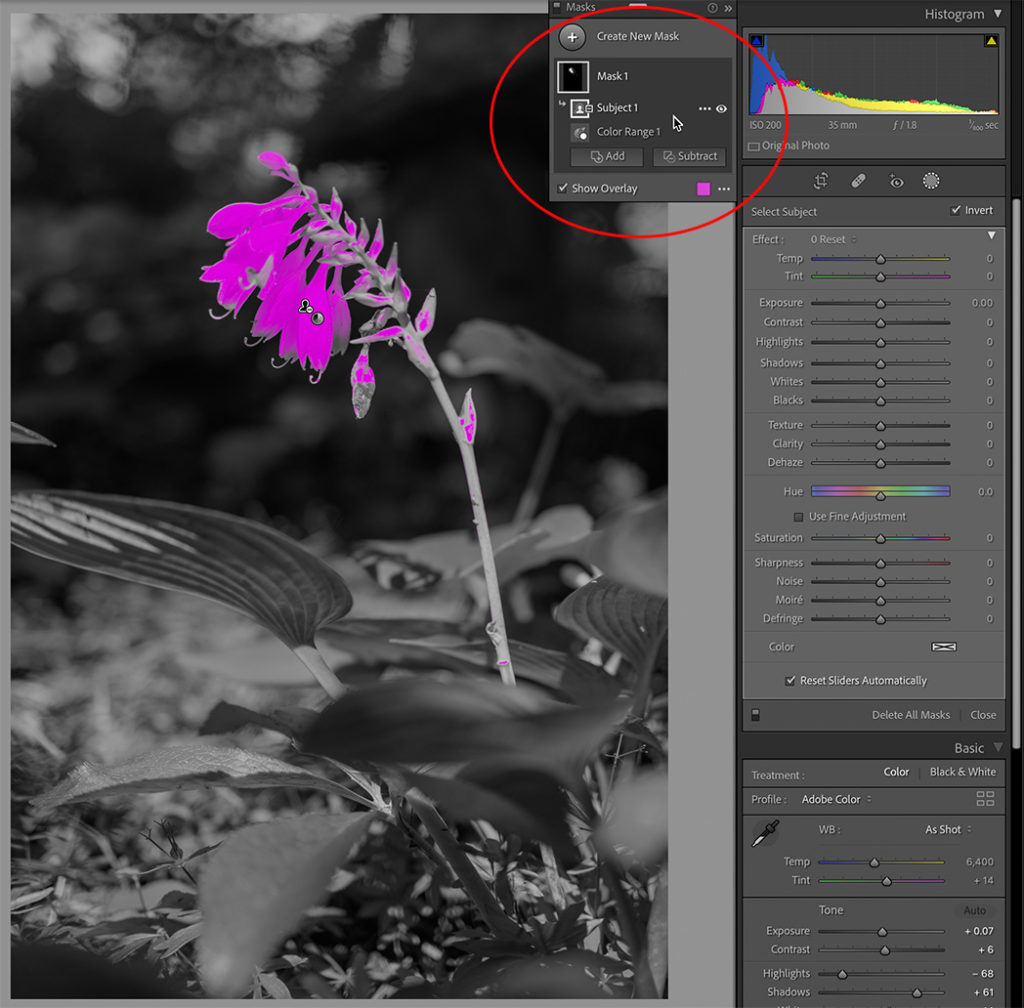
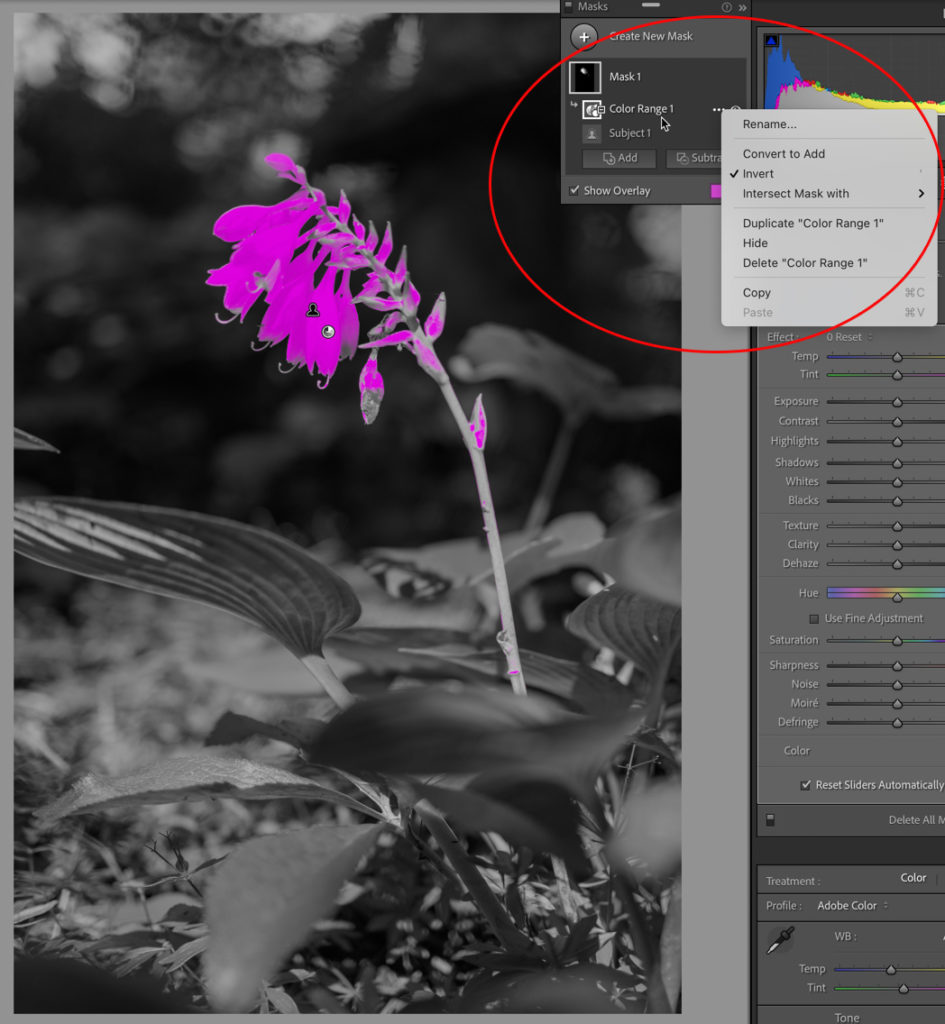
Let’s try to create that same mask using the new tools. Now Color Range can be used all on its own, so let’s start with that and select the same range of colors (note, I have the overlay set to Color Overlay on B&W with a bright pink to make it easy to see the mask).
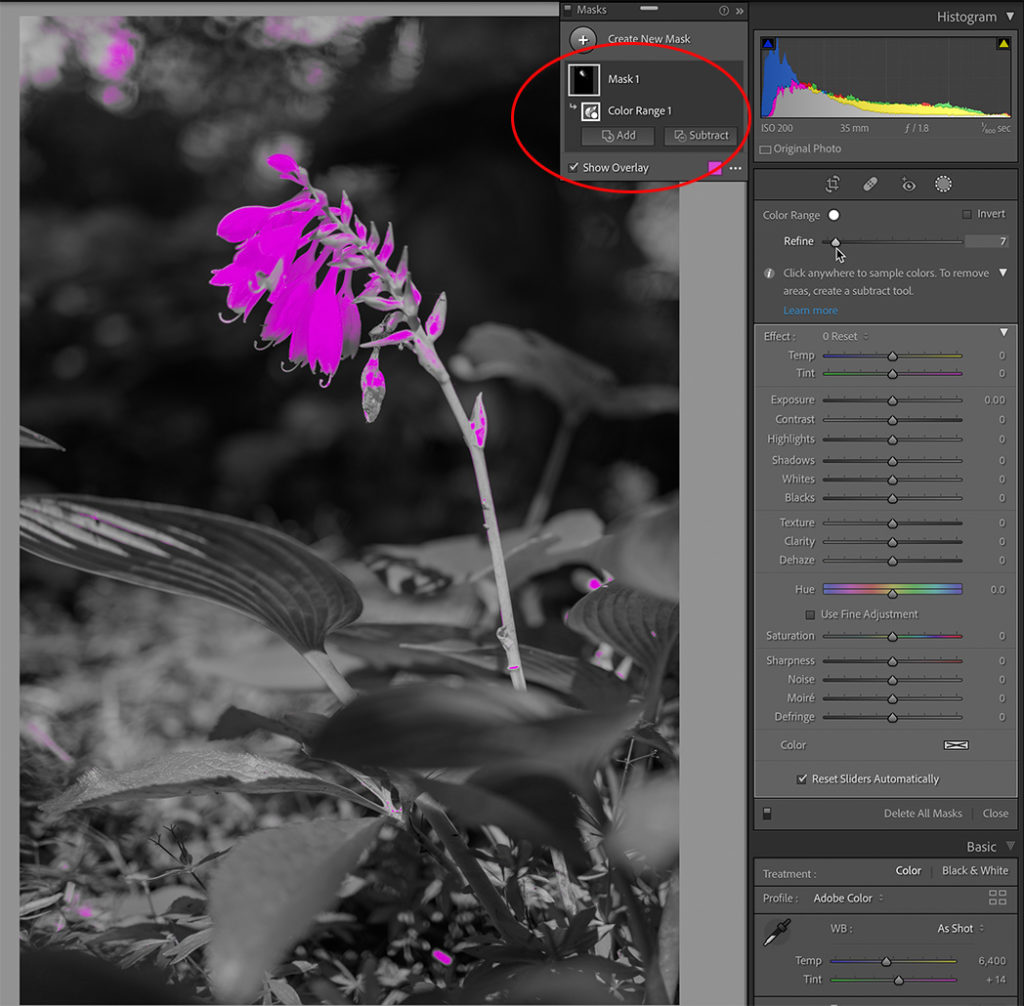
I’ve used the Refine slider to narrow the range of colors down, but it is still affecting areas outside of the flowers I want to adjust. How can we limit it down to just the flowers? One option would be to click the Subtract button within Mask 1 and choose Brush, then brush over any areas I don’t want to include in the mask. That works, but it involves brushing all over the image, which might not always work depending on the photo being adjusted. What about Intersect? If I click the three-dot menu next to Color Range 1 (or right-click) I can go to Intersect Mask with … and choose from any of the existing tools. Let’s try Select Subject and let LrC do the heavy lifting instead of me painting.
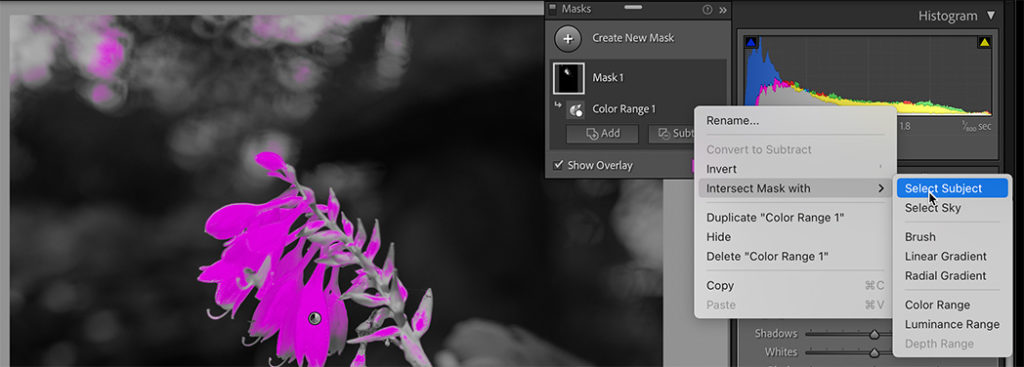
Now the mask only affects the area within the Subject AND the selected Color Range (just like in the previous version of LrC). Of course, if needed, I could use the Add or Subtract options to refine the affected area even further.
Another Approach?
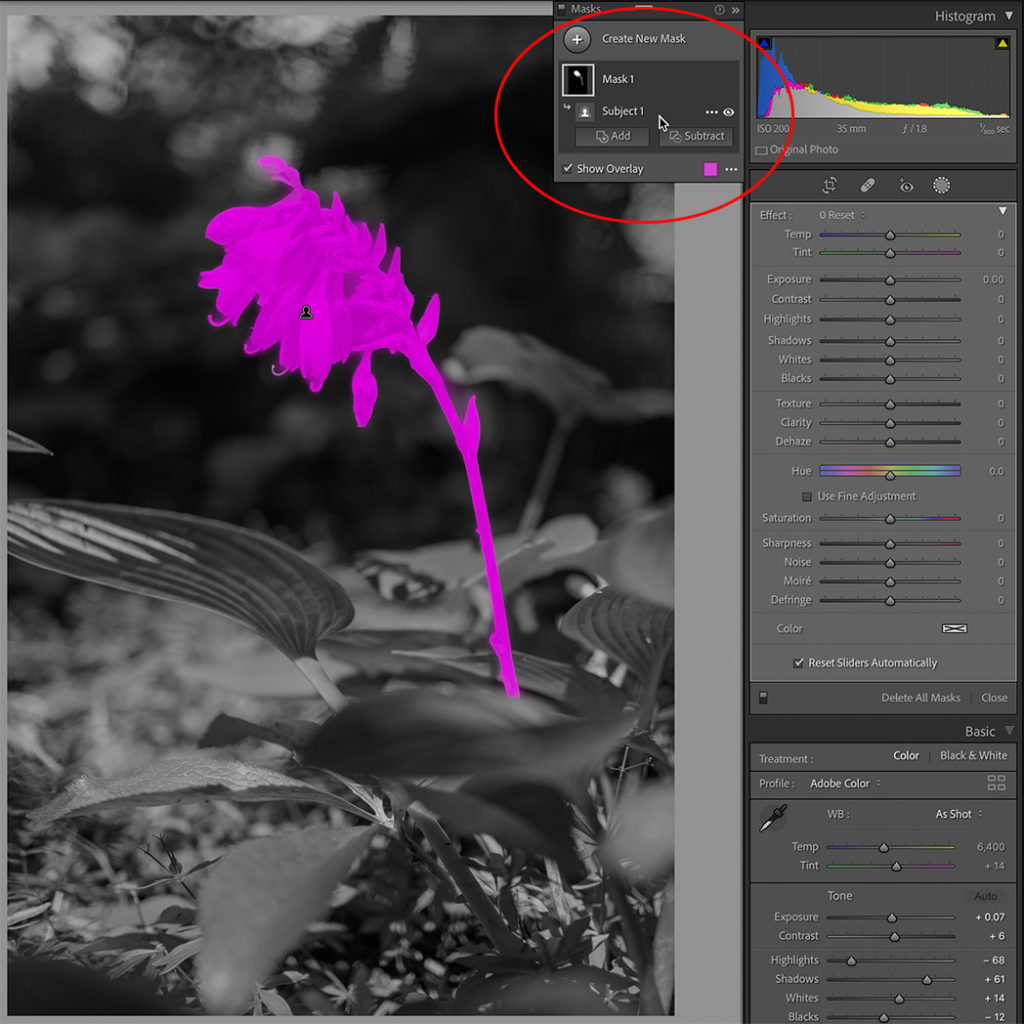
What if I started with Select Subject? I deleted my previous mask and clicked on Select Subject. It did a great job of masking only the stem and flowers.
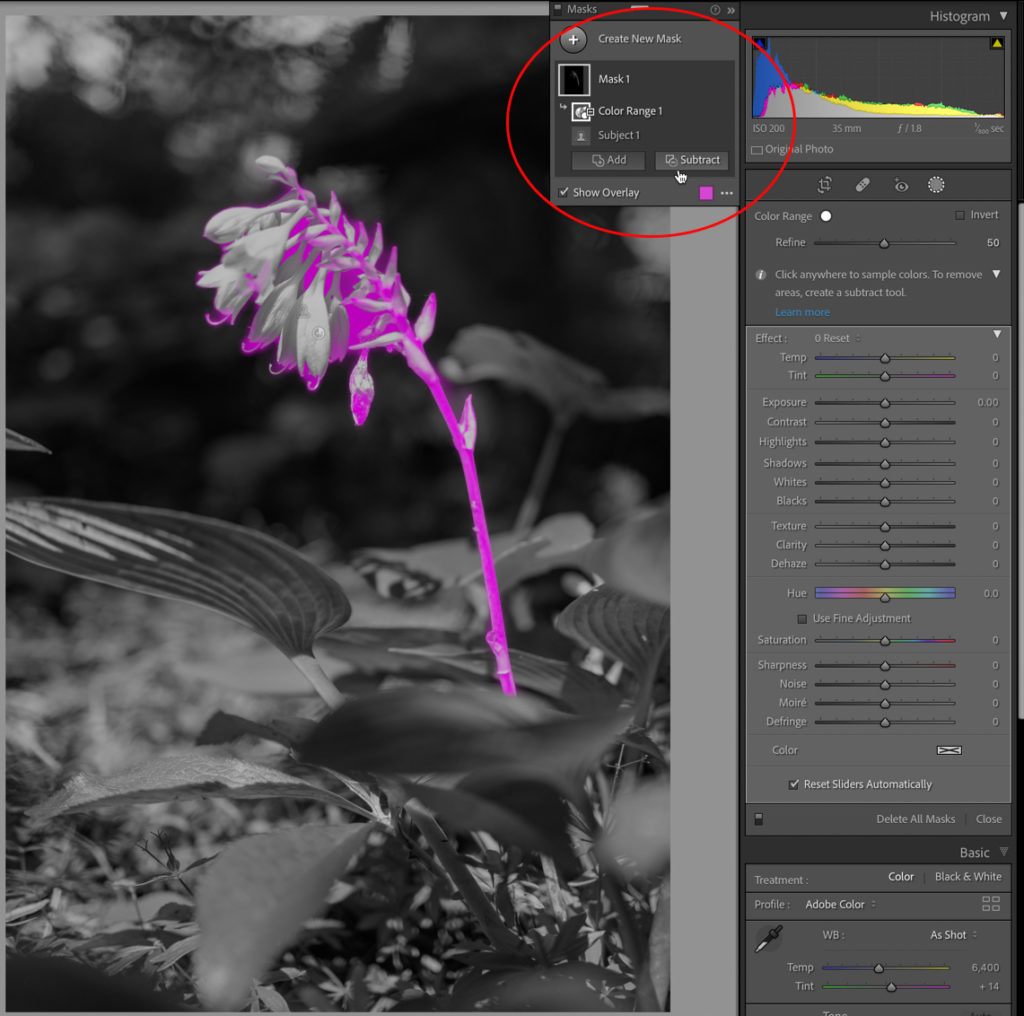
Now, I want to refine that to only affect the flowers like before, but let’s not use Intersect this time. Instead, I’ll click Subtract and choose Color Range. Now everything within the Subject except the flowers is selected. That’s not the results I wanted (yet), but if you are coming from LrC 10.4 and didn’t know about Intersect it might be the approach you’d take at first.
So with that mask in place, the way to mimic the Intersect Mask behavior (or the behavior we had in 10.4 with Color Range within an existing mask) is to take one more step and Invert the Color Range subtraction. Yeah, not super intuitive, but watch. If I click the three-dot menu next to my Color Range subtraction and choose Invert …
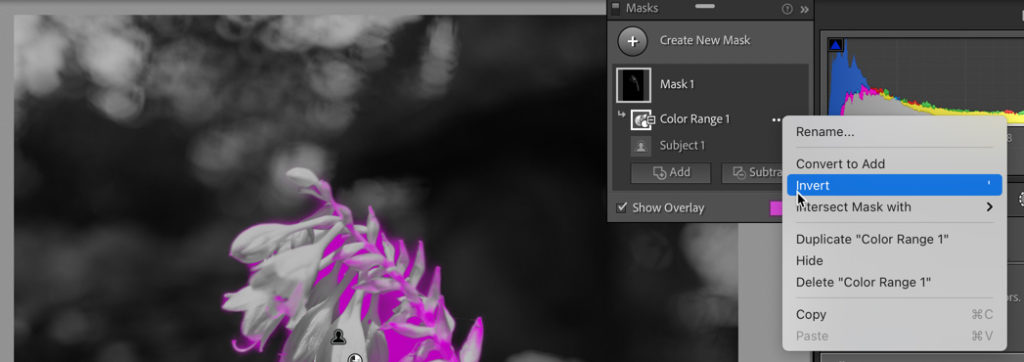
I’m right back to the same results I got using Intersect Mask with Color Range previously.
Is there a reason to take the long road? No, but if you are using the cloud-based version of Lightroom you’ll discover that it doesn’t have an Intersect Mask with option, so you can achieve the same results by following these steps:
- Apply your first mask (in this case I used Select Subject, but it can be any other).
- Click Subtract and apply a second mask tool (I used Color Range, but use what you need for the job).
- Click the three-dot menu next to that second mask tool you subtracted with and choose Invert.
Hope that helps!


Here is a great video on using the intercept feature, well worth the time to watch as it goes into more complex ways of using and inverting complex masks. – https://youtu.be/EZcHhWB437c
Hi Rob,
Excellent tutorial on this subject. I noticed that Scott left the intersect option out of his Masking Course. Maybe you can persuade him to add another section to the Masking Tutorial on the Intersect Masking. 🙂
Again, good job!
Dennis
The new masking tools are going to take some time to get used to – but they are welcome.
Very powerful tool, thanks for the dual approach.
very useful tutorial and good example.