Including Copyright Notice in Lightroom Cloud
As the new year is upon us I thought I’d share a tip on how to include your copyright info in the cloud based Lightroom apps. I’ll start in Lightroom mobile, but also point out where it is located on the desktop Lightroom app too. Be sure to read to the end to see how what I do in Lightroom Classic for photos synced from the cloud too.
Lightroom Mobile
In the Lightroom mobile app, head over to the Settings screen (depending on the screen you are currently viewing this can mean clicking the gear icon or the three-dot menu, then choosing Settings).
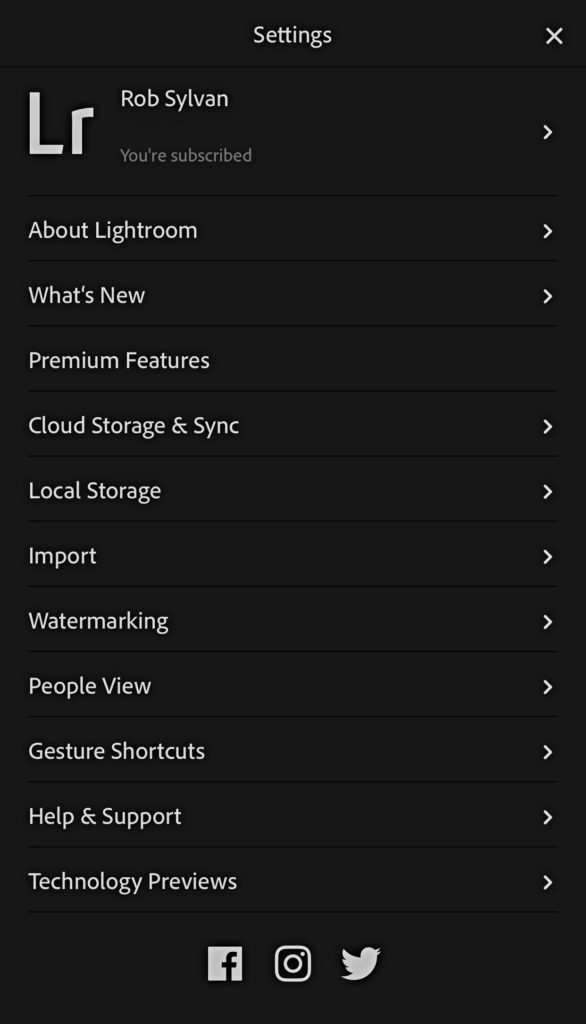
From the Settings screen, tap Import, to view the Import related settings. It is here that you’ll find the field for Add Copyright.
Unlike in Lightroom Classic, there is no full metadata template to add, just a simple field. This maps to the Copyright field in Lightroom Classic. Tap the switch above the field to turn it on, then enter your information in the field. The generally used form is the copyright symbol, the year of first publication, and the copyright holder name, so go with that unless you have a different preferred order. I know people love to argue about whether the year is required or not, but while they do that I suggest just putting it in there and moving on with your life.
Lightroom for Desktop
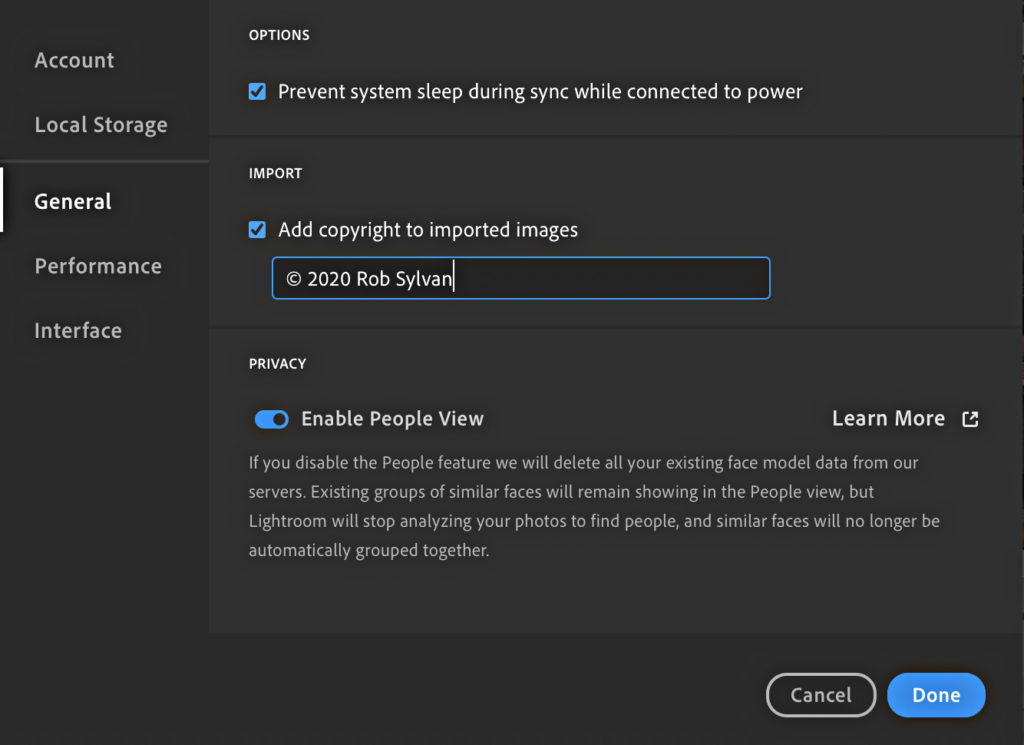
On the desktop version of the Lightroom app, click the cloud (sync) icon, and then click the gear icon to open the Preferences. In the Preferences, click the General tab to find the same copyright field. Now, you might wonder why we need to enter it separately in all these cloud-based apps, and I’d have to say that is a fair point. Until that changes, enter it in each app.
What about Watermarks?
I’m not a big fan of watermarks, but some people need them/love them, so if you are one of those people you may be disappointed in the options here. While you can apply a watermark from the Lightroom mobile apps, you can’t yet do it from the desktop Lightroom app (I don’t know why). In addition to that limitation, the watermark itself is limited to a simple text-based watermark.
To configure the watermark on Lightroom mobile, head back to the Settings screen, then tap Watermarking to customize its appearance.
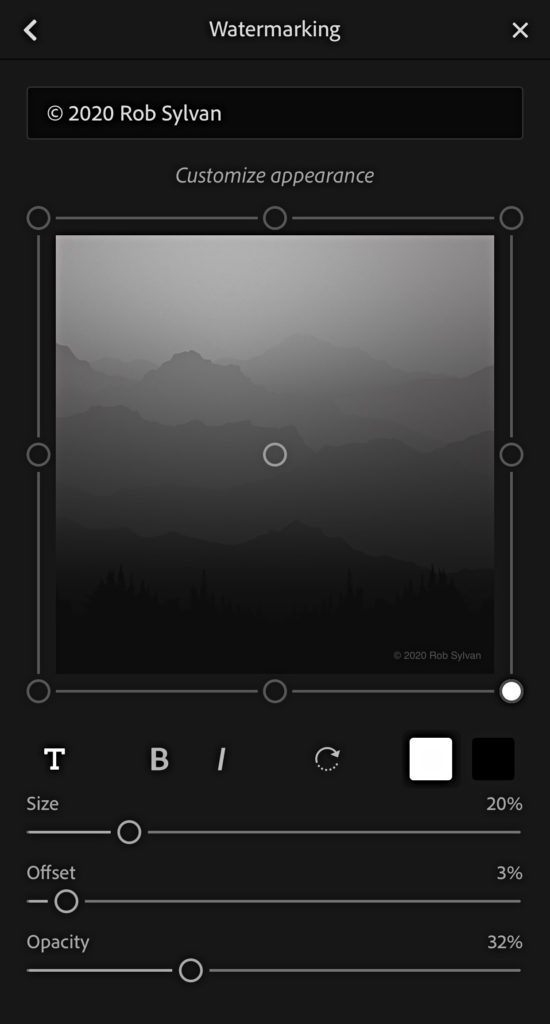
Start by editing the text (if needed) used for the watermark, then tap one of the anchor pins to choose where the watermark originates from. From there, use the Size, Offset, and Opacity sliders to position and size your watermark. There are additional controls under the live preview for changing the font, font style, rotation, and color.
Once configured, be sure to enable Include Watermark when exporting using the Export As option, then choosing More Options to find that setting.
Back in Lightroom Classic
For those of you syncing back to your Lightroom Classic catalog you may want to include your full metadata template to photos imported from or created in one of the Lightroom cloudy apps. Check out my tip from a few years ago on how to keep track of those photos and keep them updated.
Wishing all a healthy and successful 2020!