
A big howdy from the great state of Connecticut – I’m up here in Hartford (home of one of the top-5 burger joints in the USA: Plan B Burger), and I’ve got a little tip today, but it’s an important little tip about the new RAW profiles recently added to Lightroom (across all the different editions of Lightroom, including Lightroom on mobile).
The new default RAW profile (the profile which interprets the RAW image from your camera and gives it its ‘look’) has changed from the original Adobe Standard RAW profile, which has been with us for around 11 years (which I always referred to as “Adobe Dull”), to the Adobe Color RAW profile, which produces a much more pleasing profile all the way around (I haven’t found an image yet that I thought looked better in the old Adobe Standard profile).
Here comes the tip
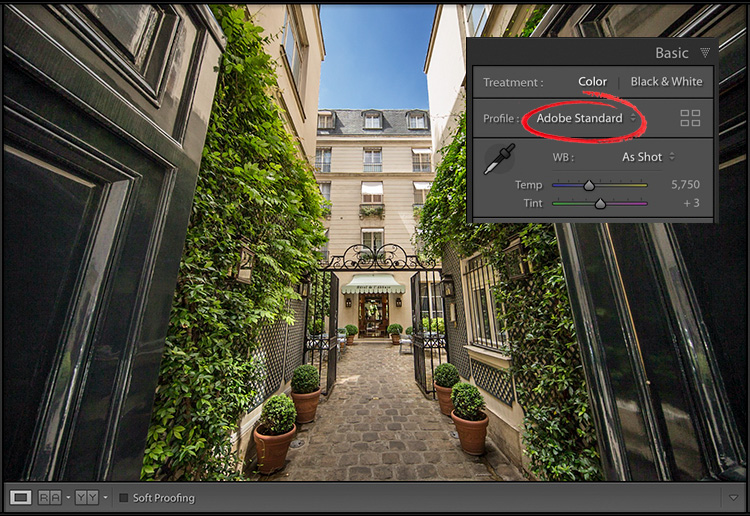
While any new RAW images you import into Lightroom have the new Adobe Color RAW profile applied to them, (and here comes the tip), all your images already in Lightroom still have the old Adobe Standard profile. It doesn’t go back and retroactively update all your existing images to Adobe Color. For example, the RAW image at the top above, taken a few years ago in Paris, was already in my Lightroom catalog so it has the old Adobe Standard profile applied, and now (since the update) you can see that right at the top of the Basic panel (it’s circled here in red).
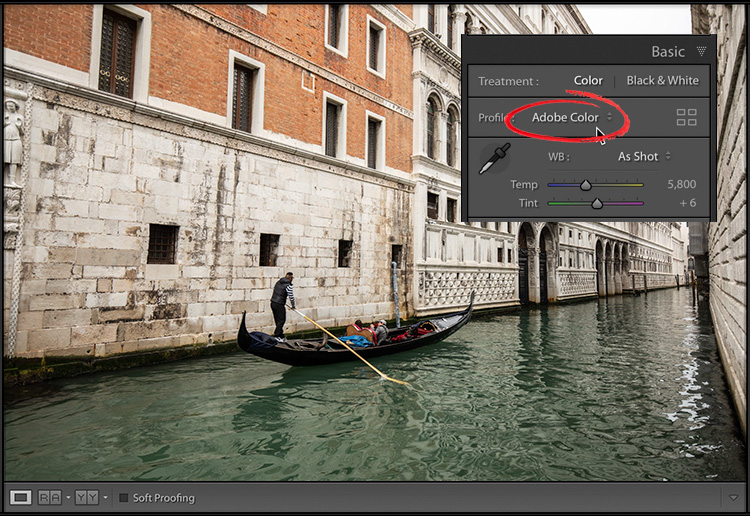
Above: Here’s a RAW file from my recent trip to Venice, and it automatically has the Adobe Color profile applied to it.
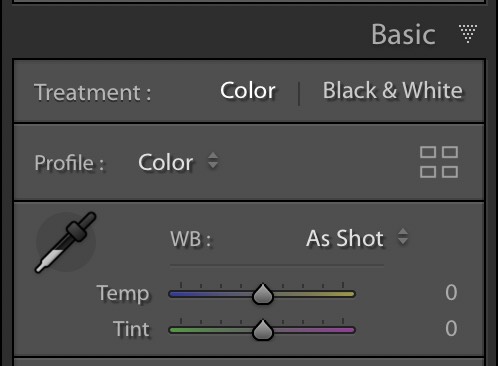
Above: In case you were wondering – if you look at a JPEG or TIFF image, the image already has a profile embedded it in, so the Profile pop-up menu will show your only choices as Color (as seen here) or Monochrome – not ‘Adobe Color’ because it’s not a RAW profile.
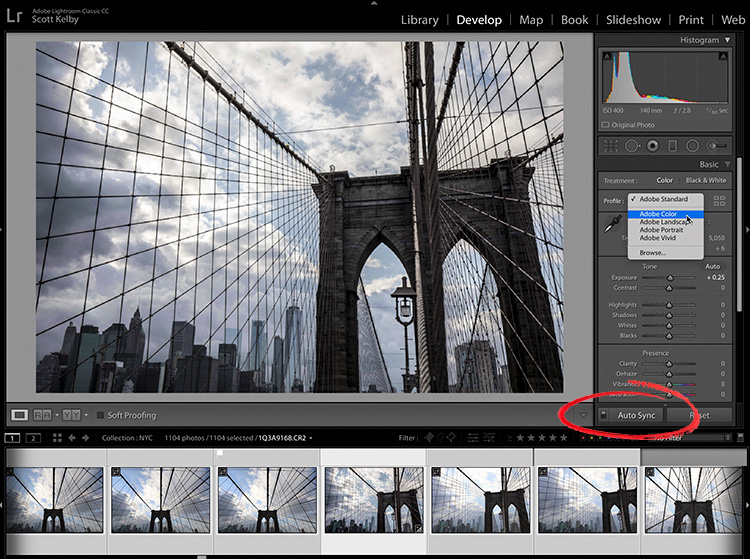
If you want to update your older RAW photos to the new profile, it’s really easy. Click on the collection (or Folder) you want to update to the new profile; make sure Auto-Sync is turned on (it’s that little toggle switch to the left of “Sync” at the bottom of the right side panels), then choose Select All and simply choose Adobe Color from the Profile Favorites menu and it will update all those images to the new Adobe Color RAW profile, and your images will look anywhere from a little better to noticeably better, depending on the image. That’s a nice little upgrade right there. Just remember, if you had chosen other RAW profiles down in the Camera Calibration panel (like Landscape or Vivid, and so on), those will all change to Adobe Color as well. If you haven’t been messing with those profiles, then no sweat, but just wanted to give you a heads up that ALL RAW photos will change to that Adobe Color profile.
What if you want to do that for ALL the RAW images in your entire catalog (updating from the old Adobe Standard to the new Adobe Color)?
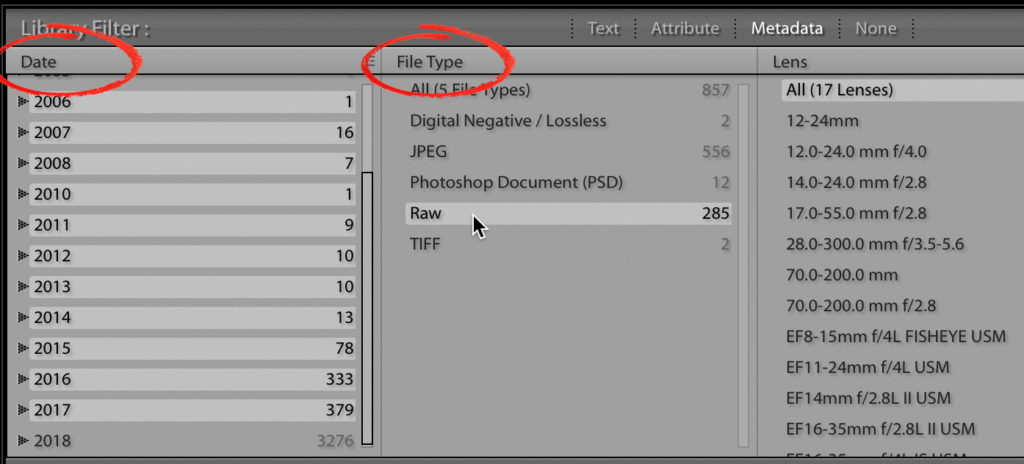
Then go the Library module; press the backslash key to bring up the Library Filter bar across the top. In the 1st column choose Date from the pop-up menu at the top of the column, and then hold the Command-key (PC: Ctrl-key) and click on every year’s results except 2018 (so all your older images are selected). In the 2nd column, choose File Type, then click on RAW. Now, what appears below that bar are just your RAW photo from 2017 and earlier. Select all and choose Adobe Color (keeping in mind what I said in the previous paragraph about what happens if you have been choosing custom Camera profiles in the Camera Calibration panel). You can do the same thing to pick up any earlier ones from 2018 (since before April) by clicking on the 2018 Date in the first column; expanding the “flippy arrow” and just choosing Jan, Feb, and March. 🙂
Hope you found that helpful. 🙂
Have a kick-butt Monday, and I hope I’ll be seeing you here at my seminar in Hartford. Next stop, Salt Lake City next week. You can still join me there: kelbyonelive.com
Best,
-Scott
P.S. Just 24 days until the big Photoshop World Conference down in Orlando. Why don’t you come be a part of it? You’re either going to see all the awesome videos and pictures of everyone learning and laughing and having a blast, and you’ll think, “Aw man, I shoulda been there” or…you could come join us be a part of it all. There’s still time – more people are signing up every day – tickets and details at photoshopworld.com. Say it with me: “This is the year. I’m going! See you in Orlando!


Thanks for the tip Scott. I like the new profile but am going to leave my old images as they unless I Edith them afresh.
With regards from England
Rick McEvoy
http://rickmcevoyphotography.co.uk/
Does updating the profile effect any of the (other) adjustments you have made with sliders and/or presets?
Thanks!
It won’t change slider values, but if you’ve previously edited a photo and then change the profile you might want to make adjustments after the change.
One thing to remember, if you have already set a profile, for example in a Fuji photo with Acros,; can you filter out all photos with a Standard profile by creating Collection with filters?
Thanks Scott. I am having a minor issue and not finding an answer anywhere else on line. I am shooting tethered to a laptop updated with the Adobe Color profile. I then export to my office computer (original file setting), also updated to the new profile, however, when it is imported and opened for development, it is in Adobe Standard profile. I assumed it would be in Adobe Color as the default.
I am sure it is something I am doing wrong, just can’t seem to figure it out. Any ideas on where to look. Enjoy the blog.
I made a minor discovery. If I make any “developments” to the file on the laptop before exporting, it comes in to the other computer as Adobe Color. If no changes were made, it still imports as Adobe Standard even though it is Adobe Color on laptop. odd?!
Thank you for the tip
Hey Scott! Thanks for the great tip! Do you know where the heck the X-rite color checker profiles went!? I can’t find any of my custom profiles!