
How to Apply An Auto Correction Automatically On Import (and why you might want to in the first place)
This is another one of the questions asked during our Lightroom Conference (which we’ll get to below), and it brought up another question: If you were to create a preset that applied an Auto Adjustment, would it apply the same Auto Adjustment to every image (moving the sliders to the same exact locations for every image), or would it analyze each image separately as it imports them, so each image would be Auto corrected individually, even if they were imported as a group of images?
Note: If you’re wincing at the thought of using Auto at all, I will tell you that today it’s vastly better than its ever been. It’s actually now quite useable as a starting place to being your editing, and for some folks, it will look good enough as an ending point, too (just depends on the image and the person editing it). Anyway, thought you’d want to know that Adobe has really worked to improve the Auto Feature big time.
Let’s answers both questions:
First, how to create an “Auto Preset” which is a bit different than you might think, because normally you would open an image; make all your edits, then save those edits as a preset. If you opened an image; hit the Auto button, and then made a preset, it would apply those same sliders in the same position to every photo, which is not what we want. To create an Auto Settings preset that works, you don’t do anything to your image (leave it untouched), then follow these steps:
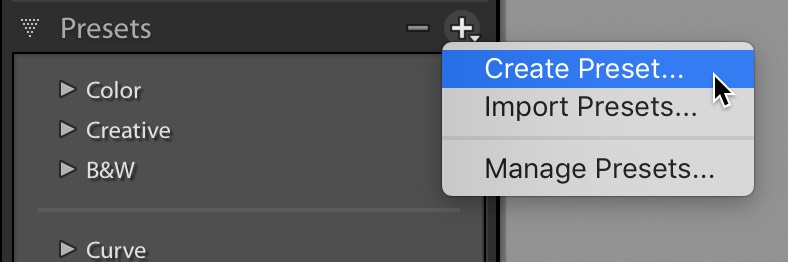
STEP ONE: As I mentioned – don’t make any edits to your image; leave everything at zero and just head straight over to the Presets panel and choose ‘Create Preset’ as shown here).

STEP TWO: When the New Preset window appears (seen above), click the ‘Check None’ button (shown circled above in red) to deselect all the different Settings checkboxes.
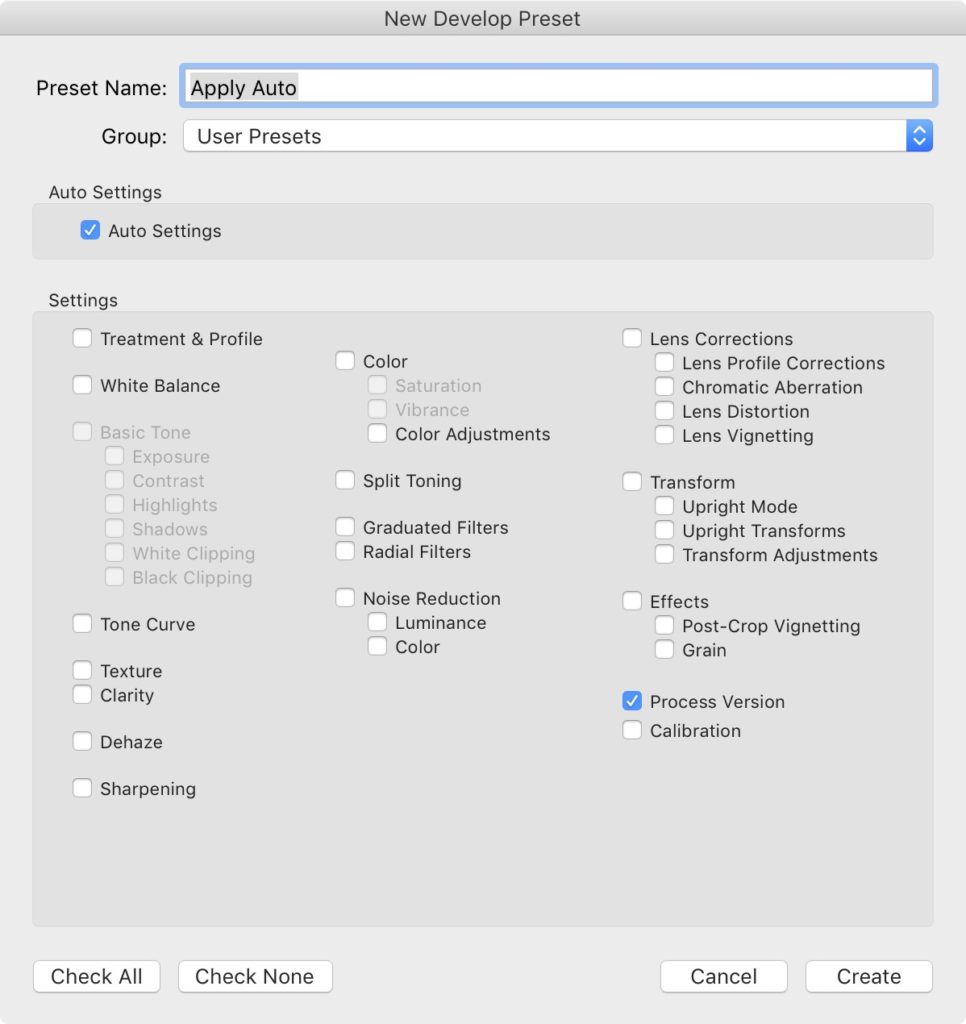
STEP THREE: Now, in the Auto Settings section up in the top third of this window, turn on the checkbox for Auto Settings (as seen here). Also, you’ll notice that down in the regular Settings section there is still one checkbox checked for ‘Process Version.’ Leave that turned on, so you’re using the most recent Lightroom math behind the scenes. Now click the Create button, and your preset is done. In the next step let’s set it up to apply this preset automatically when you import any images.
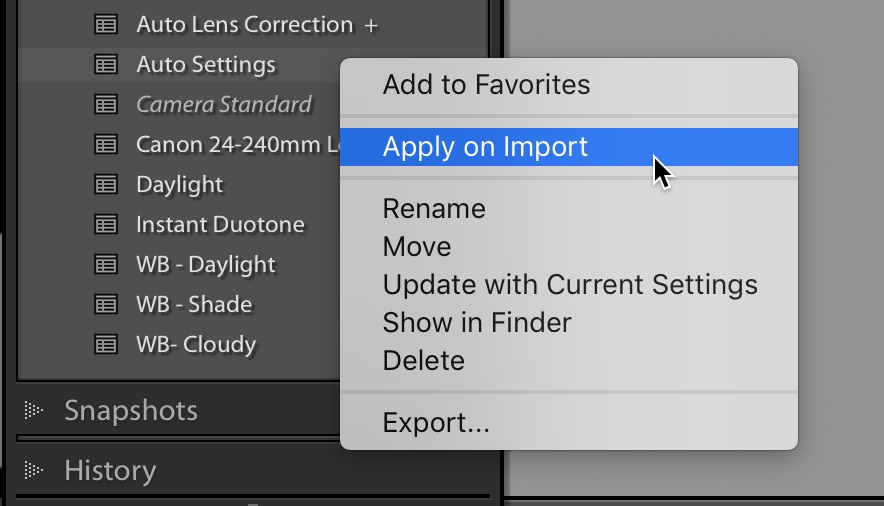
STEP FOUR: Go to the Presets panel and right-click directly on your Auto Settings preset, and from the pop-up menu that appears, choose Apply on Import (as shown here), and you’re good to go.
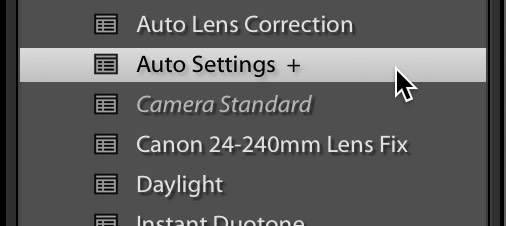
By the way — after you choose this preset as your ‘Apply on Import’ choice, it adds a + (plus sign) after the preset’s name (as seen above) to let you know that preset has been designated as the Apply on Import preset. (NOTE: If you ever want to turn this feature off, just right-click on it and choose “Apply on Import” again).
Now to answer the 2nd part of this question…
…which is, will it apply the same settings to each image, or will it analyze each image separately and apply the appropriate Auto Correction for each image? Luckily, it’s “Smart” and will correct each image individually (though it’s amazingly fast at it).
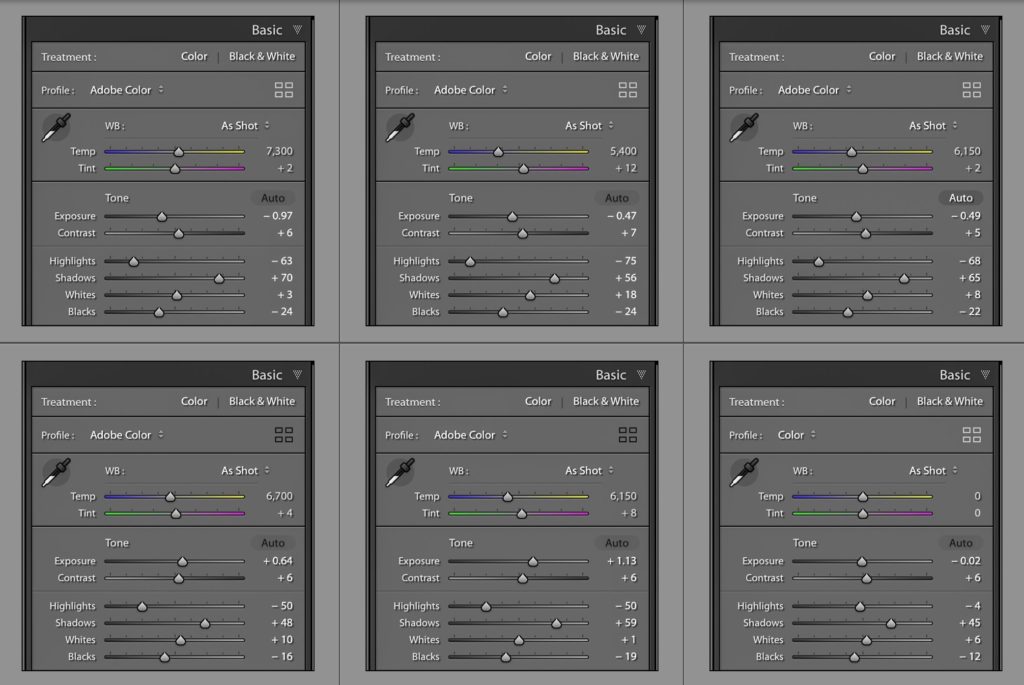
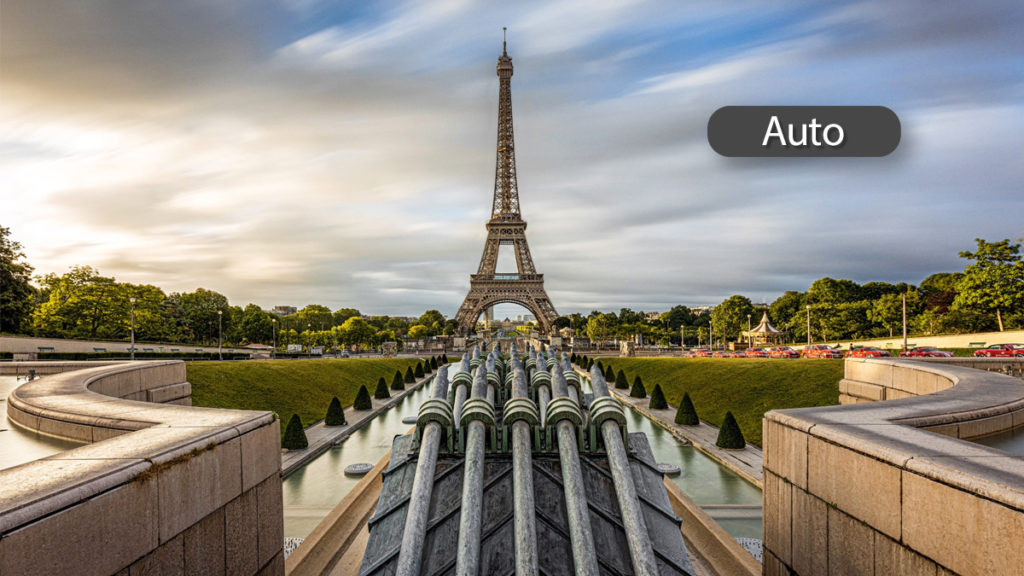
Above: I imported six different images at the same time, all very different in tone, subject, etc. and applied the Auto Import preset as they were imported, and I took a capture of each of the images after the Auto Settings feature had been applied, and you can see that each of the image has a very different Auto Correction applied to it. So, yes, it does analyze each image on its own, and applies the correction, even when you import a group of images.
Hope you found that helpful. Keep being safe out there — here’s wishing you good health, and a great week ahead. 🙂
-Scott


Wow I’ve been dreaming of this simple preset for ever.
Way Cool. THANK YOU !!
This is the article I needed, thanks. 2023 version of lightroom, the same principle.
Can you just have it auto expose the images?
There’s an issue with auto:
https://feedback-readonly.photoshop.com/conversations/lightroom-classic/lightroom-classic-auto-tone-of-a-batch-of-photos-gives-different-results-than-if-you-do-them-one-at-a-time/5f5f45d84b561a3d4262dbc9
Thank you! Worked perfectly.
Where to find Adobe color sir?
What about when you want to apply the “auto” under the upright adjustments? I do a lot of real estate photography, and find myself clicking the “auto” button there very often. How would I create a preset for this (which would analyze each photo for upright correction individually rather than applying the same correction to all photos)?
I like this one – thanks! Related to Auto Settings, it would be wonderful if there was a way to select which settings you’d like to have in the auto calculations. For example, I often find vibrance to be way overdone in almost every shot, so disabling vibrance from the auto settings would be great because most everything else on many images end up being “good enough” for general snapshots. Thanks again for the tips!
Excellent tip, thank you!
Does the auto correction match the JPEG preview seen in-camera, or is there another way to use you camera’s preview as a starting point?
I personally only edit a handful of picks from each shoot, but I may be interested in applying an auto correction to non-picks just so that the other saved photos look halfway decent.
Auto settings does not match the JPEG preview. The best Lightroom Classic/Lightroom can do is attempt to emulate the in-camera settings when you choose a profile in Lightroom that matches your in-camera picture style choice.
Nice tip – thanks. I agree, the auto feature is getting much better. Always lifted the exposure and shadows too much for my liking.
While we are adding Auto (which I normally do for each photo anyway so this is really helpful, thank you) is it worth including the lens correction at the same time ?
Yes, you could absolutely add that! Good call. 🙂
If you use it while importing and you click “auto” again when the images are imported you’ll see that some are changing again. So I wonder what auto is really doing while importing?
My understanding is that for performance reasons, when Auto is applied as a batch process it makes its calculations using a cached lower resolution version of the photo (think smart preview) to speed up the process. This can result in slight variations in the settings then if Auto was applied using the full resolution information (like when applied by clicking Auto in the Develop module).