Grid, Loupe, Compare, and Survey View: Which One to Use?
The Library module is really the hub of your Lightroom experience as file management tasks, such as making selects, deleting rejects, batch processing, applying keywords, organizing into collections, renaming, applying metadata, and so on, take up a lot of our post-processing workflow. The Library module has four different views—Grid, Loupe, Compare and Survey—and each one is designed to make some aspect of that workflow a little easier. You can move very fluidly between each one using shortcuts (preferred), choosing them from the View menu, or by clicking their relevant icons in the Toolbar.
Ok yes, there is also People view, but that’s for face recognition and a topic for another post. 🙂
Note, if your Toolbar is missing just press the T key to bring it back. On the subject of the Toolbar, you should also keep in mind that the available tools that appear there will change based on the view you are currently in, and you can control which tools are showing by clicking the drop-down arrow on the far-right end of the Toolbar.
As you hover your cursor over each view’s icon a tooltip appears displaying its name and its keyboard shortcut. You’ll use Grid view and loupE (note the E at the end) view most often, and their respective shortcuts G and E are easy enough to remember. Those shortcuts also work from anywhere within Lightroom to whisk you right back to the Library module (for me, G means Go to Library). Compare view’s shortcut is C, which is not a surprise, but for whatever reason Survey view got stuck with N (go figure). Compare and Survey view shortcuts only work within the Library module. Let’s take a closer look at how you can use each view to your best advantage.
Grid View
Your go-to view is going to be Grid view. It is the easiest way to see and work with an entire folder or collection full of images, and it is the default view when you first import a new set of photos.
Seeing that grid of thumbnails makes it a snap to perform batch operations, such as applying a preset via the Quick Develop panel to a group of selected images, selecting all photos in a folder for renaming (via the Library > Rename menu), or applying keywords, flags, color labels, or star ratings (and so much more). You can increase or decrease the size of the Grid view thumbnails via the slider on the Toolbar or by pressing the + or – keys respectively.
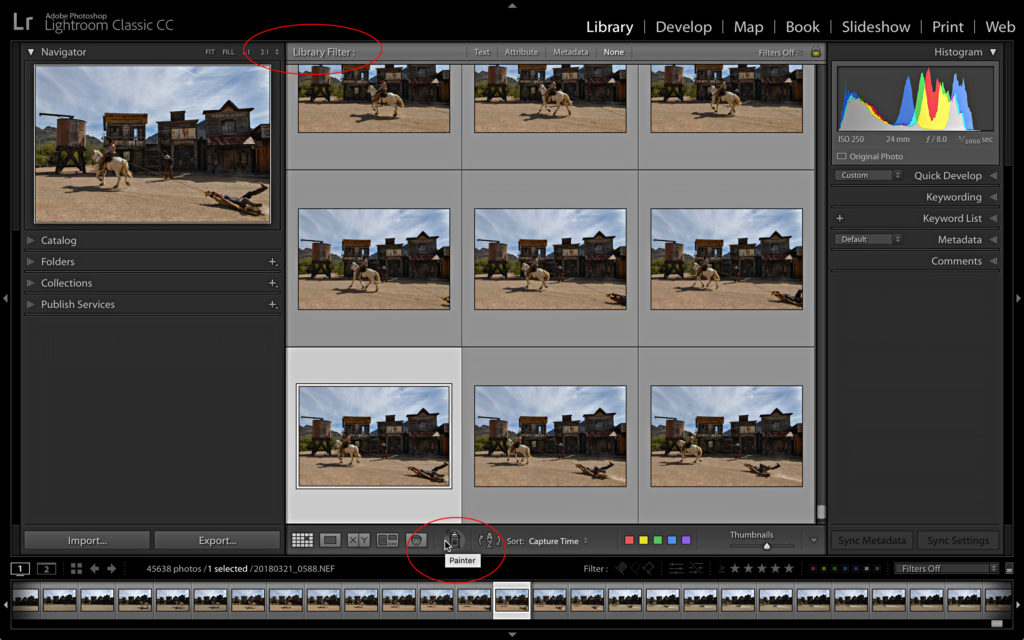
Because Grid view is designed for viewing and working with large numbers of photos at once there are certain tools that only appear in Grid view. The first is the Library Filter bar, which appears above the thumbnail grid, and it is used to filter the current view by a wide range of criteria. The second is the Painter Tool (the spray can icon in the Toolbar) that is useful for “spraying” anything from keywords to develop presets onto your photos by clicking and dragging the tool over the grid.
Here’s a few tips for working in Grid. You can select all photos in Grid view by pressing CMD+A (PC: Ctrl+A). You can select a contiguous group of photos by selecting the first photo, then hold the Shift key and select the last. To select a non-contiguous batch of photos just hold the CMD key (PC: Ctrl) while you click each thumbnail. If you want to change the way the thumbnails are sorted you can use the Sort menu in the Toolbar or from the View > Sort menu. To manually create a sort order you need to work from within a single folder or regular collection (not a smart collection), then click and drag each photo into the desired order (remember, you can’t get fingerprints on these thumbnails so click the center of the photo to drag and drop, not the border). Those tips work in the Filmstrip as well, which is visible in all views.
Loupe View
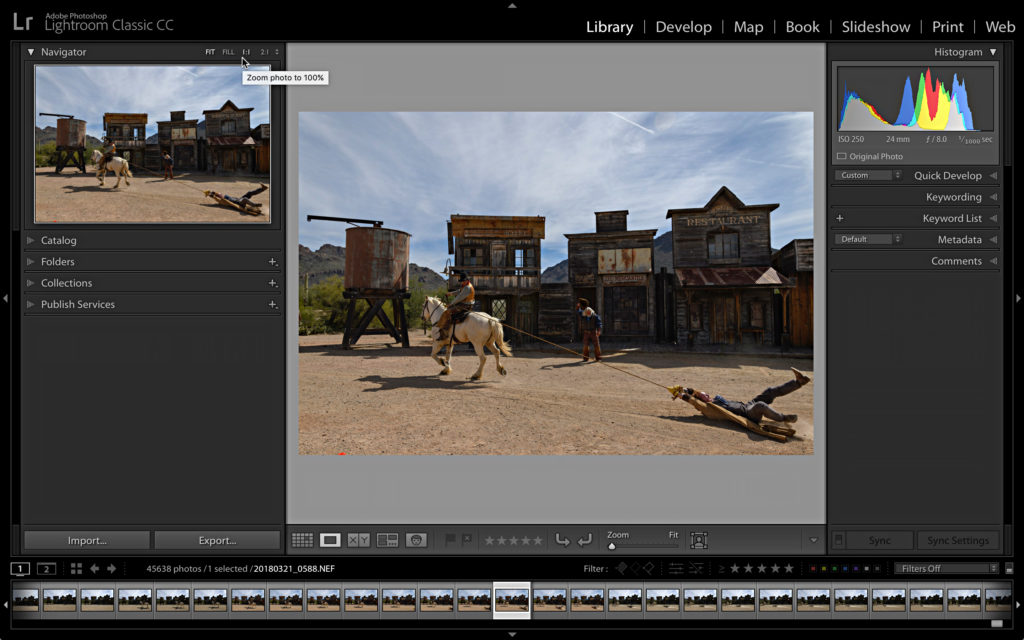
When you need to see a larger version of an image you’ll head into Loupe view. Double-clicking a thumbnail in Grid view will automatically switch you to Loupe view, but you can also use the shortcut E. By default, when you first enter Loupe view you’ll see it at Fit zoom level where the entire photo is visible, but one more click of the photo will zoom you in to 1:1 or 100% view. These zoom levels are controlled by the Navigator panel in the top-left, the View > Zoom menu, or the Zoom control on the Toolbar. When zoomed in greater than Fit level you can pan around the photo by clicking and dragging the photo itself or by clicking and dragging within the Navigator panel.
Here’s a pro tip, when in Grid view and you want to quickly zoom to 1:1 view to check focus, just press and hold the Z key and you’ll zoom straight to 100% in Loupe. When you are done viewing at 1:1 release the Z key and you’ll zoom back to Grid view again.
A very important distinction to make when you are working in Loupe view is that even though you can select multiple images via the Filmstrip (or have multiple photos selected from when you were in Grid view) the actions you perform via the Library module panels are only applied to the most selected photo you are viewing in the Loupe view. For example, if you have two photos selected in Grid view and apply a keyword to one of them the keyword is actually added to both selected photos. However, in Loupe view the keyword will only be applied to the most selected photo and not any other.
Compare View
Sometimes viewing a single photo is not enough to help you make a decision, and this is where Compare view comes into play. Imagine you have a series of similar images and you want to compare one against the other to determine which was the best of the bunch. I usually start by making my selection in Grid view, then pressing the C key, but you can also make your selection from the Filmstrip after you are in Compare view.
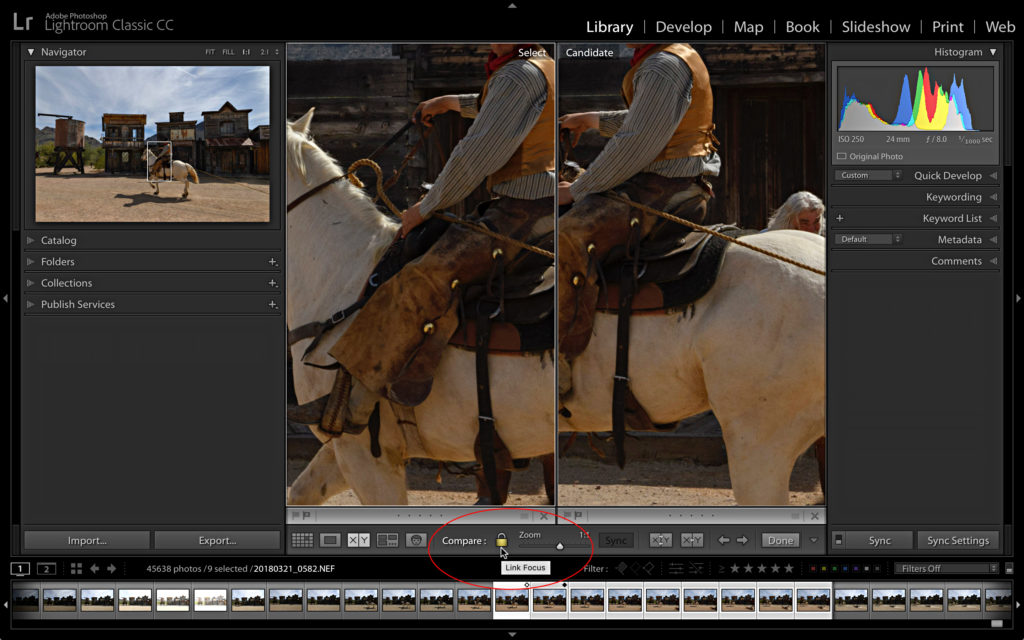
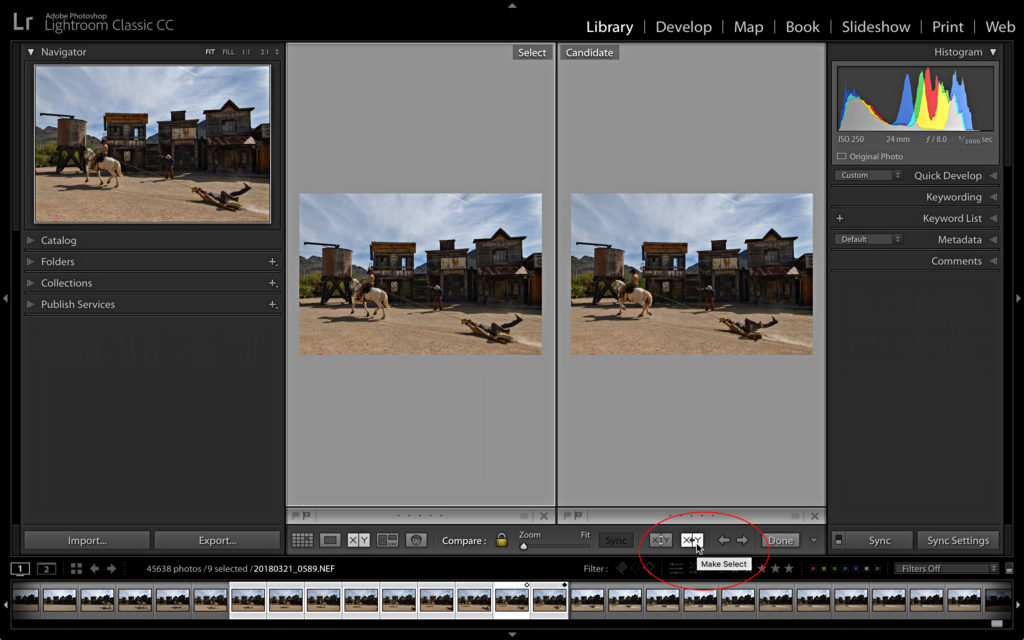
This brings you into this side-by-side view of the most-selected photo on the left (referred to as the Select and displays a white diamond on the Filmstrip thumbnail) and the next selected photo (referred to as the Candidate and displays a black diamond on the Filmstrip thumbnail) on the right. By default the zoom level of the Select and Candidate are locked together, so that if you zoom into one you’ll zoom to the same point in the other as well, which is great for comparing at 1:1. You can unlink that focus by clicking the lock icon on the Toolbar. When working unlinked you can click the Sync button on the Toolbar to bring the other photo to the same level.
I then use the arrow keys on my keyboard to scroll through the selected candidates one by one. If you find a better version of a photo and want to make that the new Select you can click the Make Select button in the Toolbar to upgrade the current Candidate to the Select and demote the current Select down to Candidate.
You can also take advantage of the controls in the Quick Develop panel for making tweaks to the photos you are comparing to help determine which shots are worth keeping. Likewise all the flagging, rating and color label controls are equally accessible.
Survey View
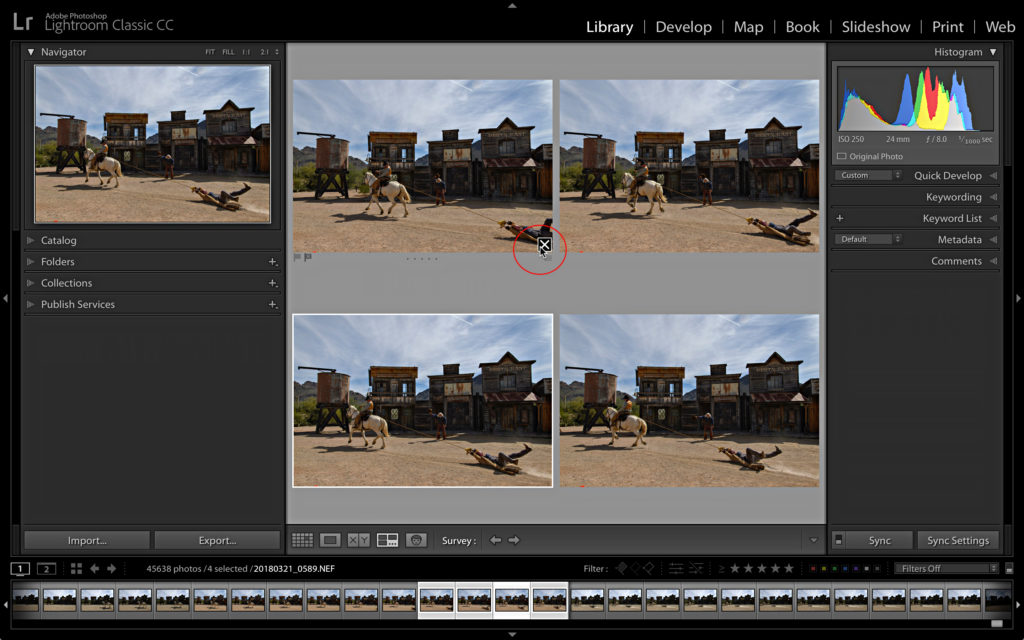
When you want to view multiple photos together and then refiNe (perhaps that’s where the N shortcut comes from?) your selection head over to Survey view. Similar to when using Compare view, I usually make the initial selection of photos from Grid view, then jump over to Survey. Lightroom will fit each of the selected photos into the main content area dynamically resizing the thumbnails to fill the available space (making them smaller or larger as more photos are added or removed from the selection). For this reason, Survey view works best with a relatively small number of selected photos.
The key function of this view is the ability to narrow down your selection choices by simply removing photos from the view without having to worry about removing the photos from the folder or collection. Just click the X under any photo to remove it from view (by removing it from view it is simply deselecting the photo). Lightroom will continue to dynamically resize the remaining photos to fill the screen. When you are done you’re left with just the winning photo(s) selected.
A couple of closing tips to making using these views a little more productive. When you want to hide all panels at once to make more room for the photos you are viewing just press Shift+Tab (then press Shift+Tab again to bring them back). In addition, you can take advantage of Lights Dim and Lights Out modes to dim or black out everything but your photos by simply pressing the L key to cycle through each mode (and back to Lights On again).


