
Happy Monday, everybody. Today I thought I’d tackle a topic I get asked about a lot and it’s how to remove glows or halos that appear around our image after we’ve been editing it in Lightroom. These
This is something I covered in my new book “Photoshop for Lightroom Users” and so I thought I do an excerpt from the book on how I deal with them. While there’s no easy way to rid of these within Lightroom, this is easy work for Photoshop thanks to two tools that work great together.
STEP ONE:
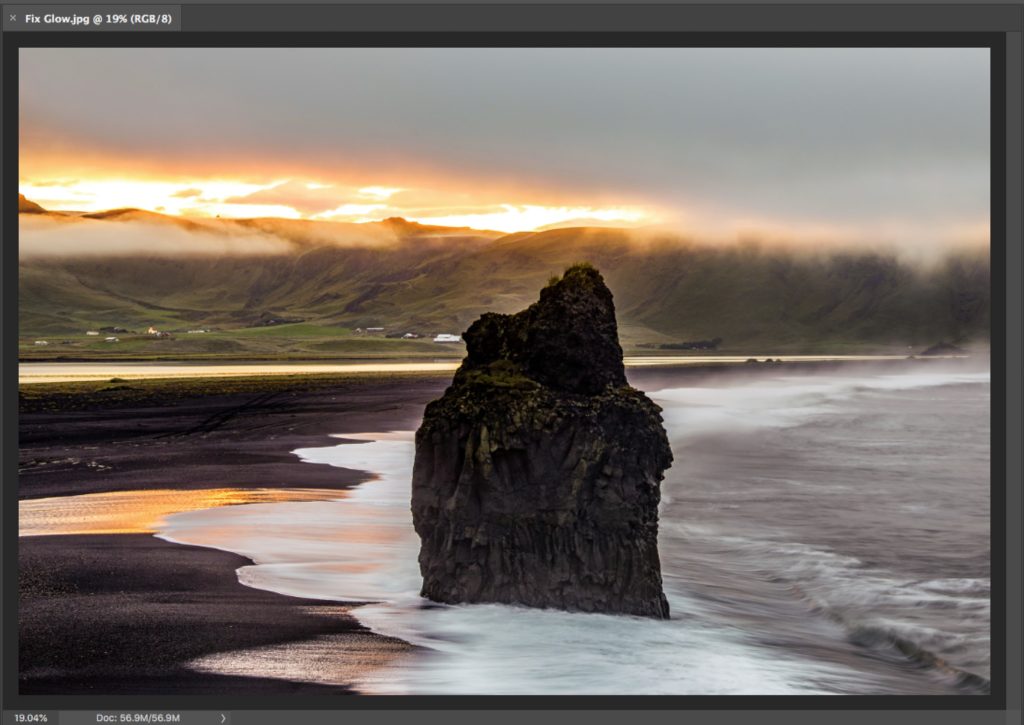
Here’s our processed image (above), and you can see that it has a white soft glow around the outside of the rock formation in our foreground, and when we zoom in (in the next step), you’ll see a brighter thin hard white glow right on along the edges. Both are pretty bad, but actually fairly easy to fix.
STEP TWO:
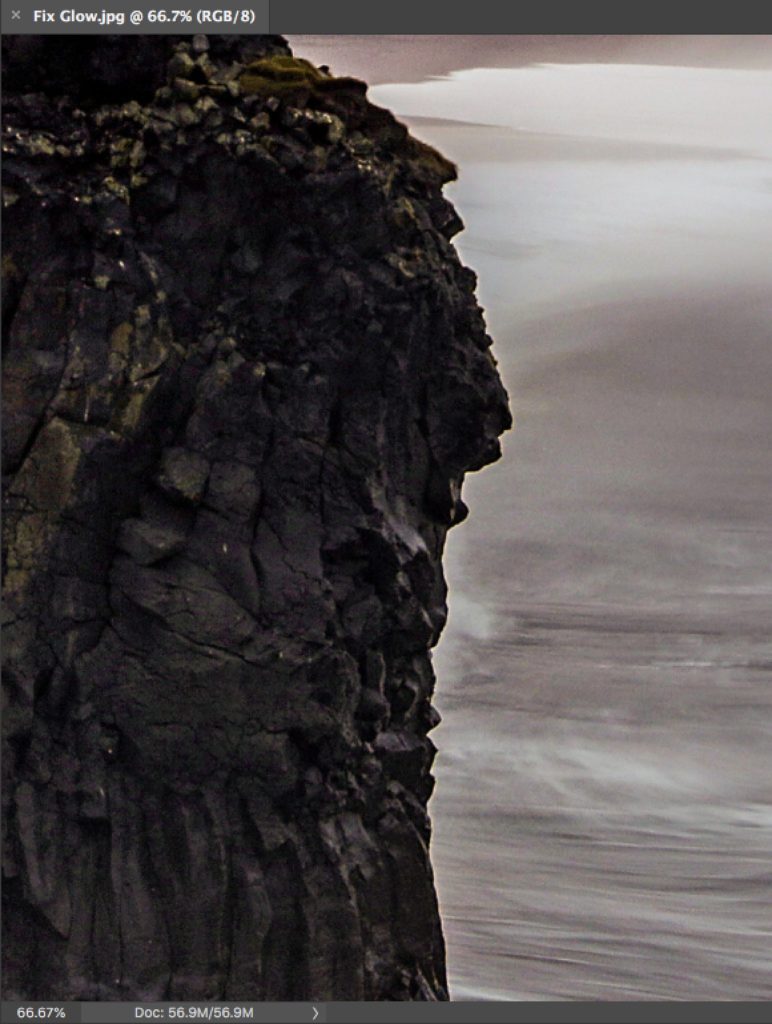
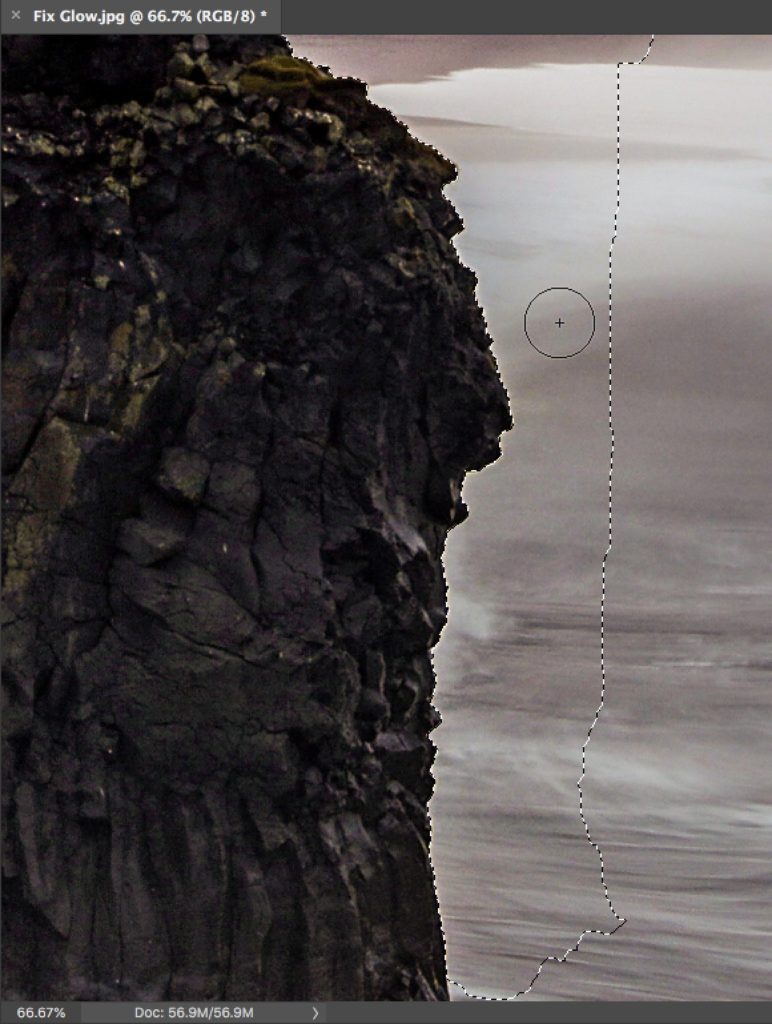
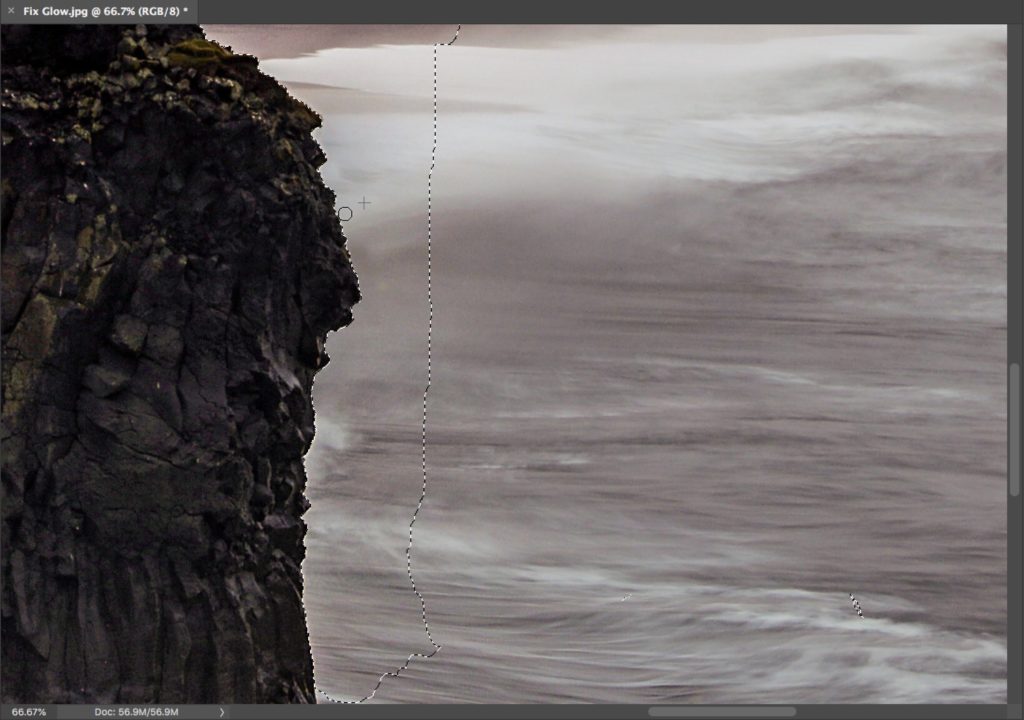
On the left here I zoomed in close so you can really see that hard glow along the edges. We want to make sure that when we get rid of this glow we don’t accidentally mess with the edges of the rock, and to do that we put a selection around the area we’re going to work on — right up to the edge — and once that selection is in place, we can’t accidentally paint outside that selected area. It’s like we put a fence around it to keep our repairs inside. The easiest tool to put up this selection ‘fence’ is the Quick Select tool (choose it from the Toolbar) then you just paint with it along the outside of that edge area and it snaps to the edge as you paint (as shown here at right where I’m painting along the right side of the rock). You can change the size of your selection brush just like you would any other brush — the left bracket key on your keyboard makes it smaller — the right makes it larger.
STEP THREE:
Now switch to the Clone Stamp tool; make your brush nice and small (as shown here). Go up to the Options Bar up top and lower your Flow amount to 25% (that way, your strokes will build up as you paint over them with the Clone Stamp tool, so if you paint over an edge and it doesn’t remove enough, you can paint over it again and it will build up). Now, hold the Option-key on Mac (the Alt-key on PC) and click right just a 1/4” or so to the right of the edge to sample that area that doesn’t have a glow. Now move your cursor right along the edge (as shown here) and start cloning over the edge. If you look closely at the image shown here, you’ll see a little ‘+’ crosshair cursor just to the right of my brush tip. That’s the area I sampled (holding Option/Alt) to clone over my glowing area. If your glow is wider than just along the edge, you’ll see the same technique but with a larger brush tip, and you sample as close to the edge as I did here — You need to sample outside the area where you see the glow. That’s all there is to it.
Hope you found that helpful. If you want to pick up the book this technique is from, it’s my book, “Photoshop for Lightroom Users” (from Peachpit Press). NOTE: the book is less than 200 pages, and I designed it to just focus on things you can’t already do in Lightroom — it’s not a “learn everything Photoshop can do” book, so it’s not a ton of pages, which I think is a good thing.
Which are you going to, Photoshop World Orlando, or Vegas?
Registration is now open for both conferences this year (head over to my blog today for more info, or go straight over to PhotoshopWorld.com and sign on up and save big with the early bird discount. You’ve always wanted to go; you know we have Lightroom classes all day every day throughout the conference — why not make plans to join me at the conference this year! 🙂
Have a good one, everybody!
-Scott

I’m new to Photoshop. Thank you for this and the other tips you post that help people like me learn the advanced functions, while learning the basics.
De fringing in camera raw really helps with this also.
Sometimes you’ll find the Quick Selection didn’t quite get behind the glow, Leaving very small areas still with a glow or halo. To take care of this:
After doing the steps above you may need to invert your selection and perform the same steps on the inside of the object, which should take care of any edge differences during the selection.
Careful though. The inverted ‘fence’ (selection) will not contain you as it did above once you work you way down the rock. Work carefully if you are doing this technique in sections.
Have an even better tip, why not get things right first in camera, what ever happened to natural photography where you go out, enjoy the world around you and use the cameras natural limitations?
I.ve been professional 5 years now, never used photoshop and little to no editing in lightroom, if you have lr set up so its matching your kit you find you have no need to edit. Landscape photography is easy compared to other forms of photography if its not flying away, running away then it should be sinple to get right.
Art comes from your mind and not software.
Keep trying, kateyjanephotography.co.uk
Ohh bless ya Joshy lol.
Thanks Scott! You made a video of this a year or so ago and I use this method older images that I’ve over processed. Most of the time it happens with a dark subject against a bright sky.
Take care,
Dennis