
When family and friends ask me for copies of photos that they can get printed online I try to make it as easy as possible for them to get good quality at a range of typical print sizes. There are two components to this (aside from starting with a good source photo of adequate resolution, which we’ll assume is true). The first is cropping to the desired aspect ratio and the second is exporting a copy to match the desired print size. Here’s my approach (though there is more than one way to do this):
Create Export Presets
To save yourself time and make this simple in the future, create export presets containing the settings you want to include for each desired print size. For example, let’s assume the common print size of 4 inches by 6 inches. Let’s also, for the sake of argument, stick with 300 PPI for the desired resolution for these prints (sticking to my prior assumption on adequate resolution in the source photo).
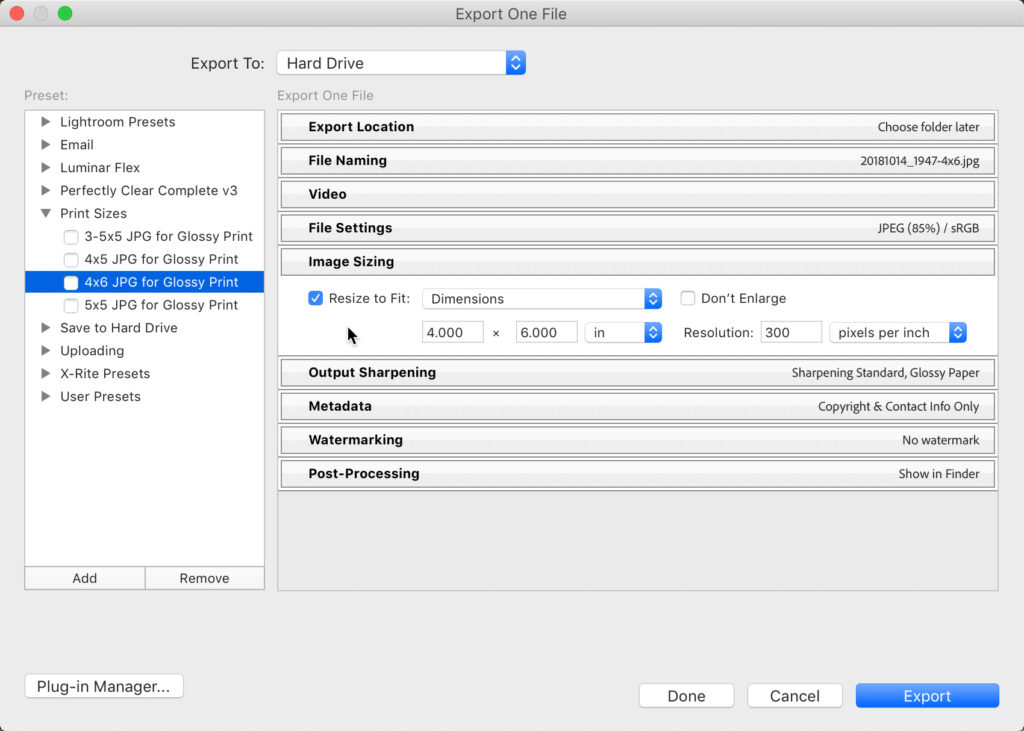
Select any photo and click the Export button to open the Export dialog. Our goal here is not to export this photo, but simply to configure the settings for the desired print size and create a preset with those settings, then close the Export dialog (this is what that Done button is for).
The main concerns for getting this photo printed are the size in inches, the resolution setting, the file type, and the color space. You’ll also want to be able to find where the exported copies go easily, so choose your location wisely, and you may consider renaming the exported copy in a way that helps the person understand what size this copy is intended to be printed. Optionally, you may want to apply output sharpening if that suits your taste.
To that end, I configured the Export dialog as follows:
- Location: Choose folder later (this is ideal for presets)
- File Naming: Created a filename template that appends the print size at the end of the filename (e.g., file123-4×6.jpg)
- File Settings: an sRGB JPG at 85% quality (good compromise on file size and quality)
- Image Sizing: Dimensions at 4 x 6 inches and 300 pixels per inch (PPI)
- Output Sharpening: Standard Glossy (completely optional)
- Configure other settings as desired
Once configured, click the Add button to save as a preset. In the New Preset dialog box that appears, direct the preset to go into a folder to stay organized, then give it a meaningful name (to you). Click Create to save the preset.
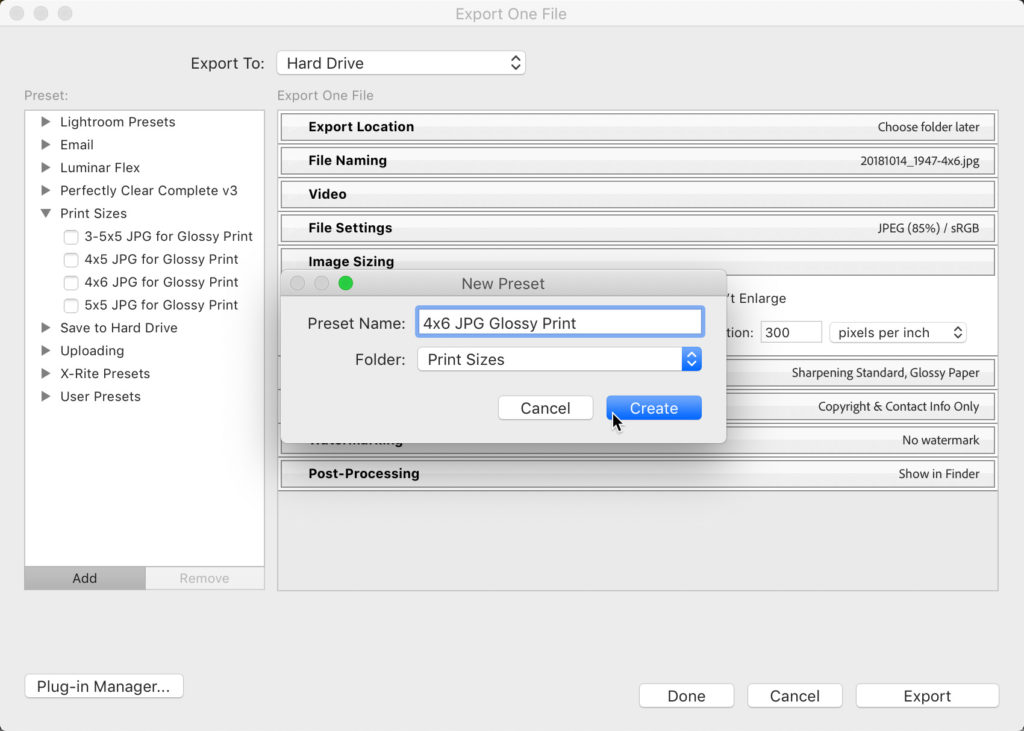
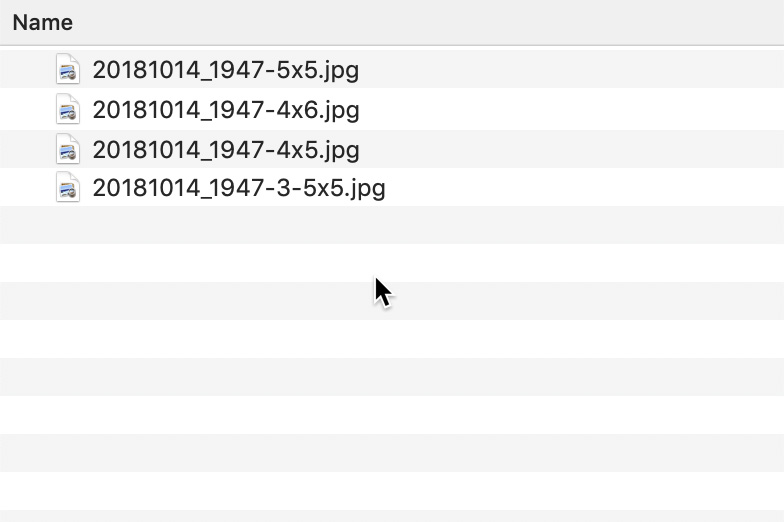
With the Export dialog still open, create additional presets for each of the desired print sizes you want to provide. I opted for the common sizes of 3.5 x 5, 4×5, 4×6, and a square sized to 5×5 (all inches). This means all I needed to do was to reconfigure the Image Sizing panel for each preset, and because I renamed the exported copy with the print size in the name, I also updated the File Naming panel to match. Once you have all of your presets created, click the Done button to close the Export dialog without exporting any copies.
Crop to Aspect Ratio
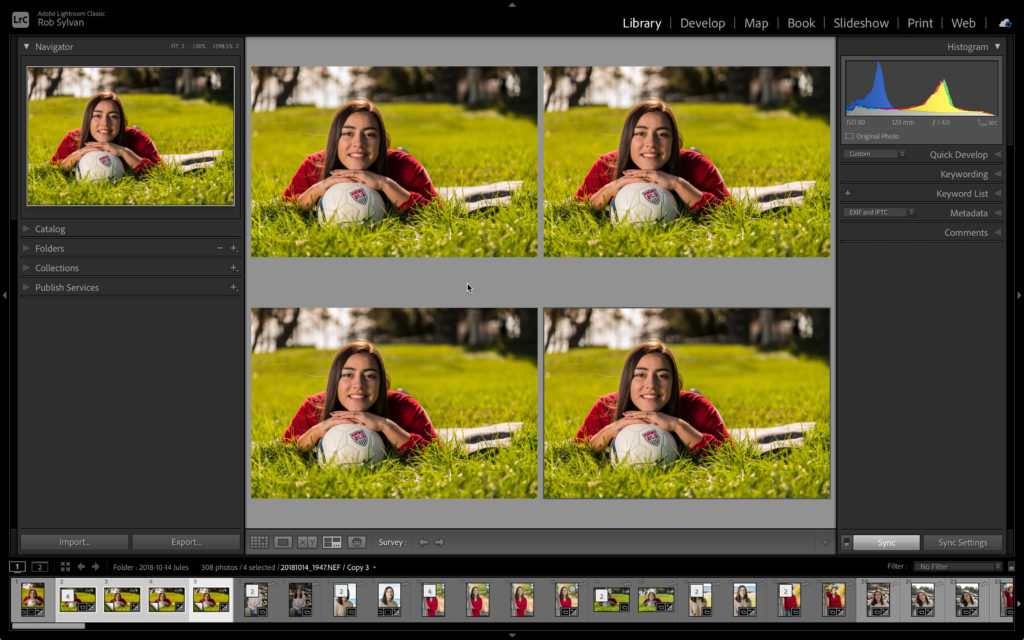
The export presets we just created will only work if we first crop the photo to the correct aspect ratio for the desired print. In other words, if you don’t crop to the correct aspect ratio the resulting copy will not be sized correctly. If you are a visual person (you know, like a photographer), you might create a virtual copy for each aspect ratio you want to crop to match, but this is not required. For example, I selected the photo I wanted to export at these four different print sizes, and created 3 virtual copies (Photo > Create Virtual Copy), which gave me 4 versions of the photo.
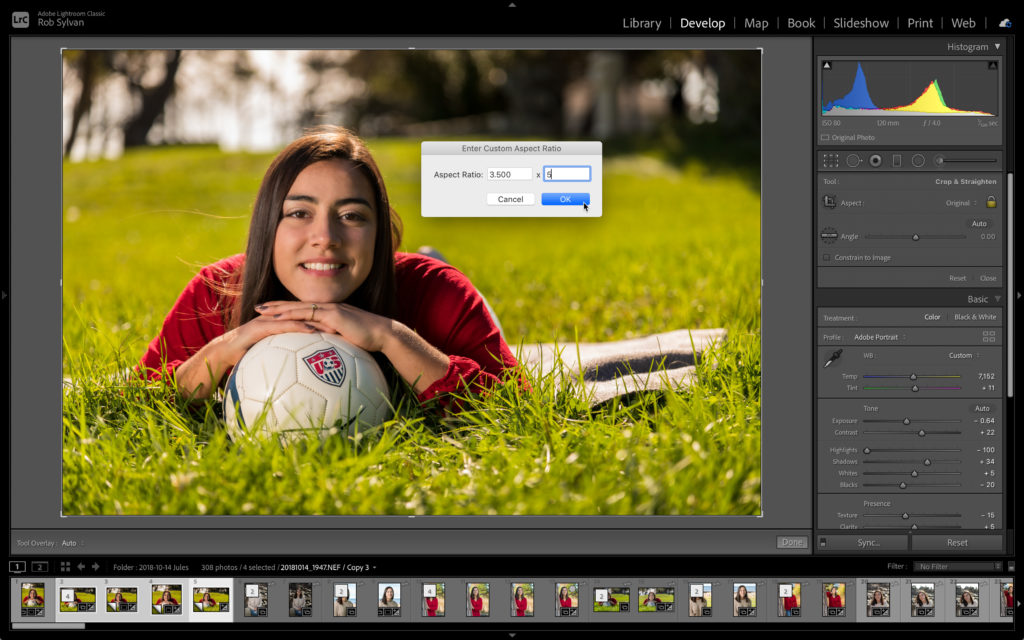
Then, pressing R to jump to the Crop tool, I cropped each one to match one of the desired aspect ratios. Most DSLR cameras will produce a source photo that has a 4×6 (2×3) aspect ratio, so I left the original (master) at the default 4×6. LrC comes pre-loaded with crop presets for 4×5 and 1×1, so in turn, I cropped the next virtual copies to those aspect ratios respectively. Tip, you can hold CMD/Ctrl and press the right (or left) arrow key to move between selected photos while remaining in the Crop tool.
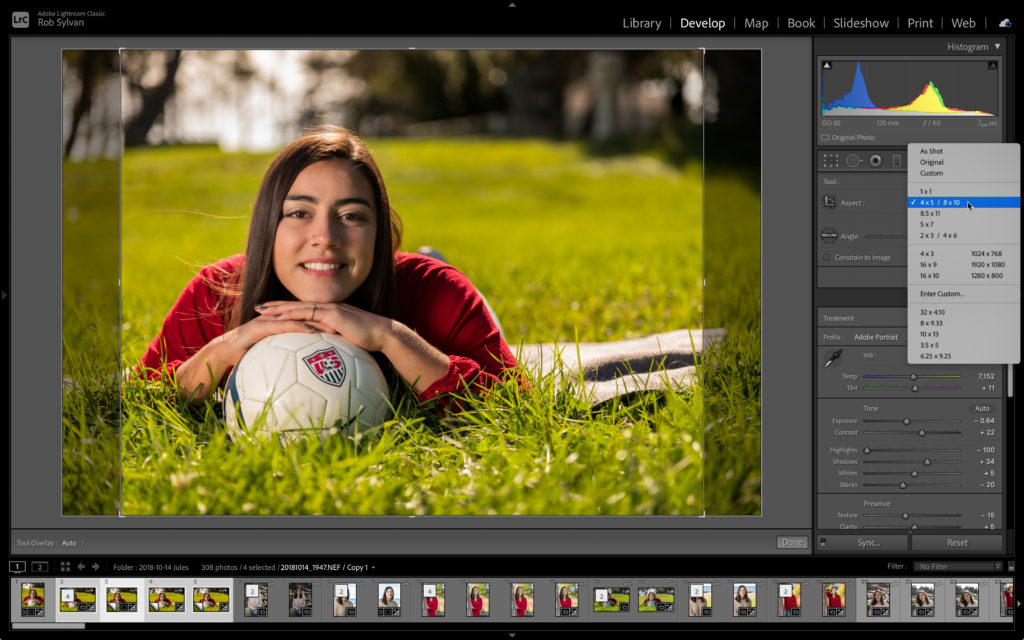
The 3.5 x 5 aspect ratio is not included by default, so for that one I clicked the Enter Custom option, and entered those values in the resulting dialog box.
Now, with each photo cropped to the correct aspect ratio I was ready to export a copy that will be sized accordingly (using the corresponding export preset). So, with only the photo cropped for 4×6 selected, I used the File > Export with Preset > [choose the name of your preset], which by-passes the Export dialog and uses the settings you already configured. Now, in my case I deferred the choice of export location until this moment, so I was presented with a dialog to choose where I wanted this copy to go. I like to use Dropbox for delivery of photos, so I chose a subfolder of my Dropbox folder (you should choose what makes sense for you).
Then, in turn, select the next virtual copy and use the Export with preset menu to select the preset that corresponds with the aspect ratio you used to crop that virtual copy. At the end of the process I had 4 versions, each cropped, sized, and renamed differently just waiting to be delivered.
Now, the beauty of choosing Dimensions for sizing in our Export preset is that it doesn’t matter if the selected photo is vertical/portrait or horizontal/landscape. Likewise, you can select any number of photos that have been cropped to the desired aspect ratio for the given print size (I just used a single photo for this example). Check out my older article on batch cropping to quickly crop multiple photos to the same aspect ratio. From here, I simply shared access to that Dropbox folder to let them have the copies and then they were free to print at whatever size fit their needs (obviously, if their needs required other sizes we’d factor that in too). Please feel free to share any tips or other ways of doing this in the comments.


Really like this tip. I have been experimenting with Canon’s Professional Print & Layout software and find it a little easier to use than the Lightroom Classic print module. So, exporting as you suggest here will work nicely. Thank you.
Excellent! Definitely multiple ways to use that type of export preset.