
Exploring the World with the Map Module
I don’t utilize the Map module with all of my photography, but I’m grateful it is there when I have a project that is a good fit. There’s a sweet little river that passes near my home on its way to the sea. As small as it is, it is probably the reason my town exists.
Like many New Hampshire towns, mine was originally a mill town and the heart of a mill town is the river from which it drew its power. My favorite spot on this river, the site of a different mill, is just a mile away and I have been taking my son there to explore for the last 10 years or so. I’ve taken a lot of pictures there too. Looking back at those photographs got me thinking about that river, where it originated from, and what else lies along its path. I started thinking that perhaps it would make for a good personal photographic project, and so I did a little research and found its headwaters was only a few towns away, and that it is one of only two New Hampshire rivers designated as a National Wild and Scenic River. Pretty cool.
Enter the Map Module
I wanted to scout out the river from its origin to the place where it meets the bay, and I thought the Map module would be a useful partner to help me keep track of where I’ve been, and where I still have yet to go. This meant I had two tasks as it relates to the Map module, with one to place existing photos on the map at the right locations, and the second taking new photos and adding them to the map.
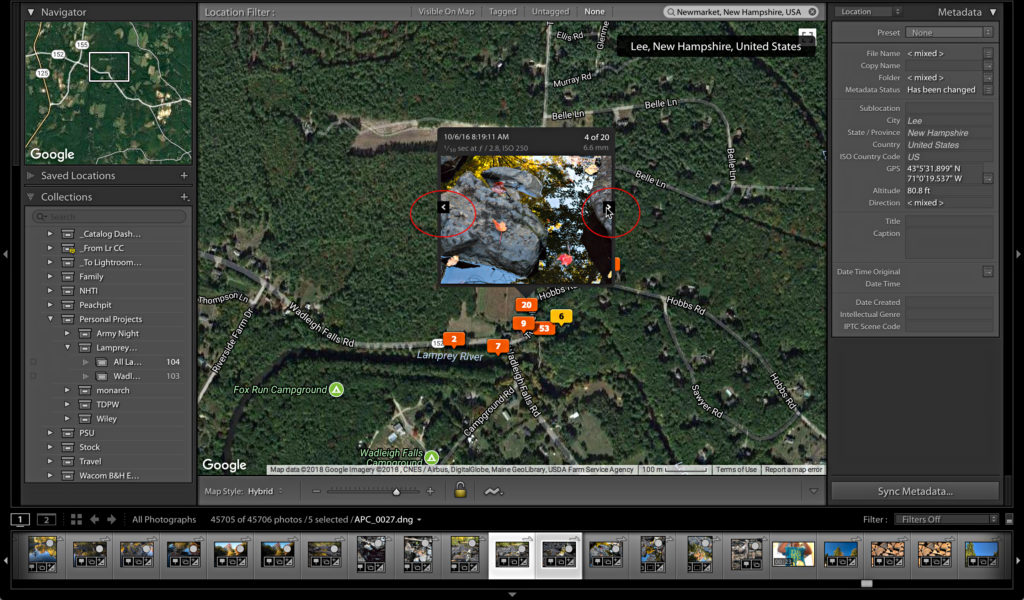
Over the years I’ve photographed other parts of the river with GPS enabled mobile phones, and DSLRs without GPS capability. Any of the existing photos with GPS coordinates will automatically be placed on the map, and adding the rest is as easy as drag and drop from the Filmstrip to the map. To see the existing photos with GPS coordinates I clicked All Photographs in the Catalog panel so that my Filmstrip was filled with every photo in this catalog. Then I switched to the Map module and did a search for my town in the Location filter above the map.
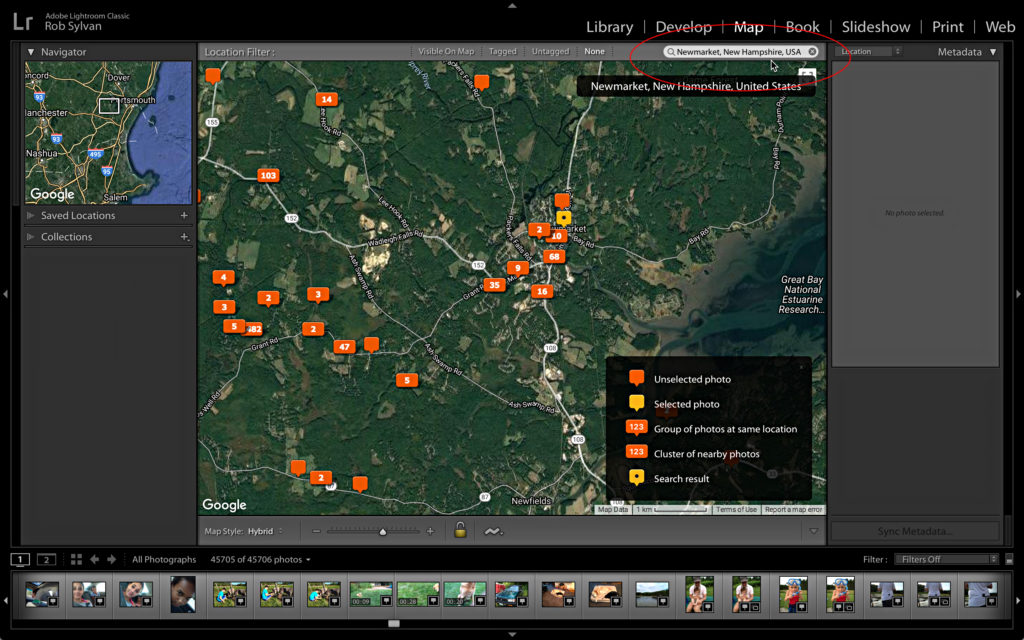
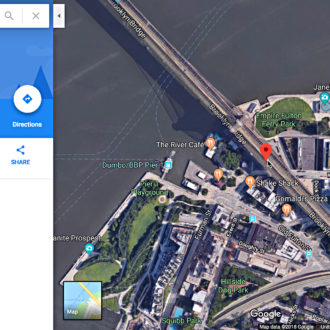
As you can see there are a lot of places, represented by the orange pins, that I have photographed around here over the years. If you are new to the map, it is useful to keep the Map Key visible to help get oriented and learn what each icon means, but you can hide it by going to the View menu and unchecking Show Map Key. On the left of the Map module you’ll find the panels for the Navigator, Saved Locations, and Collections. On the right there is just the Metadata panel, which is the same as we see in the Library module. Setting the Metadata panel to the Location view is the most useful here.
I created a Collection Set to contain all of the collections I create for this project, and inside of it I created a regular collection to start to gather all photos taken along the river. I designated this collection as the Target Collection when I created it so that I can select photos and press the B key to add them right to it.
When I came to a notable location that had a lot of photos around it I saved it as a Location. Here’s how:
STEP ONE: Click the plus symbol at the top of the Saved Locations panel to open the New Location dialog box.
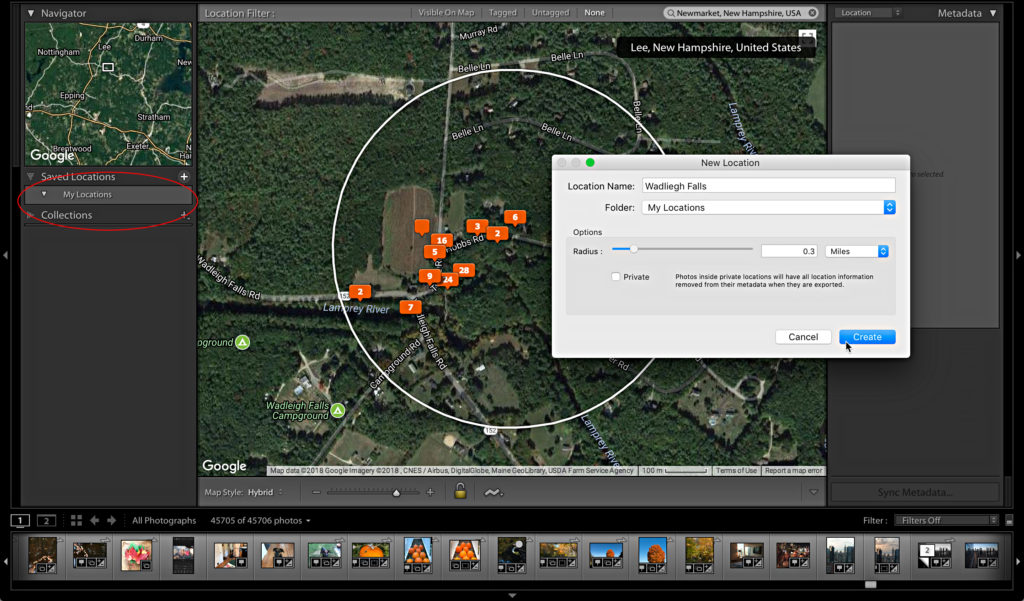
STEP TWO: Give the location a meaningful name, add it to a folder of your choosing (or make a new folder), configure how large of a radius you want to include for that location, and decide if you want to mark that location as private to ensure all location metadata is stripped during export.
STEP THREE: When you are done, click Create to complete the process.
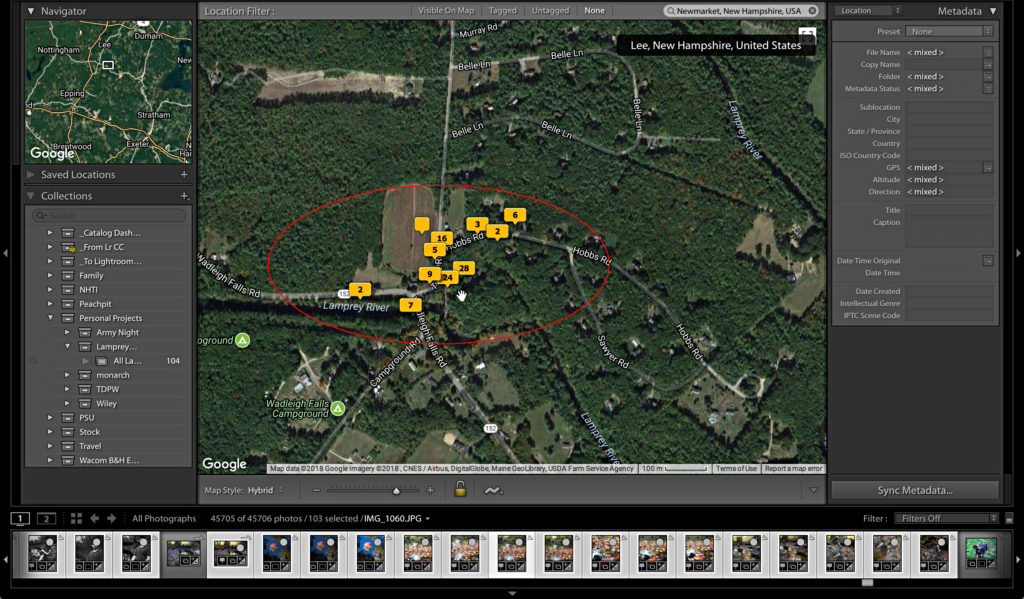
If you hold the CMD key (PC: Ctrl) you can click multiple points to select all photos at all points. I would do this at these locations to easily add all photos to my target collection (select all photos and press B). With all the photos at this location selected I also created a collection specific to that site and added it to my Collection Set for this project.
If you only have a single pin at a given location and want to create a collection from the photos at that pin, just control-click (PC: right-click) the pin and choose Create Collection from the contextual menu to create one based on just that pin.
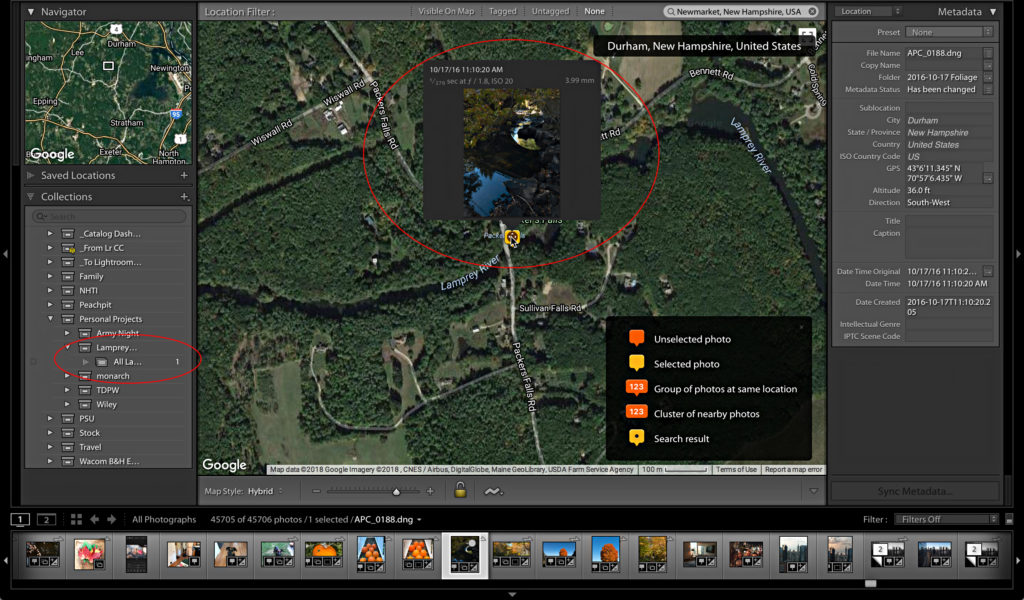
As I viewed this location I noticed that some of the pins weren’t quite on the river, even though that was the obvious place they were taken based on the thumbnail. This is easy to correct. If there is just one photo at a pin, you can drag and drop the pin to the place on the map where you think is a better match. If there are multiple photos at a pin, click the pin to select the photos associated with that GPS coordinate, then drag the photos from the Filmstrip to the correct location on the map. I took a few seconds and cleaned up this area. To preview the photos tagged at a given pin, click the pin to see a thumbnail appear above it, then use the left and right arrows in the box that appears to scroll through the photos.
That was about the extent of locations along that river that I’d visited to date. My next phase was to hop in the car and head out to the lake where this river began. Luckily for my project this river is only about 50 miles long, so I didn’t have far to go. For this trip I took my mobile phone and a DSLR that can pull the GPS coordinates from my phone. I also used an app on my iPhone called GPS Tracks to create a tracklog of the route I took, and I am sure there are other apps for both iOS and Android that can generate a similar tracklog. A tracklog simply marks my GPS coordinates at certain time intervals and can be saved out in a format (.gpx) that Classic’s Map module can understand. With the time stamps in the tracklog, Classic can place photos taken at matching times right on the map without the photo having to contain GPS coordinates. This was my backup plan, plus it will show the route I took on the map. It is helpful to make sure your camera’s date/time is correct and in sync with your phone (or whatever device you are using to create the tracklog) before you go, but there is a time offset option if you forget or change time zones.
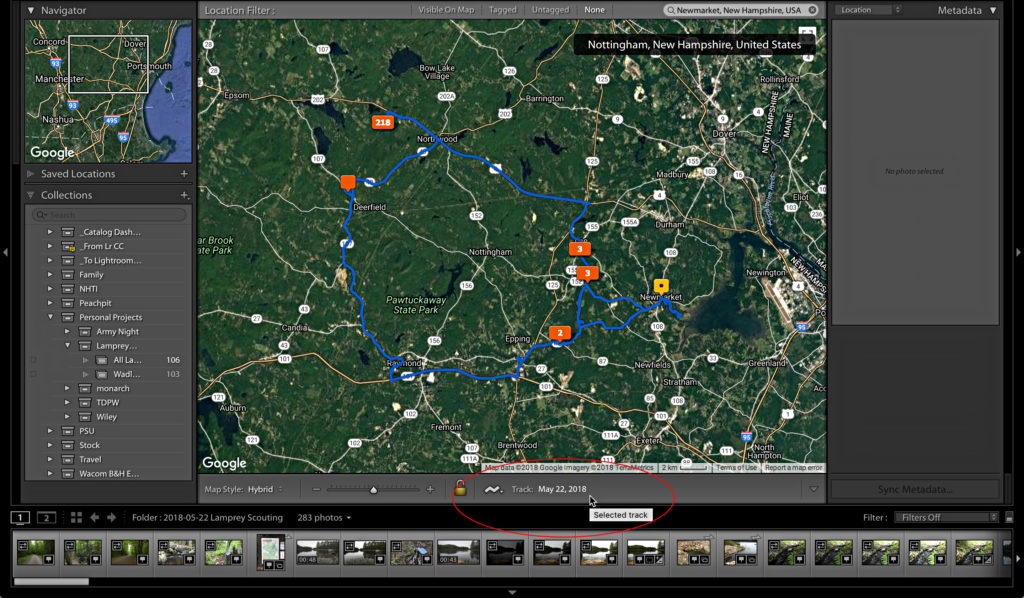
I spent the day scouting locations along the river that I’d like to come back through the changing seasons to photograph at different times of day. The photos I took during this scouting mission were more for marking on the map than attempts at great photos. I came home with about 300 photos (most of which were taken around the lake where it began, and I had never been). After importing into one folder, I selected just that folder in the Library module and switched to the Map module. Since I also had the tracklog, I wanted to add that in to see my route. Here’s how to add a tracklog:
STEP ONE: Click the GPS Tracklogs icon in the Toolbar and choose Load Tracklog to open the window used to find where you saved the tracklog.
STEP TWO: I had exported the tracklog in .gpx format to my Dropbox folder from the GPS Tracks app, so I navigated to that location and selected the file and clicked Choose. Classic imports that data and shows the track on the map.
STEP THREE: Select all photos taken during that route in the Filmstrip.
STEP FOUR: Click the GPS Tracklogs icon in the Filmstrip and choose Auto-Tag [n] Selected Photos to have Lightroom apply the GPS coordinates based on their time stamps.
This picked up 54 photos and videos that didn’t get GPS coordinates applied by the camera for whatever reason. This is why I had the tracklog as a backup.
I then added all the new photos to my master collection. The last thing I needed to do was to go through my library and add old photos taken along the river in the past but did not have GPS coordinates. Now that I had the river so well covered, it was easy to drag and drop those photos onto the map at the right locations. To find these photos I used the keywords I had applied in the past, and then double-checked using the new folder search in the Folders panel for folder names with river locations in them.
Back in Library
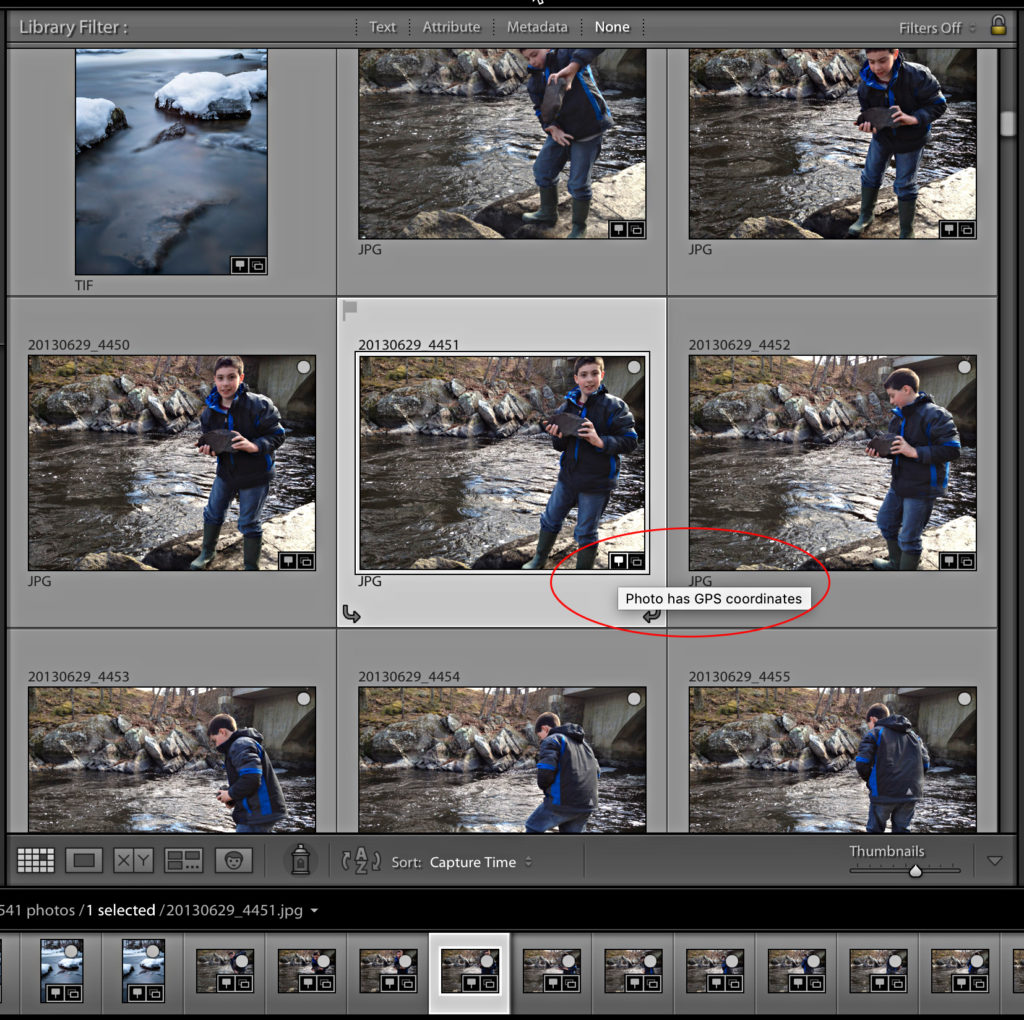
Now I had over 500 photos in my master collection that I can use to filter out the best and note locations I want to revisit over time. Looking at the thumbnails in Grid view I can see all the photos with GPS coordinates have a pin badge on the thumbnail (also in the Filmstrip if it is tall enough). Clicking that badge will switch my view to the location of that photo on the map.
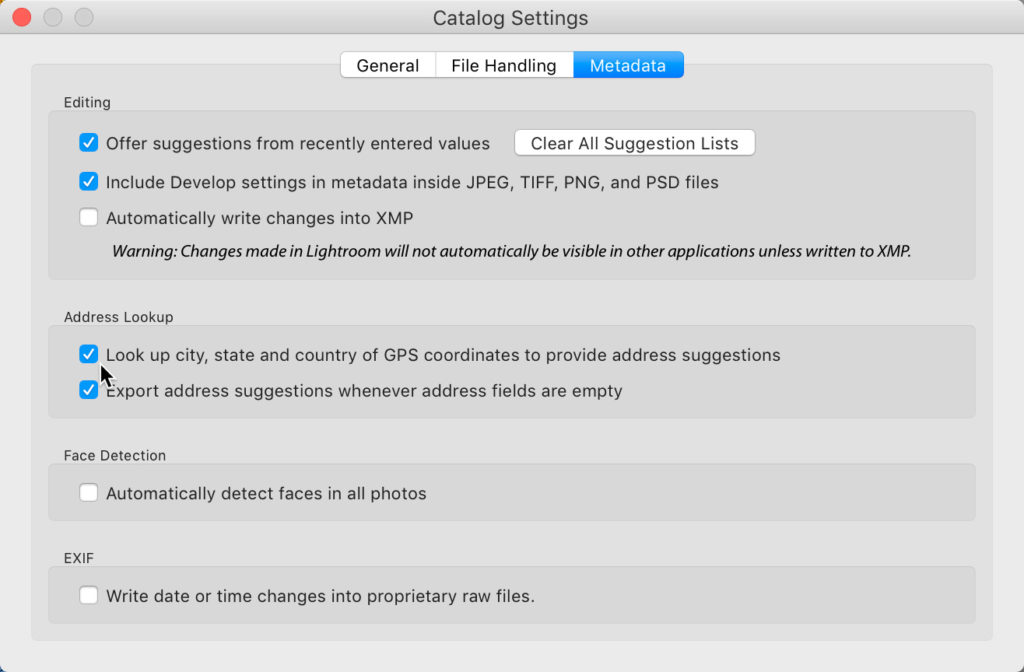
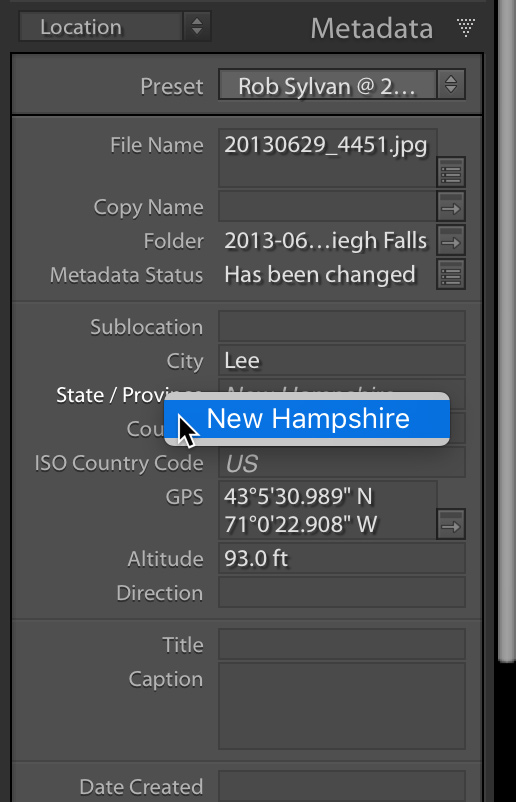
Expanding the Metadata panel and setting it to the Location view I can see the GPS coordinates applied to that photo, along with altitude and direction (if your device captured that info). Additionally, if you have Address Lookup enabled in the Metadata panel of Catalog Settings, Classic can use the GPS coordinates to look up city, state, and country info.
You’ll see that information display in italics at first, which means it has been found, but it has not yet been applied to the photo. You have to manually apply each data point by clicking the associated label, and then clicking on the name that appears.
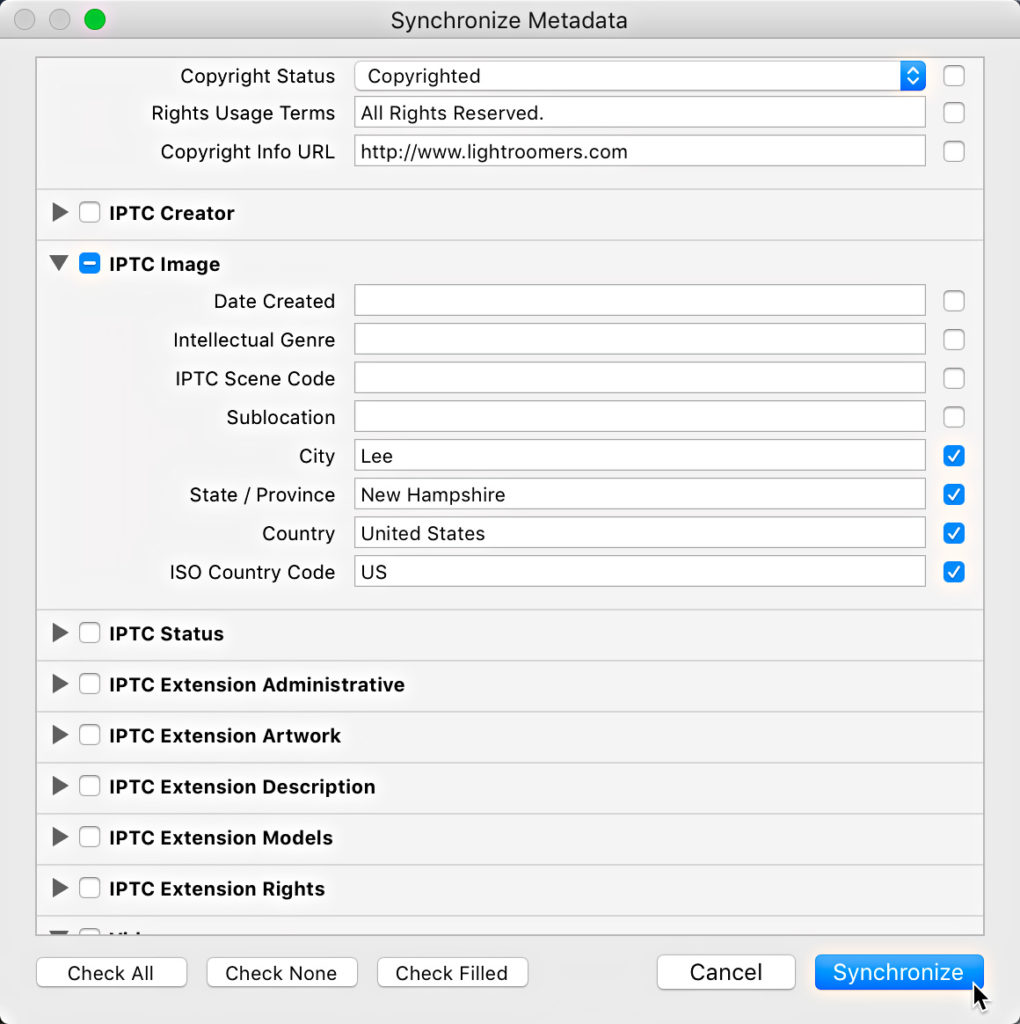
You can speed that process up by selecting other photos taken at that same location (as far as city, state, country goes) in Grid view, then click Sync Metadata. When the Synchronize Metadata dialog appears, only check the boxes for city, state, country, and ISO country code, and you can sync that data across all selected photos to save you from having to individually click each location label. Much faster!

My dad started me with a long-time love of maps. The Map Module is, to me, a very useful addition to my photography. Hope it stays.
Are any updates due to this module? It seems far removed from the current Google Maps. It’s also difficult to search for locations if I’m trying to find a location for an image I didn’t turn on the GPS for.
Thanks! I know Scott is always dissing the Maps module 🙂 so it is good to see it given some love here. I did not know about the Locations function even after geotagging all my photos for over 10 years!
You’re welcome! 🙂