
Following up on last week’s post, I want to look at all the options we have in the Develop module.
As you might expect the Develop module is packed with batch editing opportunities to make your workflow more efficient. The simplest option is the easily overlooked Previous button at the bottom of the right panel group.
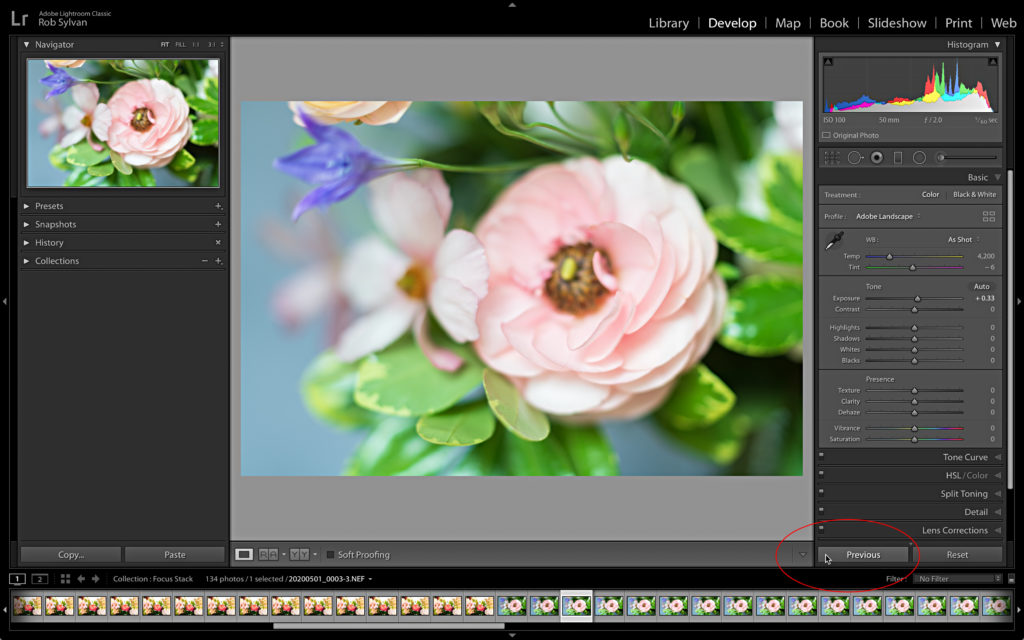
One reason it is easily overlooked is that it only appears when only one photo is selected in the Filmstrip. All the Previous button does is apply all of the settings you applied to the previously edited photo to the new photo that is now selected. This is most useful when editing a set of very similar photos and after editing the first, you move to the second and decide it should get the same exact treatment. Theoretically, you could manually edit the first photo, then use just your right arrow key and the Previous button to work your way through editing the entire set.
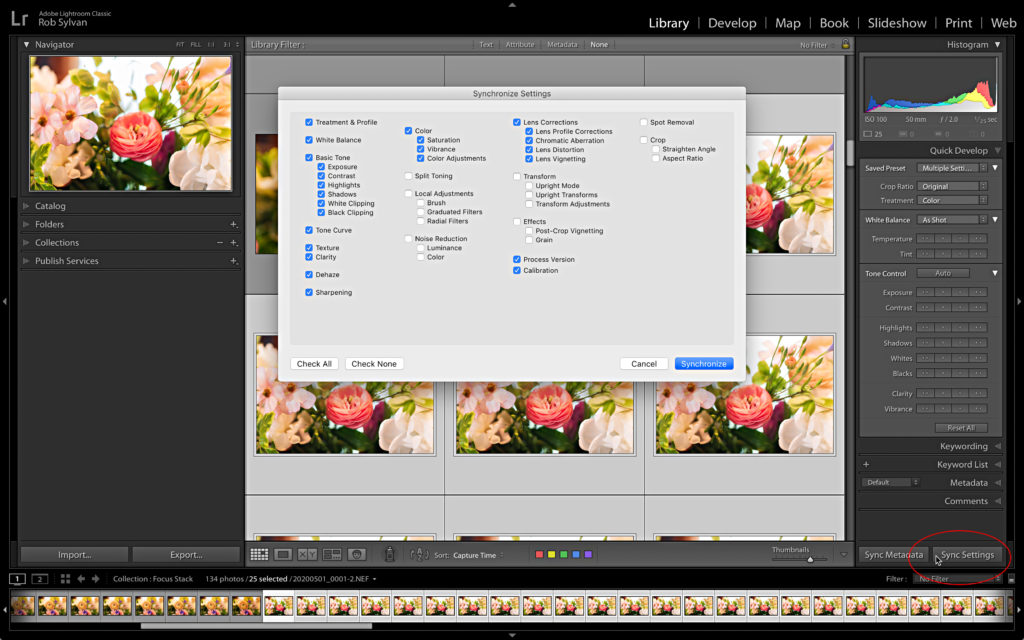
That’s not terribly efficient though, so that’s where you might employ the Sync button instead. You can start the same way by manually editing the first photo, but then select all similar photos in the Filmstrip (but keep your edited photo as the active photo) and watch the Previous button change to Sync.
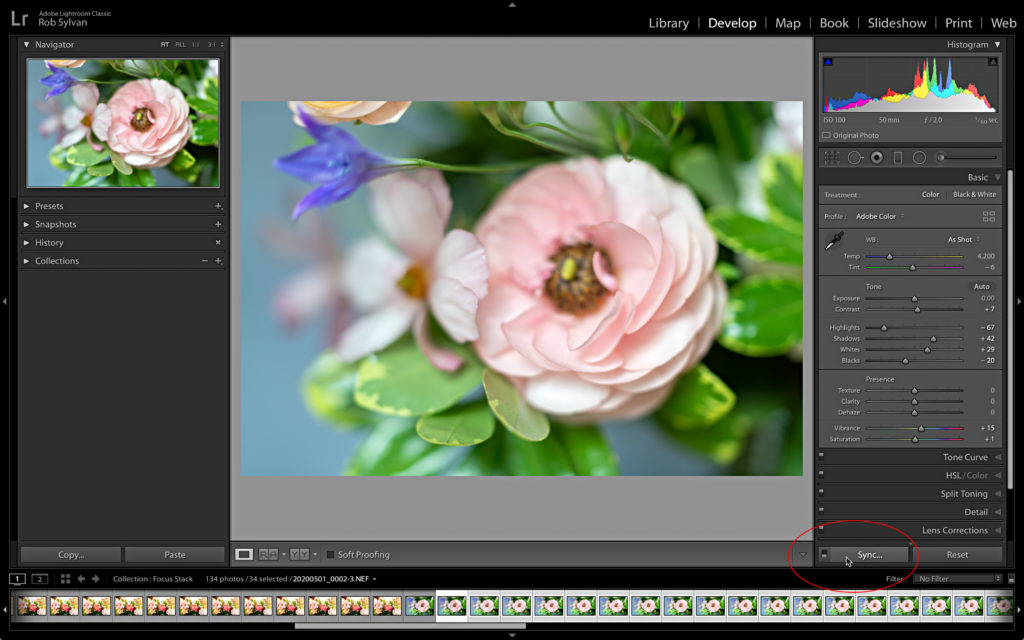
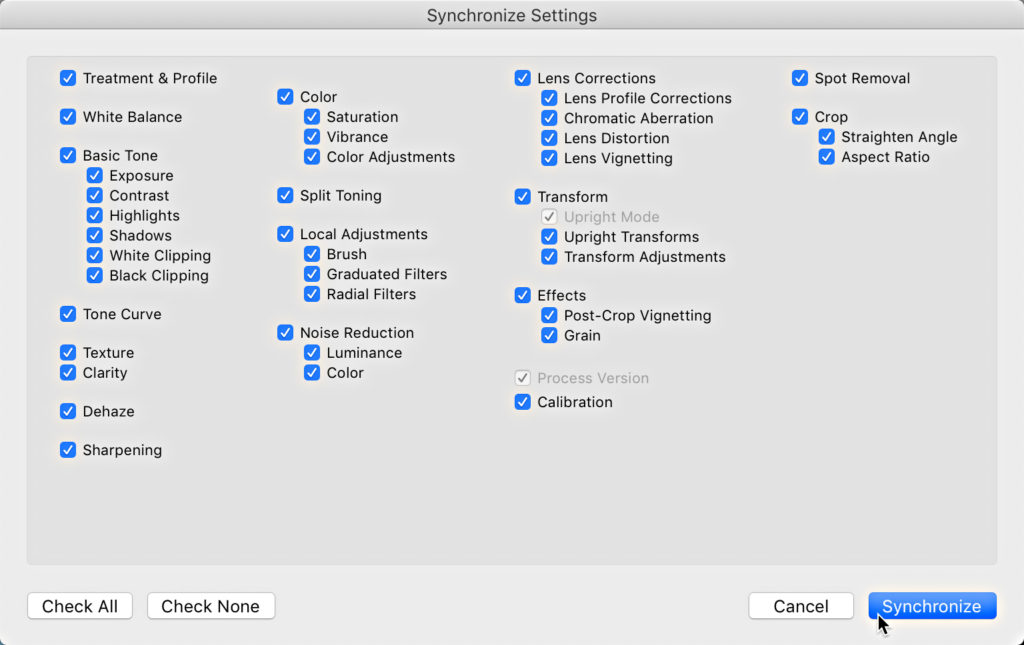
Then click the Sync button to open the Synchronize Settings dialog box and choose which settings you want to be synced from your edited photo to all of the rest. This is not only a whole lot faster than using the Previous button through an entire set, but it also gives you control over what settings you want to synchronize. If you intended to sync all settings, click the Check All button, then the Synchronize button, and away you go.
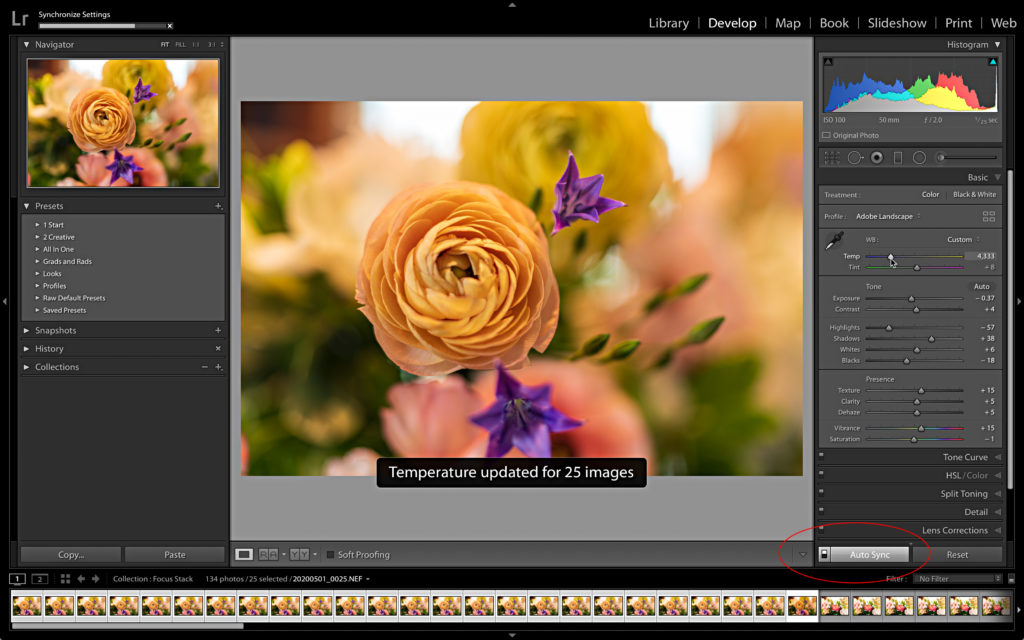
If you are really in a hurry, and like walking on the wild side, click that little switch to the left of the Sync button to change it to Auto Sync. Once Auto Sync is engaged, all edits you make to the active photo are automatically synced to all selected photos in real time. This is a very powerful setting. You could theoretically edit an entire set of photos all at once, which is exactly what I did with my photo sets for focus stacking. It is so powerful that Adobe recently made Auto Sync more visibly highlighted when it is enabled, and even pops up a bezel displaying what edits are being auto synced to all selected photos each time you move a slider, click a button, check a box, or apply a preset. As soon as you are done with your Auto Sync session, click that same little switch to change it back to Sync.
Another option to consider is Copy and Paste. You can think of this as a version of the Sync function, but instead of syncing settings to all selected photos it loads your desired settings into your clipboard so that you can paste those settings to a photo as needed while working through an editing session. Here’s how it works, first, like all the other options so far, you edit a photo. Then, if there are settings you’ve applied that you think you will want to apply to other similar photos in that set, click the Copy button to open the Copy Settings dialog where you can choose the settings you want to have at the ready.
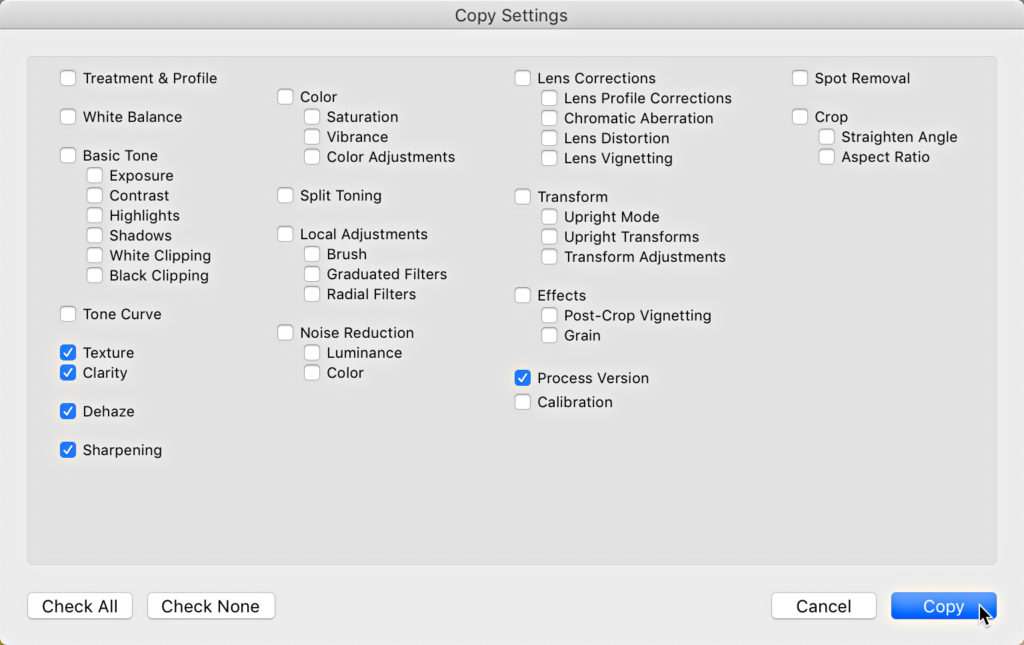
Thinking back to our simple example of a batch photo containing both landscape and portrait photos, you could manually edit the first portrait photo, then use the Copy button to copy key settings, and then when you encounter the next portrait photo in the set, use the Paste button to apply those same settings before fine tuning for that photo. Here’s a handy guide to all of the keyboard shortcuts for these options to really add some efficiency to your workflow:
- Paste settings from Previous: CMD+Option+V (PC: Ctrl+Alt+V)
- Sync settings: CMD+Shift+S (PC: Ctrl+Shift+S)
- Enable/Disable Auto Sync: CMD+Option+Shift+A (PC: Ctrl+Alt+Shift+A)
- Copy settings: CMD+Shift+C (PC: Ctrl+Shift+C)
- Paste settings: CMD+Shift+V (PC: Ctrl+Shift+V)
Post Develop Module
We’ve covered a lot of batch editing options, but I want to leave you with one more, which is back in the Library module. While it may be nice to edit an entire shoot in a single session in a nice linear fashion, there are many times where that is just not possible for a variety of reasons. I want to point out that there is also a Sync Settings button in the Library module too. It works just the same as the Sync button in the Develop module (same shortcut too). Just select the first photo with settings, then select the rest of the photos you want to sync those settings across, and click the Sync Settings button at the bottom of the right panel group. That will open the now familiar Synchronize Settings dialog where you can choose which settings you want to apply to the rest of the selected photos, then click Synchronize to complete the task.
In fact, using the keyboard shortcuts I mentioned previously, you can even invoke the Copy, Paste, and Previous functions while in the Library module. This combo of features gives us a tremendous amount of power to edit our photos faster and more consistently by leveraging the work we’ve already done to apply it to other similar photos. I highly encourage you to pick one of these many options and start implementing it in your workflow. Once it becomes second nature, add another, and before you know it you will have transformed the way you edit and reduced the amount of time it will take.

Is there any way when you sync to NOT have any tool adjustments (i.e. iris enhance, heal, etc) not sync with the next photo? I realize I can copy and paste and select what copies, however, sometimes I want to revert back to my previous “copy” and I have to scroll back and find that photo to copy again– unless there is a better way.
Thank you!
Useful stuff there Rob – thanks.
I think the not obvious, hidden value one from these 2 posts is using the incremental adjustments available in the Library module, vs absolute values. Very handy.
Yeah, that is an easy one to overlook (and forget). 🙂