
Since the beginning of Lightroom Classic’s existence (back when it was just called Lightroom), it was made to play nicely with Photoshop. Under the Photo > Edit in menu in both Library and Develop are various options for sending a copy (or the original in some cases) to Photoshop for editing.
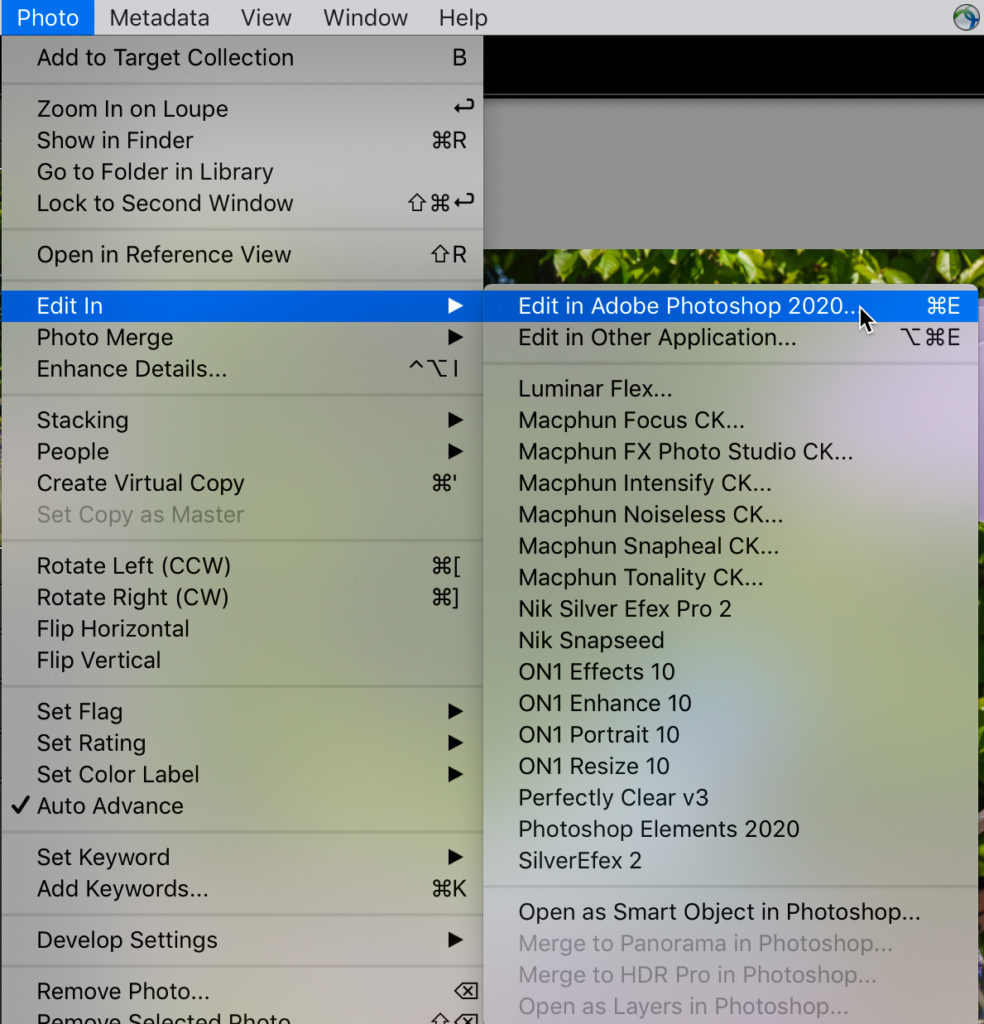
The CMD/Ctrl+E shortcut are well known and used by most when the opportunity arises. Granted, we may try to find ways to avoid the trip to Photoshop, but I’ve been wondering about ways to make that process more efficient.
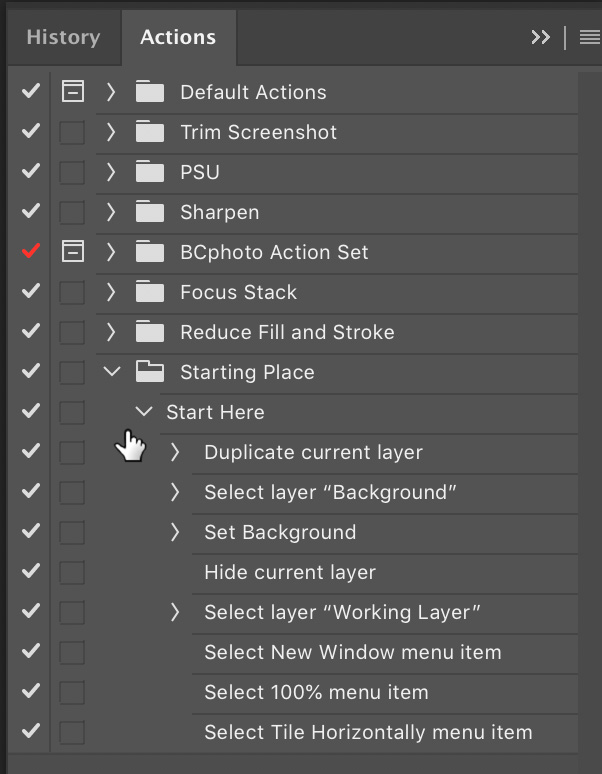
So I started thinking about what are some of the common steps I take after a photo opens in Photoshop, regardless of the reason for going there or the subject matter of the photo. Obviously, these steps will vary with each individual, but here are some things I almost always do:
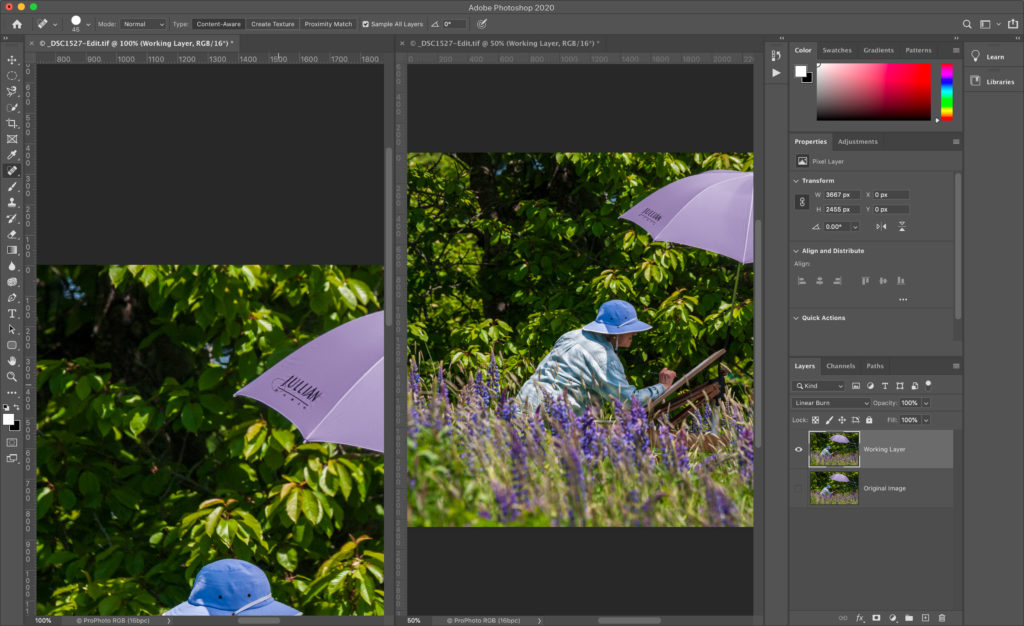
- duplicate the background layer (old habit for a fall back to the original image)
- rename layers
- open a secondary instance of the photo at a different zoom level
All of these things can be easily added to an action, and so I created an action that I could apply as soon as the photo opened in Photoshop.
Then I remembered that it was possible to create an executable form of an action called a droplet, which once created gives you the ability to drag and drop a photo onto the droplet to run the steps in the action. More importantly, you can trigger Droplets to run as the last step of an export from LrC.
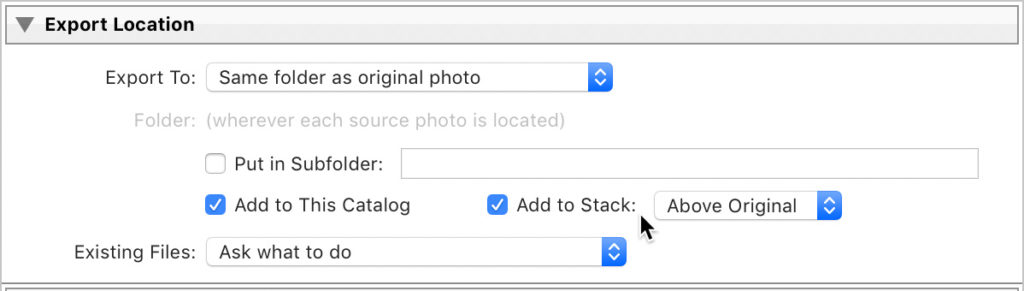
Now, the Photo > Edit in > Edit in Photoshop command takes its cues from the External Editing tab of the Preferences with regard to the file type, color space, and bit depth of the copy created in that process. All of those options are available from the Export dialog as well. In addition, at the top of the Export dialog are the options to save the photo to the same folder as the original, add the copy to the catalog, and even stack the copy with the original (you can even choose the stacking order). Basically, you can get the same results via export as you can via Edit in menu.
Putting it All Together
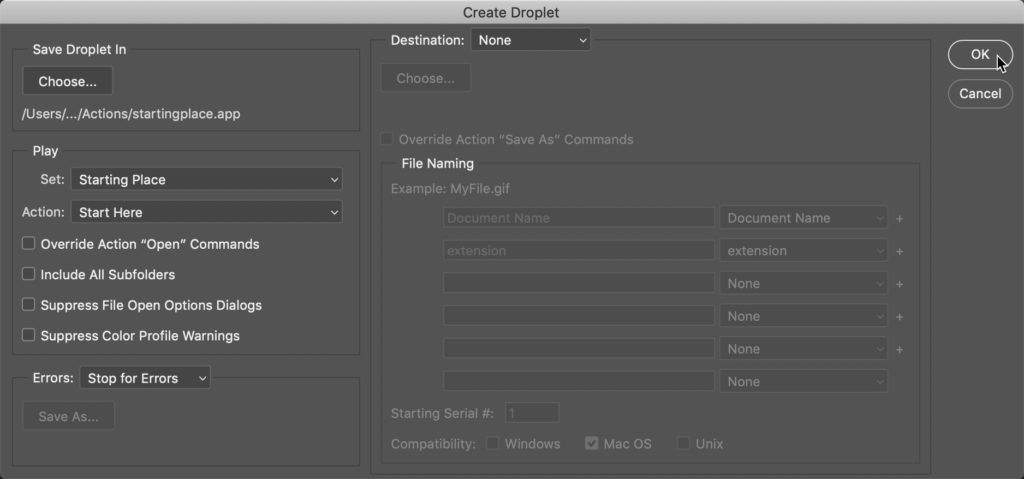
First, you’ll want to give this some thought about your own Photoshop workflow and what tasks make the most sense for you to add to such an action. Then, create the action in Photoshop. Once you are happy with your action, use the File > Automate > Create droplet command in Photoshop to create a droplet from your action. When creating the droplet, it may be easiest to save it to your desktop at first, so that you can move it to the right folder for LrC later.
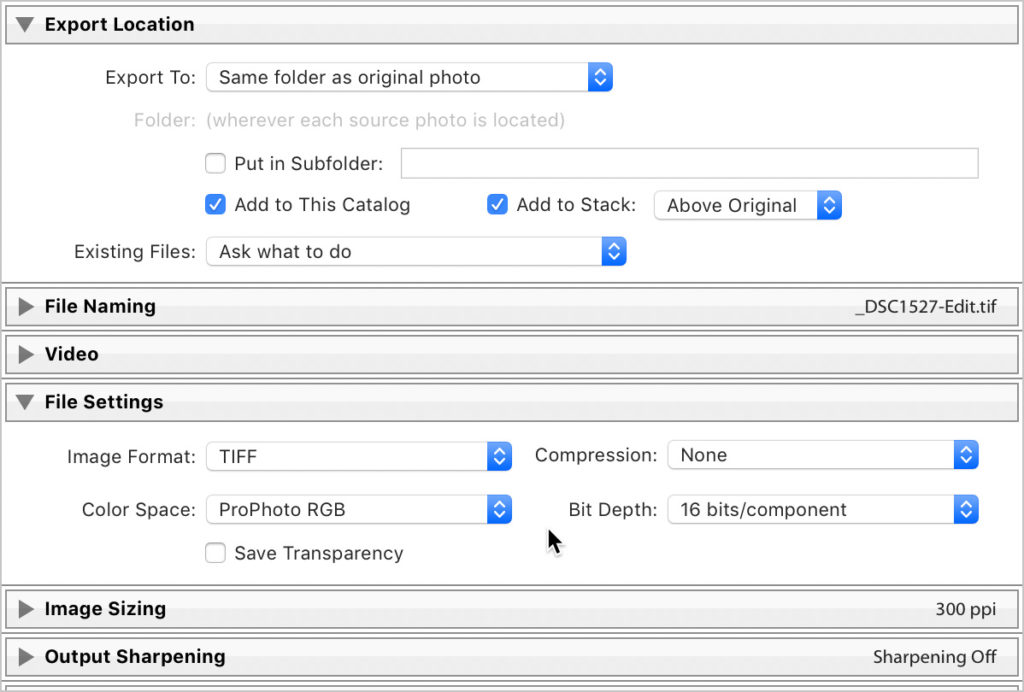
Once your droplet is made, open LrC and click the Export button (you might want to select a photo for testing first). On the Export dialog, configure the Export Location panel so that the resulting copy is saved to same folder as original, added to the catalog, and stacked accordingly.
Then, expand the File Settings panel, and configure it the same way you’ve configured the External Editing settings in Preferences. I set mine using the default preference settings, but do what works for you.
Then, go down to the Post Processing panel, click the After Export drop-down menu and chose Go to Export Actions Folder Now.
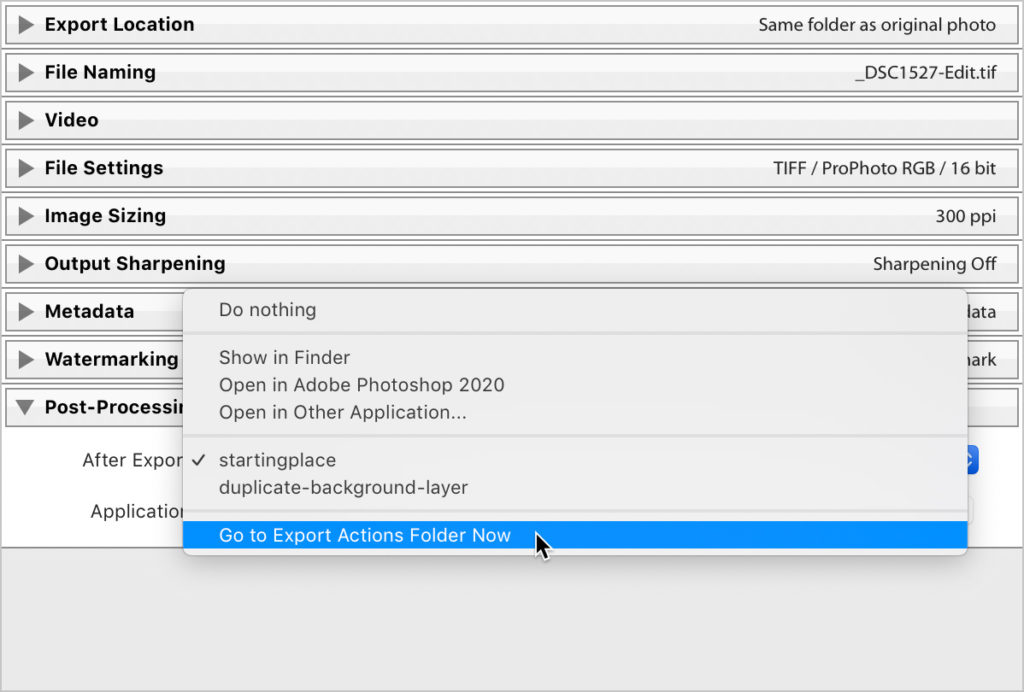
This will open your file browser to that folder. Open the folder and place your freshly minted droplet inside. Then, go back to the Export dialog and click that After Export drop-down menu again, and you should see the name of your droplet in the list. Select your droplet.
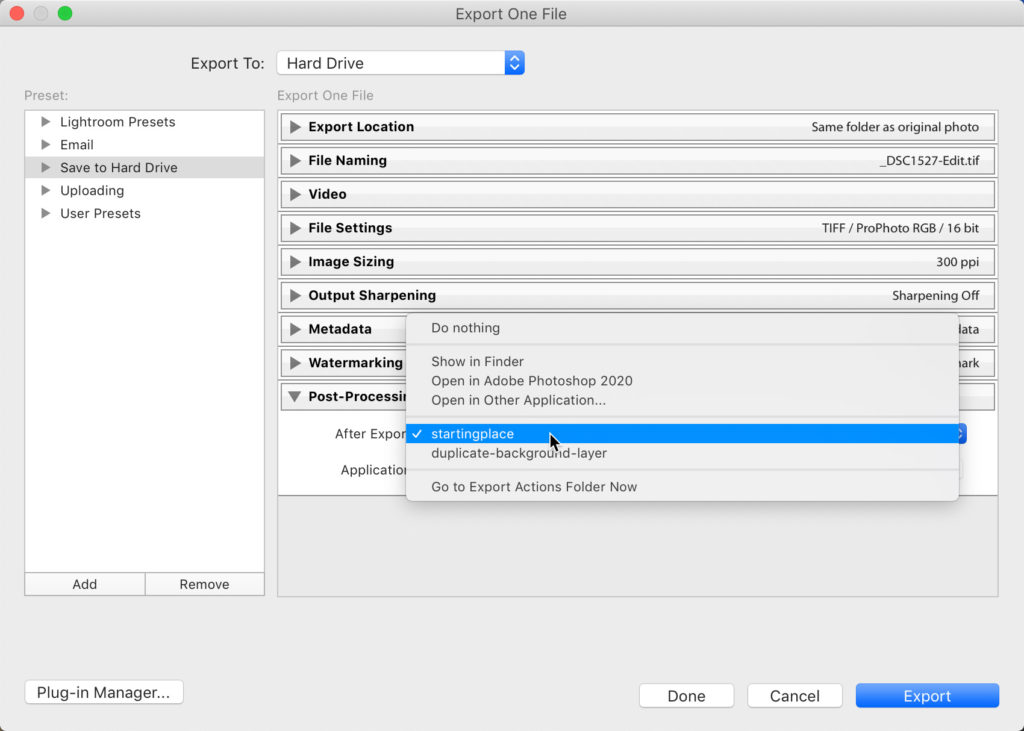
Once the Export dialog is configured to your liking, click the Add button under the Preset panel on the left, and save your settings as a preset. I recommend putting the new preset in a folder to keep things organized, and give it a meaningful name. Then, click the Export button and give it a test run. If all was configured properly, you should see a copy of the selected photo appear in the same folder as original, added to the catalog (stacked with original), and then open in Photoshop where your action will be run.
I think it is pretty cool, and will probably continue to evolve as I use it. You might be wondering, what about a keyboard shortcut? Well, that isn’t as simple. That said, it is worth noting that once you save it as a preset you can access all export presets via the File > Export with Preset menu, which allows you to skip seeing the Export dialog and just get on with running the process. While there aren’t keyboard shortcuts for that command, there are third-party utilities that allow you to assign shortcuts to menu commands. I use Keyboard Maestro on my Mac, and I’m sure there must be a similar alternative for Windows (please do share if you use one). I hope you find this concept helpful, and would love to hear about any ways you have improved on the process.

Life changing for my workflow, I have one hangup you might be able to help me with. I am always exporting multiple images and need them stacked. I usually select all of my images in LR then click open as layers in PS. Once I am in PS I run my action. Can I maintain the open as layers aspect? Right now if I run this droplet while multiple images are selected through the export in LR it opens each individually.
I love this. Don’t know if I am missing a step but if I send a photo to PS using this method when I am finished and save in PS the edited image does not automatically reappear in LR
Did you check the box to add to catalog on the Export dialog?
This is excellent. Great explanation and usefulness. Too few people (including me) take a moment to do these things to save lots of moments later.
Thanks, am going to do this.
I will make the duplicate layer smart as I have other actions that muck about with the whole structure to which it is applied. That way, I will not need to backtrack/repeat nearly as much, even as the moments are saved.
Glad you found it helpful!