
Editing Video in Lightroom (Lr)
Back in the June 2022 update I mentioned that Adobe added the ability to edit video in the Lightroom (cloud) family of apps. I got a chance to use it this week, and wanted to share how it worked. I captured a time lapse of the Milky Way using the built-in time lapse feature of the Canon R10. This allows you to configure all of the settings, fine tune exposure with test shots, then start the time lapse process of recoding a final MP4 video completely in camera. While not the preferred method for having ultimate control over the post processing, retouching, and video creation, it was super easy to set it and walk away while you are on vacation.
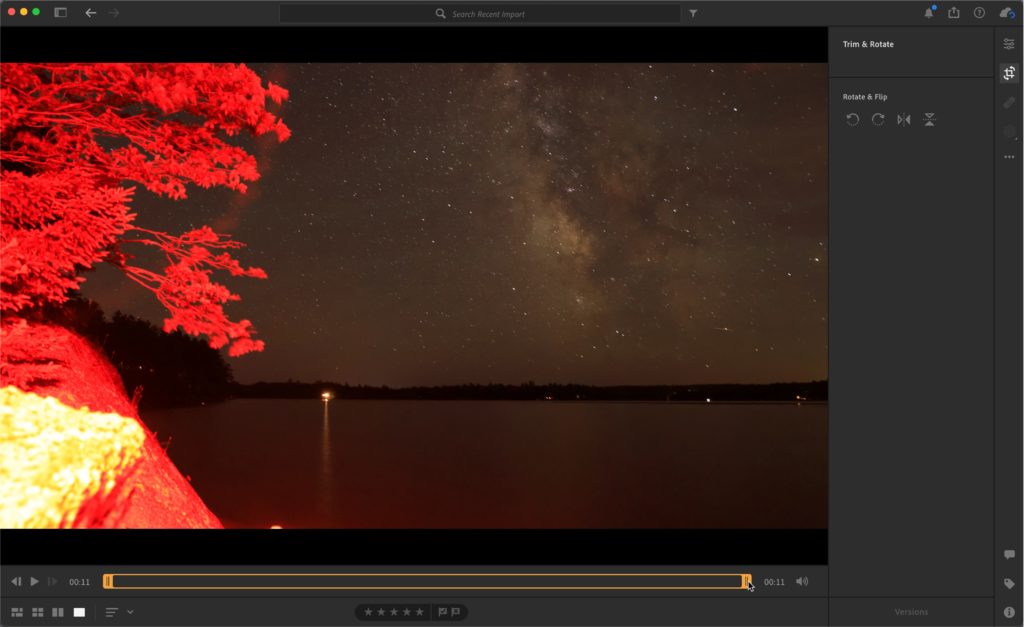
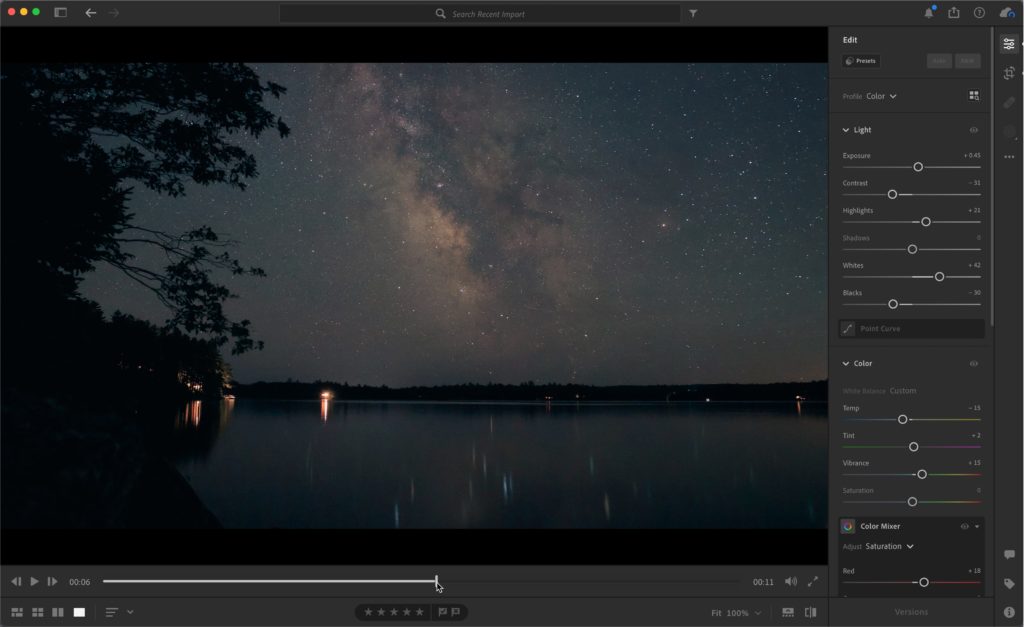
The camera did its thing for about two hours, starting from around 10:45pm until almost 1am. I walked down to check on the camera perched on the edge of a lake at one point, but otherwise, left it alone until I thought it was done. The red from my headlamp showed up at the start of the video, about midway through, and at the end. Lightroom’s limited video editing capabilities wouldn’t allow me to do anything with the red light in the middle, but I could trim off the beginning and the end. I also wanted to adjust tonal values a bit, tweak the white balance, and see what else it would let me do.
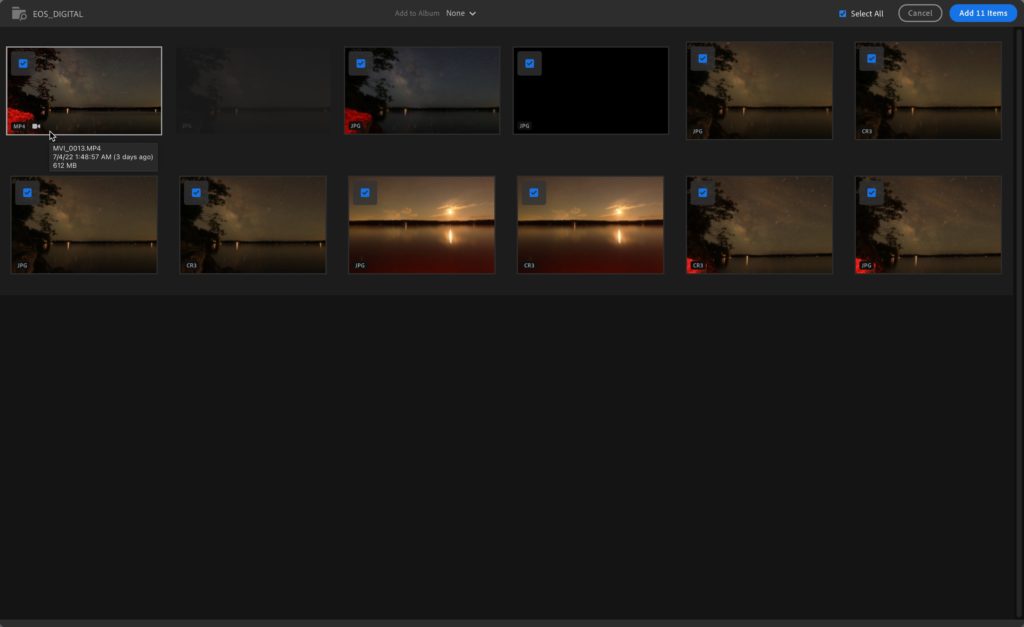
First thing was to import the video into Lr. I opted to import it into Lr on my laptop so I could view it on a larger screen. I decided not to bring a Lightroom Classic catalog with me on this trip and just ingest everything through either Lr on my laptop or on my iPhone, which eventually uploads to the cloud, and then will download into my LrC catalog when I get home and open it up. The import of video is the same as stills in Lr. It is important for LrC users who sync with the cloud to remember that any photo/video you import into any Lr app will count against your cloud storage quota, unlike smart previews synced from LrC, so you need to manage your cloud storage to avoid running out of space.
While the files are syncing to the cloud they are stored locally after import, so I can play the video within Lr as well as begin editing before sync is complete.
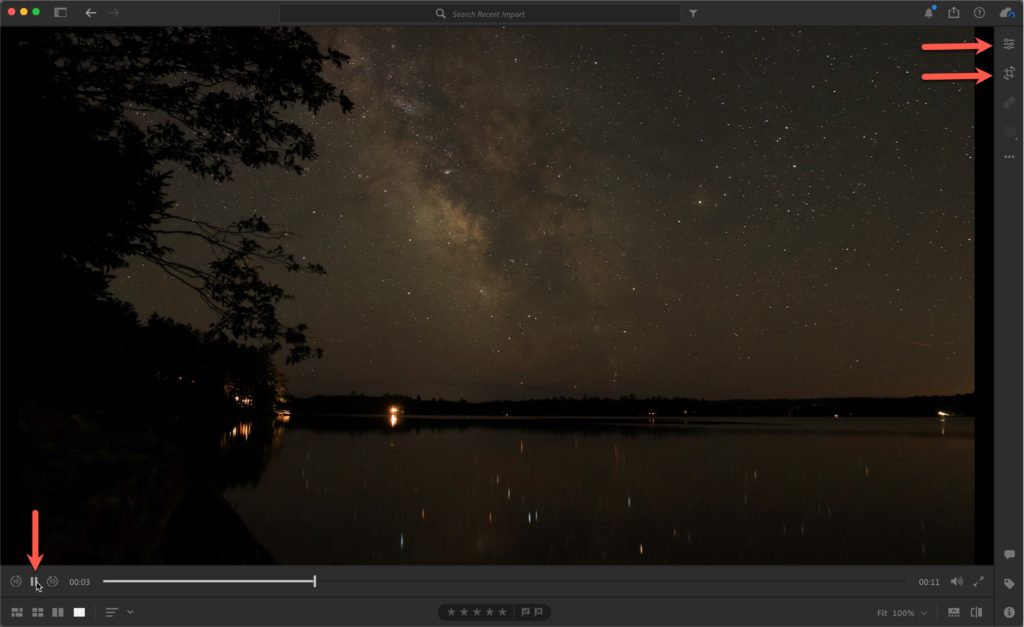
After playing the video to see what needed to be edited I decided to start with trimming the beginning and the end where the red light from my headlamp lit the foreground. When a video is selected/active you will see which tools are supported on the right edge of the interface. The Edit panel contains the tools for adjusting the look of the video (only a small subset of editing tools are supported) and the Crop icon is where you can find the tools for trimming the video. Clicking the Crop icon provides access to tools for trimming, rotating, and flipping the video (it appears as though rotating and flipping videos is not yet supported on iOS devices). To trim, grab the handle at the beginning or end of the video and drag inward as much as desired to remove unwanted footage (I only need to get rid of a second or two).
From there I clicked the Edit icon to make adjustments to tonal values and color. Panels containing unsupported tools are grayed out, as are unsupported tools within a panel that is not grayed out (like texture, clarity, and dehaze being grayed out within Effects while Vignette and Grain are active, though I wish the opposite were true).
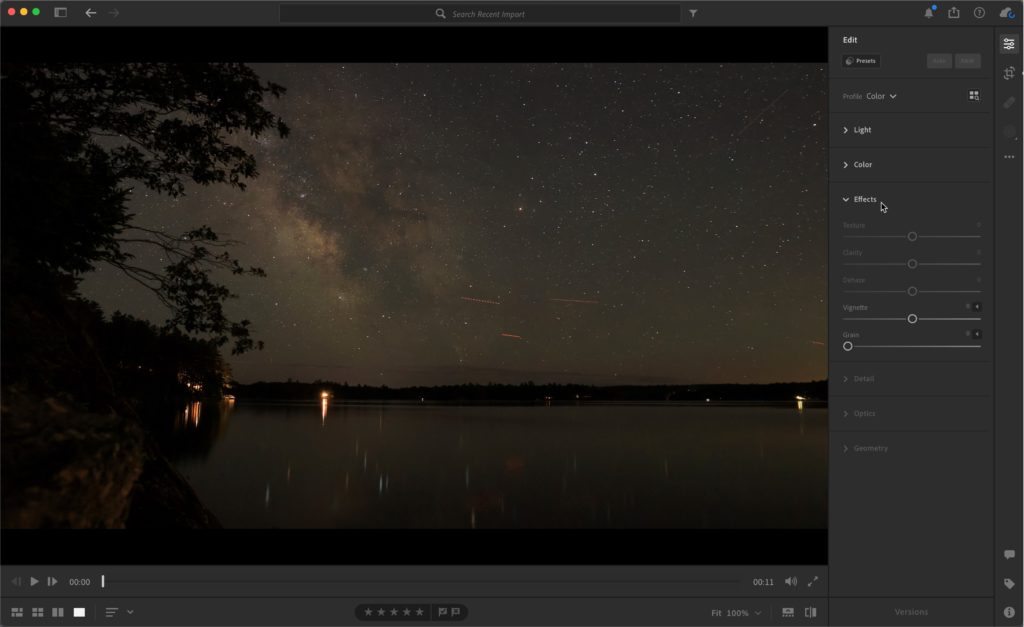
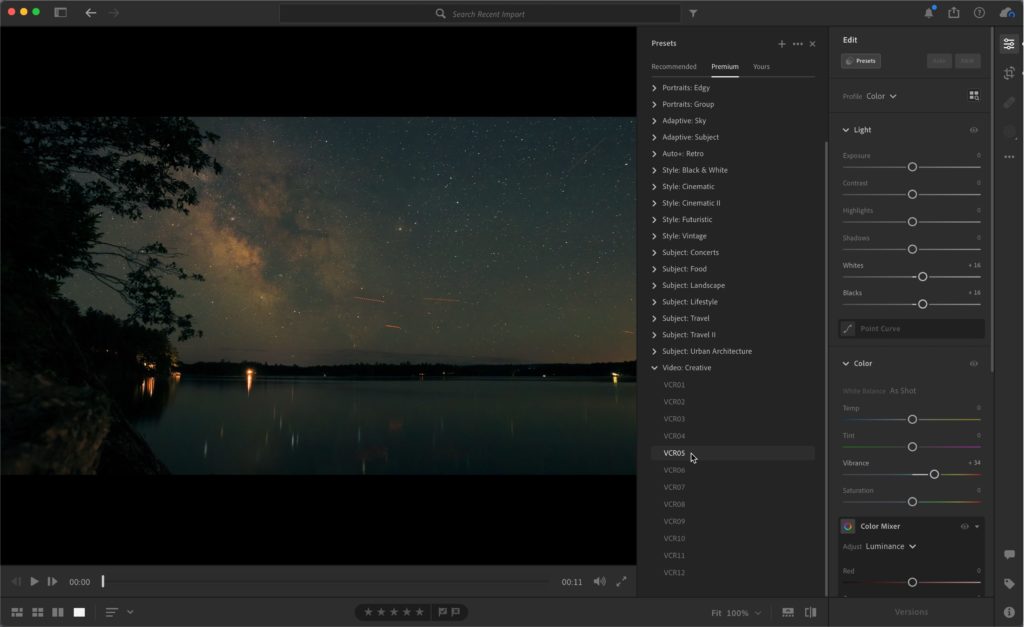
Also worth noting that there is a new group of video specific presets within the Presets panel you might want to explore. A very useful feature of Lr for desktop is that as you move your cursor over presets you not only see a live preview of the settings, but also the sliders move to show you what is being adjusted. If a preset is selected, don’t forget that awesome Amount slider to fine tune results.
Drag the playhead across the timeline to see how your changes affect the video as it plays.
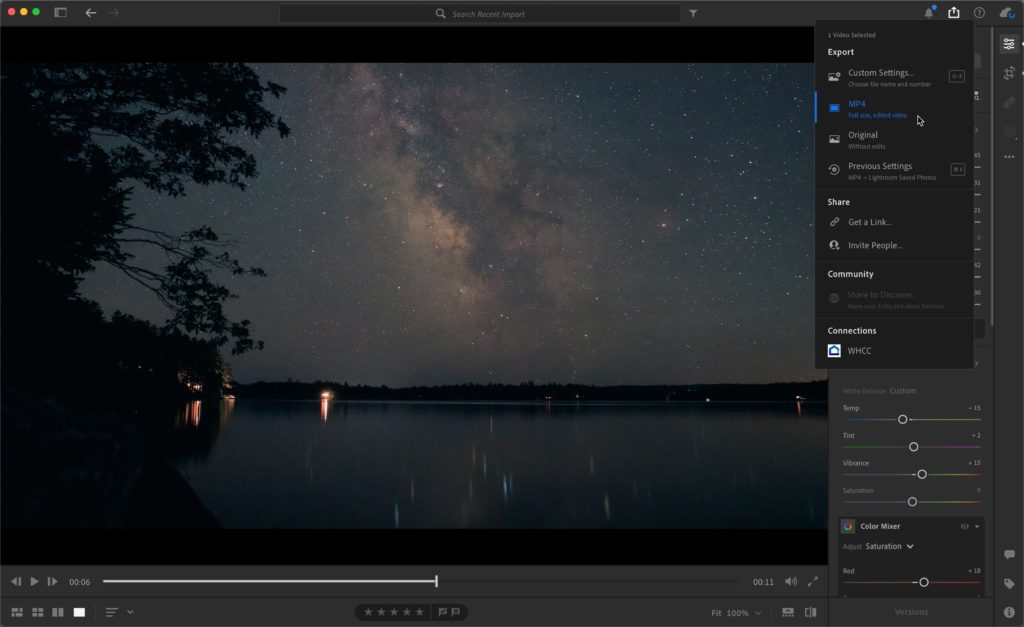
Playing the video within Lr is fine, but you can also export out a copy with your edits in MP4 format or the unedited original. I’m not a big video creator or editor, but I’m glad to have this basic functionality inside of Lr (editing and exporting is possible on mobile too).
I hope you’ll join me at Photoshop World!
I’m excited to be part of the amazing roster of instructors at this year’s Photoshop World, from August 30th to September 1st. It is all virtual (hopefully for the last time), so you can tune in from where ever you are. You’ll get 3 full days of multiple tracks of learning on Photoshop, Lightroom, and photography. You can even rewatch sessions for a year after its over, so if you miss any part of the live event you can always catch it later. Register and take your skills up a few more notches!


nice ! can we edit video in lightroom classic and how ?