
Creating, Editing, and Managing Local Adjustment Presets
Nestled away under the Effect drop-down menu under each of the local adjustment tools (Adjustment Brush, Graduated Filter, and Radial Filter) are a set of presets that are specific to these tools. Any preset made in any of those tools will be available to all.
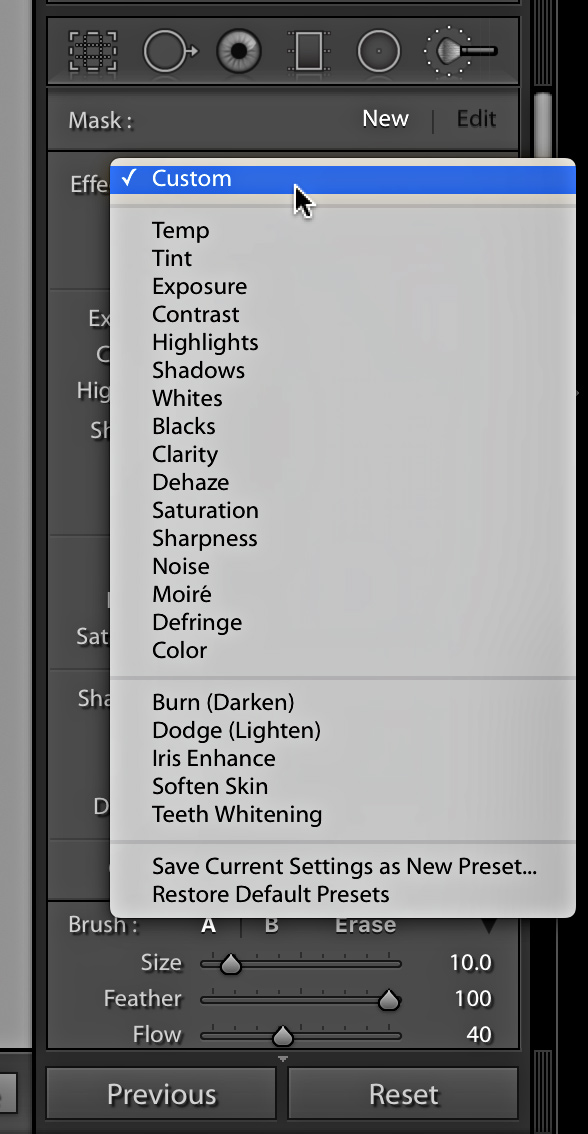
Like the Develop presets found in the Presets panel, these presets are basically text files that hold some combination of settings dialed into the local adjustment tool’s sliders. The default set of presets shown above come pre-installed with Lightroom, and are great for getting started. Click any of those presets to see what settings are affected in the panel. Most of them are single slider adjustments, such as choosing Exposure moves the Exposure slider to +1.
Down near the bottom of the list you’ll find Iris Enhance, Soften Skin, and Teeth Whitening, which contain a combination of slider settings designed to help with those tasks. Note: If you don’t see any of the default presets on your installation of Lightroom, go to Lightroom (PC: Edit)>Preferences, click on the Presets tab, and click the Restore Local Adjustment Presets button to see if that brings them back.
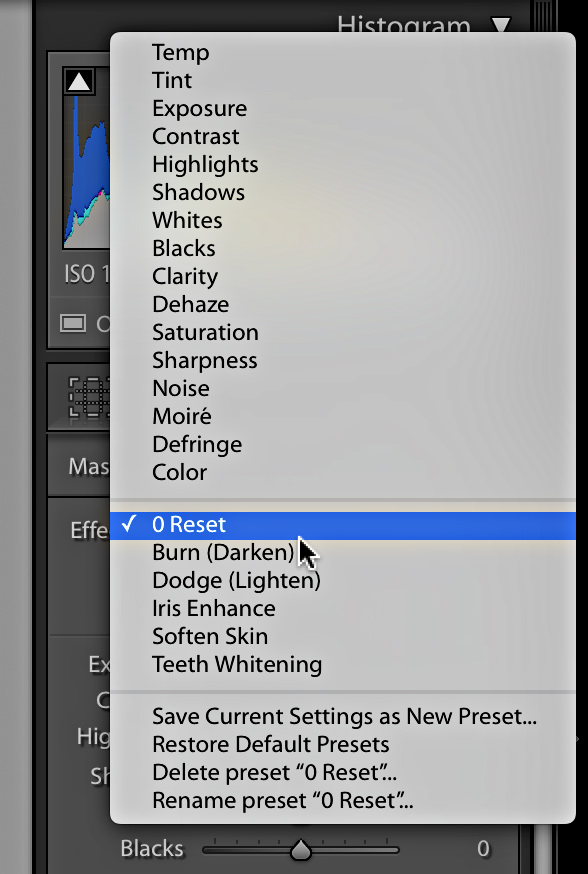
Presets can be great starting points, but to get the most out of them you’ll want to create and customize your own. One of the first presets I created is one I call “0Reset” because I often like to paint with the Adjustment Brush with only the mask overlay showing and no settings applied just to focus on the area I want to adjust. You can, of course, double-click the Effect label to reset all sliders to 0, but I liked having a preset that I knew would zero everything out and show the name at the top so I know I’m starting with a clean slate.
To create a local adjustment preset:
- Dial in only the settings you want included in the preset.
- Click the Effect drop-down menu, and scroll down to Save Current Settings as a New Preset.
- Give the preset a meaningful name, and click Create.

That preset will be added to the drop-down list for future use.
Installing Downloaded Presets
You may encounter presets that you can download (free or for a fee), and those can be useful for learning, as well as new starting points. To install a local adjustment preset that you downloaded, do the following:
- Most come packaged in a zip file. On a Mac, double-click the zip file to unzip. On Windows, Right-click and choose Extract. You want access to the .lrtemplate files (these are the actual presets).
- In the Presets tab of the Lightroom Preferences, click the Show Lightroom Presets Folder button to open a file browser window with the Lightroom folder containing all your presets selected/highlighted.
- Navigate inside that Lightroom folder, and find the folder named Local Adjustment Presets.
- Copy-and-paste, or drag the presets (.lrtemplate files) into the Local Adjustment Presets folder.
- Restart Lightroom.

Once Lightroom relaunches, select any local adjustment tool, and you should see your new presets in the Effect drop-down menu.
Managing Presets
If over time you need/want to prune your local adjustment presets to a more manageable number, or just get rid of the ones you no longer use, you can simply delete them from that Local Adjustment Presets folder, or try this:
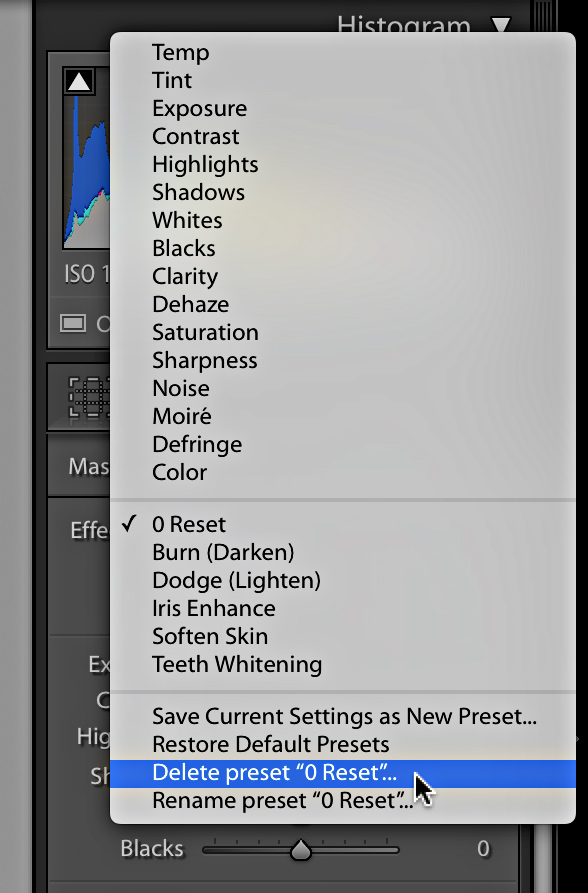
- Select any local adjustment tool to open the panel.
- Click the Effect drop-down menu and select the preset you want to delete.
- Click the Effect drop-down a second time, and choose Delete Preset “[preset name]”
- Repeat as necessary.
Those same basic steps can also be used for renaming an existing preset, or updating the settings to an existing preset. When updating the settings on an existing preset, select the preset first, update the settings as desired, click the drop-down again, and choose the Update Preset “[preset name]” option.

I would like to find a way to return my saved presets to the original saved. I have been using presets I purchased and over time I have tweaked several while editing a photo and now they are well. off. I know I can remove them and reinstall them. I have the originals in a file. But can I lock them or restore them after use.?
I would delete any you no longer want. Rename any that you modified and want to keep. Then, reimport the originals and just don’t update them, or if you do, duplicate them, then move them to their own folder and rename accordingly. No way to lock a preset or reset it to some earlier state.
Super helpful blog! Thanks for writing.
Hey Rob! Funny I was just googling about a management issue I’m having with LR local adjustment presets and see that this just posted today. So maybe you can help me figure things out. I have a bunch of local adjustment presets that were beautifully sorted because of the way they’re named. For example, one would be named “01 — Skin Fixes –” and underneath would be “01a Soften,” “01b Reduce Redness,” etc. Now, even though the names are the same, they’re no longer in order. I’m not sure if this is to do with the latest LR update or not. I tried restoring the default presets then reinstalling my fancy ones. Still all FUBARed. Any thoughts? Let me know if you want a screenshot and I’ll send you one through FB.
Or maybe it’s High Sierra causing the madness. I wonder…
Hey Dawn! Yeah, send me a screen capture. We’ll see if we can figure it out.
Had the same issue once upgrading to MacOS High Sierra. Once I renamed one preset the rest of them went back in order. Hopefully you’ll have the same luck!